
I’m Ava Sinclair, and if you’re like me, your countertop baker’s guilt is peaking every time you scoop out that excess starter. We founded Cheffinity on the idea that real food shouldn’t be complicated, even when dealing with the aftermath of artisan bread making. That’s why I absolutely insist you stop tossing that precious material! Today, we’re using it up in the most satisfying way possible: crafting incredible sourdough discard bagels. Forget limp, sad bagels; these are chewy, tangy, and prove that reducing food waste delivers gourmet results without the usual three-day process.
Honestly, achieving that classic New York chewiness used to intimidate me, but I’ve streamlined the process so you can have amazing homemade bagels ready faster than takeout. This recipe is where efficiency meets incredible flavor, which is exactly what we strive for here at Cheffinity.
- Why You Need This Easy Sourdough Discard Bagels Recipe
- Gathering Ingredients for Sourdough Discard Bagels
- Step-by-Step Instructions for Homemade Bagels
- Topping and Baking Your Sourdough Discard Bagels
- Tips for Success with Sourdough Discard Bagels
- Storage and Reheating Instructions for Homemade Bagels
- Serving Suggestions for Your Chewy Bagels
- Frequently Asked Questions About Sourdough Discard Bagels
- What to Make Next: More Starter Discard Baking Ideas
- What to Make Next: More Starter Discard Baking Ideas
Why You Need This Easy Sourdough Discard Bagels Recipe
Why hassle with complicated sourdough maintenance just to create something beautiful? You don’t have to! This recipe is specifically designed for the weekday cook who respects flavor but needs speed. It’s the ultimate way to tackle your sourdough waste reduction goals.
- It’s ready fast—under three hours total time, which on the bread scale, is lightning speed!
- The flavor is complex and tangy thanks to using that discard.
- It handles like regular dough, making shaping less stressful than you think.
This provides that hearty, slightly sour flavor we all love without demanding a whole overnight fermentation schedule.
Achieving True New York Style Bagels at Home
The secret sauce, or maybe the secret boil, for that classic texture is not skipping the water bath! Seriously, don’t cheat this step. Boiling the shaped batch for just 30 seconds per side sets the starches perfectly. This immediately creates the signature chewy interior and gives you that shiny, crisp crust that defines great sourdough discard bagels. It’s non-negotiable for true New York style!
Gathering Ingredients for Sourdough Discard Bagels
Okay, time to pull everything out! Getting the right components is key here, especially since we are utilizing that sourdough discard. I’ve listed everything you need for 8 perfect bagels, but make sure your water is warm—not hot—to wake up the dough nicely. This recipe is forgiving, but precision counts when you want that homemade bagel magic!
- 400 g bread flour (Use strong flour if you have it; it helps with the structure!)
- 100 g sourdough discard (It really doesn’t matter if it’s unfed sit-at-the-counter discard or recently fed, just measure it out.)
- 240 ml warm water
- 1 tablespoon honey or malt syrup (Malt syrup is the pro move for that dark, classic color.)
- 1 teaspoon instant yeast (Optional, but I’ll talk about that next.)
- 10 g fine salt
- 1 tablespoon olive oil
- For the water bath: Boiling water mixed with 1 teaspoon of baking soda.
- Topping: Of course, we need that beautiful Everything Seasoning mix!
You can check out some other great easy breakfast ideas later, but for now, focus right here!
Ingredient Notes and Substitutions for Sourdough Discard Bagels
Let’s talk about that tiny yeast packet. Many people want to skip it for a true sourdough experience, and you totally can! If you skip the optional instant yeast, trust me, the dough rise time will definitely be longer, sometimes pushing us closer to a 4-hour total time. That’s fine, just give it time to puff up nicely. If you happen to have active, bubbly starter instead of discard, it works too! Just be aware that active starters are wetter, so you might need to dock the liquid slightly to keep your dough from getting too sticky for these sourdough discard bagels.
Step-by-Step Instructions for Homemade Bagels
Alright, grab your biggest bowl because we’re putting this dough together! We are aiming for that smooth, manageable dough that tells you it’s going to be a great bake. Remember, we’re not looking for the massive puff of a highly active sourdough loaf here; we’re looking for structure, which is why the texture check after kneading is so important. If you plan on making these homemade bagels often, get used to the feel of this dough—it’s your new favorite foundation!
Mixing and Kneading Your Sourdough Discard Bagels Dough
First, dump everything that isn’t the topping or the boiling water into that bowl. Mix it until it looks messy—we call that shaggy—and then it’s time to work! You need to knead this for a solid 8 to 10 minutes. Keep going even if you used yeast; you need to develop that gluten so your magnificent sourdough discard bagels hold together against the boiling water. When you are done, the dough should feel unified and elastic, not tearing when you gently pull it.
Shaping and Preheating for Perfect Sourdough Discard Bagels
Once the dough rests for an hour or two (just until it looks a little happier), divide it into 8 equal parts. Roll each part into a tight ball first—that keeps the texture tight inside. Then, gently use your finger to push a hole right in the center. Don’t be shy; stretch that hole slightly because they will puff up! Pop them on a parchment-lined sheet, cover them loosely, and let them chill out for 30 minutes while you get your oven blazing hot to 425°F (220°C).
The Crucial Boiling Step for Chewy Bagels
This is where the magic that makes them chewy and glossy happens, so pay attention! Fill a large pot with water and bring it to a rolling boil. Add that teaspoon of baking soda—this changes the pH and helps that gorgeous crust form. Carefully drop in 2 or 3 bagels; don’t crowd the pot! Give each side exactly 30 seconds. Seriously, just watch the clock. Any longer and you risk making them doughy inside, but those 30 seconds on each side lock in the New York style chewiness we are after. You can see a similar technique that utilizes discard over at this great resource!
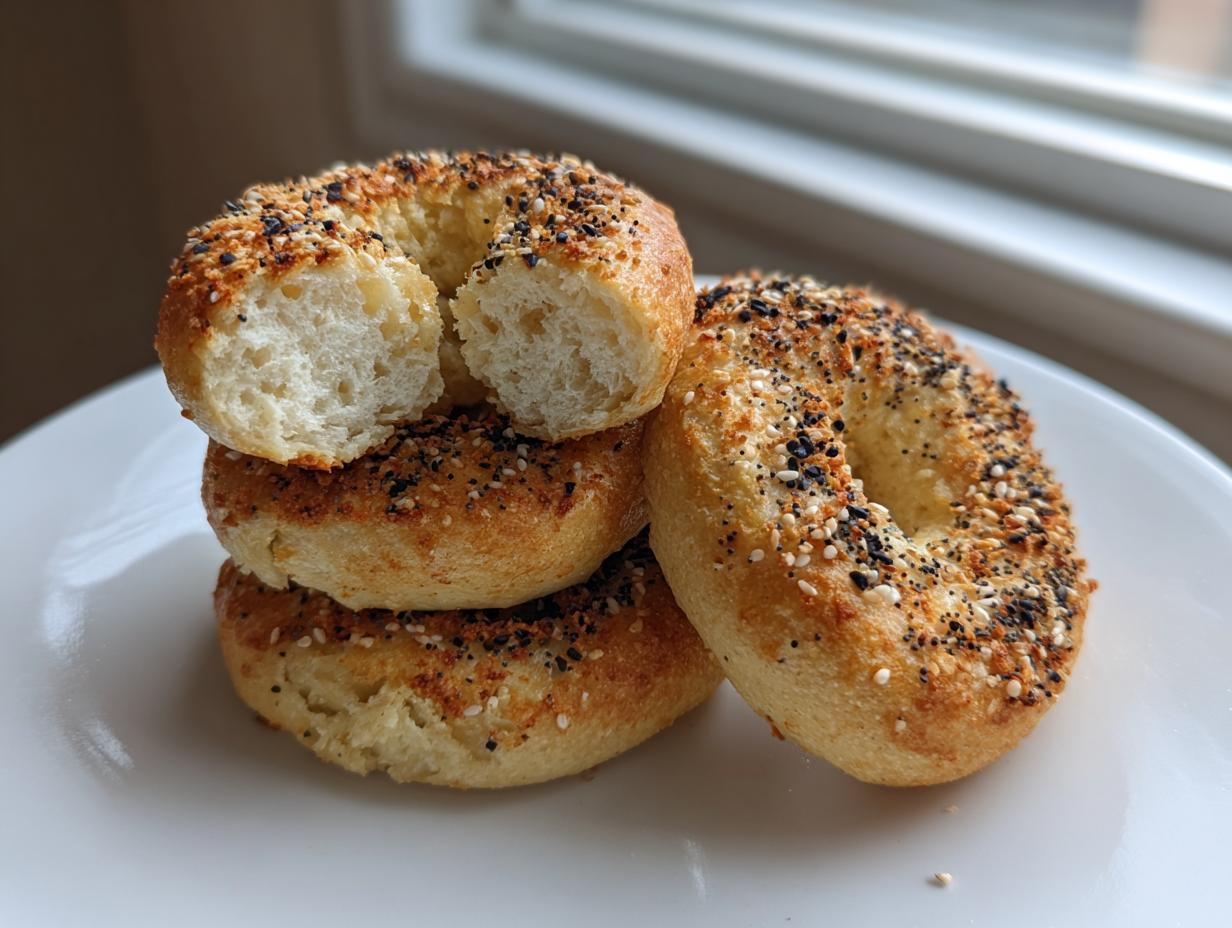
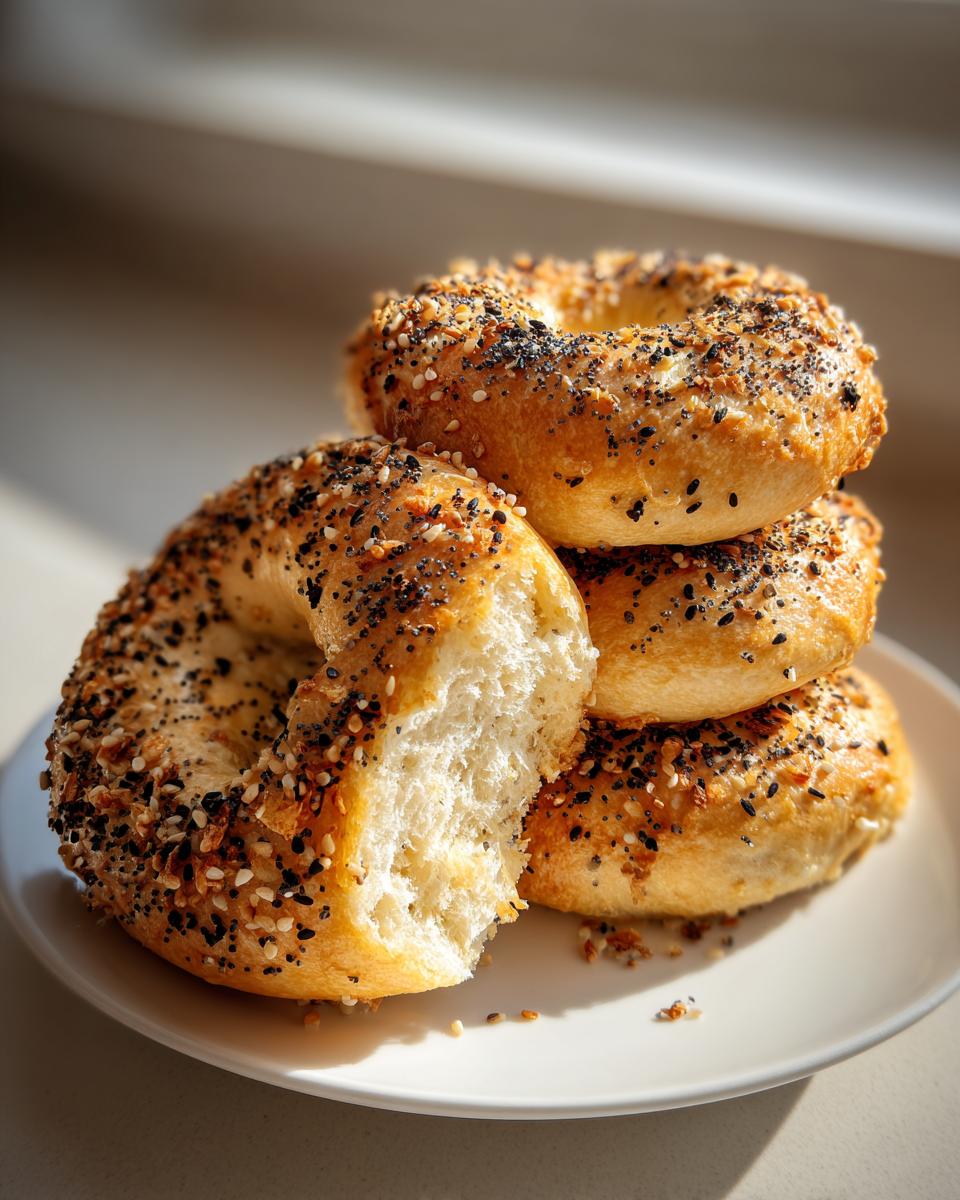
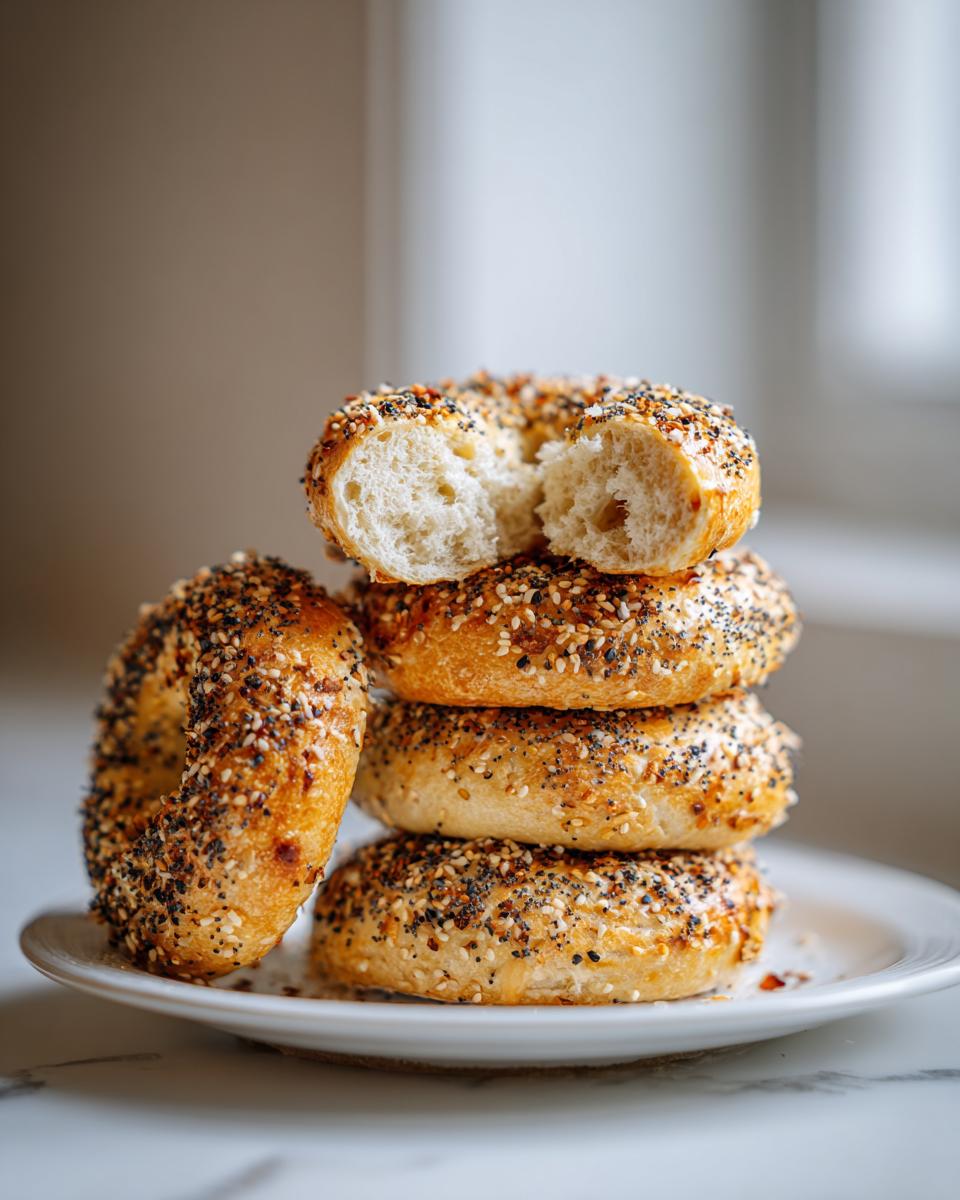
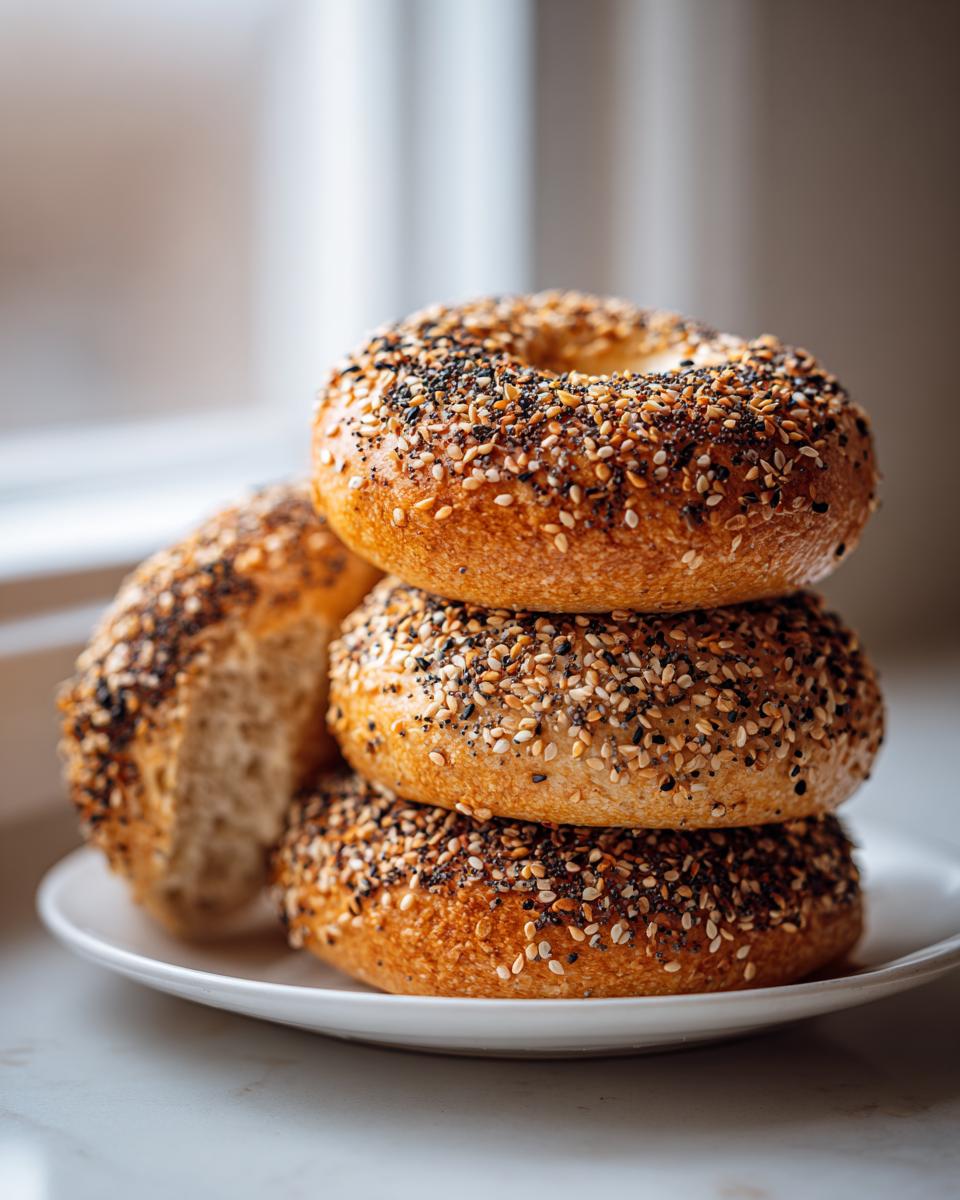
Topping and Baking Your Sourdough Discard Bagels
Once those boiled babies are looking plump and shiny, it’s time to deck them out! You need to move quickly here because you want the topping to stick before the outside dries out completely. I usually brush the tops with just plain water, but if you want extra color, a quick egg wash works wonders. Immediately after brushing, sprinkle them generously with your Everything Seasoning. Don’t be shy; you want complete coverage!

Now, slide them onto that waiting parchment paper. We’re baking them at a hot 425°F (220°C) for about 20 to 25 minutes. Remember, every oven is unique, so keep an eye on them! I always set a timer for 15 minutes, then I pull the pans out and carefully rotate them. This ensures even browning throughout all your beautiful sourdough discard bagels. Check the resource from Food Made Gently if you want to see how they approach their topping game—it’s excellent!
They should come out deep golden brown. Don’t forget to make a batch of my easy apple butter to go with them this weekend!
Tips for Success with Sourdough Discard Bagels
Even when following the steps perfectly, baking throws curveballs! When I first started making these sourdough discard bagels, I had an issue where my bagels were sinking in the boiling water. It was so frustrating! I realized I wasn’t kneading long enough, which meant the structure wasn’t strong enough to hold up to that quick boil. Don’t let that happen to you!
Here are my absolute must-know tips for getting perfect results every time:
- Don’t Crowd the Pot: Seriously. I tried boiling six at once once, and they ended up sticking together in a doughy mess. Stick to 2 or 3 at a time so they have room to float and float they should! If they sink momentarily, that’s fine, but they need to float back up quickly.
- Warm Dough Handling: If your dough feels really sticky and hard to shape (especially if you use unfed discard), chill it for 15 minutes before rolling. Cold dough is easier to handle than slightly sticky room-temperature dough.
- Glaze Immediately: When you pull them out of the water bath, brush them right away before they cool off. If the water evaporates too much first, your Everything Seasoning mix won’t stick well.
If you want to try a different flavor profile, I highly recommend marinating some chicken later this week using my best chicken marinade and serving it on these bagels for lunch!
Storage and Reheating Instructions for Homemade Bagels
You made 8 perfect sourdough discard bagels, and now you have survivors that need storing! If you plan on eating them all today, room temperature in a paper bag is fine. But if leftovers happen—and they usually do in my house—pop them into an airtight container once they are fully cool. I’d skip the fridge, though; it always makes bread go stale faster, and we want to keep that chew!
To bring that fresh-baked glory back, you have two options. For a single bagel, a quick 2-minute toast does the job. But if you have several, try brushing them lightly with water and warming them in a 350°F oven for about 5 minutes. That steam brings back the chewiness beautifully. If you love making easy overnight oats, you might just have to make a smaller batch of bagels next time!
Serving Suggestions for Your Chewy Bagels
Okay, we conquered the bake, so now we get to the best part: the toppings! While a smear of cream cheese is totally acceptable (who am I to judge?), these tangy, chewy bagels deserve more attention. Since we focused on making this an amazing breakfast baking triumph, let’s elevate it.
For savory fans, try a layer of that good smoked salmon and maybe a schmear of homemade dip, like my smoked salmon dip. For sweet, smear them with butter and top with sliced banana and a drizzle of real maple syrup. See? So much better than just plain!
Frequently Asked Questions About Sourdough Discard Bagels
I know sometimes the written recipe isn’t enough, and you need a quick answer before you start mixing! Baking is always better when you feel confident, so here are the things I get asked most often about this recipe. Don’t hesitate to leave a comment if your question isn’t answered!
Can I really skip the boiling step if I’m short on time?
Oh, I know the temptation is huge, especially when you’re aiming for a quick fix! But the boiling step is what sets the starch on the outside, which is what creates that classic, slightly tough, chewy layer we all want in a real bagel. If you skip it, you’ll end up with a delicious, savory roll, but it won’t be a true bagel. I promise, that 30 seconds per side is worth the effort for those sourdough discard bagels!
How long can my sourdough discard sit on the counter before I can use it?
This is part of the beauty of using discard; it’s flexible! If you keep your discard in the fridge, it’s good for months. If you leave it on the counter (unfed), you need to use it within 1-2 days max for this recipe. Why? Because beyond that, hungry wild yeast gets too active, and the acidity can start breaking down your gluten too much, making the dough sad. For the best results in these sourdough discard bagels, use it the day you pull it out of the fridge or within 24 hours of feeding it.
What’s the difference between using discard versus active starter in this recipe?
Using active, bubbly starter means your dough will proof (rise) much faster and higher because the yeast activity is at its peak. If you use active starter, you should definitely skip the optional instant yeast, and you might need a tiny splash less water because active starters are often wetter than straight discard. If you want to experiment with a no-yeast approach, check out the tips from Family Table Vibes!
What to Make Next: More Starter Discard Baking Ideas
I’m thrilled you tackled these bagels! Now that you’ve successfully reduced food waste, make sure you keep that momentum going. If you’ve got more discard sitting around after making my banana zucchini bread, I have tons of other fun recipes waiting for you. Let me know how your bagels turned out in the comments below!
PrintEasy New York Style Sourdough Discard Bagels

Make chewy, flavorful New York Style bagels using your leftover sourdough discard. This recipe is simple to follow and reduces food waste, giving you homemade bagels ready quickly.
- Prep Time: 20 min
- Cook Time: 30 min
- Total Time: 2 hours 50 min
- Yield: 8 servings 1x
- Category: Breakfast
- Method: Boiling and Baking
- Cuisine: American
- Diet: Vegetarian
Ingredients
- 400 g bread flour
- 100 g sourdough discard (unfed or recently fed)
- 240 ml warm water
- 1 tablespoon honey or malt syrup
- 1 teaspoon instant yeast (optional)
- 10 g fine salt
- 1 tablespoon olive oil
- Topping: Everything Seasoning mix
- Boiling water (for water bath)
- 1 teaspoon baking soda (for water bath)
Instructions
- In a large bowl, combine the bread flour, sourdough discard, warm water, honey or malt syrup, optional yeast, salt, and olive oil.
- Mix the ingredients until a shaggy dough forms. Knead the dough on a lightly floured surface for about 8 to 10 minutes until it becomes smooth and elastic.
- Place the dough in a lightly oiled bowl, cover it, and let it rest at room temperature for 1 to 2 hours, or until it has slightly increased in volume.
- Divide the dough into 8 equal pieces. Roll each piece into a ball, then poke a hole through the center of each ball with your finger, stretching the hole slightly to form a bagel shape.
- Place the shaped bagels on a parchment-lined baking sheet. Cover loosely and let them rest for 30 minutes while you preheat your oven to 425°F (220°C).
- Bring a large pot of water to a boil. Add the baking soda.
- Carefully drop 2 or 3 bagels into the boiling water. Boil for 30 seconds per side. This step creates the chewy interior and glossy crust.
- Remove the boiled bagels with a slotted spoon and place them back on the baking sheet.
- Brush the tops of the bagels lightly with water or an egg wash, then immediately sprinkle generously with Everything Seasoning.
- Bake for 20 to 25 minutes, rotating the pan halfway through, until the bagels are golden brown.
- Cool on a wire rack before slicing and serving.
Notes
- If you skip the optional instant yeast, your dough rise time will be longer.
- For a true New York Style texture, do not skip the boiling step.
- You can use active starter instead of discard, but adjust the liquid slightly if the starter is very wet.
Nutrition
- Serving Size: 1 bagel
- Calories: 280
- Sugar: 3
- Sodium: 350
- Fat: 2
- Saturated Fat: 0.5
- Unsaturated Fat: 1.5
- Trans Fat: 0
- Carbohydrates: 58
- Fiber: 2
- Protein: 10
- Cholesterol: 0