
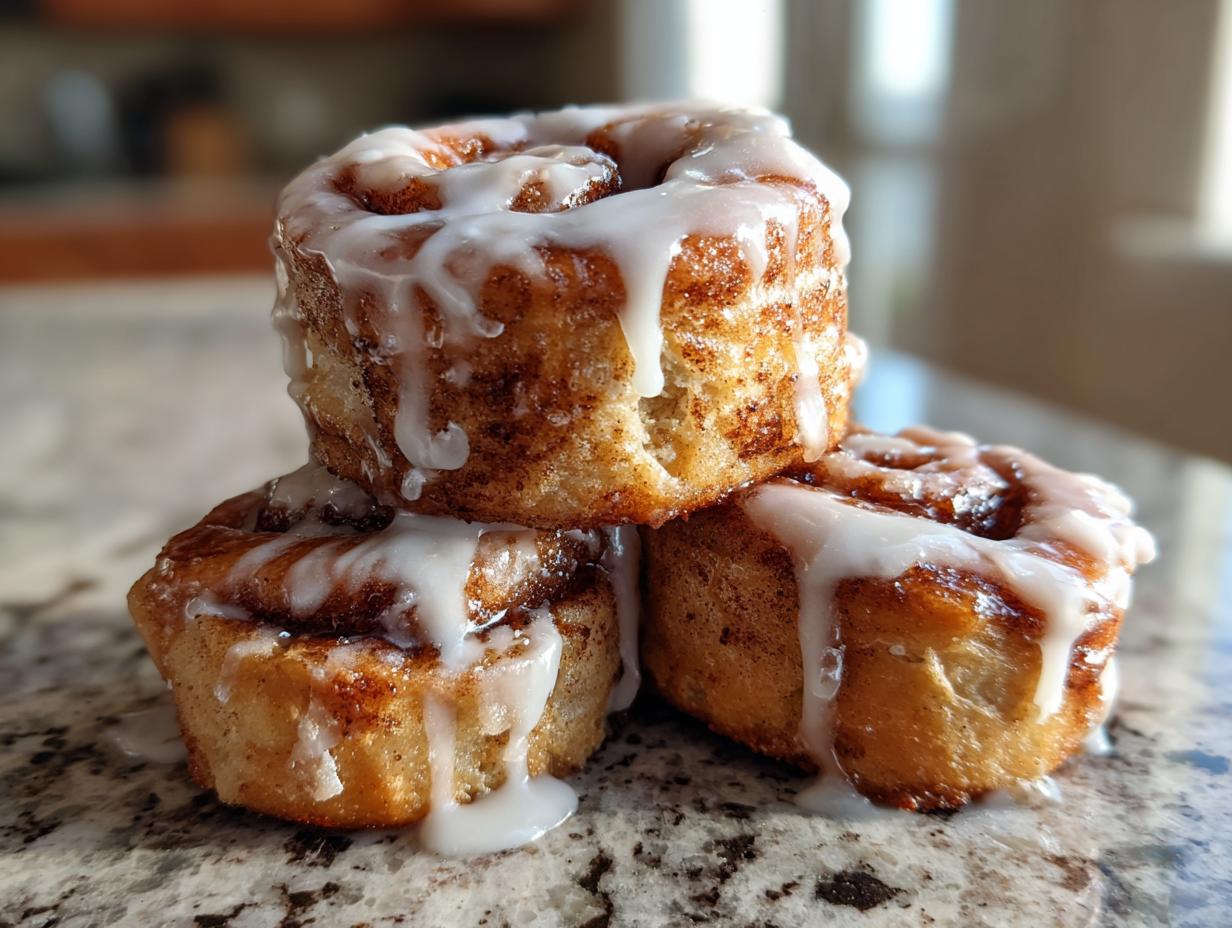
Oh, if I had a dollar for every time I’ve sighed over a batch of gluten-free pastries that turned out tasting like sweet cardboard! It’s the constant baking challenge, right? Everything either crumbles into dust or comes out dense and heavy. But listen, I finally cracked the code for that wonderfully soft, gooey texture we all crave, and I’m sharing it because you deserve amazing breakfasts. We are talking about gluten free sourdough discard cinnamon rolls that have that delicious, subtle tang from fermentation, yet they stay incredibly soft. This method cuts out that extra step of making a separate poolish or using commercial yeast. I learned long ago, as detailed in my journey here at Cheffinity, that solving real kitchen problems efficiently is key. This has become my go-to solution for naturally leavened, soft, and gooey rolls right from my kitchen—no compromise needed!
- Why This Gluten Free Sourdough Discard Cinnamon Rolls Recipe Works
- Gathering Ingredients for Gluten Free Sourdough Discard Cinnamon Rolls
- Step-by-Step Guide to Make Gluten Free Sourdough Discard Cinnamon Rolls
- Tips for Perfect Gluten Free Sourdough Discard Cinnamon Rolls
- Making the Essential Glaze for Your Homemade GF Sweet Rolls
- Storage and Reheating Instructions for Gluten Free Sourdough Rolls
- Frequently Asked Questions About Gluten Free Sourdough Discard Baking
- Nutritional Estimates for Gluten Free Sourdough Discard Cinnamon Rolls
- Share Your Gluten Free Sourdough Discard Cinnamon Rolls Success
Why This Gluten Free Sourdough Discard Cinnamon Rolls Recipe Works
When you’re dealing with gluten-free flours, which lack that stretchy protein structure, you have to fake it a little, and that’s where the sourdough discard shines! We’re tapping into the magic of fermented gluten free baking here. The acidity leftover in the discard helps tenderize the crumb structure, fighting off that terrible dry texture we usually get. This recipe focuses on creating a dough that hydrates completely, making it one of those rare naturally leavened gluten free desserts that actually feels rich.
Achieving Soft Gluten Free Breakfast Pastry Texture
The secret weapon isn’t just the discard, it’s the wait time! After you mix everything up, we let that shaggy dough sit for a full hour. This hydration rest, mentioned in Step 4, is crucial. It gives those specialized gluten-free starches time to fully absorb the liquid before baking. Trust me, this step is non-negotiable if you want a truly soft gluten free breakfast pastry that isn’t crumbly.
Sourdough Discard Baking Tips for Sweet Rolls
When using discard in sweet things, remember a couple of things. First, always taste your discard—if it’s intensely sour, you might want to dial back the optional vanilla in the glaze just a hair. Second, never try to knead GF dough like wheat dough; you’ll just tear it apart. We mix it until just combined. These little sourdough discard baking tips make sure the flavor is balanced and the texture holds up perfectly for these sweet rolls!
Gathering Ingredients for Gluten Free Sourdough Discard Cinnamon Rolls
Okay, let’s talk about what you need to pull off these amazing rolls. Since we aren’t using traditional wheat flour here, the flour blend is where you need to pay close attention. You absolutely must grab a high-quality gluten free all-purpose flour blend, and—this is huge—make sure it already contains xanthan gum. That gum is doing the heavy lifting that gluten normally handles, giving us structure. Seriously, don’t substitute that part unless you know exactly what you are doing with psyllium husk!
If you’re navigating dairy-free, and I know so many of us are, this recipe is wonderfully adaptable. Just swap out the standard milk for oat or almond milk, and use coconut oil in place of the butter in the dough mixture. It works just as beautifully. For those curious about making their own starter base, check out my guide on how to make a sourdough starter from scratch.
Ingredient Clarity for Gooey Cinnamon Rolls Gluten Free
Now, let’s get specific about the filling because that’s what guarantees those gooey cinnamon rolls gluten free texture we love. For the filling, you need butter that is truly softened—think creamy and spreadable—not melted at all. Melted butter turns into an oily mess when you roll it up! Also, when measuring your brown sugar, pack it firmly into the cup. And please, make sure that sourdough discard you’re using is active, meaning you fed it about 4 to 12 hours ago so it’s bubbly and ready to work its magic.
Step-by-Step Guide to Make Gluten Free Sourdough Discard Cinnamon Rolls
Alright, grab your mixer, because this is where we bring it all together! Remember, handling gluten-free dough is delicate work; you can’t muscle it the way you would traditional dough. We need gentle encouragement, not brute force. If you follow these steps carefully, you’ll realize just how truly easy gluten free cinnamon buns can be when you know the GF quirks! Because we are using a naturally leavened approach, these rolls don’t need yeast, which saves you time later when looking for easy breakfast ideas.
Mixing the Dough and Hydration Rest
First things first, let’s introduce the wet ingredients. In your big bowl, you’ll combine that warm milk, your active sourdough discard, the melted butter or oil, the egg, and the vanilla. Just give it a quick stir to be sure they are happy together. Next, whisk your dry stuff separately—the GF flour blend, sugar, salt, and baking powder. Don’t skip whisking the dry stuff; it helps distribute everything evenly since we don’t have gluten pulling it all together later.
Now, slowly introduce the dry mix into the wet ingredients while mixing on low speed. You want to stop as soon as it comes together into a shaggy mass. I mean it—do not overmix! If you beat it too long, you’ll end up with a tough texture. Once it’s mixed, cover the bowl up tight and just let it sit there for one hour at room temperature. This hydration rest (Step 4) is so important for GF flours to plump up and absorb all that goodness.
Rolling, Filling, and Freezing the Log
While it rests, whisk up your filling—that softened butter blended with the brown sugar and cinnamon until it looks like a delicious, thick paste. Once the dough is rested, don’t panic that it won’t behave like perfect wheat dough! Lay out a big piece of parchment paper and dust it lightly with more GF flour. Turn the dough onto the paper and gently roll it out into that 10×14 inch rectangle. If little tears happen (and they might!), just press them gently back together. Gluten-free dough is forgiving that way!
Spread that heavenly filling evenly over the dough, making sure you leave a clean 1-inch border down one of the long sides—this helps seal everything up. Then, starting from the opposite long edge, roll it up nice and tight into a log. Pinch that seam closed for security. Here’s a neat trick I picked up: wrap that log up tightly in plastic wrap and pop it into the freezer for just 30 minutes. This chilling firming step makes slicing your perfect rolls so much easier and cleaner in the next step.
Proofing and Baking Your Gluten Free Cinnamon Rolls Recipe
Preheat your oven to 375°F (190°C) and get that 9×13 dish greased up. Take your chilled log out and use a very sharp, un-serrated knife—or even some clean dental floss—to slice it into 12 even rolls. Place them cut-side up in your baking dish. Now we proof. Cover the dish loosely and let them hang out in a warm spot for 45 to 60 minutes. Here’s where GF sourdough baking throws a curveball: don’t expect them to double in size like traditional rolls! They will puff up slightly, maybe look a little happier, but they won’t balloon up. That’s totally normal for this gluten free cinnamon rolls recipe because there’s no strong gluten network trapping all that gas. After that short proof, slide them into the oven. Bake them for about 22 to 28 minutes. You’re looking for them to be golden brown on top and set in the middle. Checking at 22 minutes is key to keeping them wonderfully soft!
Tips for Perfect Gluten Free Sourdough Discard Cinnamon Rolls
Baking without gluten requires a little insider knowledge, and I pull these insights straight from my notes on every batch I make. The most crucial element for success is that flour blend. If you want those beautiful rolls, you absolutely need a high-quality gluten free flour blend that contains a binder like xanthan gum or guar gum already mixed in. It provides the structure we just don’t get naturally!
When you’re figuring out how to use sourdough discard in a sweet recipe like this, remember you are relying on fermentation for flavor, not just rise. If you are aiming for a dairy-free version, which I often do, the swap is seamless. Just use your favorite non-dairy milk—oat milk offers a great richness—and switch out the butter in the dough for coconut oil. I’ve gathered all my best advice on minimizing frustration with GF baking in my guide to sourdough discard baking tips.
Flour Blend Selection and Dairy Free Option
Seriously, if your blend doesn’t have a gum, those rolls will deflate mid-bake or crumble when you try to spread the filling. It’s the backbone of the whole thing! And don’t stress about the dairy swaps; the flavor profile holds up beautifully whether you use real butter or coconut oil in the dough mixture. It just goes to show, these rolls are designed for real-life substitutions!
Making the Essential Glaze for Your Homemade GF Sweet Rolls
We’ve done the hard work rolling and baking, so now we need that final, glorious, sweet topping to complete these homemade gf sweet rolls. Making this glaze is ridiculously simple, and it’s all about getting the consistency just right!
This is step 15: whisk the sifted powdered sugar, that couple of tablespoons of milk or cream, and the vanilla extract together in a small bowl. You really only need to stir until there are no lumps left. If it looks too thick—like it’s holding a stiff peak—add just a tiny splash more milk. If it looks too runny and thin, add just a sprinkle more powdered sugar. We want it easy enough to drizzle generously over the warm rolls, creating those tempting little rivers of sweetness.
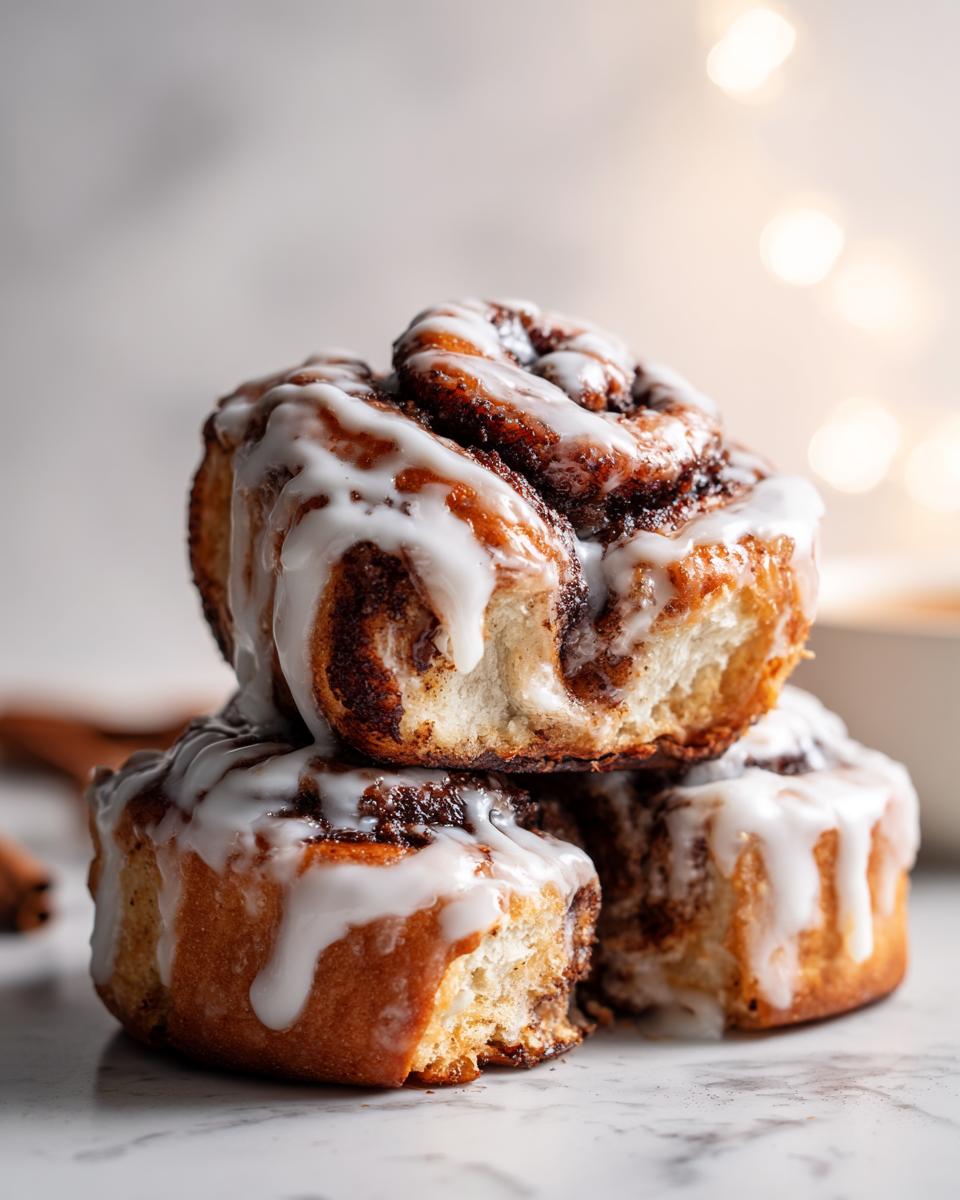
I love serving these rolls while they are still slightly warm—that’s when the glaze starts to melt just perfectly into the warm crevices. If you want to get fancy (and why wouldn’t you?), I have a great recipe for the ultimate cream cheese topping over at my favorite cream cheese recipe, but for these sourdough rolls, the simple vanilla glaze hits the spot every time!
Storage and Reheating Instructions for Gluten Free Sourdough Rolls
Now, keeping these amazing rolls soft after they’ve cooled is the final boss battle, but don’t worry, I have the cheat codes for you. If you are lucky enough to have any leftovers of these delicious gluten free sourdough discard cinnamon rolls, you need to store them correctly right away. I find that storing them in an airtight container at room temperature is best for the first day. Putting them straight into the fridge really speeds up the staling process for gluten-free goods, which we are trying to avoid!
If you know you won’t finish them in one day, go ahead and separate the rolls into freezer-safe bags or containers. They freeze beautifully, especially before you add the glaze! If you freeze them unfrosted, they’ll last for about two months easily.
When it’s time to eat a reheated roll, you have two great options to bring back that fresh-baked softness. The absolute best way is low and slow: wrap a roll loosely in foil and warm it in a 300°F oven for about 8 to 10 minutes. This warms the sugars and butter back up just right.
If you’re in a rush, the microwave works, but you have to be careful not to turn it into a rubber brick. Pop the roll on a microwave-safe plate, place a damp paper towel right on top of it, and heat it in 10-second bursts. Seriously, check it after 10 seconds—15 seconds total is often all you need. That little bit of trapped steam from the towel makes the roll feel wonderfully tender again, just like when they first came out of the oven!
Frequently Asked Questions About Gluten Free Sourdough Discard Baking
I know when you first look at a recipe involving both sourdough discard AND gluten-free flour, you’re going to have questions. That’s totally fair! It’s a combination that requires a slightly different approach than what you might be used to. I’ve collected the questions I get asked the most when people are diving into how to use sourdough discard in their sweet bakes, so we can clear up anything before you start mixing!
Can I substitute the sourdough discard with commercial yeast for these gluten free cinnamon rolls recipe?
You absolutely *could* swap out the discard and add commercial yeast, but honestly, you’d lose the whole point of using the discard in the first place! The acidity from that fermented starter is what helps break down the proteins in the gluten-free flours slightly, making the final product more tender. If you use just yeast, you get a standard, yeasted roll, but it won’t have that complex, subtle tang that makes these the best cinnamon rolls without wheat in my opinion. Stick with the discard for the best flavor and texture payoff!
What is the best gluten free flour blend for rolls?
This is probably the most critical question for any great gluten free cinnamon rolls recipe! You need a blend that is designed to mimic wheat structure. The absolute best choice is a reputable 1:1 replacement blend that already contains xanthan gum, guar gum, or maybe even psyllium husk added in. The gums provide the necessary elasticity and structure so the dough doesn’t collapse when you roll it or bake it. Skip the basic blends that just have rice flours, or you’ll definitely end up with a crumbly structure.
My dough is too sticky, what should I do?
Oh, sticky dough. That’s the signature move of gluten-free doughs! If you’ve done the hydration rest and it still seems impossible to handle, don’t panic or add a ton of flour, or you’ll end up with bricks later. Instead, I recommend either chilling the dough for another 15 minutes—cold dough is always easier to manage—or sprinkling a tiny bit more of your GF flour blend *very* sparingly onto your work surface and just gently patting the dough instead of trying to roll it aggressively. You can find more troubleshooting tips for your starter management over at my guide on using up that discard!
Nutritional Estimates for Gluten Free Sourdough Discard Cinnamon Rolls
Now, I know some of you are tracking macros and watching what goes into your body, and that’s totally fair! But I always want to give you a heads-up that these numbers are just estimates based on standard ingredients, especially since the type of gluten-free flour blend you choose can change things quite a bit. Remember, we are using sourdough discard and a good amount of butter for that gooey factor, so it’s a treat!
Here is what we are generally looking at for one of these fantastic, soft rolls:
- Serving Size: 1 roll
- Calories: Approximately 380
- Fat: Around 20g (with 12g being saturated fat, mostly from the butter)
- Carbohydrates: About 48g
- Protein: Roughly 5g
- Sugar: This one is higher, coming in around 30g because, hey, they are cinnamon rolls!
- Sodium: About 250mg
We’re looking at 2g of fiber, which is great for a sweetened pastry! Don’t forget, if you use non-dairy milk and coconut oil, the fat content shifts slightly, but the overall profile stays similar. Enjoy this marvelous, naturally leavened breakfast pastry, knowing exactly what you’re fueling up with!
Share Your Gluten Free Sourdough Discard Cinnamon Rolls Success
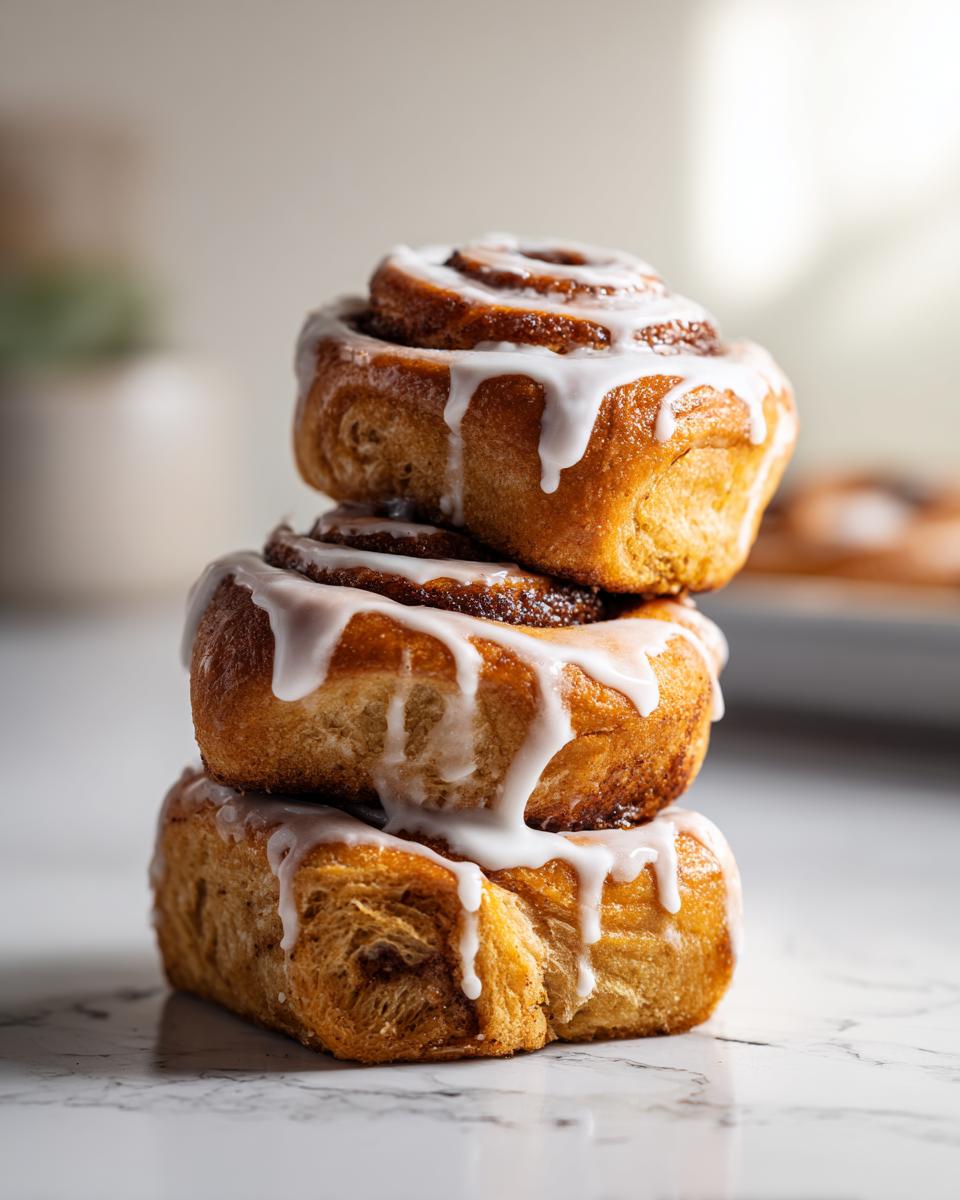
We made it! You tackled the soft dough handling, you respected the hydration rest, and now you have this glorious tray of naturally leavened, gooey goodness. Honestly, seeing those turns in the roll makes all the effort worth it, doesn’t it?
I truly want to know how they turned out for you! Baking is always a shared experience, and hearing about your success—or even troubleshooting a little bump in the road—helps me refine these recipes further for everyone else using my system. Did they stay perfectly moist? Was the sourdough tang just right?
Please head down to the comments section and give this recipe a star rating—let me know what you think using a simple 1-to-5 star system. If you snapped a photo of your finished gluten free sourdough discard cinnamon rolls on your breakfast table, please share it on social media and tag me! I absolutely love seeing your beautiful results. If you have a question about adapting this for another sourdough discard project, feel free to reach out through my contact page, and I’ll get back to you!
PrintGluten-Free Sourdough Discard Cinnamon Rolls

Make soft, gooey gluten-free cinnamon rolls using your sourdough discard. This recipe provides simple steps for naturally leavened, delicious sweet rolls without traditional wheat flour.
- Prep Time: 20 min
- Cook Time: 28 min
- Total Time: 2 hr 8 min
- Yield: 12 servings 1x
- Category: Breakfast
- Method: Baking
- Cuisine: American
- Diet: Gluten Free
Ingredients
- 1 cup active gluten-free sourdough discard (fed 4–12 hours prior)
- 1/2 cup warm milk (dairy or non-dairy)
- 1/4 cup melted butter or coconut oil, plus more for greasing
- 1 large egg
- 1 teaspoon vanilla extract
- 1/2 teaspoon salt
- 3 cups high-quality gluten-free all-purpose flour blend (with xanthan gum)
- 1/2 cup granulated sugar
- 1 teaspoon baking powder
- 1/2 cup (1 stick) unsalted butter, softened (for filling)
- 3/4 cup packed brown sugar (for filling)
- 2 tablespoons ground cinnamon (for filling)
- 1/2 cup powdered sugar (for glaze)
- 2 tablespoons milk or cream (for glaze)
- 1/2 teaspoon vanilla extract (for glaze)
Instructions
- Combine the warm milk, sourdough discard, melted butter, egg, and vanilla extract in a large bowl. Mix until just combined.
- In a separate bowl, whisk together the gluten-free flour blend, granulated sugar, salt, and baking powder.
- Gradually add the dry ingredients to the wet ingredients, mixing on low speed with a stand mixer or by hand until a shaggy, slightly sticky dough forms. Do not overmix.
- Cover the bowl and let the dough rest at room temperature for 1 hour. This allows the gluten-free flour to hydrate fully.
- Prepare the filling: In a small bowl, mix the softened butter, brown sugar, and cinnamon until smooth and spreadable.
- Lightly dust a large piece of parchment paper with gluten-free flour. Turn the dough out onto the paper. Dust the top lightly.
- Roll the dough into a rectangle approximately 10×14 inches. Gluten-free dough may tear; patch gently if needed.
- Spread the cinnamon filling evenly over the dough, leaving a 1-inch border on one long edge.
- Starting from the long edge opposite the border, tightly roll the dough into a log. Pinch the seam closed.
- Wrap the log tightly in plastic wrap and freeze for 30 minutes. This firms the dough for easier slicing.
- Preheat your oven to 375 degrees F (190 degrees C). Grease a 9×13 inch baking dish.
- Remove the dough log from the freezer and slice it into 12 equal rolls using a sharp, un-serrated knife or dental floss.
- Place the rolls cut-side up in the prepared baking dish. Cover loosely with plastic wrap and let them proof in a warm spot for 45 to 60 minutes. They will puff slightly but will not double in size like wheat dough.
- Bake for 22 to 28 minutes, or until the tops are golden brown and the center is set.
- While the rolls cool slightly, prepare the glaze: Whisk together the powdered sugar, milk, and vanilla extract until smooth.
- Drizzle the glaze generously over the warm rolls before serving.
Notes
- For the softest rolls, use a high-quality gluten-free flour blend that contains binders like xanthan gum.
- If your discard is very active, reduce the proofing time slightly.
- If you prefer dairy-free rolls, use non-dairy milk and coconut oil instead of butter in the dough and filling.
- For a gooey texture, do not overbake the rolls. Check them at 22 minutes.
Nutrition
- Serving Size: 1 roll
- Calories: 380
- Sugar: 30
- Sodium: 250
- Fat: 20
- Saturated Fat: 12
- Unsaturated Fat: 8
- Trans Fat: 0
- Carbohydrates: 48
- Fiber: 2
- Protein: 5
- Cholesterol: 55