
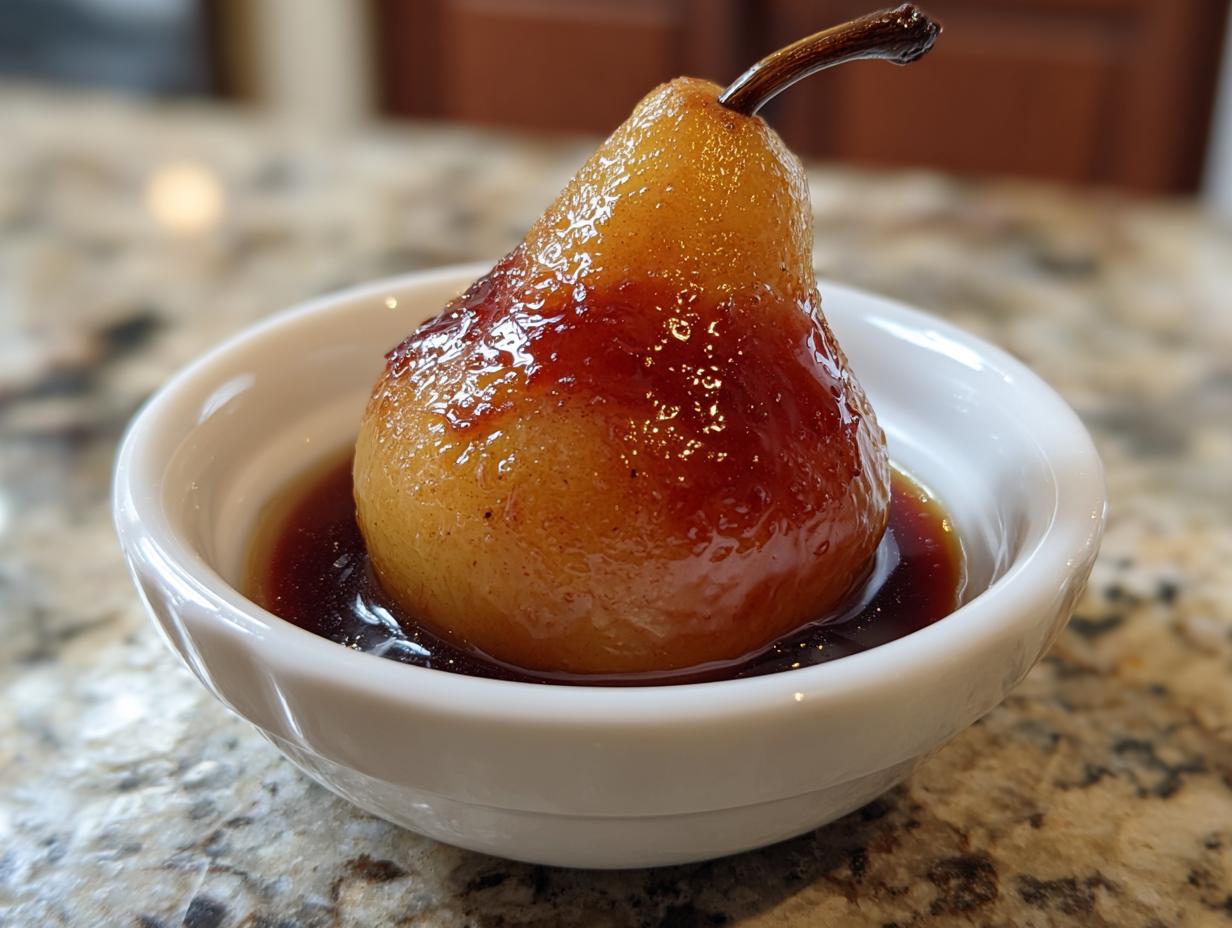
I know that feeling when you need a spectacular dessert but you’re running on fumes after a busy day. We’ve all been there! You want something that looks like it took hours of painstaking work—that gourmet fruit dessert feel—but honestly, who has that time on a Tuesday? Well, I cracked the code on that one, applying all my streamlining tricks to create something truly show-stopping. These poached pears are the answer. We are making my signature Vanilla Bourbon Poached Pears today, and trust me, this is the one elegant, high-impact recipe that proves dessert doesn’t need to be complicated. This fits right into my Cheffinity philosophy: maximum wow on minimal effort, which means you can nail those dinner party desserts without stressing! If you love quick sweet wins, you should check out my full collection of delicious dessert recipes too.
- Why You Will Love These Vanilla Bourbon Poached Pears
- Selecting the Best Pears for Poached Pears
- Ingredients for Flavorful Poached Pears
- How to Poach Pears Perfectly: Step-by-Step Instructions
- Flavor Variations for Classic Poached Pears
- Serving Suggestions for Elegant Poached Pears Dessert
- Storage and Make Ahead Tips for Poached Pears
- Frequently Asked Questions About Poached Pears
- Estimated Nutritional Data for Vanilla Bourbon Poached Pears
Why You Will Love These Vanilla Bourbon Poached Pears
Seriously, these are going to become your new go-to for impressing people. I designed this recipe to hit that sweet spot where homemade elegance meets effortless execution. You get that complex, rich flavor from the vanilla and bourbon without having to juggle five different pots. It’s the ultimate confidence booster when company shows up!
- Maximum Elegance, Minimum Fuss: This is the Elegant Poached Pears Recipe that looks like it belongs on a restaurant menu, but it’s secretly a dump-and-simmer situation.
- Flavor Depth Done Right: The combination of high-quality bourbon, real vanilla bean, and bright orange creates a truly gourmet fruit dessert experience.
- Perfect for Planning Ahead: Best of all? This is one of those fantastic Make Ahead Dessert Recipes. Make them a day or two before your party and just chill!
Selecting the Best Pears for Poached Pears
The secret to having a beautiful presentation after all that simmering starts at the grocery store, or maybe the farmer’s market! You cannot use a pear that’s already soft, or you’ll end up with pear mush instead of these gorgeous, intact fruits. If you’re looking for the Best Pears for Poaching that hold onto their shape perfectly while absorbing all that amazing bourbon syrup, you absolutely have to reach for Bosc pears. They are firm, they have that wonderful elongated neck, and they stand up to the heat like troopers.
Bartlett pears are also great, but they ripen much faster, so you have to be super careful with your cook time. My rule of thumb when I’m testing any pear for poaching is to give it a gentle squeeze near the stem. It should give just a tiny bit—firm, but not rock hard. If you press too hard, you’re already bruising it, and that spot will get mushy in the syrup. Remember, we want tender, but structurally sound!
Ingredients for Flavorful Poached Pears
Okay, let’s talk about what goes into that rich, aromatic poaching liquid for these poached pears. Because we are aiming for a true gourmet fruit dessert experience here, the quality of your liquids really does matter. Don’t skimp on the vanilla or the bourbon—since they are sitting with the pears for 40 minutes, they infuse everything!
Here is exactly what you’ll need for four servings. If you’re planning on making a double batch for leftovers (which you should!), just double everything up, but you might need a bigger pot!
- 4 firm Bosc pears (Yes, Bosc! They are tough enough for this job.)
- 4 cups water
- 2 cups granulated sugar
- 1 cup good quality bourbon (Use something you wouldn’t mind drinking a small glass of!)
- 1 vanilla bean, split and scraped (Don’t just use extract here; we need those beautiful seeds speckled throughout.)
- 1 orange, sliced (Don’t bother peeling it; the zest adds so much brightness.)
- 1 cinnamon stick
- 1 tablespoon fresh lemon juice (This is our secret weapon against ugly brown pear spots.)
See? It’s just a handful of things, but that bourbon and vanilla bean combo is powerful. It’s much more interesting than just poaching them in plain water, right? If you ever need a quick topping sauce later, I have a great recipe for chocolate syrup, but honestly, the reduced pear syrup is all anyone ever asks for with these!
How to Poach Pears Perfectly: Step-by-Step Instructions
Now we get to the fun part—the actual cooking! Mastering how to poach pears perfectly is all about gentle heat and patience. You want them to break down just enough to become buttery tender, but not so much that they turn into mush when you try to put them on a plate. Watch the liquid, not the clock, and you won’t go wrong.
Preparing the Pears and Poaching Liquid
First things first, peel those beautiful Bosc pears, but I always tell people: leave the stems on! It’s the easiest way to plate them later, giving you that elegant look effortlessly. As soon as you cut the surface, grab that lemon juice and rub it all over! This stops them from turning that sad, oxidized brown color while you get your poaching bath ready. Next, combine all your liquid ingredients—water, sugar, bourbon, orange, and cinnamon—in your biggest saucepan. Get that sugar totally dissolved over medium heat before anything else happens.
Simmering and Reducing the Syrup for Poached Pears
Once the sugar is gone, gently lower the firm pears into the liquid. Keep the heat low enough so it’s just a lazy, gentle bubble—a low simmer. We let these cook, partially covered, for 25 to 40 minutes. You’ll know they are ready when you use a small, sharp knife (or even a toothpick) and it slides in mostly without resistance. Be careful though! I always check three spots. Once they are tender, pull the pears out and save them. Now, the real magic happens: turn that heat UP! Boil that leftover vanilla bourbon liquid hard, uncovered. It has to reduce by about half, maybe more. My personal secret for a super glossy syrup is to let it go until it coats the back of a spoon heavily. That reduction concentrates all that gorgeous flavor into a thick sauce for your poached pears!
Flavor Variations for Classic Poached Pears
While my Vanilla Bourbon Poached Pears are absolutely top-tier, I know sometimes you want to mix things up depending on what you have open or what flavor mood strikes you! It’s so easy to pivot this basic method if you know the swapping ratios. This versatility keeps your dessert offerings feeling fresh, even though the method is simple. If you need an idea for a savory side pairing once you’ve had dessert, check out my recipe for Italian Herb and Cheese Bread!
If you want that deep, dramatic color and a slightly richer, earthier flavor, you have to try the classic Red Wine Poached Pears. The best way to do this is to swap out two cups of the water in the original recipe for a dry red wine, like a Merlot. It makes the poaching liquid darker and more complex. You might want to cut back the sugar just a touch when you do this swap, too!
For something lighter, especially if you’re serving a heavier main course, skip the bourbon and use a lovely, floral honey instead. I call these my Poached Pears with Honey version. You can use honey in place of the sugar, maybe using about one and a quarter cups for every cup of sugar called for. Just make sure you keep an eye on it because honey can caramelize faster!
Sometimes people even ask me about saffron—it sounds fancy, but it’s just swapping out the liquid for something like apple juice, which gives a beautiful golden hue and a slight tang. I think I saw a great recipe for Saffron Infused Poached Pears in Apple Juice if you want to get really colorful!
See? Basic poaching liquid ingredients are your framework. Just swap out the booze or the sweetener, and you have a whole new batch of gorgeous poached pears ready to go. It’s like having a secret menu for your dinner parties!
Serving Suggestions for Elegant Poached Pears Dessert
Okay, the pears are poached, the syrup is gloriously thick and glossy—now for the fun part: serving them! You don’t want to rush this step, because presentation is huge when you’re making a dessert this elegant. We want this to look like the showstopper it is, especially for those dinner parties we plan for!
My absolute favorite way to serve these poached pears is warm, right out of the gentle simmering (or just reheated slightly), with a big, creamy dollop of mascarpone. I often sweeten my mascarpone just a hair with a little powdered sugar and vanilla. It is heavenly! If you don’t have mascarpone, vanilla bean ice cream is a close second for that hot/cold contrast.
But honestly, you can’t go wrong if you make a drizzle out of that reduced poaching liquid. It clings perfectly to the fruit. If you happen to have a great caramel sauce on hand—maybe one you made earlier—a swirl of that over the top turns this into the decadent Poached Pears with Caramel Sauce everyone dreams about. Remember, even a simple dessert deserves a beautiful finish. For another frosting idea that might elevate another dessert you’re making, I have this amazing recipe for quick and smooth cream cheese frosting!
Storage and Make Ahead Tips for Poached Pears
Listen, one of the absolute best things about making these poached pears—and why they are perfect for those big Dessert Ideas for Dinner Parties—is that you don’t have to stress on the day of the event! You can completely cook these a couple of days in advance. It really lets those vanilla and bourbon flavors deepen, making them even better the next day, honestly.
When you take the pears out after poaching, let them cool down a little bit. Then, you can store the cooled fruit right back into the saucepan with the strained, reduced poaching syrup, or transfer them to a clean, airtight container. Make sure they are totally submerged in that thick syrup! This keeps them moist and saturated with flavor. They hang out beautifully in the fridge for up to five days. When you are ready to serve, just warm them up gently on the stove or even serve them chilled with your favorite topping. It’s such a relief knowing that fancy dessert is already done! If you ever need another make-ahead recipe, my no-bake grasshopper pie is another winner!
Frequently Asked Questions About Poached Pears
I always get questions when people first try making these, which is great! It shows you want to get this Elegant Fruit Dessert just right. Here are the common things that trip people up, but trust me, they’re easy to fix!
Can I make poached pears without alcohol?
Absolutely! I know not everyone wants bourbon floating around, especially if kids are enjoying the dessert. For the non-alcoholic version of these spiced poached pears, you can easily replace the bourbon cup for cup. I recommend using either water, or for a little extra flavor, try white grape juice or apple juice. White grape juice gives you a nice sweetness that plays well with the vanilla and spices. Just treat it exactly like the bourbon in the recipe—add it right in with the water and sugar!
How long do poached pears last in the refrigerator?
These are fantastic for leftovers, which is why I love them as a make ahead dessert recipe. As long as you keep those lovely poached pears completely submerged in their reduced syrup, they will last beautifully in an airtight container in the fridge for up to five days. They actually get even more flavorful as they sit overnight, soaking up all that vanilla goodness, so don’t be afraid to make them Sunday for a Wednesday night treat!
Another common worry from people making their first batch of poached pears is that the fruit just falls apart in the pot. That usually happens for two reasons: you picked a pear that was too ripe, or your heat was too high. Remember how I stressed using firm Bosc pears? That’s key! And if you look back at the instructions, we bring the liquid to a simmer, but then we drop the heat way down so it’s just barely bubbling. If you boil them hard, they disintegrate. We want tender, not mushy!
And yes, you can absolutely reuse the syrup! While I wouldn’t use it on anything else savory, that leftover vanilla bourbon syrup is incredible drizzled over vanilla ice cream or next time you make a very basic pound cake. If you’re looking for more ideas to use up pantry staples, you might enjoy checking out my tips for easy breakfast ideas!
Estimated Nutritional Data for Vanilla Bourbon Poached Pears
Look, I always tell people that when we’re making something this special, we aren’t really worrying about macros, right? But since you might be planning a whole dinner party menu, I pulled out the breakdown from the recipe card! This lets you know what you’re stepping into when you decide to make these incredible poached pears.
Here are the estimated numbers based on the recipe as written. Remember, since we are using good bourbon and a whole vanilla bean, these values are an estimate for one serving (one pear plus a good amount of that glorious syrup). Always remember that your brand of bourbon or how much syrup you drizzle on top can change things!
- Serving Size: 1 pear with syrup
- Calories: 350
- Sugar: 65g (Yes, it’s high, but it’s mostly from the fruit and the reduction, so treat yourself!)
- Sodium: 5mg
- Fat: 1g
- Saturated Fat: 0g
- Unsaturated Fat: 1g
- Trans Fat: 0g
- Carbohydrates: 85g
- Fiber: 8g
- Protein: 1g
- Cholesterol: 0mg
So yes, they are sugary, because they are poached in a sugar syrup—that’s how you get that glossy coating! But they are virtually fat-free and cholesterol-free, which keeps them squarely in the ‘elegant, light fruit dessert’ category for me. It’s all about balance, my friends!
PrintElegant Vanilla Bourbon Poached Pears
Make this elegant dessert easily. Tender pears simmer in a flavorful vanilla bourbon syrup, perfect for dinner parties or holiday meals.
- Prep Time: 15 min
- Cook Time: 45 min
- Total Time: 60 min
- Yield: 4 servings 1x
- Category: Dessert
- Method: Stovetop Simmering
- Cuisine: American
- Diet: Vegetarian
Ingredients
- 4 firm Bosc pears
- 4 cups water
- 2 cups granulated sugar
- 1 cup good quality bourbon
- 1 vanilla bean, split and scraped
- 1 orange, sliced
- 1 cinnamon stick
- 1 tablespoon fresh lemon juice
Instructions
- Peel the pears, leaving the stems intact. Rub the cut surfaces with lemon juice to prevent browning.
- In a saucepan large enough to hold the pears standing up, combine the water, sugar, bourbon, vanilla bean seeds and pod, orange slices, and cinnamon stick. Bring this mixture to a simmer over medium heat, stirring until the sugar dissolves completely.
- Gently place the prepared pears into the simmering liquid. The liquid should mostly cover the pears. If needed, add a little more water.
- Reduce the heat to low, cover the saucepan partially, and poach the pears for 25 to 40 minutes, or until they are tender when pierced with a small knife. The time depends on the ripeness and size of your pears.
- Carefully remove the pears from the liquid and set them aside.
- Increase the heat to medium-high and boil the remaining poaching liquid, uncovered, for about 10 to 15 minutes, until the syrup reduces and thickens slightly. This creates a glossy sauce.
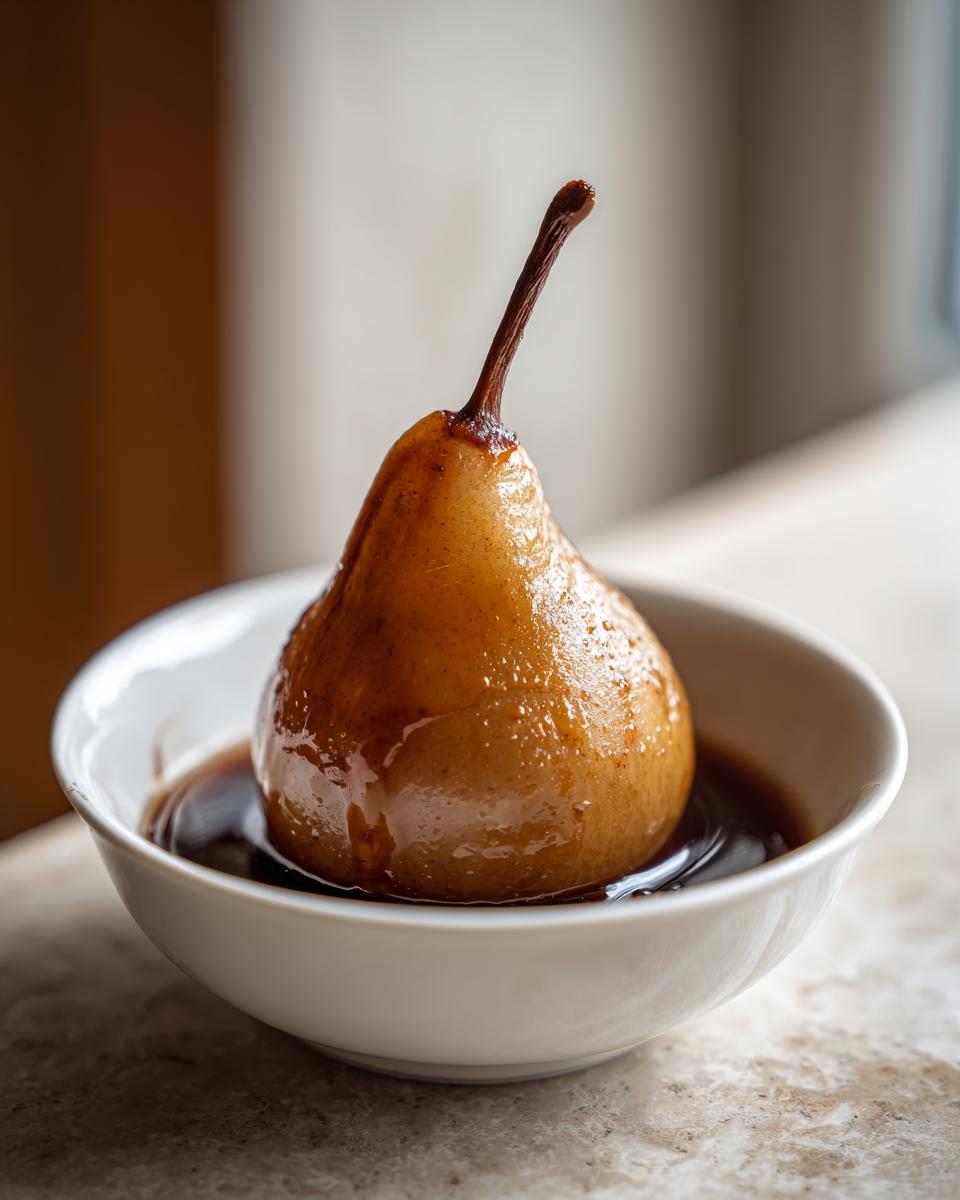
- To serve, place one warm or chilled pear in a bowl. Spoon a generous amount of the reduced vanilla bourbon syrup over the pear. Serve with a dollop of mascarpone cheese or vanilla ice cream.
Notes
- For a richer flavor, use Bosc pears, as they hold their shape well during poaching.
- You can make this a Red Wine Poached Pears dessert by substituting 2 cups of the water with a dry red wine, like Merlot or Cabernet Sauvignon.
- This is a great make ahead dessert recipe; store the cooled pears submerged in the strained syrup in the refrigerator for up to 5 days.
Nutrition
- Serving Size: 1 pear with syrup
- Calories: 350
- Sugar: 65g
- Sodium: 5mg
- Fat: 1g
- Saturated Fat: 0g
- Unsaturated Fat: 1g
- Trans Fat: 0g
- Carbohydrates: 85g
- Fiber: 8g
- Protein: 1g
- Cholesterol: 0mg