
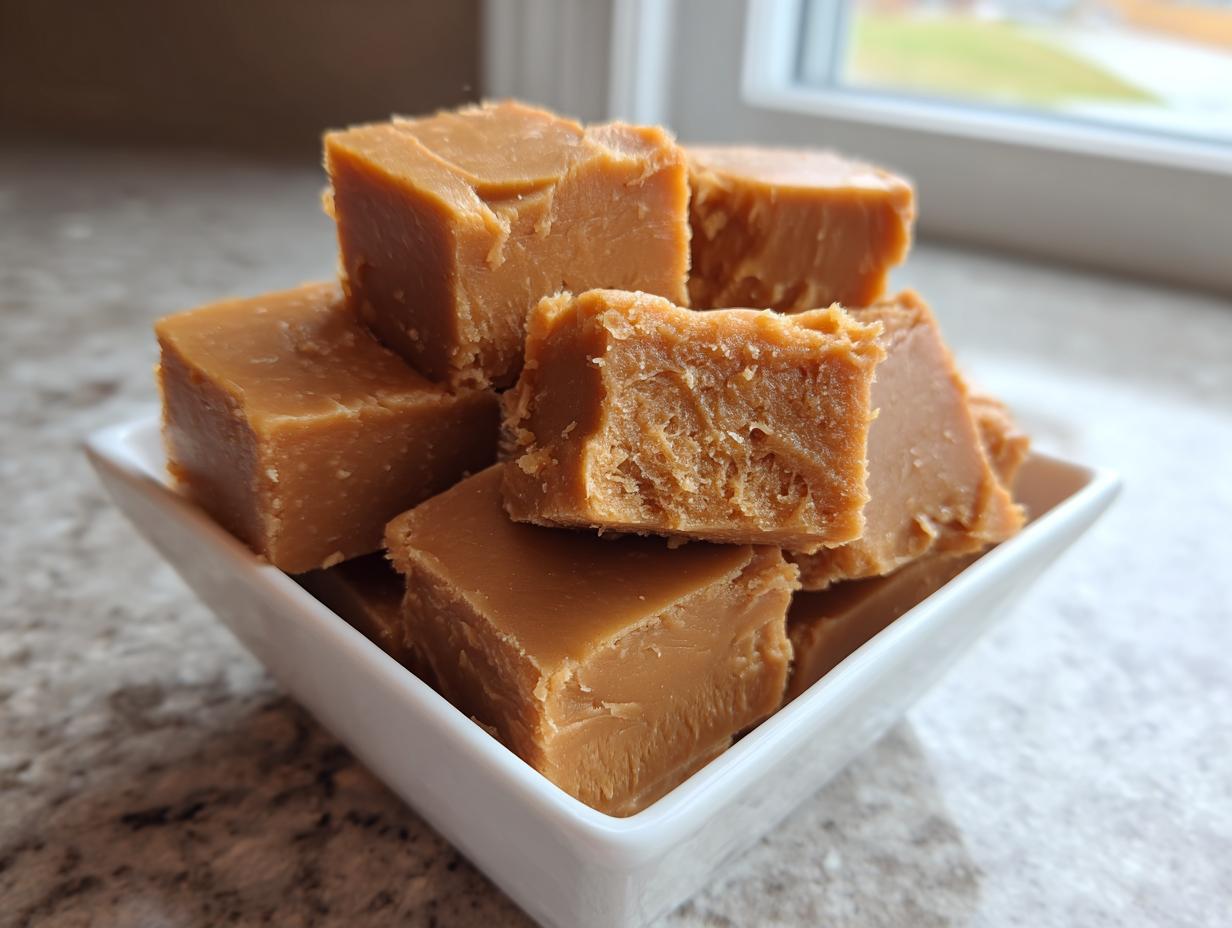
There’s just something deeply comforting about pulling a pan of perfect homemade candy from the counter, right? Not the stuff dripping with chocolate, either. I’m talking about that rich, buttery, old-fashioned sweetness that smells like toasted sugar and pure nostalgia. If you’ve ever been scared off by candy making, thinking it involved complicated steps and grainy results, I have fantastic news for you. This easy penuche fudge recipe is completely straightforward and seriously classic. It’s an unbelievably creamy fudge that relies only on butter and brown sugar creating this incredible caramel fudge flavor.
When I first started tackling these old family recipes, I was determined to keep the authenticity while slashing the fuss. My goal, just like Ava Sinclair’s philosophy here at Cheffinity, is to ensure you get those melt in your mouth dessert squares without spending half your afternoon stirring frantically. This brown sugar fudge is the reliable standard you can count on every time you need a simple sweet treat.
- Why This Easy Penuche Fudge Recipe Works (Old Fashioned Fudge)
- Ingredients for Classic Penuche Fudge
- How to Prepare Penuche Fudge Step-by-Step
- Tips for Perfect Old Fashioned Fudge Success
- Variations on This Classic Confection
- Serving Suggestions for Homemade Candy
- Storage and Keeping Your Penuche Fudge Fresh
- Frequently Asked Questions About Penuche Fudge Recipe
- Share Your Penuche Fudge Experience
Why This Easy Penuche Fudge Recipe Works (Old Fashioned Fudge)
Okay, let’s talk about the scary part of homemade candy making: graininess. That usually happens when the sugar crystals decide to clump up instead of staying smooth and creamy. My biggest promise to you is that this penuche fudge recipe completely bypasses that disaster, which is why it’s my go-to old fashioned fudge anytime I need guaranteed success! Trust me, we are keeping things easy while hitting that luxurious texture.
Achieving That Melt In Your Mouth Dessert Texture
The entire secret rests on two temperature checkpoints. First, we cook the mixture to exactly 234 degrees Fahrenheit—that’s the soft-ball stage. Then, and this is the non-negotiable step, you pull it off the heat and let it cool, untouched, until it hits 110 degrees Fahrenheit. If you start beating it while it’s too hot, you’ll end up with hardened sugar, not your dreamy, creamy fudge.
The Rich Caramel Fudge Flavor Profile
Since this is a no chocolate fudge, the flavor relies 100% on the sugars we choose. That deep, nutty sweetness you taste is pure magic from the brown sugar doing its job. That’s why we call it brown sugar fudge!
Ingredients for Classic Penuche Fudge
When you’re making a classic confection like this, you absolutely need the right players on your team. Since this recipe is all about that beautiful butter and brown sugar candy base, we don’t need a huge grocery list. Good news! It’s wonderfully fast because the ingredient list is so short. You can gather everything you need in about five minutes, giving you a solid head start on that 15-min prep time.
Remember, precision matters when you’re dealing with candy temperatures, so measure everything out before you even turn on the stove. I usually put everything in little prep bowls—it saves my sanity!
- Two full cups of plain old granulated sugar.
- One cup of light brown sugar—and you have to pack it tightly into the measuring cup so you get the right molasses content for that deep color!
- One cup of heavy cream. This is the rich part that makes it so wonderfully creamy fudge. Don’t try to substitute milk here; it just won’t have the body we need for this easy fudge recipe.
- One tablespoon of butter. We’ll stir this in right at the end to boost the richness.
- One teaspoon of pure vanilla extract. Make sure it’s real vanilla! It really stands out in this no chocolate fudge.
How to Prepare Penuche Fudge Step-by-Step
This is where we put in the focus, but don’t panic! Even with the critical temperature checks, you’ll find that your penuche fudge comes together incredibly fast. Overall, the active prep time is only about 15 minutes, which is faster than most of my weeknight dinners, honestly. The remaining time is just waiting for it to set up beautifully.
Preparation and Initial Cooking for Penuche Fudge
First things first, let’s get the home ready for our homemade candy. Grab an 8×8 inch baking pan and line it completely with parchment paper. You want a good overhang on two sides—this is crucial because we are going to use those flaps to lift the whole slab out later! Lightly grease that paper, just for good measure.
Next, toss the granulated sugar, the packed light brown sugar, and the heavy cream into a serious, heavy-bottomed saucepan. You need that heavy bottom to prevent scorching, which results in sad, gritty candy, and trust me, we want zero grit here.
Set this mixture over medium heat. You must stir constantly until you can’t feel any sugar granules grinding against the bottom of your pan anymore. Once the sugar is dissolved—and I mean *totally* dissolved—you can carefully clip on your candy thermometer. Don’t let it boil over before that sugar dissolves, or it gets tricky!
The Critical Cooling and Beating Phase for Creamy Fudge
Now, keep stirring occasionally so the mixture cooks evenly, and watch that thermometer. We need to hit exactly 234 degrees Fahrenheit. As soon as the thermometer signals we are there, yank the pan off the heat immediately. Stir in your tablespoon of butter and the vanilla extract until the butter melts completely. That’s the last bit of stirring it gets for a while.
Here’s the magic move that separates the amazing creamy fudge from the hard candy brick: Stop stirring! Let the mixture cool down completely, undisturbed, until the thermometer reads 110 degrees Fahrenheit. This cooling period is vital for getting that perfect, desirable melt in your mouth dessert texture.
Once you hit 110°F, get moving! Beat that mixture vigorously—I use a hand mixer on medium speed if I’m feeling lazy, or a solid wooden spoon if I need an arm workout. You keep beating until it really starts to look dull, stops being glassy, and thickens up like thick frosting. That’s your cue to quickly dump it into that waiting pan and let it chill out! Don’t mess with it—just let it set up firm.
Tips for Perfect Old Fashioned Fudge Success
Even with a straightforward recipe like this penuche fudge, candy making can feel high stakes. I totally get it! I once skipped the 110-degree cool-down step because I was rushing to get to a school meeting, and you know what happened? The fudge turned immediately grainy before I could even finish beating it. It was still edible, but it tasted like sugary sand instead of that glorious, creamy fudge I wanted.
That’s why I preach patience in the cooling stages. This isn’t just about making old fashioned fudge; it’s about mastering a technique. If you’re adding any extra goodies, like nuts, you’ll want to toss those in right after you pull it off the heat, before the cooling starts, or wait until the very tail end of the beating process.
Avoiding Graininess in Your Penuche Fudge
We already mentioned the temperature checkpoints, but I want to shout this from the rooftops: The 110°F cool-down is absolutely the gatekeeper to smooth fudge. When you stir in the butter and vanilla after taking it off the heat at 234°F, you are setting the stage, but the actual crystal growth needs to happen slowly as it cools to 110°F.
Once it hits that 110 mark, you must beat it hard until it loses its shine and starts setting up. If you start beating when it’s 130°F, the sugar crystals form too large, and boom—grainy. If you wait until it’s 90°F, it will be too stiff to beat properly, resulting in a crumbly, stiff block. This is why checking that thermometer is the difference between enjoying the gorgeous butter and brown sugar candy you deserve and having to start over. For more brilliant examples of simple, sweet success, you can check out some of the tips here on what makes cookies melt delightfully, because the low-and-slow cooling methodology is similar!
If, heaven forbid, you watch it cool and it still looks too liquidy or glassy when it hits 110°F, you can *gently* place the pan back on the stove over very low heat just until it warms up a bit, and then take it off again to cool slowly. But honestly, using quality, heavy-bottomed cookware and following the timing usually means you won’t need to go back to the stove. Trust the process, and you’ll have the silkiest no chocolate fudge imaginable, just like my friends over at The Delicious Spoon always manage to achieve with their classic take!
Variations on This Classic Confection
Once you nail the basic, perfect method for this penuche fudge—and you absolutely will, because we mastered the cooling—you start thinking about how to jazz it up a little! This base, relying on that beautiful butter and brown sugar candy foundation, is surprisingly flexible. It’s not like chocolate fudge where you have to be super careful with temperature changes; this stuff just loves a little company.
Even though it shines on its own as a classic confection, turning it into a special edition for the holidays or just because it’s Tuesday is fun. We aren’t really changing the recipe here, just adding in a few things at the right time to keep that creamy fudge texture intact.
Adding Nuts or Spices to Penuche Fudge
If you like a little crunch with your smooth sweetness, nuts are your best friend here. Pecans or walnuts are my favorites because their earthy tones really complement the deep, almost molasses-like flavor from the brown sugar. You want about a cup of chopped nuts for this batch. Don’t dump them in when the mixture is scorching hot; they won’t distribute evenly.
Instead, wait until you pull the mixture off the heat after adding the butter and vanilla, or even better, toss them in during the last few minutes of the beating phase once the fudge has started to really thicken up. That way, they get suspended evenly throughout the whole batch instead of sinking straight to the bottom while they’re liquidy.
For spices, think about what flavors go well with caramel! A half-teaspoon of ground cinnamon or a quarter-teaspoon of nutmeg works wonders if you are presenting this as a holiday fudge recipe. A tiny pinch of cayenne pepper is a fun secret addition I tried once—it doesn’t make it hot, it just wakes up the brown sugar flavor! Cinnamon and nutmeg are best added right alongside the vanilla and butter just before that crucial cooling step begins.
If you enjoy that cozy feeling in your baked goods, check out my Snickerdoodle Cheesecake recipe; those warm spices translate beautifully into fudge, too!
Serving Suggestions for Homemade Candy
Okay, so you’ve got this gorgeous, creamy batch of penuche fudge, perfectly set, and smelling divine. What now? Since this is such a fantastic nostalgic dessert, I love treating it like a little treasure. This isn’t the kind of candy you wrap haphazardly in tin foil; it deserves a nice presentation, especially if you’re giving it away.
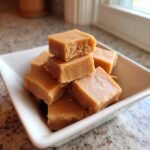
If you’re making this as part of your holiday fudge recipes haul, cut the squares neatly, just like the recipe calls for—about 36 perfect little squares. I always use a very sharp knife warmed under hot water and wiped dry between cuts; it keeps the edges super clean, which is key for that professional look.
For presentation, individual wrapping is always lovely. Small squares of cellophane tied with a nice ribbon make this an instant gift. If you’re keeping it around the house for those times you need a little pick-me-up, put the pieces into a sturdy, airtight container. It always looks pretty layered between wax paper squares.
But what to pair it with? Since this brown sugar fudge is so rich and sweet—that perfect balance of butter and brown sugar candy—you need something to cut through that richness. Seriously, this fudge alongside a strong cup of coffee is almost a religious experience. Whether it’s your morning brew or an afternoon espresso, the bitterness balances the sweetness perfectly. It’s also amazing with a hot cup of black tea if you want a break from the coffee buzz. If you’re looking for other cozy pairings, my recipe for sour cream coffee cake offers a similar vibe when paired with this sweet treat!
It’s a simple sweet treat that looks fancy without any extra effort on your part, which is exactly what my philosophy is all about over here!
Storage and Keeping Your Penuche Fudge Fresh
The best part about this penuche fudge, besides how easy it is to make, is that it doesn’t need refrigeration! Honestly, keeping candy in the fridge just makes it hard and less enjoyable. Since this is essentially a butter and brown sugar candy, it holds up beautifully if you treat it right.
For the best texture—that lovely, soft, melt-in-your-mouth experience—you want to store this at cool room temperature. Think 60 to 70 degrees Fahrenheit if you can manage it. If your kitchen runs really hot in the summer, you might need to find a cooler spot, maybe a pantry or cupboard away from the oven.
I use an airtight container, and I always layer the squares between pieces of wax paper or parchment paper. This keeps them from sticking together. If you skip the paper, they’ll fuse into one giant, delicious block of brown sugar fudge by day three!
How long does it last? Well, if you hide it well enough, it lasts a good week, maybe 10 days, tasting just as fresh as the day you made it. The fats and sugars are natural preservatives, so it’s quite stable. But let’s be real, a batch of creamy fudge this good usually disappears in about three days around my house. I haven’t encountered a need to reheat it, frankly, because if it gets a little too firm even at room temp, a minute on the counter softens it right up. Don’t even try the microwave; you’ll just end up with instant caramel sauce!
Frequently Asked Questions About Penuche Fudge Recipe
I know when you tackle kitchen candy making, you always have questions pop up. It’s totally normal! Especially with something a little less common than chocolate fudge, you want to make sure you get that beautiful result. I’ve rounded up a few questions I always get about making this simple sweet treats recipe. Take a look! If you are looking for more quick dessert wins, check out my guide to the ultimate easy fudge recipe!
What is the difference between penuche and regular fudge?
That’s a fantastic question that gets right to the heart of this classic confection! Think of it this way: traditional fudge usually relies on white sugar and sometimes chocolate (or cocoa powder) to set the structure and deliver the main flavor profile. Penuche, on the other hand, is built completely around brown sugar. This substitution is huge—it gives our penuche fudge recipe that deep, rich, toffee-like or caramel fudge flavor that white sugar just can’t replicate. It’s that distinct brown sugar base that truly makes penuche, well, penuche!
Can I make this easy fudge recipe without a candy thermometer?
Oh, I wish I could say yes, but for this specific easy fudge recipe, I really, really urge you to use a candy thermometer. Remember how I stressed hitting 234°F and then cooling to 110°F? Those numbers are the blueprint for achieving that perfect, melt in your mouth dessert texture. Trying to do this without a thermometer means relying on the old ‘soft-ball test,’ where you drop a bit of the hot syrup into cold water to see if it forms a soft, pliable ball.
If you try the soft-ball test, you have to be super careful that the water isn’t too cold or too warm, and honestly, it adds another layer of stress, which defeats the purpose of having an easy fudge recipe! If you absolutely cannot use a thermometer, find a reliable recipe that uses sweetened condensed milk (which cooks lower), but for this specific, authentic mix of butter and brown sugar candy, the thermometer keeps you sure and steady.

Share Your Penuche Fudge Experience
Alright, now that you’ve made a batch of this heavenly, creamy fudge, I honestly can’t wait to hear what you thought! This is the kind of homemade candy that deserves a little celebration. Did it set up perfectly? Did the 110-degree cooling trick work its magic for your penuche fudge?
I’d absolutely love it if you could leave a star rating right below this section. That little rating is so helpful for other busy cooks trying to figure out which holiday fudge recipes they can trust. Plus, if you tried one of those variations—maybe you added pecans or a tiny dash of cinnamon—tell us all about it in the comments!
Seriously, seeing your successes with old-fashioned recipes like this just makes my day. It proves that getting a fantastic, melt-in-your-mouth treat doesn’t have to mean spending hours over the stove. If you played around with the technique or want to suggest a pairing, please drop by and say hello via my contact page!
Happy cooking, and may your next batch of brown sugar fudge be just as perfect as the first!
PrintEasy Old-Fashioned Penuche Fudge (Classic Brown Sugar Candy)
Make classic penuche fudge with rich caramel flavor in just 15 minutes prep time. This old-fashioned recipe yields creamy squares that melt in your mouth, perfect for gifting or simple sweet treats.
- Prep Time: 15 min
- Cook Time: 15 min
- Total Time: 40 min
- Yield: 36 squares 1x
- Category: Dessert
- Method: Stovetop Cooking
- Cuisine: American
- Diet: Vegetarian
Ingredients
- 2 cups granulated sugar
- 1 cup packed light brown sugar
- 1 cup heavy cream
- 1 tablespoon butter
- 1 teaspoon vanilla extract
Instructions
- Line an 8×8 inch pan with parchment paper, leaving an overhang for easy removal. Lightly grease the paper.
- Combine the granulated sugar, brown sugar, and heavy cream in a heavy-bottomed saucepan.
- Place the pan over medium heat. Stir constantly until the sugars dissolve completely. Do not let the mixture boil rapidly before the sugar dissolves.
- Attach a candy thermometer to the side of the pan, making sure the bulb is submerged but not touching the bottom.
- Cook the mixture, stirring occasionally to prevent scorching, until it reaches 234 degrees Fahrenheit (soft-ball stage). This takes about 10 to 15 minutes.
- Remove the pan from the heat immediately. Stir in the butter and vanilla extract until the butter melts.
- Stop stirring. Allow the mixture to cool undisturbed to 110 degrees Fahrenheit. This cooling step is crucial for creamy texture.
- Once cooled to 110 degrees Fahrenheit, begin beating the mixture vigorously with a wooden spoon or an electric mixer on medium speed.
- Continue beating until the fudge loses its glossy shine, thickens significantly, and starts to set. This may take 5 to 10 minutes.
- Quickly pour the fudge into the prepared pan. Do not scrape the sides of the pan.
- Let the penuche fudge cool completely at room temperature for several hours, or until firm.
- Cut into squares before serving. Store airtight at room temperature.
Notes
- For guaranteed creamy texture, cool the mixture to exactly 110 degrees Fahrenheit before beating. If you beat it too hot, the fudge may become grainy.
- This recipe is for no chocolate fudge, relying on the brown sugar for its caramel fudge flavor.
- If you want a slightly richer flavor, substitute 1/4 cup of the heavy cream with 1/4 cup of evaporated milk.
Nutrition
- Serving Size: 1 square
- Calories: 145
- Sugar: 25g
- Sodium: 35mg
- Fat: 4g
- Saturated Fat: 2.5g
- Unsaturated Fat: 1.5g
- Trans Fat: 0g
- Carbohydrates: 27g
- Fiber: 0g
- Protein: 1g
- Cholesterol: 15mg