
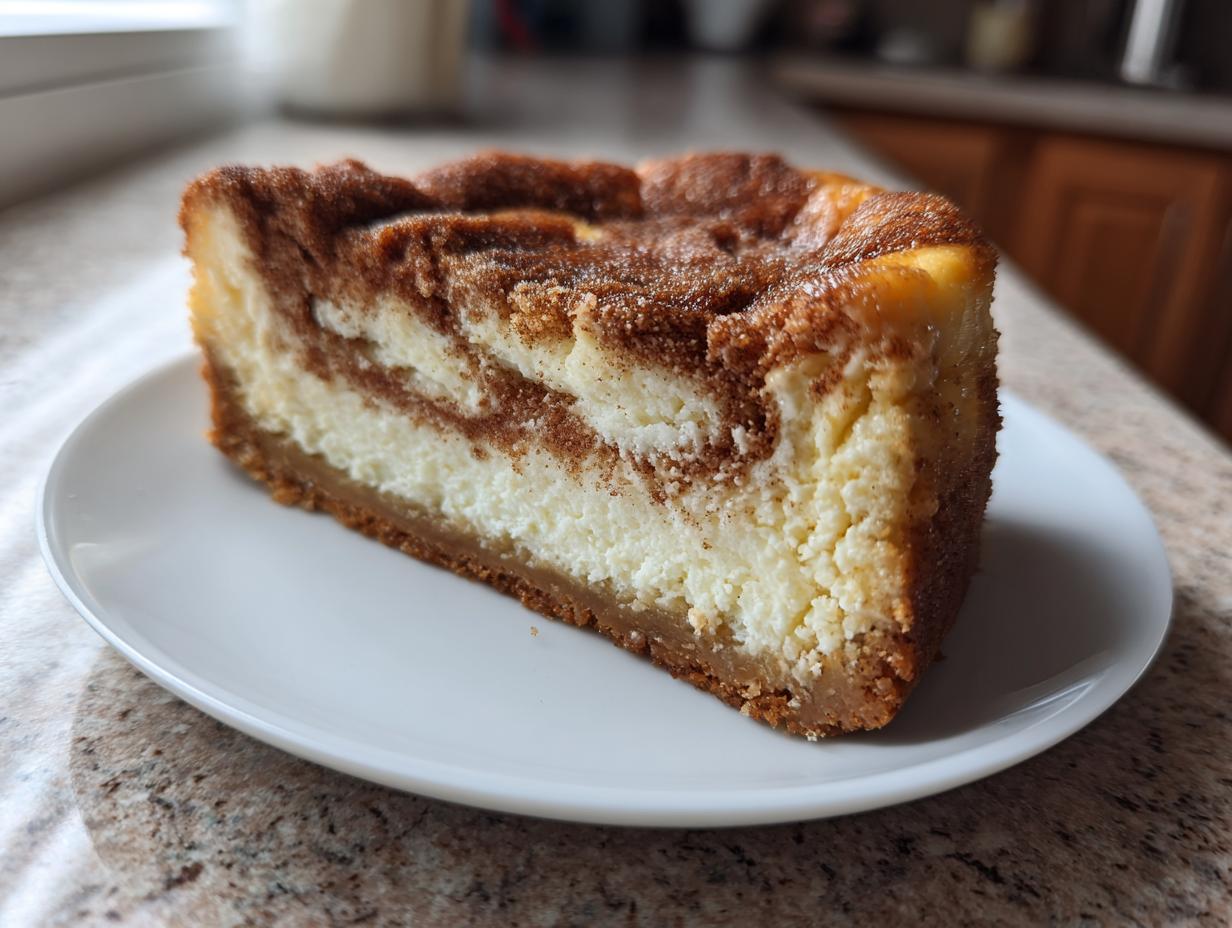
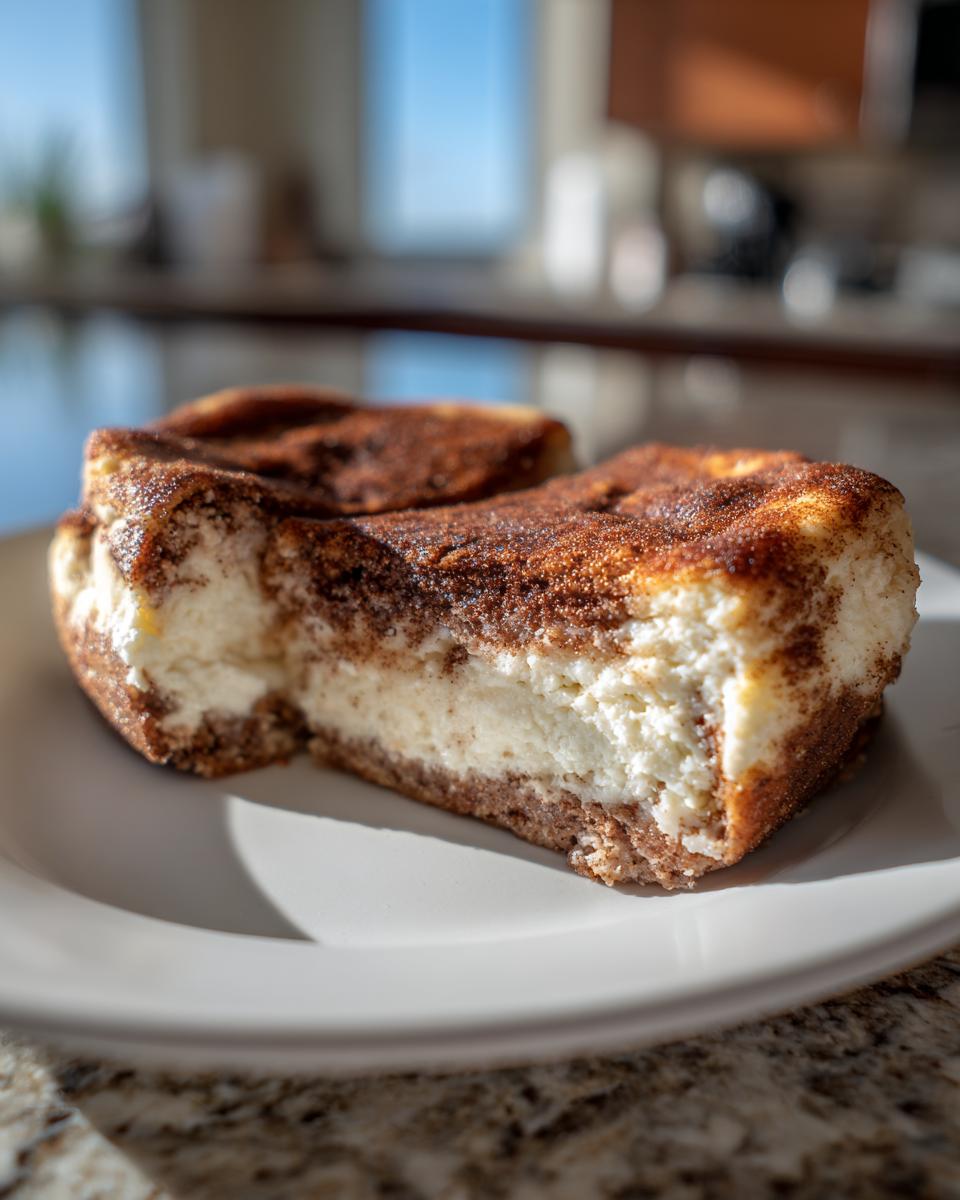
Okay, you know how sometimes you just can’t decide if you want warm, buttery snickerdoodle cookies or a rich, tangy slice of cheesecake? Well, you don’t have to choose anymore! I’m talking about the ultimate fusion: the snickerdoodle cheesecake. This recipe isn’t just another merger; it’s the combination dreams are made of—it’s unbelievably creamy and stands tall without all that stress cheesecake usually causes.
When I was developing this, I put it through the wringer in my own chaotic kitchen, just like all our Cheffinity recipes. I wanted zero cracks and maximum flavor payoff. Trust me, after testing this dozens of times, the water bath and slow cool-down process make this an absolute showstopper dessert recipe that tastes like it came from a fancy bakery.
Forget those sinking, overly sweet imposters. This version is carefully calibrated for that perfect balance of sweet cinnamon and velvety smooth filling. You are going to want to bookmark this one for every holiday gathering, especially if you’re looking for stunning delicious dessert recipes!
- Why This Snickerdoodle Cheesecake Recipe Works (EEAT Focused)
- Ingredients for the Ultimate Snickerdoodle Cheesecake Recipe
- Step-by-Step Instructions for Snickerdoodle Cheesecake
- Tips for Making the Best Snickerdoodle Dessert Bars
- Storage and Reheating Instructions for Your Snickerdoodle Cheesecake
- Serving Suggestions for This Holiday Cheesecake Dessert
- Frequently Asked Questions About Creamy Cinnamon Cheesecake
- Nutritional Estimate for Snickerdoodle Cheesecake
- Share Your Showstopper Dessert Recipe Experience
Why This Snickerdoodle Cheesecake Recipe Works (EEAT Focused)
I know what you’re thinking: cheesecake is finicky! But that’s why I spent so much time nailing down the technique here. This isn’t just a recipe; it’s a system for guaranteed success so you can proudly serve up an amazing snickerdoodle cheesecake dessert every single time. We focus on two main pillars:
- We ensure a **creamy** interior by controlling the mixing speed—no shortcuts here!
- We completely eliminate the dreaded crack using the one trick pros always use: the water bath.
These steps, which come straight from hours of testing, are what elevate this from good to genuinely memorable.
Achieving Velvety Cheesecake Filling
The key to that melt-in-your-mouth result is temperature, temperature, temperature! You absolutely must have room temperature cream cheese, eggs, and sour cream. When the dairy is cold, it doesn’t emulsify correctly, which leads to lumps, no matter how long you beat it.
And please, when you add the eggs, mix them on low speed, only until they disappear. If you overmix the batter after the eggs go in, you beat too much air into it. That trapped air tries to escape while baking, and poof—sudden cracking! We want a dense, velvety cheesecake filling, not a soufflé.
The Secret to a Crack-Free Snickerdoodle Cheesecake
This is where we guarantee you a flawless top for your showstopper dessert recipe. You have to use the water bath, folks. Wrapping that springform pan tightly in foil and setting it into a pan of hot water insulates the sides and keeps the baking environment steamy.
This gentle, even heat is what prevents the edges from cooking too fast and pulling away from the center. Then, once the baking is done, you just turn off the oven and let it sit inside for an hour while it slowly cools down. That gradual transition is non-negotiable for a smooth, beautiful top!
Ingredients for the Ultimate Snickerdoodle Cheesecake Recipe
Okay, getting the ingredients right is half the battle, and that’s where precision comes in. I’ve broken everything down so you know exactly what goes where. Remember what I said about room temperature? It matters most for the filling! Gather everything before you even think about turning on the mixer.
If you’re looking for great ways to use up leftover cinnamon or want a new take on a cinnamon classic, check out my notes on my cinnamon roll casserole—it’s just as cozy!
For the Buttery Graham Cracker Crust
This crust has to hold up to the heavy filling, so we keep it simple and sturdy. Make sure that butter is indeed melted when you mix this up!
- 1 1/2 cups graham cracker crumbs
- 1/4 cup granulated sugar
- 1/2 teaspoon ground cinnamon
- 6 tablespoons unsalted butter, melted
For the Creamy Cinnamon Cheesecake Filling
This is the heart of the showstopper, so pay attention to the state of the cream cheese—it needs to be completely soft. And yes, you need four eggs to get that perfect density!
- 3 (8 ounce) packages cream cheese, softened
- 1 1/2 cups granulated sugar
- 1/4 cup all-purpose flour
- 2 teaspoons ground cinnamon
- 1 teaspoon vanilla extract
- 1/4 teaspoon salt
- 4 large eggs
- 1/2 cup sour cream
For the Cinnamon Sugar Swirl Topping
This simple mixture is what gives us that signature snickerdoodle look and extra punch of spice throughout the creamy layer. Don’t skip this—it’s essential for that cookie flavor!
- 1/2 cup granulated sugar
- 1 teaspoon ground cinnamon
- 1/4 cup all-purpose flour
Step-by-Step Instructions for Snickerdoodle Cheesecake
Alright, deep breath! This is where we bring it all together. Making this ultimate snickerdoodle cheesecake recipe requires about 25 minutes of active prep time, and then the oven magic takes about 75 minutes. If you follow these steps, especially around the cooling, you’ll get that perfect, dreamy texture we talked about.
Before you start mixing, if you ever need a simple, rustic dessert, you should check out my foolproof easy apple crumble recipe for inspiration. But for now, let’s focus on getting this cheesecake gorgeous!
Preparing the Crust and Oven Setup
First things first: get your oven preheated to 325 degrees Fahrenheit. Now, this is crucial for avoiding leaks. Take heavy-duty aluminum foil—and I mean heavy-duty—and wrap the outside bottom of your 9-inch springform pan really well. We’re making a water bath, and we don’t want any sneaky water seeping in!
For the crust, just mix those graham cracker crumbs, 1/4 cup of sugar, the 1/2 teaspoon of cinnamon, and your 6 tablespoons of melted butter right in the pan base. Press it down firmly and evenly. Pop that into the oven for exactly 10 minutes to set up, then take it out while you whip up the filling.
Mixing the Velvety Cheesecake Filling
Grab your mixer and start with the softened cream cheese. Beat it until it is completely silky smooth—no lumps allowed! Then, gradually add that 1 1/2 cups of sugar and the 1/4 cup of flour, mixing only until they are just incorporated. Remember what I said? Low speed now!
Next, mix in the 2 teaspoons of cinnamon, the vanilla, and the salt. Add your four large eggs one at a time, beating on low speed just until each yolk disappears into the batter. Stop immediately after the last egg is mixed in, and then gently stir in the sour cream by hand if you need to. Do not overmix this batter; we are aiming for smooth, not airy!
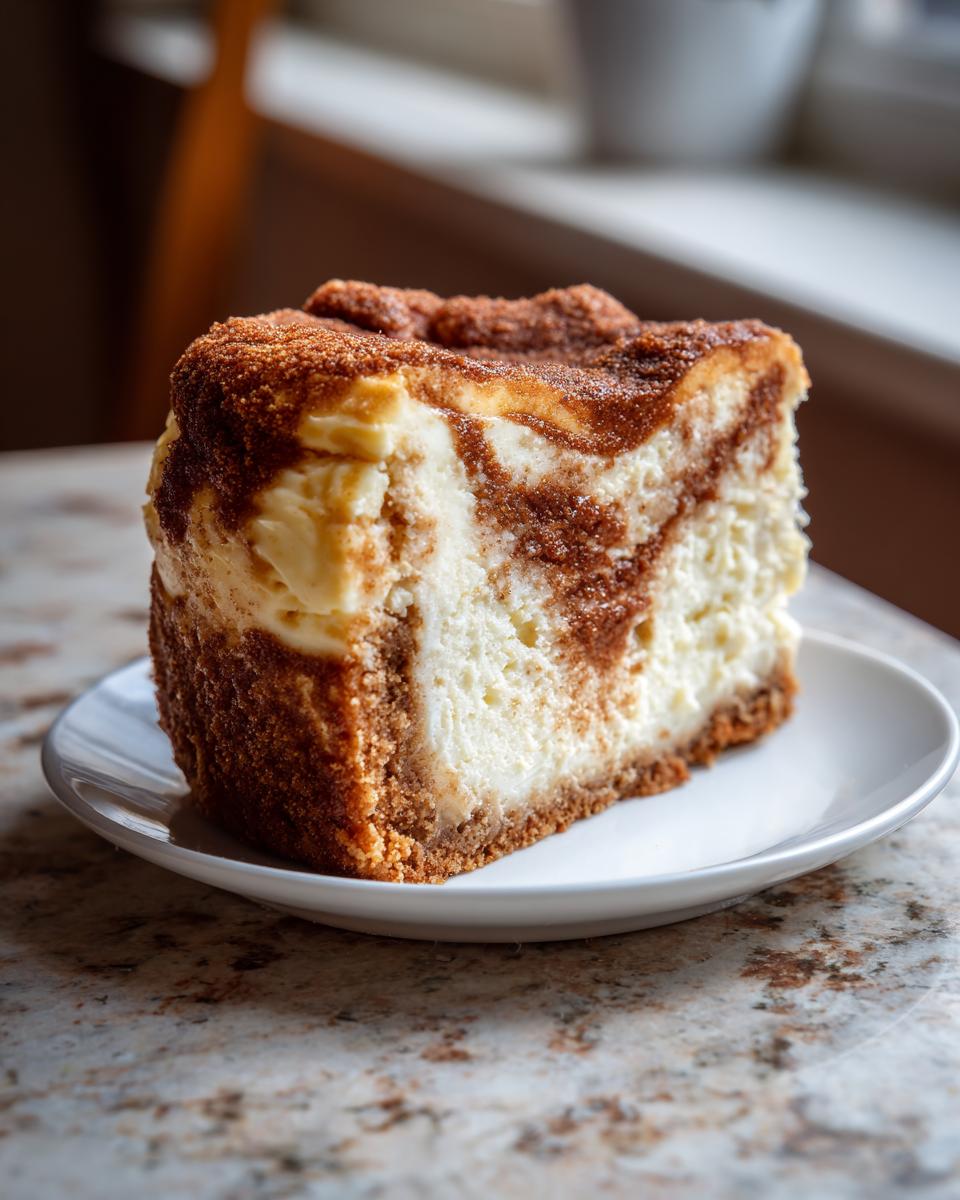
Layering and Swirling the Cinnamon Swirl Cheesecake
While your crust is cooling a bit, go ahead and mix up that swirl layer—the remaining sugar, flour, and 1 teaspoon of cinnamon in a small bowl. Now, pour about half of your beautiful, smooth cheesecake batter right over that baked crust.
Sprinkle about half of that cinnamon sugar mixture evenly over the first layer. Then, pour the rest of the batter on top, and finish by sprinkling the rest of the cinnamon sugar on the very top. Take a knife and gently draw it through the top layer a few times. You aren’t trying to mix it completely; you just want a beautiful, marbled, **cinnamon swirl cheesecake** effect. Be gentle!
Baking and Slow Cooling for Perfect Results
Time for the water bath! Place your foil-wrapped springform pan inside a larger roasting pan. Carefully pour hot water into the roasting pan until it comes about halfway up the sides of your cheesecake pan. This is your ticket to avoiding cracks.
Bake this masterpiece at 325 degrees for 60 to 75 minutes. You know it’s done when the edges look set, but the very center still has a little bit of a jiggle when you nudge the pan. Don’t touch it yet! Turn the oven off, crack the door open just a tiny bit, and let it sit in there, warming down slowly, for a full hour. I cannot stress this enough—this slow cooling prevents drastic temperature changes and keeps that top smooth!
Tips for Making the Best Snickerdoodle Dessert Bars
So you love the flavor but maybe you don’t have a springform pan, or perhaps you need something easier to serve at a big party? That’s where making this into snickerdoodle dessert bars comes in handy! It’s almost the exact same recipe, but presented in a perfect, easy-to-handle square.
If you want to switch to bars, you’ll want to grab a standard 9×13 inch baking dish. Remember those notes about the crust? Press it firmly into the bottom of that larger pan, just like normal. You still want to pre-bake it for 10 minutes at 325 degrees F.
When you move to the baking stage, the time changes because a 9×13 pan is much shallower than a tall springform. Instead of 60 to 75 minutes, you’ll need to start checking around the 45-minute mark. Since the batter is spread thinner, it sets up faster. Keep that water bath going, though! It helps keep the whole thing rich, even in the larger pan.
The slow cooling process is still important, but because the bars cool slightly quicker than a full round cheesecake, just letting them cool on the counter for about 45 minutes before chilling overnight is usually enough to keep them from cracking. Honestly, cutting them into neat squares once chilled makes serving at any gathering so much easier—hello, apple snickerdoodle dump cake inspiration for future bar experiments!
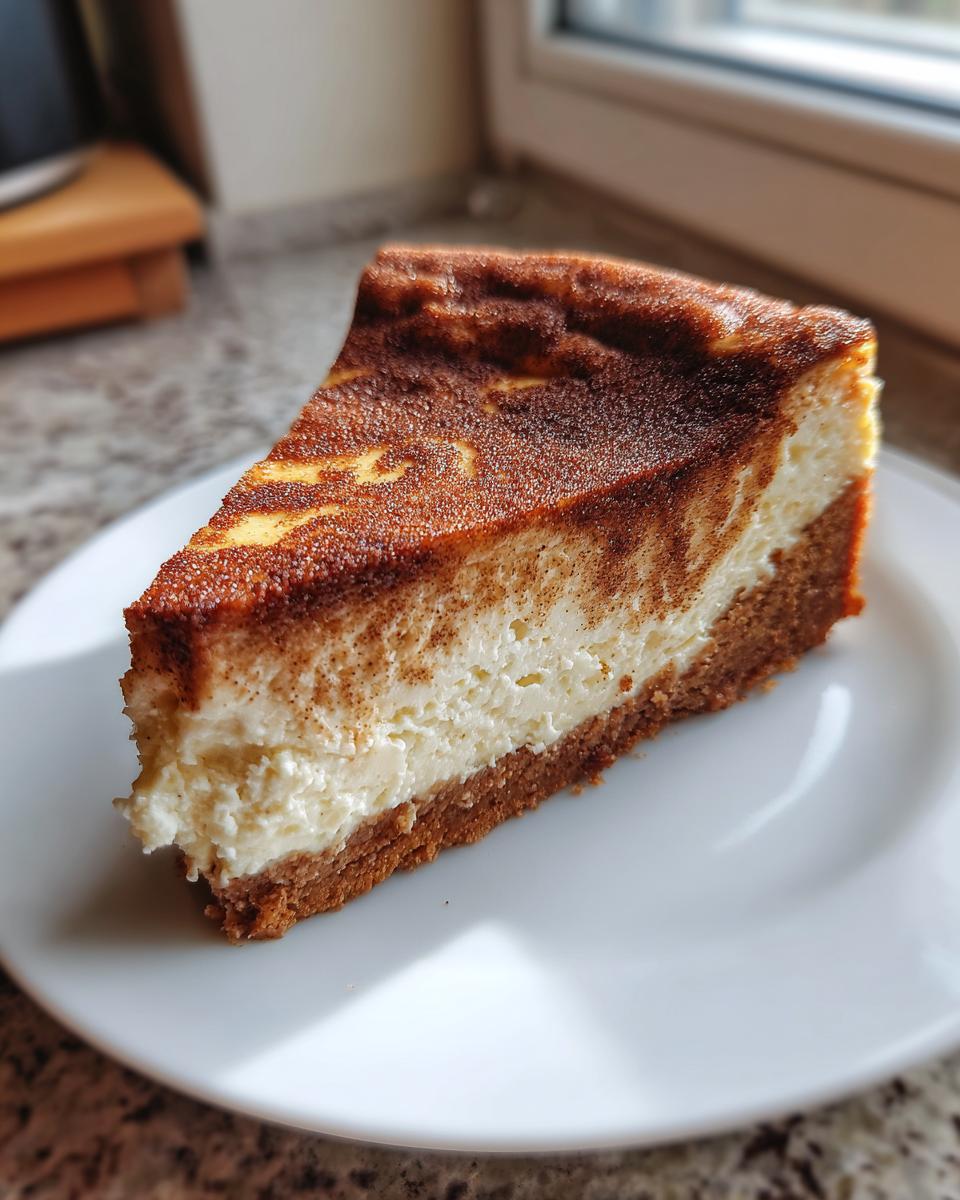
Storage and Reheating Instructions for Your Snickerdoodle Cheesecake
Okay, you’ve successfully baked and slowly cooled your dessert, which means you’ve conquered the two hardest parts! Now we need to give this beautiful snickerdoodle cheesecake the proper rest it deserves. The chilling process isn’t just for making it easier to slice; it’s absolutely essential for achieving that perfect, firm, yet yielding texture we are aiming for.
You have to let this chill for a minimum of six hours, but honestly? Treat yourself and wait until the next day. Overnight chilling is when the flavors really settle in and the filling firms up into that dense, luxurious bite. Once it’s fully chilled, run a thin knife around the edge before releasing the springform sides, just in case it decided to stick.
When it comes to storage, cover the cheesecake loosely with plastic wrap or foil once it’s firm. Keep it in the refrigerator. Because of its high-fat, high-sugar content, it does really well! You can usually keep this magnificent creation fresh in the fridge for up to five days. I always make mine the day before a big event, like Thanksgiving or Christmas, so it’s ready to go.
Now, reheating? Usually, we don’t reheat cheesecake. It’s designed to be served cold! If you happen to have a slice that’s been sitting out for a while and it feels too firm, don’t put it in the microwave! Just let it sit on the counter for about 20 minutes before serving. That little bit of time at room temperature allows the texture to soften just slightly, bringing out the best flavor from that creamy cinnamon cheesecake filling.
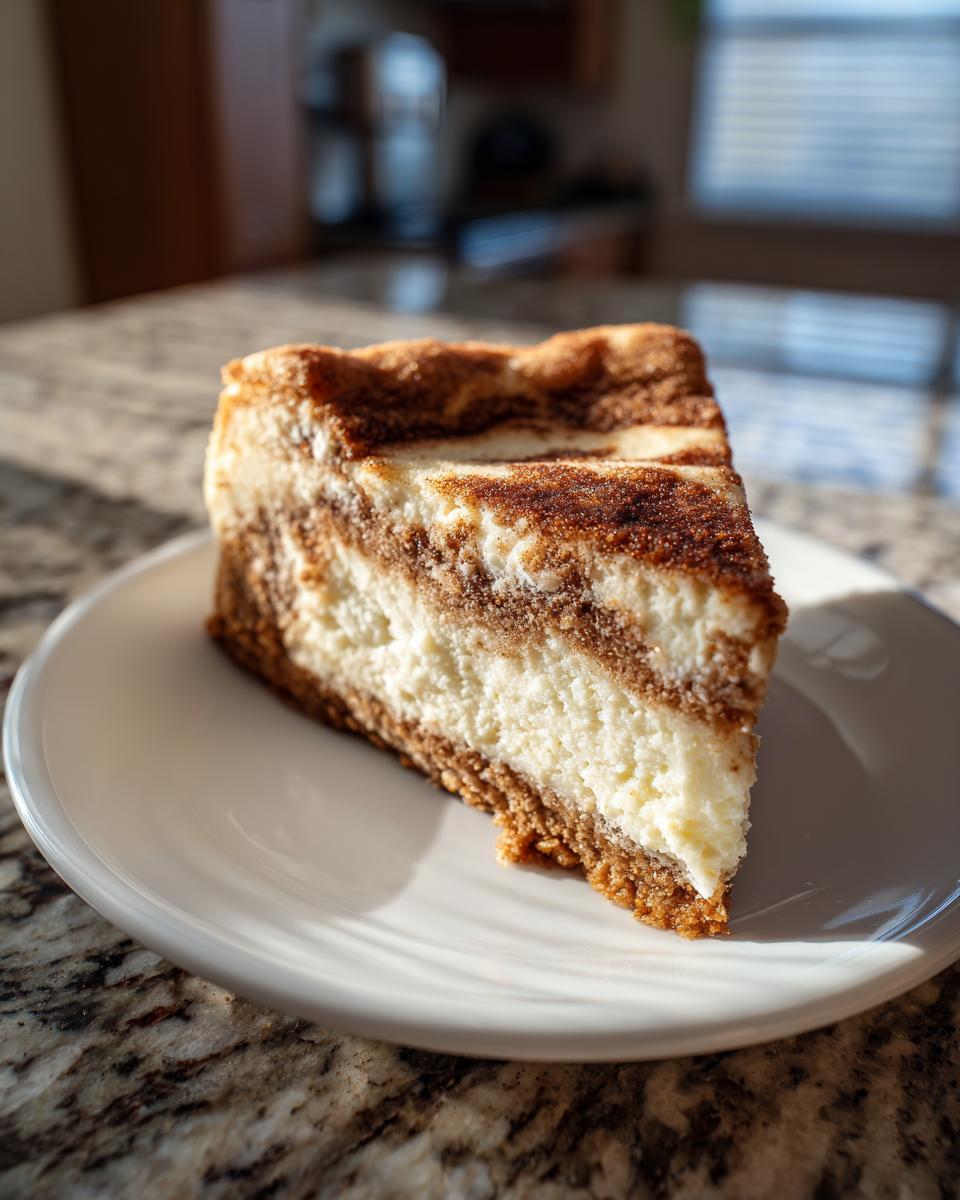
Serving Suggestions for This Holiday Cheesecake Dessert
Once you’ve managed the patience required for that overnight chill, it’s time for the fun part: making this dessert look absolutely show-stopping! Since this snickerdoodle cheesecake is so rich and packed with flavor already, you don’t need to do much, but a few simple finishes can really elevate it, especially for a big meal.
This is truly the perfect centerpiece for your holiday table. It’s cozy enough for a crisp fall evening but dazzling enough for Christmas gatherings. If you’re looking for more amazing festive bakes, I have a great recipe for churros with cinnamon sugar that could play beautifully alongside this for a major dessert spread!
It shines beautifully as a Thanksgiving cheesecake alternative, and Pinterest is full of people raving about how well it fits right into their Christmas dessert recipes rotation. Here are my favorite ways to plate it up:
- Simple Dusting: If you skipped the glaze or just want a cleaner look, a very light, even dusting of pure powdered sugar right before serving always looks elegant. Be careful not to use too much, or it might melt into the cinnamon swirl.
- Whipped Cream Clouds: A dollop of freshly whipped heavy cream seasoned simply with a touch of vanilla extract is the perfect light counterpoint to the rich, dense cheesecake. This adds height and freshness.
- Caramel Drizzle (Use Sparingly!): If you want to go truly decadent, a very thin drizzle of salted caramel right on top can be amazing. Since we already have so much cinnamon sugar, make sure the caramel isn’t overwhelming—just a delicate ribbon or two!</li
- Citrus Brightness: For a little tang against all that sweet spice, grating a tiny bit of fresh orange zest right over the top just before cutting helps brighten every single bite. It’s unexpected, but I love it!
Frequently Asked Questions About Creamy Cinnamon Cheesecake
I know when I’m looking up a recipe, I always have a few lingering questions before I dive in. It’s smart to be prepared! We want to make sure you walk away with a perfect dessert, so here are the big ones I get asked all the time about this creamy cinnamon cheesecake.
Can I make a No Bake Snickerdoodle Cheesecake instead?
That’s a great question, especially if you’re short on oven time! You absolutely *can* make a no-bake version, but I have to warn you—it won’t taste or feel exactly like this recipe. This version relies on the structure created by eggs and baking to get that dense, rich texture. A no-bake version relies heavily on stabilizers like gelatin or sometimes heavy amounts of stabilized whipped topping to set up. It leans more toward a mousse texture, whereas this baked recipe is truly satisfyingly firm. If you are looking for something chilled and super easy, you might want to check out my thoughts on no-bake pumpkin cheesecake for guidance on stabilizers!
What makes this one of the Best Cheesecake Recipes?
Honestly, it comes down to ditching the panic and using proven techniques! What sets this apart from others that might crack or taste eggy is truly the baking environment. The water bath is non-negotiable; it guarantees that gentle, slow cooking that results in that unbelievably smooth and even texture. Coupled with the slow cooling inside the turned-off oven, we achieve a flawless presentation.
But technique aside, it’s the flavor balance. We’ve got enough cinnamon and sugar in that swirl to taste like a cookie, but we haven’t sacrificed the tangy foundation needed to be a truly homemade creamy cheesecake. It’s that marriage of cookie nostalgia and creamy dairy that nails it every time.
How far in advance can I prepare this Snickerdoodle Cheesecake?
This is actually a wonderful advantage of cheesecake: it tastes *better* when made ahead! I highly recommend letting this chill overnight for that absolute signature sliceability and flavor blend. Allowing those cinnamon notes to really soak into the cream cheese base overnight is key.
You can certainly make this 24 to 48 hours ahead of time. Just make sure it’s well-covered in the fridge so it doesn’t absorb any weird smells from your fridge (though that’s rare!). If you make it too far ahead, say four or five days, you might find the crust starts to get a little soft, so aim for that sweet spot right before your big gathering—especially if you’re using it for those big Best Cheesecake Recipes events like Thanksgiving!
Nutritional Estimate for Snickerdoodle Cheesecake
Now, I always feel a little guilty talking about macros when we’re deep into decadent holiday baking, but I know some of you are curious! As Ava says, we focus on real food made easy, and transparency is part of that. I’ve pulled the standard estimates for a single slice of this amazing dessert based on the ingredients list above.
Just remember, this is an estimate for one slice (1/12th of the entire cheesecake). If you cut smaller squares—like if you made those Snickerdoodle Dessert Bars—your numbers change! The actual values can vary quite a bit depending on the brand of cream cheese you use or if you use full-fat sour cream versus light.
- Serving Size: 1 slice
- Calories: 450
- Sugar: 35g
- Fat: 28g
- Saturated Fat: 17g
- Carbohydrates: 42g
- Protein: 7g
- Cholesterol: 110mg
See? Totally worth every single gram of sugar when you end up with a **showstopper dessert recipe** this good! Eat it up, enjoy the cinnamon-sugar coating, and worry about the fitness goals tomorrow!
Share Your Showstopper Dessert Recipe Experience
If you made it this far, you’ve officially committed to baking one of the best desserts I’ve ever perfected! I truly cannot wait to hear what you think of this *ultimate creamy snickerdoodle cheesecake* mashup. When I serve this for company, it usually disappears first, and I have a feeling that will happen in your house too.
The greatest joy for me, just like Ava Sinclair mentioned about building this community, is seeing your successes! Did you nail that swirl? Did your water bath work like a charm? Did your family lose their minds over the **creamy cinnamon cheesecake**?
Don’t be shy! Head down to the comments section below right now. I want you to rate this recipe—give it a solid 1 to 5 stars so other busy parents know it’s worth the effort. More importantly, tell me if you made any little tweaks! Did you add a tiny pinch of nutmeg to the swirl? Did you try serving it with coffee?
If you ran into a little snag or just want to share a picture of your gorgeous, crack-free surface, please drop a line. If you need to reach out directly with detailed questions (maybe about scaling this up for a huge party!), you can always contact me directly through the site. Happy baking, and enjoy every single decadent bite of this phenomenal holiday dessert!
PrintUltimate Creamy Snickerdoodle Cheesecake Recipe
Make this showstopper Snickerdoodle Cheesecake that combines the rich, velvety texture of classic cheesecake with the warm cinnamon-sugar flavor of snickerdoodle cookies. This recipe is perfect for holiday gatherings like Thanksgiving or Christmas.
- Prep Time: 25 min
- Cook Time: 75 min
- Total Time: 100 min
- Yield: 12 servings 1x
- Category: Dessert
- Method: Baking
- Cuisine: American
- Diet: Vegetarian
Ingredients
- 1 1/2 cups graham cracker crumbs
- 1/4 cup granulated sugar
- 1/2 teaspoon ground cinnamon
- 6 tablespoons unsalted butter, melted
- 3 (8 ounce) packages cream cheese, softened
- 1 1/2 cups granulated sugar
- 1/4 cup all-purpose flour
- 2 teaspoons ground cinnamon
- 1 teaspoon vanilla extract
- 1/4 teaspoon salt
- 4 large eggs
- 1/2 cup sour cream
- 1/2 cup granulated sugar
- 1 teaspoon ground cinnamon
- 1/4 cup all-purpose flour
Instructions
- Preheat your oven to 325 degrees Fahrenheit. Prepare a 9-inch springform pan by wrapping the outside bottom with heavy-duty aluminum foil to prepare for a water bath.
- Make the crust: Mix graham cracker crumbs, 1/4 cup sugar, 1/2 teaspoon cinnamon, and melted butter in a bowl. Press the mixture firmly into the bottom of the prepared springform pan. Bake for 10 minutes. Let cool slightly.
- Make the cheesecake filling: In a large bowl, beat the softened cream cheese with an electric mixer until smooth. Gradually add 1 1/2 cups sugar and 1/4 cup flour, mixing until just combined. Beat in 2 teaspoons cinnamon, vanilla extract, and salt. Add eggs one at a time, mixing on low speed after each addition until just incorporated. Mix in the sour cream. Do not overmix the batter.
- Prepare the cinnamon swirl layer: In a small bowl, mix the remaining 1/2 cup sugar, 1/4 cup flour, and 1 teaspoon cinnamon.
- Pour half of the cheesecake batter over the cooled crust. Sprinkle half of the cinnamon sugar mixture evenly over the batter. Pour the remaining cheesecake batter on top. Sprinkle the remaining cinnamon sugar mixture over the top layer. Gently swirl the top layer with a knife to create a marbled effect.
- Place the foil-wrapped springform pan into a larger roasting pan. Carefully pour hot water into the roasting pan until the water reaches halfway up the sides of the springform pan. This water bath helps prevent cracks.
- Bake for 60 to 75 minutes, or until the edges are set but the center still has a slight jiggle.
- Turn off the oven, crack the oven door open slightly, and let the cheesecake cool inside the oven for 1 hour. This slow cooling prevents cracking.
- Remove the cheesecake from the water bath and let it cool completely on a wire rack. Once cool, cover and refrigerate for at least 6 hours, or preferably overnight, before serving.
Notes
- For a foolproof, velvety cheesecake, ensure all dairy ingredients (cream cheese, eggs, sour cream) are at room temperature before mixing.
- If you prefer cheesecake bars, press the crust into a 9×13 inch pan and adjust baking time slightly, checking for doneness around 45 minutes.
- For an extra festive touch, top the chilled cheesecake with a light dusting of cinnamon sugar or a simple cinnamon glaze before serving.
Nutrition
- Serving Size: 1 slice
- Calories: 450
- Sugar: 35g
- Sodium: 250mg
- Fat: 28g
- Saturated Fat: 17g
- Unsaturated Fat: 11g
- Trans Fat: 0.5g
- Carbohydrates: 42g
- Fiber: 1g
- Protein: 7g
- Cholesterol: 110mg