
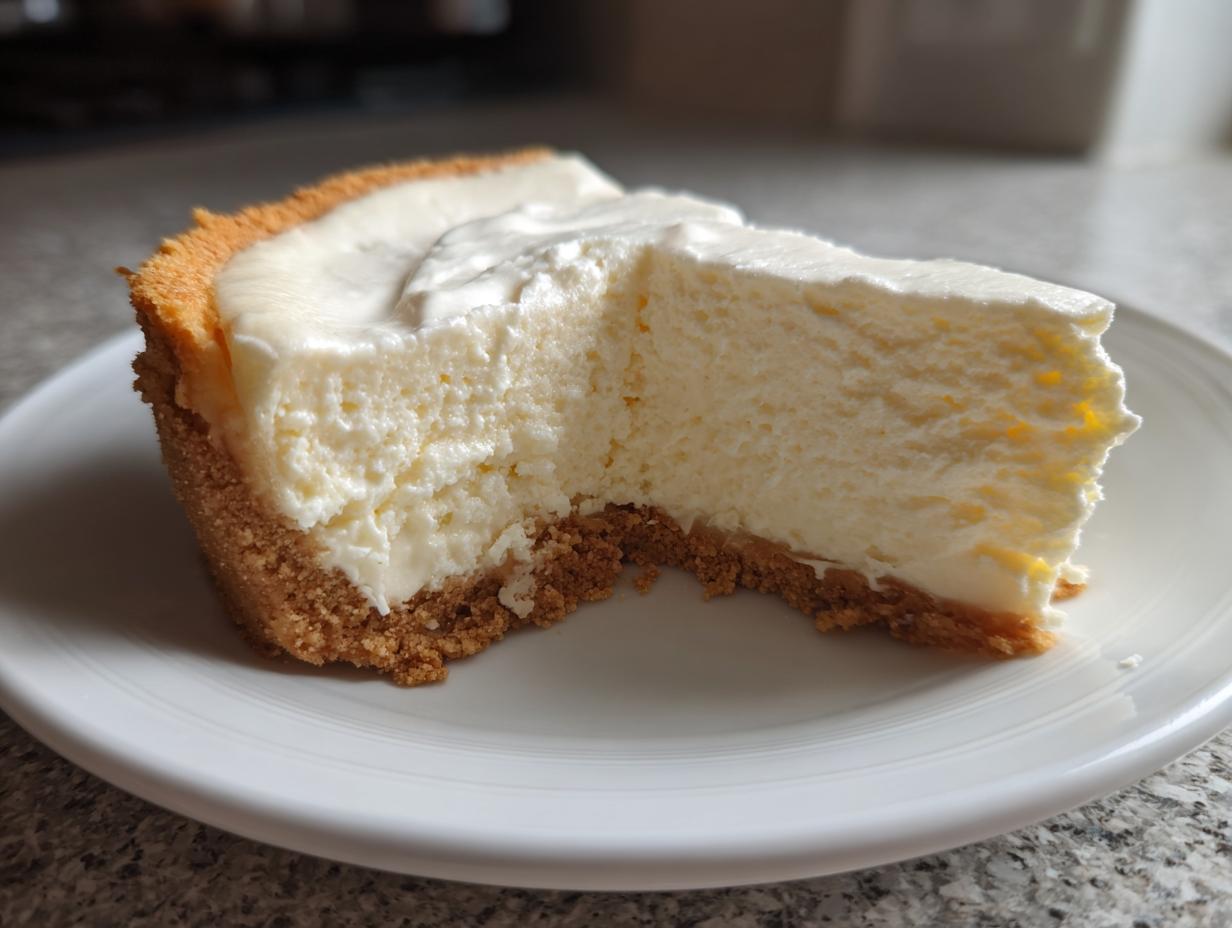
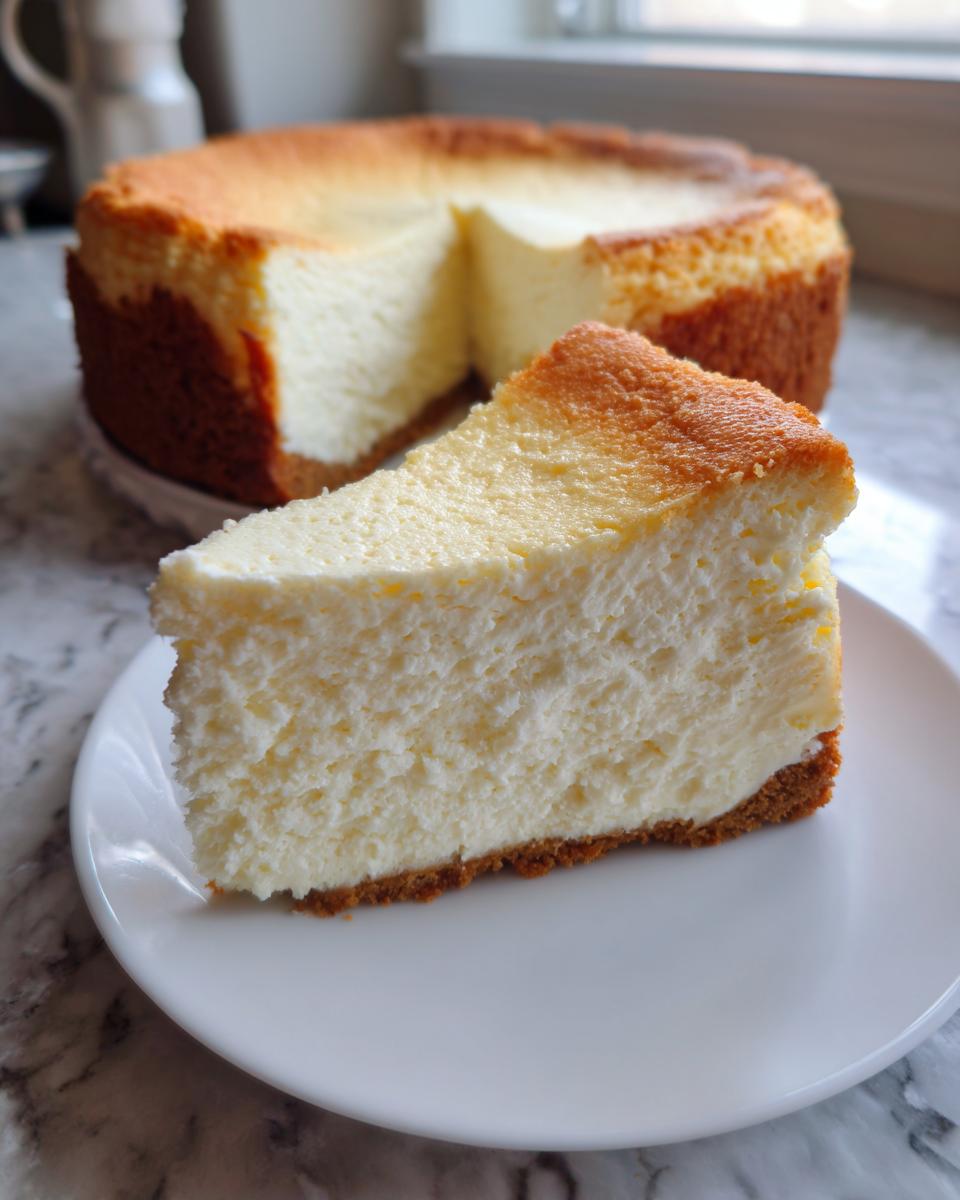
Oh, that moment when you absolutely *need* a slice of deep, rich, luxurious cheesecake. You know the one—that perfect, velvety smooth texture that doesn’t fall apart or, heaven forbid, crack on top? When I started Cheffinity, it was about solving the weeknight dinner dilemma, but I knew I couldn’t leave out the desserts that feel like an extravagance but should be an everyday treat. Trust me, making the best cheesecake recipe doesn’t require culinary school or a degree in advanced oven engineering! This is the Best Easy Homemade Creamy Cheesecake guide, designed to give you that incredible, no-crack finish every single time. We’re aiming for that classic, melt-in-your-mouth experience, the kind that makes everyone ask for the recipe.
- Why This Is the Best Cheesecake Recipe You Will Make
- Gathering Ingredients for Your Creamy Cheesecake Recipe
- Creamy Cheesecake Instructions: Step-by-Step Tutorial
- Mastering the New York Style Cheesecake: Expert Tips for Success
- Serving Suggestions for Your Rich Dessert Recipes
- Storage and Reheating Instructions for Leftover Cheesecake
- Frequently Asked Questions About This Cheesecake Recipe
- Nutritional Snapshot of This Classic Cheesecake Recipe
- Share Your Experience Making This Cheesecake
Why This Is the Best Cheesecake Recipe You Will Make
I know everyone claims theirs is the best, but this recipe really cuts through the noise. When you follow these steps, you are guaranteed that decadent, rich dessert result that screams ‘New York Style’ without any of the usual kitchen drama. Seriously, we solved the most common problems for you!
- It delivers that legendary velvety smooth cheesecake texture, every time.
- It’s packed with no crack cheesecake tips woven right into the instructions.
- It’s surprisingly approachable—even if you usually stick to super quick desserts!
Achieving Velvety Smooth Cheesecake Texture
The secret to that luxurious mouthfeel isn’t just the cream cheese; it’s how you treat it! Room temperature ingredients are non-negotiable here. If your cream cheese is cold, it will lump up, period. Also, once those eggs go in, I want you to mix them gently. Over-beating adds air, and air equals potential cracks when cooling. Keep it low and slow!
Simple Steps for an Easy Homemade Cheesecake
I developed this as an easy homemade cheesecake because life is already complicated enough! We’re using a straightforward graham cracker base, the one we all know and love, and the filling process is streamlined. You spend most of the time waiting for it to chill, not actively mixing. It’s designed for real life, not for TV chefs.
Gathering Ingredients for Your Creamy Cheesecake Recipe
Okay, this is where we transform simple pantry items into something truly amazing. Since this is a cheesecake from scratch recipe, ingredient quality really matters, especially getting everything nice and soft before starting. Don’t run to the store until you double-check your fridge! If you want to check out some other great baking projects while you’re grabbing supplies, take a peek at my sugar cookie bars recipe too!
For the Classic Graham Cracker Crust
- 1 1/2 cups graham cracker crumbs
- 1/4 cup granulated sugar (for crust)
- 6 tablespoons unsalted butter, melted
For the Rich Filling
Remember, everything here—the cream cheese, sour cream, and eggs—needs to be at room temperature. I mean it! It’s the secret to fighting those lumps!
- 3 (8 ounce) packages full-fat cream cheese, softened to room temperature
- 1 1/2 cups granulated sugar (for filling)
- 1 teaspoon vanilla extract
- 1/4 teaspoon salt
- 1 cup sour cream, room temperature
- 3 large eggs, room temperature
Creamy Cheesecake Instructions: Step-by-Step Tutorial
Alright, this is where the magic happens! Pull out your mixer, because these creamy cheesecake instructions are going to lead you straight to dessert perfection. I’ve broken down the process so there are no surprises. The goal is richness, not stress!
Preparing and Pre-Baking the Classic Cheesecake Crust
First things first, we need that foundation. Preheat your oven to 350°F (175°C). While it’s warming up, mix your graham cracker crumbs, the crust sugar, and the melted butter until they look like wet sand. Press that mixture firmly and evenly into the bottom of your 9-inch springform pan. Don’t be shy; press it down really well! Bake that crust for just 10 minutes. Once it’s done, pull it out, let it cool a bit, and then crank that oven temperature back down to 325°F (160°C). We need that lower, gentle heat now.
The Water Bath Setup and Mixing the Filling
Listen up, this next part is critical for avoiding leaks. Wrap the bottom and sides of your springform pan super tight with heavy-duty aluminum foil—I usually do three layers just to be safe! Place that wrapped pan inside a larger roasting pan. Now for the filling: Beat your softened cream cheese until you see absolutely zero lumps. Then slowly add the sugar, vanilla, and salt. Follow that with the sour cream. Finally, add those room-temperature eggs, one at a time, mixing *just* until they disappear. Stop mixing right then! Do not overbeat once the eggs are in, or you’ll invite air bubbles in—and we don’t want those!
Baking and Slow Cooling: Essential No Crack Cheesecake Tips
Pour that beautiful, silky batter over your pre-baked crust. Carefully pour hot water into the outer roasting pan until it comes halfway up the sides of your springform pan. Bake this whole setup for 60 to 75 minutes. You’re looking for the edges to be set, but that center needs a slight jiggle when you nudge the pan. Don’t panic! Once that time is up, turn the oven OFF. Prop the door open with a wooden spoon and leave the cheesecake inside for a full hour. This slow cool-down is one of the best no crack cheesecake tips I have! After that hour, take it out and let it finish cooling on the counter for another hour before you finally cover it and get it into the fridge. If you’re making a topping, you might want to whip up my salted caramel sauce while it chills!
Mastering the New York Style Cheesecake: Expert Tips for Success
Now that you know the core steps for this New York style cheesecake, let’s talk about making sure it’s perfect every time you pull it out of the oven. Refining the technique is what separates a good dessert from the *best* one. I want you to feel totally confident tackling this rich dessert, even if you usually stick to simpler baked goods. Sometimes mastering the basics of temperature application is all it takes! If you love diving deep into rich flavors, you absolutely have to check out my German chocolate cheesecake recipe later!
Ingredient Temperature Check for the Perfect Cheesecake Recipe
I can’t hammer this point home enough: your cream cheese, your sour cream, even those three eggs—they MUST be at room temperature! If things aren’t the same temperature, they just won’t combine smoothly. Cold cream cheese clumps, and those lumps stay put even after mixing. Honestly, if I’m running short on time, I carefully microwave the blocks of cream cheese for maybe 10 seconds each. Just enough to take the hard chill off, but not enough to make them greasy. A uniform, smooth batter is 90% of the battle when making that cheesecake recipe.
Troubleshooting Common Cheesecake Issues
We all have kitchen mishaps, but with cheesecake, they often come down to speed or temperature. If you see cracks, it’s almost always because you overmixed the eggs (too much air!) or you cooled it too fast (that sharp temperature drop sinks the center). If water sneaks into your pan, your foil wrap was the culprit. Make sure that heavy-duty foil goes way up the sides! For the most incredible inspiration on tall cakes, you might want to check out some advanced tips here. For me, preventing those cracks and leaks is worth the extra five minutes of preparation.
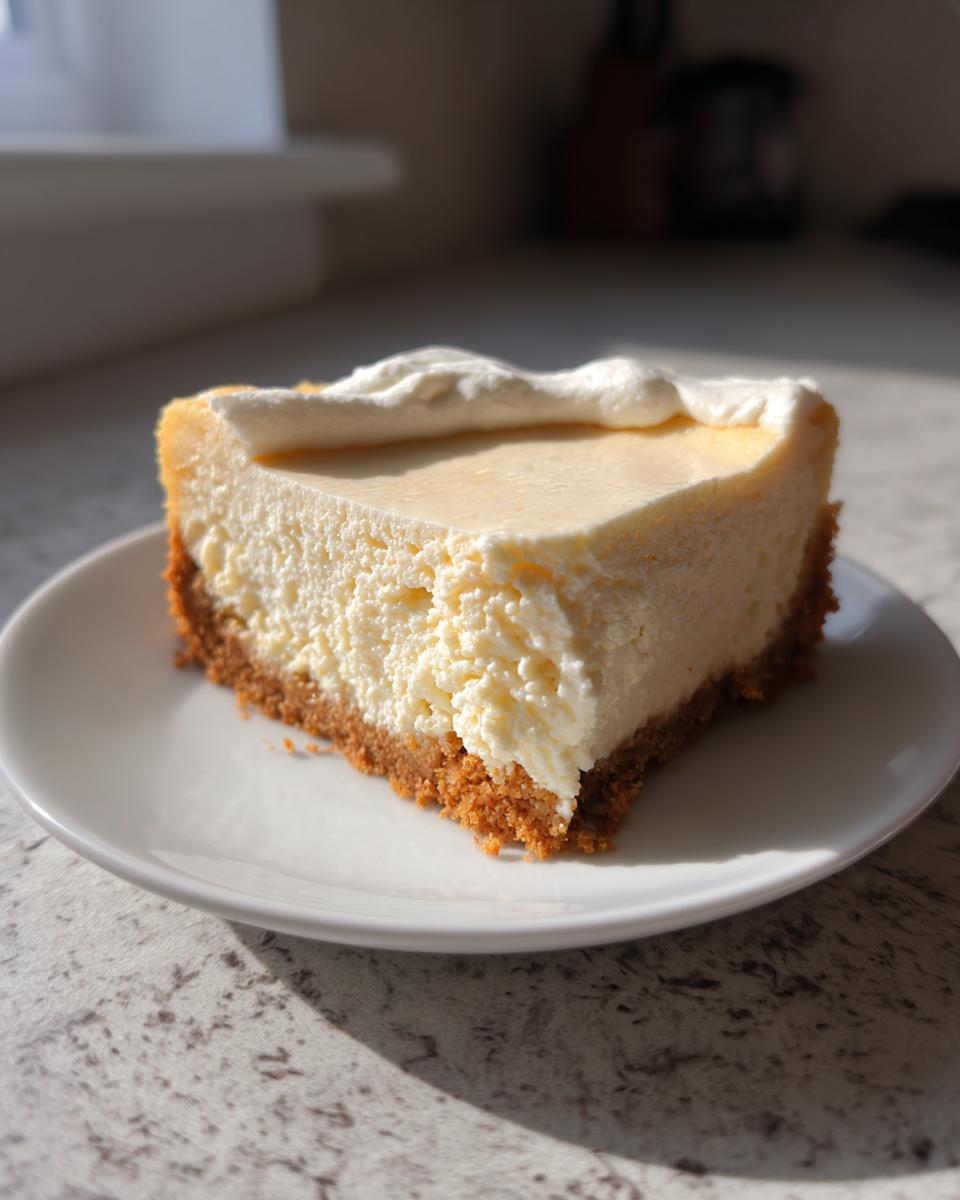
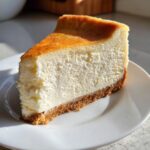
Serving Suggestions for Your Rich Dessert Recipes
Once this beautiful, creamy perfection has chilled overnight, it’s ready for the spotlight! Since this is such a rich dessert recipe, you don’t need much fanfare, but a little something extra always takes it over the top for those party spreads. I love keeping the toppings simple so the cheesecake flavor shines through. A light drizzle of something bright or fruity is perfect.
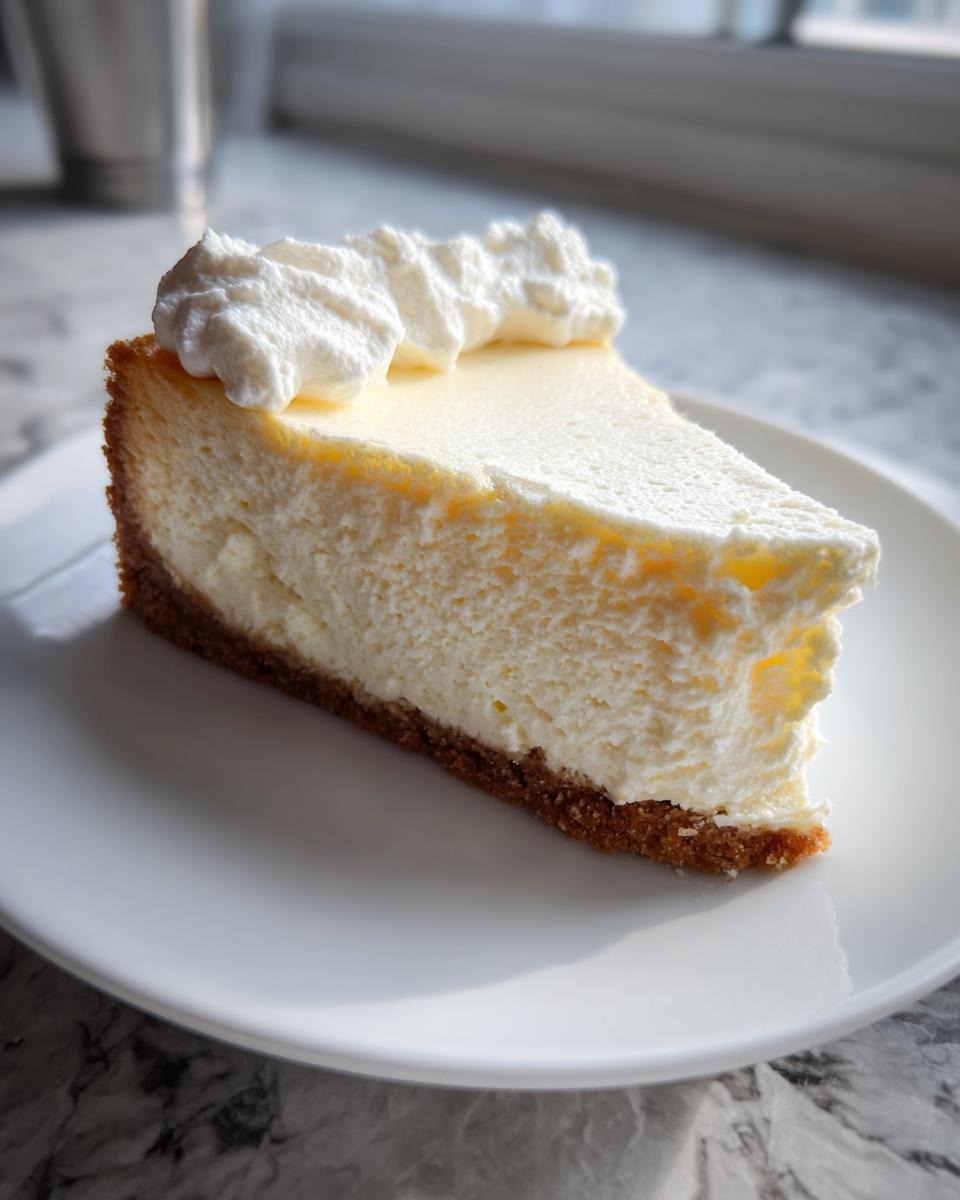
If you want an easy addition that tastes incredibly fancy, you absolutely have to try topping slices with my quick homemade salted caramel. Seriously, it takes minutes. Fresh berries—raspberries or perfectly ripe strawberries—are always a winner, offering a nice tart contrast to the sweet filling. A simple dusting of powdered sugar works too, but trust me, that caramel drizzle makes people think you spent all day toiling over this!
Storage and Reheating Instructions for Leftover Cheesecake
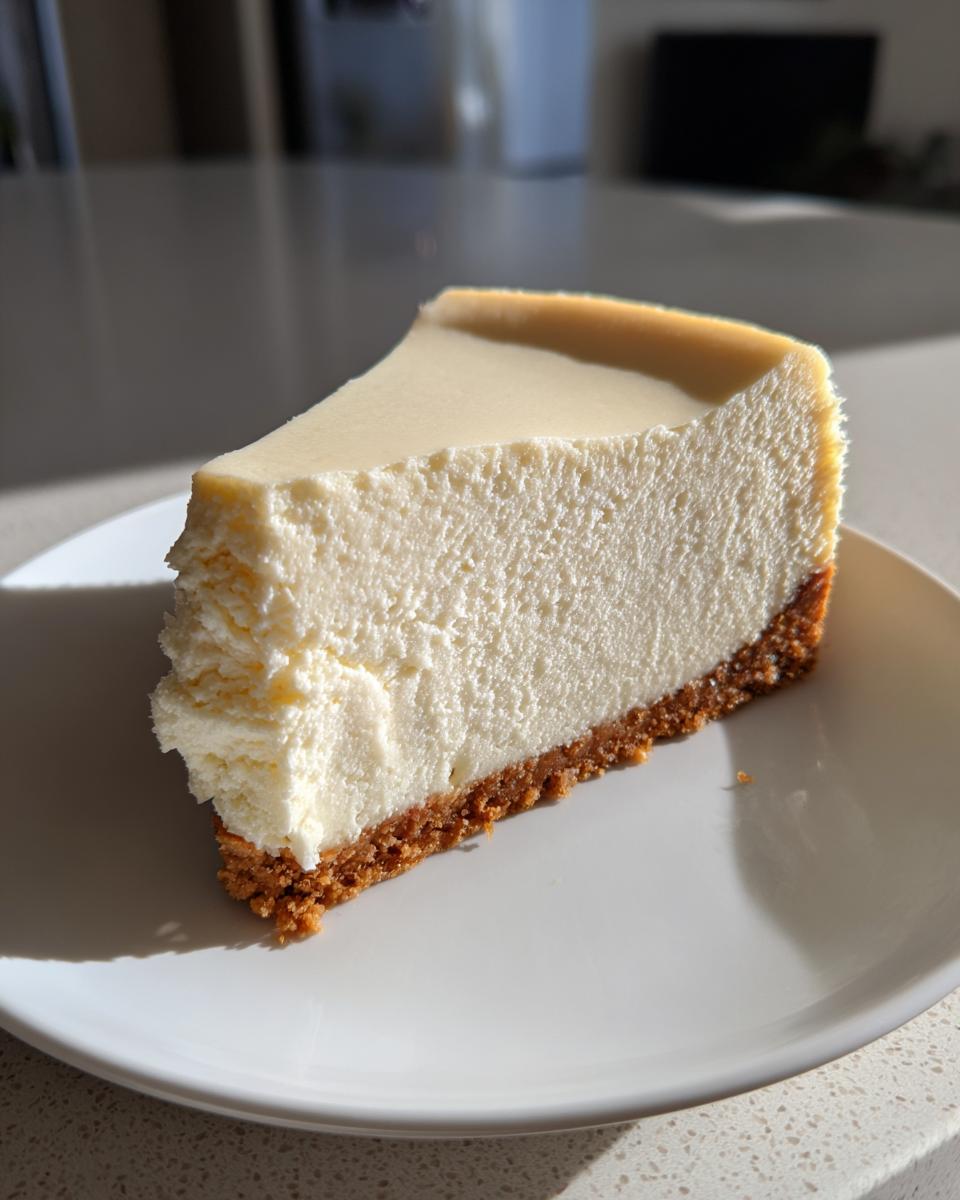
The hardest part about making this amazing cheesecake recipe is waiting for it to chill, but that wait is the key! You need a minimum of 6 hours in the fridge before you even think about slicing it, but honestly, leave it overnight. That chilling time really firms up that velvety texture we worked so hard to achieve. It keeps beautifully in the fridge, covered loosely, for about 4 to 5 days.
If you just can’t resist and need to save some for later, you can totally freeze it! Just make sure the cheesecake is completely chilled first. Wrap individual slices or the whole thing tightly in plastic wrap, and then foil. When you’re ready to eat it thawed, take it out of the freezer and let it thaw slowly in the fridge overnight. That slow thawing keeps the texture perfect!
Frequently Asked Questions About This Cheesecake Recipe
I know when you’re following a recipe, especially one aiming for perfection like this cheesecake recipe, you always have a few questions pop up that the main steps didn’t cover. That’s totally normal! I want to make this simple cheesecake tutorial stress-free, so here are the questions I get asked most often about getting that beautiful, rich result.
Can I make this cheesecake recipe without a water bath?
That water bath setup seems like a hassle, right? Look, if you absolutely cannot manage it, you can try skipping it, but I have to warn you: the water bath is the #1 way to ensure that velvety smooth cheesecake texture and guarantee no cracking. If you skip it, lower your oven temperature way down to 300°F (150°C) and bake it until it’s just set. It might be slightly less creamy, but it should still be delicious! Just be ready to watch it closely.
What is the minimum chilling time for the best results?
This is the one requirement you can’t cheat! You need a minimum of 6 hours in the fridge before you even think about slicing into this. That time allows the starches and fats to set up properly. Honestly though? I always tell people to aim for overnight. Seriously, that extra 6 or 7 hours makes the difference between a good cheesecake and the *best* one you’ll ever make. It gets so beautifully dense and flavorful when rested properly.
If you’re short on time and looking for something faster, maybe check out my guide on easy no-bake mini cheesecake recipe for a quicker fix next time!
Nutritional Snapshot of This Classic Cheesecake Recipe
Now, I know we’re here for the indulgence, not the spreadsheets! But since we’re building trust and giving you the most complete cheesecake recipe out there, I wanted to share the estimated nutritional breakdown for one slice. Please remember, since this is a rich dessert recipe and everyone measures just a little differently, these numbers are just guides based on standard ingredient volumes.
- Serving Size: 1 slice
- Calories: 450
- Sugar: 35g
- Sodium: 350mg
- Fat: 30g
- Saturated Fat: 18g
- Unsaturated Fat: 12g
- Trans Fat: 0g
- Carbohydrates: 40g
- Fiber: 1g
- Protein: 8g
- Cholesterol: 120mg
There you have it! A perfect slice of creamy heaven, clocking in with that necessary dose of fat and sugar that makes a classic cheesecake crust so unbelievably satisfying. Enjoy every bite—you earned it!
Share Your Experience Making This Cheesecake
Okay, my friend, now you have what you need to conquer the world of creamy desserts! I truly hope you enjoyed this process as much as I do every time I make it. Seriously, once you taste that velvety smooth texture, you won’t look back—this is your new go-to cheesecake recipe for parties!
When you nail that beautiful, crack-free top—and I know you will using my tips—I want to hear all about it! Please take a moment to leave a rating below. A 5-star review helps other home cooks who are nervous about trying a baked cheesecake feel confident enough to jump in. If something felt tricky, or if you tried one of my suggestions (like adding a little extra vanilla!), drop a comment too. I read every single one!
And if you snap a picture of your masterpiece—especially when you slice into it and see that perfect texture—tag me on social media! Sharing successes is the best part of cooking together, even when we are miles apart. Good luck, and happy baking! If you’re looking for something perfectly chewy to have with your next cup of coffee, maybe give my snickerdoodle cookies a try next time!
PrintThe Best Easy Homemade Creamy Cheesecake (No-Crack Water Bath Method)
Follow this simple tutorial to make the best cheesecake recipe: a rich, velvety smooth New York style cheesecake with a classic graham cracker crust. This recipe focuses on creamy texture and avoiding cracks.
- Prep Time: 25 min
- Cook Time: 75 min
- Total Time: 1 hour 40 min
- Yield: 10 servings 1x
- Category: Dessert
- Method: Baking
- Cuisine: American
- Diet: Vegetarian
Ingredients
- 1 1/2 cups graham cracker crumbs
- 1/4 cup granulated sugar (for crust)
- 6 tablespoons unsalted butter, melted
- 3 (8 ounce) packages full-fat cream cheese, softened to room temperature
- 1 1/2 cups granulated sugar (for filling)
- 1 teaspoon vanilla extract
- 1/4 teaspoon salt
- 1 cup sour cream, room temperature
- 3 large eggs, room temperature
Instructions
- Prepare the crust: Preheat your oven to 350°F (175°C). In a medium bowl, mix the graham cracker crumbs, 1/4 cup sugar, and melted butter until fully combined. Press the mixture firmly into the bottom of a 9-inch springform pan. Bake the crust for 10 minutes. Remove and let it cool while you prepare the filling. Reduce the oven temperature to 325°F (160°C).
- Prepare the water bath: Wrap the outside bottom and sides of the springform pan tightly with heavy-duty aluminum foil to prevent water from seeping in. Place the wrapped pan inside a larger roasting pan.
- Make the filling: In a large bowl, use an electric mixer to beat the softened cream cheese until it is completely smooth and there are no lumps. This step is key for a velvety smooth cheesecake.
- Gradually beat in the 1 1/2 cups of sugar, vanilla extract, and salt until just combined. Scrape down the sides of the bowl.
- Beat in the sour cream until smooth. Add the eggs one at a time, mixing only until each egg is incorporated. Do not overmix the batter once the eggs are added, as this incorporates air and can cause cracking.
- Pour the filling over the cooled crust.
- Bake using the water bath: Carefully pour hot water into the roasting pan until the water reaches about halfway up the sides of the springform pan. Bake for 60 to 75 minutes. The edges should look set, but the center 2 inches should still have a slight jiggle when gently nudged.
- Cool the cheesecake: Turn off the oven, but leave the cheesecake inside with the oven door propped open slightly (use a wooden spoon) for 1 hour. This slow cooling prevents rapid temperature change, which helps prevent cracking.
- Remove the cheesecake from the water bath and foil. Let it cool completely on a wire rack at room temperature for about 1 hour.
- Chill: Cover the cheesecake loosely and refrigerate for at least 6 hours, or preferably overnight, before serving. This chilling time is necessary for the best creamy texture.
Notes
- Use room temperature ingredients for the cream cheese, sour cream, and eggs. This prevents lumps and ensures a smooth batter.
- Do not overbeat the batter after adding the eggs. Overmixing introduces air, which expands during baking and causes cracks upon cooling.
- If you skip the water bath, bake at a lower temperature (300°F or 150°C) and check for doneness earlier.
Nutrition
- Serving Size: 1 slice
- Calories: 450
- Sugar: 35g
- Sodium: 350mg
- Fat: 30g
- Saturated Fat: 18g
- Unsaturated Fat: 12g
- Trans Fat: 0g
- Carbohydrates: 40g
- Fiber: 1g
- Protein: 8g
- Cholesterol: 120mg