
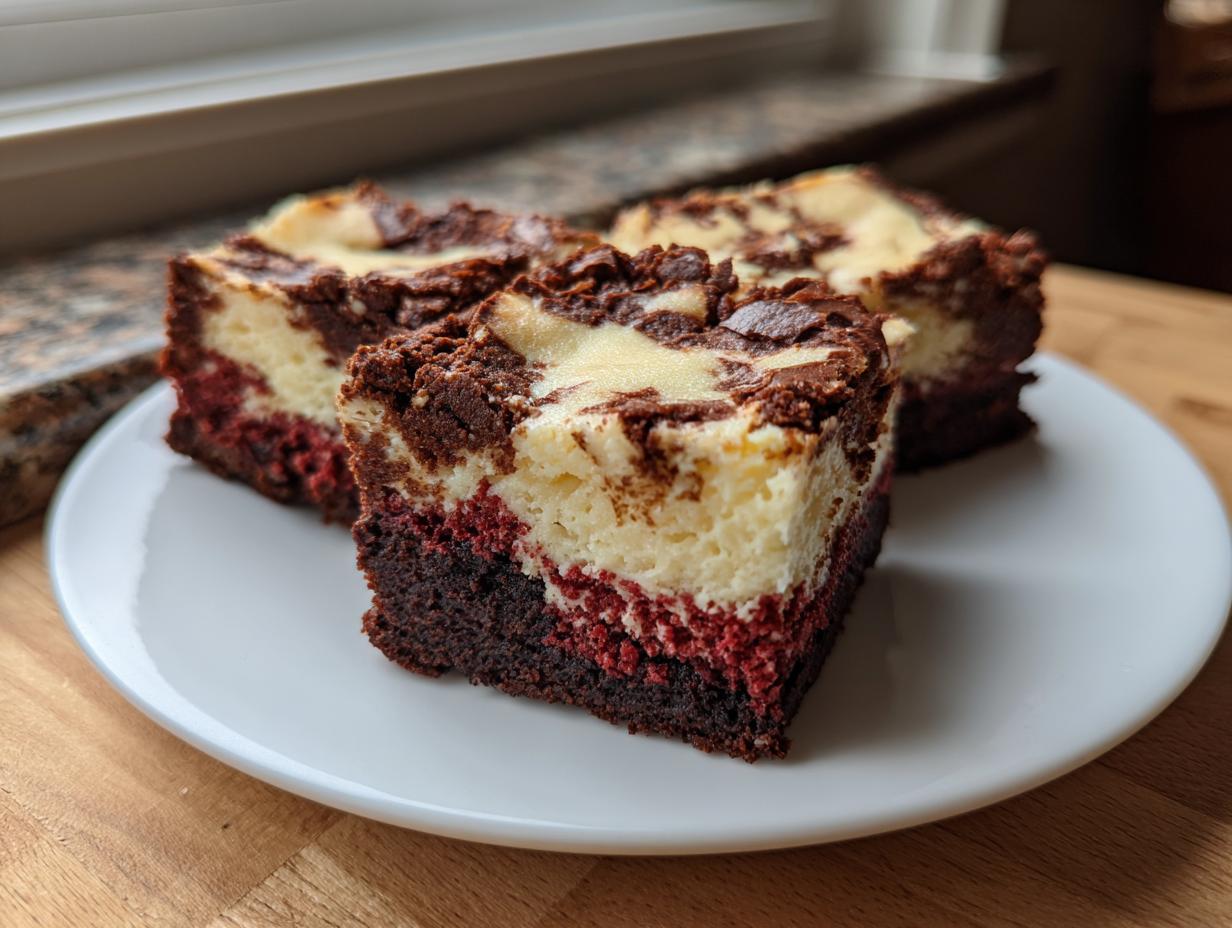
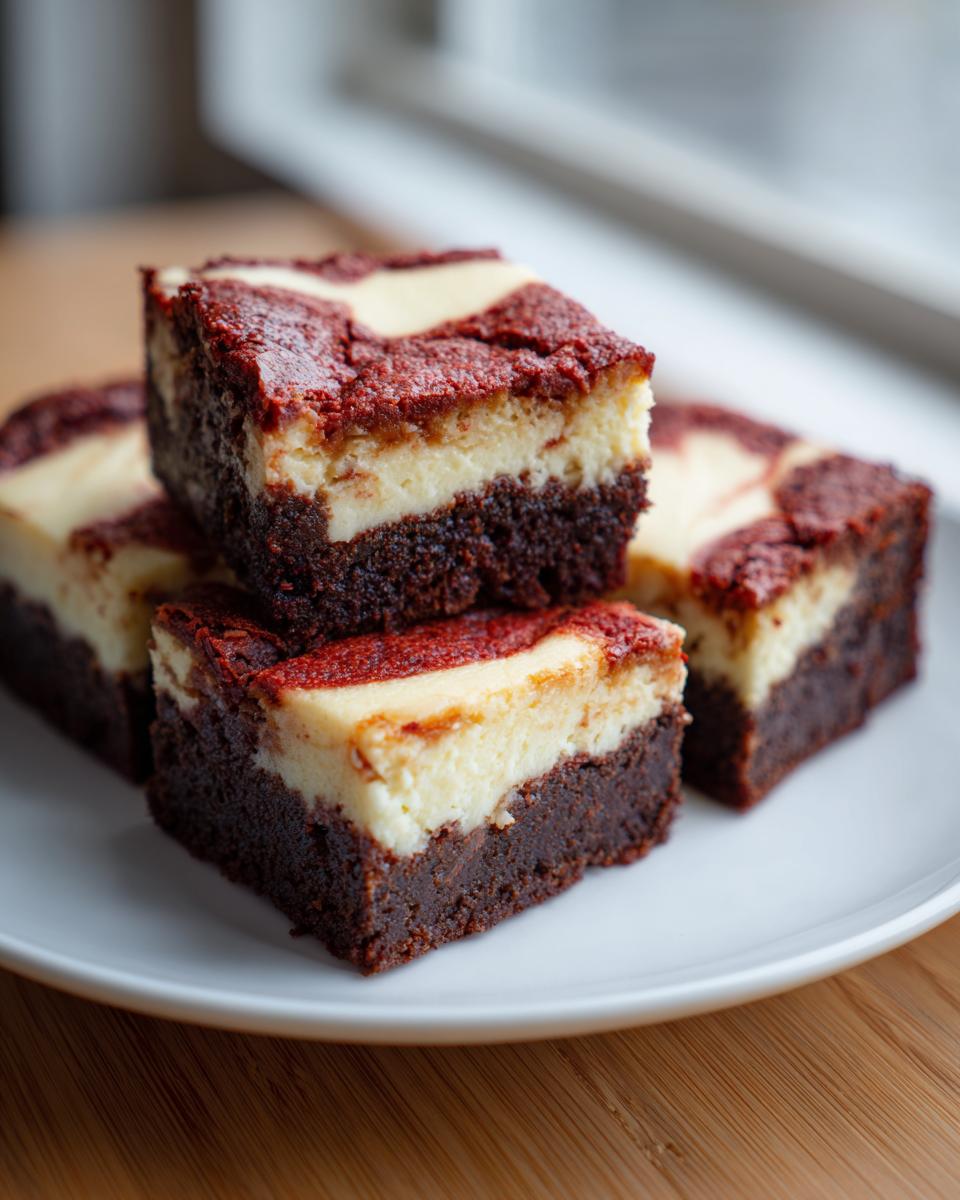
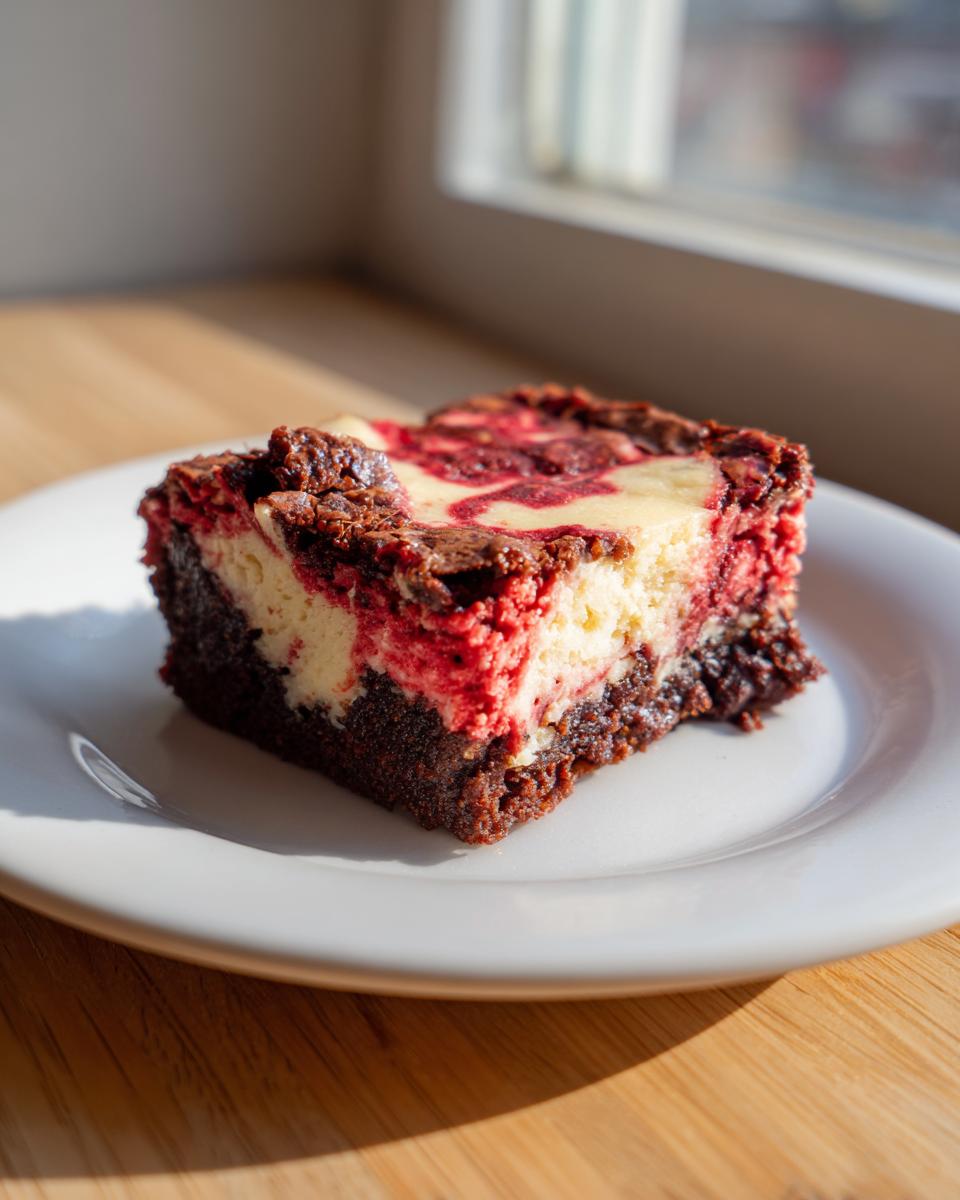
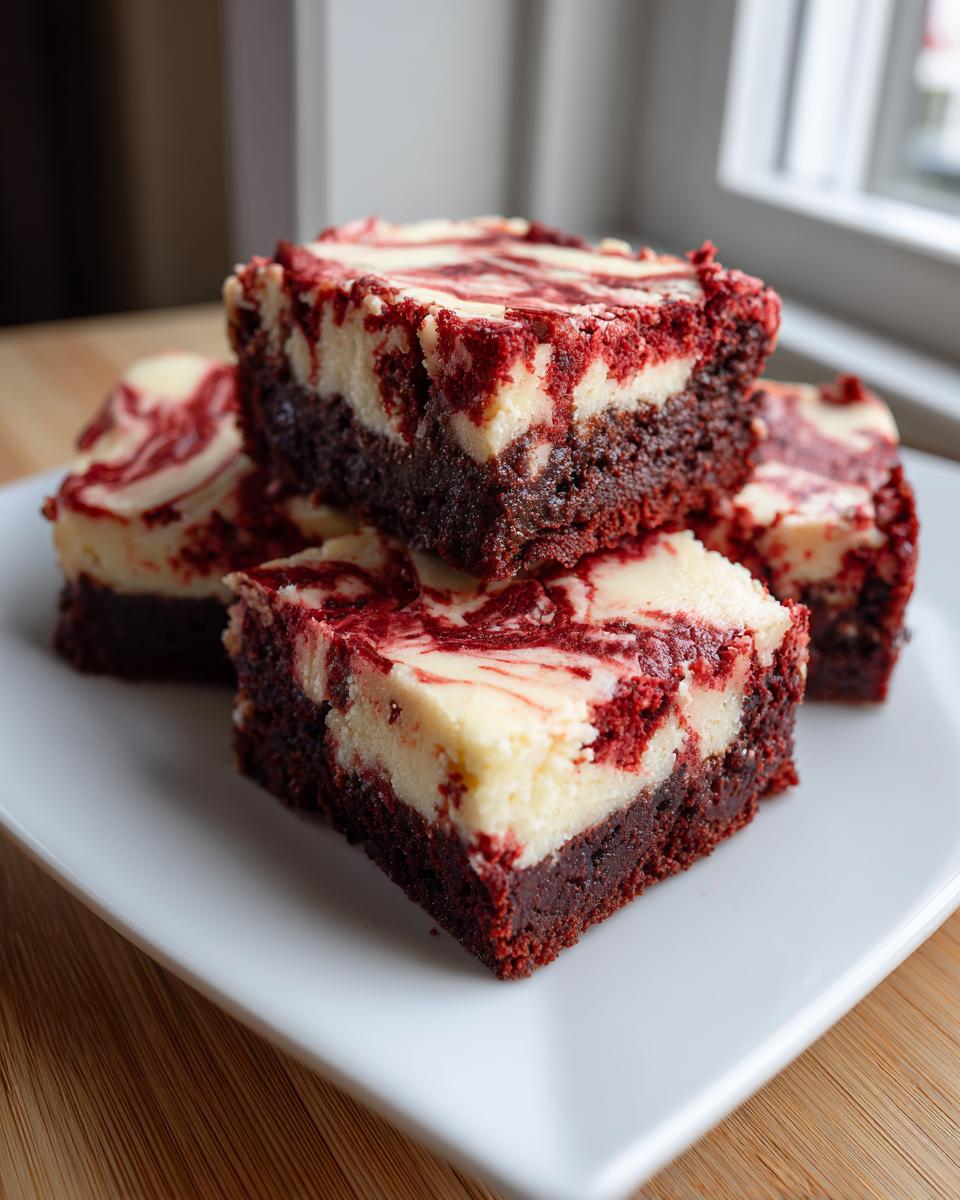
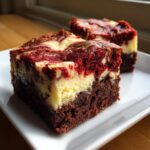
You know those moments when you just can’t pick between chocolate indulgence and creamy tang? Happens to me every time! That’s why I’m obsessed with finding those dessert mashups that solve all my cravings at once. And trust me, when it comes to sheer decadence, these red velvet cheesecake brownies are the absolute truth! We’re talking seriously fudgy, intensely colored brownie base hugging a creamy, tangy cream cheese swirl. It looks complicated, right? That’s the Cheffinity magic right there. Ava Sinclair built this whole platform on the idea that you shouldn’t need extra hours in the day to pull off something showstopping. These bars prove that you can get bakery-level results even when life is chaotic. If you love finding amazing flavor combinations, check out our other delicious dessert recipes. Get ready to make your new favorite, ultimate indulgent dessert.
- Why You Will Love These Red Velvet Cheesecake Brownies
- Gathering Ingredients for Your Red Velvet Cheesecake Brownies
- Essential Equipment for Perfect Red Velvet Cheesecake Brownies
- Step-by-Step Guide to Making Red Velvet Cheesecake Brownies
- Tips for the Best Red Velvet Cheesecake Brownies
- Storage and Make-Ahead for Your Red Velvet Cheesecake Brownies
- Frequently Asked Questions About Red Velvet Cheesecake Brownies
- Nutritional Estimates for Red Velvet Cheesecake Brownies
- Share Your Ultimate Indulgent Dessert Experience
Why You Will Love These Red Velvet Cheesecake Brownies
Honestly, these aren’t just brownies; they’re an event! I keep making these because they tick every single dessert box I might have on any given day. You get that amazing visual pop, but the texture is where they really steal the show. I promise you, once you make these rich baked goods, they’ll be a staple.
- You get that perfect textural contrast: super fudgy brownie meets impossibly smooth cheesecake.
- The color is simply stunning! A vibrant red that makes them perfect for holidays or parties.
- They look like they came from a fancy bakery, but they use such simple steps—no complex layering needed.
- We use cocoa powder in the red velvet base, which deepens that rich chocolate flavor we all crave in a brownie.
- The cream cheese swirl layer adds a necessary, bright tang that cuts through all that richness beautifully.
- They bake up fast—we’re talking less than an hour total time, which is a miracle for a two-layer dessert like this!
If you’re looking for decadent chocolate treats that feel gourmet but are totally easy, stop your search right now. These are it.
Gathering Ingredients for Your Red Velvet Cheesecake Brownies
Okay, let’s talk supplies! This recipe is deceptively simple because we are layering two amazing things—classic fudgy brownies and a tangy cheesecake topping—but the ingredient list is really straightforward. The secret to making sure your cheesecake layer is silky smooth and not lumpy? Temperature! You absolutely must plan ahead and make sure your cream cheese and your eggs are sitting out on the counter before you even think about preheating the oven.
When you look over the list, you’ll see that the structure of the brownie relies on cocoa powder for that deep, rich chocolate note, which pairs wonderfully with the red food coloring. Don’t skimp on the coloring here; we want that vibrant color! Gather everything up, and you’ll be ready to go in just a few minutes. We’re keeping things efficient, just like Ava taught us.
For the Red Velvet Brownie Base
This is where the beautiful deep red color comes from, mixed with cocoa for that classic brownie chew.
- 1/2 cup unsalted butter, melted
- 1 cup granulated sugar
- 2 large eggs, room temperature (this really helps them emulsify!)
- 1 1/2 teaspoons red food coloring
- 2 teaspoons vanilla extract
- 1/2 teaspoon salt
- 3/4 cup all-purpose flour
- 3 Tablespoons Dutch process cocoa powder
For the Cream Cheese Swirl
This layer needs to be totally smooth so those beautiful ribbons form when you swirl them into the batter. Make sure that cream cheese is totally soft so you don’t end up with any unmixed lumps!
- 8 ounces cream cheese, room temperature
- 1 large egg, room temperature (for swirl)
- 1/3 cup granulated sugar (for swirl)
Essential Equipment for Perfect Red Velvet Cheesecake Brownies
The beauty of making these bars is that you don’t need a cabinet full of fancy gadgets—just the basics! Having the right tools ready means you can move smoothly from mixing to swirling without having to hunt things down mid-process. Trust me, nobody wants to stop beating the cream cheese batter because they can’t find the right spatula.
Since we are making rich, fudgy treats, having things that help you get the batter out cleanly later is key, too. Here is what you’ll want lined up before you start melting that butter:
- A 9×9 inch metal baking pan is perfect for getting those thick, satisfying layers.
- Parchment paper is non-negotiable! We fold it deliberately to create an overhang so we can lift the entire baked block out later.
- You’ll need a medium mixing bowl for the brownie batter and a separate smaller bowl just for the cheesecake swirl mixture.
- A sturdy whisk for combining the initial melted butter and sugar, and then a rubber spatula for folding in the flour gently.
- A standard electric hand mixer is great for getting the cream cheese swirl perfectly smooth, but you can certainly use elbow grease if you need a bit of extra upper body workout today!
Keeping these pieces handy ensures that when it’s time to layer and swirl, you can do it quickly and confidently. Preparation is half the battle when baking!
Step-by-Step Guide to Making Red Velvet Cheesecake Brownies
Okay, this is where the magic happens! We’re going to take those simple ingredients and turn them into stunning, two-toned bars. Remember, the name of the game for these red velvet cheesecake brownies is layering and gentle swirling—we want ribbons, not mud! Don’t rush the cooling part at the end; that patience pays off when you slice into them neatly later. If you want to see how we handle simple, fudgy textures in other recipes, check out our guide on fudgy date brownies.
Preparing the Pan and Oven
First things first, let’s get your oven warmed up to 350°F (175°C). Now, grab that 9×9 inch pan. This next part is crucial for easy cleanup and zero sticking: line it completely with parchment paper. I always make sure the parchment hangs over two opposite sides like little handles. This overhang is your lifesaver later—it lets you just lift the whole block of cooled brownies right out of the pan like it’s nothing!
Mixing the Red Velvet Brownie Batter
In a medium bowl, start with the wet stuff. Whisk that melted butter and one cup of sugar together until they look happy and combined. Now, beat in your two room-temperature eggs, one after the other. Once that’s mixed, pour in the vanilla and get aggressive with your red food coloring! Pro tip from Ava: if you can snag a high-quality gel-based red coloring, you’ll get that ultra-vibrant, bakery-worthy red without using a ton of liquid, which keeps the batter from getting thin.
In a separate small bowl, whisk your dry ingredients: flour, cocoa powder, and salt. Now, add the dry mixture gradually into the wet ingredients. Mix only until *just* combined. Seriously, stop mixing the second you see the last streak of flour disappear. Overmixing develops gluten, and we are aiming for fudgy, not tough!
Creating the Cream Cheese Swirl
Switch gears to your second bowl for the cream cheese swirl. Again, temperature is your friend here—make sure that cream cheese is super soft. Beat it until it’s completely smooth and creamy, no lumps allowed! Then, mix in that last egg and the smaller portion of sugar until the whole mixture looks glossy and uniform. That’s it! Easy, tangy goodness ready to go.
Layering and Swirling the Red Velvet Cheesecake Brownies
Time to assemble! Spread about half of your beautiful red velvet brownie batter evenly across the bottom of that parchment-lined pan. Next, grab that smooth cream cheese mixture and dollop it right on top of the batter layer. Don’t worry about perfection here; spreading it evenly is fine.
Gently spoon the remaining red velvet batter over the cheesecake dollops. Now comes the art! Take a knife or a skewer—don’t use anything thick that will drag the batter too much—and gently poke it into the layers. Make broad S-shapes or figure eights across the top. You are just trying to marble the two layers together. Stop swirling as soon as you think you’ve done enough. If you keep going, the colors will merge into one boring pink!
Baking and Cooling
Slide that pan into the preheated oven and bake for 30 to 35 minutes. How do you know they’re done? Forget setting a timer; use your senses! The edges should look set, and when you insert a toothpick near the center, you want to see moist crumbs clinging to it, *not* wet batter. That’s the sweet spot for a fudgy brownie base!
The final, most critical step: Cooling. You must let these cool completely in the pan on a wire rack. I usually let them cool on the counter for an hour and then pop the whole thing into the fridge for at least two hours, or even overnight. If you try to slice them warm, the cheesecake layer will totally collapse and ooze out. Once they are chilled and firm, use those parchment handles—lift the whole slab out, place it on a cutting board, and slice them into 9 or 16 squares. Enjoy that perfect bite!
Tips for the Best Red Velvet Cheesecake Brownies
Look, anyone can dump ingredients in a bowl, but getting that bakery-quality finish on your Cream Cheese Swirl Brownies takes just a couple of tiny tweaks. Following these pointers is how we turn a good bake into a repeat request at every single event you attend. It’s all about maximizing that contrast between the fudgy brownie and the creamy filling.
First, let’s talk color again. If you want those rich, vibrant red desserts, ditch the liquid food coloring bottle and order yourself some high-quality gel coloring. You need less product to get far more saturation, which keeps your batter from getting thin and messing up that crucial fudgy texture. Also, for the swirl part, make sure your cream cheese mixture is perfectly smooth before layering it in; you can check out my guide for the best cream cheese frosting technique for practice, which focuses on beating out air and lumps.
Finally, the chill time is non-negotiable! Don’t try to cut these warm. I promise that chilling them for two hours or more ensures you get those beautiful, clean-cut squares worthy of sharing online. If you’re curious how others make their swirls look stunning, take a peek at what the folks over at Savor Queen suggest for visual appeal!

Storage and Make-Ahead for Your Red Velvet Cheesecake Brownies
One of the absolute best things about these decadent treats is that they are fantastic for making ahead of time! Honestly, I think they taste even better on day two once all those chocolate and cream cheese flavors have had a chance to really marry together. This makes them perfect for holiday baking trays or when you need a potluck dessert bars recipe that you don’t have to fuss with the morning of the party.
Since the recipe has that rich cheesecake component, we need to be mindful about how we store them. You can absolutely leave them out on the counter if you plan on eating them within a day, provided your kitchen isn’t brutally hot. Just make sure they are sealed tightly in an airtight container. This keeps them from drying out and protects that lovely swirl on top. If you’re prepping these more than 24 hours in advance, or if your kitchen is warm, sliding them into the fridge is the smartest move.
When you chill them, they firm up even more, which makes slicing super neat, like I mentioned! For long-term storage, you can actually freeze these bars! I highly recommend checking out my thoughts on best make ahead desserts because structure matters in the freezer. Wrap each square individually in plastic wrap, then tuck them all into a heavy-duty freezer bag. They keep beautifully for about three months. When you’re ready to eat one, just let it thaw on the counter for about an hour, and it tastes almost freshly baked!
Frequently Asked Questions About Red Velvet Cheesecake Brownies
I get so many questions about these bars when I bring them to gatherings—everyone wants the secret to making them look and taste just right! It’s all about nailing those textures and that iconic color. Don’t worry if you have a few hiccups; baking is flexible! If you want to try different spins on this classic, take a look at my notes on easy brownie variations for fun ideas.
Can I skip the red food coloring in these red velvet cheesecake brownies?
You absolutely *can*, but trust me, you’ll be missing out on the whole Red Velvet experience! The flavor profile comes mostly from the vanilla and the touch of cocoa powder, so yes, it will still taste delicious. But what makes a Red Velvet Dessert instantly recognizable is that incredible, vibrant red color, right? If you skip the coloring, you’ll end up with a nice chocolate-swirl bar, but it won’t have that showstopping look we’re going for. If you keep it in, please use a gel coloring! It gives you that deep color saturation without making your brownie base too liquidy.
How do I get a true fudgy brownie texture instead of cakey?
Ah, the fudgy vs. cakey debate! For these rich baked goods, we are aiming squarely for fudgy, and that comes down to two things we talked about. One: the ratio of fat (butter and eggs) to flour. We kept the flour low to ensure that dense chewiness. Two: the mixing! You must treat the flour gently when you fold it in; stop mixing the second the flour streaks vanish. Overmixing makes those gluten strands strong, and that’s what pushes a brownie toward cake territory. Keep it minimal, and keep it fudgy!
What is the best way to cut clean squares from these swirled dessert bars?
This is the trickiest part, especially when you have that softer cheesecake swirl tucked inside! Trying to cut these when they are warm or even room temperature is a disaster—the cheesecake squishes out, and your fudgy base breaks. The absolute best way to get those picture-perfect, clean squares is to chill them completely. Once they are totally cool, I wrap the whole slab in plastic and force them to chill in the refrigerator for at least two hours, or even better, overnight!
When you are ready to cut, take a long, sharp knife and dip it in hot water, then wipe it dry before each slice. That hot blade glides right through the layers, giving you sharp edges on your two layer brownies every single time.
Nutritional Estimates for Red Velvet Cheesecake Brownies
Now, let’s be honest, when you make glorious, decadent treats like these ultimate indulgent dessert bars, you aren’t typically doing it for a low-calorie count, right? These red velvet cheesecake brownies are pure dessert joy! But I always feel tracking a general idea is helpful, especially if you’re serving these rich baked goods for a crowd.
Please remember that these numbers are estimates based exactly on the ingredient measurements listed in the recipe and divided into 16 equal servings. Once you start drizzling extra glaze or tweaking things, those numbers shift slightly, so take these as a *very* good ballpark figure for one brownie square.
- Serving Size: 1 brownie square
- Calories: Approximately 280
- Sugar: Around 25g (That’s the brownie and the cheesecake sugar combined!)
- Fat: About 16g
- Saturated Fat: Roughly 9g
- Carbohydrates: Around 30g
- Protein: About 4g
- Cholesterol: Around 65mg
See? Totally worth it for that perfect fudgy texture and creamy swirl! These are meant for indulgence, not for sipping on a salad!
Share Your Ultimate Indulgent Dessert Experience
Whew! Now that you’ve conquered the world of fudgy brownies and created that stunning cream cheese swirl, I genuinely want to see what you made! Ava Sinclair built Cheffinity because we believe real, delicious food should fit into real, busy lives—and sharing these wins with each other is the best part of the whole process.
Did your swirl turn out perfectly marbled? Or did you discover a new trick that made cutting those clean squares easier? Tell me about it! Don’t be shy. Drop a comment below, rate this recipe five stars if it brought chocolate and cheesecake bliss to your kitchen, and let me know how many batches you’ve already whipped up.
Seriously, tagging us on social media with a picture of your beautiful bars is the highest compliment you can give! It helps other busy people see just how easy it is to achieve these gourmet results without spending all afternoon prepping. If you need to reach out directly with a question or want to share feedback on the recipe itself, you can always send us a note through our contact page. Happy baking, everyone!
PrintUltimate Red Velvet Cheesecake Brownies
Make these rich, fudgy red velvet cheesecake brownies that feature a creamy, tangy cream cheese swirl. This recipe combines two favorite desserts into one decadent bar perfect for any occasion.
- Prep Time: 20 min
- Cook Time: 35 min
- Total Time: 55 min
- Yield: 16 servings 1x
- Category: Dessert
- Method: Baking
- Cuisine: American
- Diet: Vegetarian
Ingredients
- 1/2 cup unsalted butter, melted
- 1 cup granulated sugar
- 2 large eggs, room temperature
- 1 1/2 teaspoons red food coloring
- 2 teaspoons vanilla extract
- 1/2 teaspoon salt
- 3/4 cup all-purpose flour
- 3 Tablespoons Dutch process cocoa powder
- 8 ounces cream cheese, room temperature
- 1 large egg, room temperature (for swirl)
- 1/3 cup granulated sugar (for swirl)
Instructions
- Preheat your oven to 350°F (175°C). Line a 9×9 inch baking pan with parchment paper, leaving an overhang for easy removal.
- Prepare the brownie batter: In a medium bowl, whisk together the melted butter and 1 cup of sugar until combined.
- Beat in the 2 eggs one at a time. Mix in the red food coloring and vanilla extract until the color is uniform.
- In a separate small bowl, whisk together the flour, cocoa powder, and salt. Gradually add the dry ingredients to the wet ingredients, mixing only until just combined. Do not overmix.
- Prepare the cream cheese swirl: In another bowl, beat the cream cheese until smooth. Add the remaining 1/3 cup sugar and the second egg. Mix until the mixture is smooth and creamy.
- Spread half of the red velvet brownie batter into the prepared pan.
- Dollop the cream cheese mixture evenly over the brownie layer.
- Top with the remaining red velvet brownie batter.
- Use a knife or a skewer to gently swirl the cheesecake layer into the brownie batter, creating a marbled effect. Do not over-swirl.
- Bake for 30 to 35 minutes, or until a toothpick inserted near the center comes out with moist crumbs attached, but not wet batter.
- Let the brownies cool completely in the pan on a wire rack before lifting them out using the parchment overhang.
- Cut into 16 squares and serve.
Notes
- For the most vibrant red color, use a high-quality gel-based red food coloring.
- Ensure both the cream cheese and eggs for the swirl are at room temperature for a smooth texture.
- For fudgier brownies, slightly underbake them by a minute or two.
- These bars are excellent made a day ahead and stored covered at room temperature.
Nutrition
- Serving Size: 1 brownie square
- Calories: 280
- Sugar: 25
- Sodium: 150
- Fat: 16
- Saturated Fat: 9
- Unsaturated Fat: 7
- Trans Fat: 0.5
- Carbohydrates: 30
- Fiber: 1
- Protein: 4
- Cholesterol: 65