
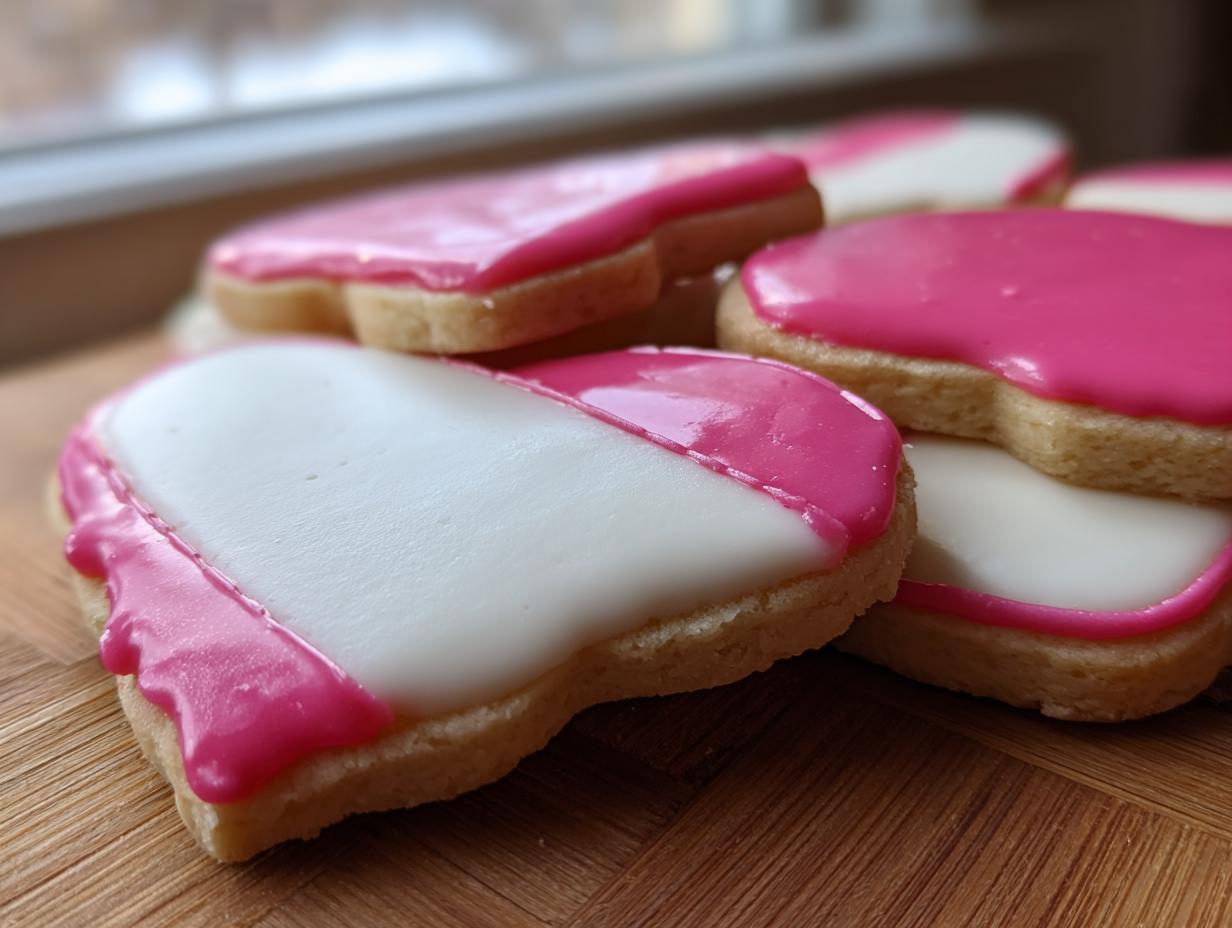
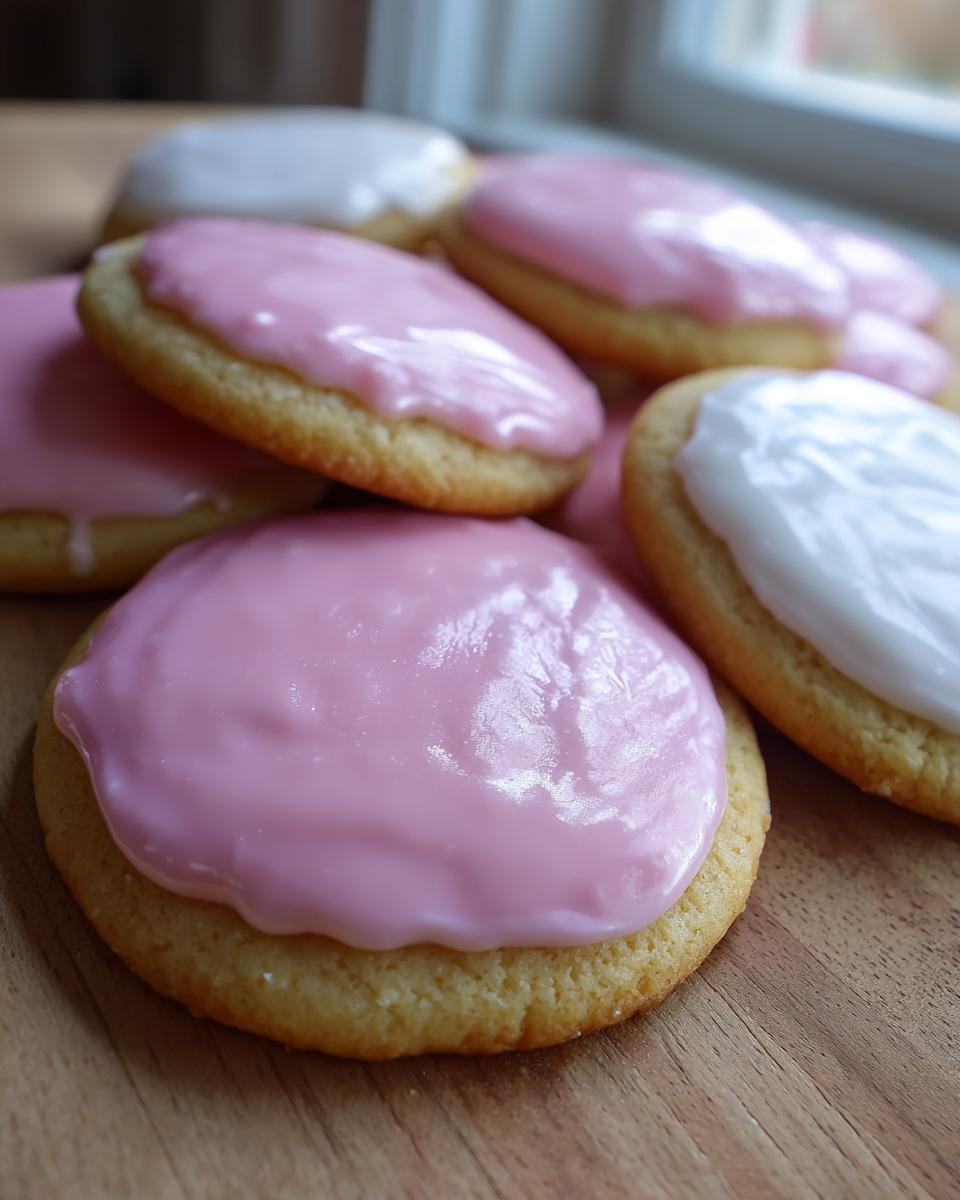
Oh, the sticky sadness when you bake gorgeous cut-out sugar cookies, spend an hour decorating them, only to have the icing stay tacky forever? I know that frustration! It ruins stacking them for gifts and makes handling them a nightmare. That’s exactly why I spent weeks perfecting this sugar cookie icing recipe. Ava Sinclair and our team here at Cheffinity believe you deserve icing that works the first time, dries rock hard, and gives you that beautiful, professional, glossy finish. Trust me, this is the foolproof method that actually sets solid so you can finally stack those lovely treats! You can find more reliable sweets inspiration over in our delicious dessert recipes collection.
- Why This Is the Best Sugar Cookie Icing Recipe for Decorating
- Ingredients for Your Foolproof Sugar Cookie Icing Recipe
- How to Make Icing That Sets Firm: Step-by-Step Instructions
- Tips for Success with Your Sugar Cookie Icing Recipe
- Ingredient Notes and Simple Powdered Sugar Icing Substitutions
- Frequently Asked Questions About This Sugar Cookie Icing Recipe
- Serving Suggestions for Decorated Cookies
- Storage and Reheating Instructions for Leftover Cookie Icing
- Estimated Nutritional Data for This Sugar Cookie Icing Recipe
Why This Is the Best Sugar Cookie Icing Recipe for Decorating
If you’ve ever tried a simple powdered sugar icing, you know the struggle—it stays soft! That won’t happen here, because this sugar cookie icing recipe is designed for durability. We lean on meringue powder, which acts as our secret weapon. It’s the key to getting that hard, candy-like shell that lets you stack your holiday cookies ten high or pack them up to mail!
Unlike a basic glaze, this recipe transforms into a beautiful, smooth cookie glaze that sets firm. That means no smudging, no sticking, and no sad, cracked designs when you try to box them up. This is kitchen strategy, folks—it’s why I love easy apple crumble recipe tricks, too; making things easier while guaranteeing results is always the goal.
Achieving That Perfect Hardening Sugar Cookie Icing
The magic really is in the meringue powder. It provides the structure that egg whites provide in traditional, sometimes finicky, Royal Icing. When you whip this up, you aren’t just mixing sugar; you’re building an architecture that will dry into a truly strong shell. This is how you get that sturdy cookie frosting that just won’t budge.
Glossy Cookie Icing Finish Without Corn Syrup
Many bakers rely on corn syrup to get that mirror-like finish, but honestly, I just don’t always keep it on hand! Good news: this version gives you a stunning, glossy cookie icing finish using just the meringue powder and properly beating the mixture. It looks professional, drapes beautifully over the cookie edges, and keeps things simple for your kitchen.
Ingredients for Your Foolproof Sugar Cookie Icing Recipe
Gather these simple items! Getting the ratios right is key to any successful sugar cookie icing recipe. Remember, we are aiming for that beautiful, hard, glossy finish, so precision matters here. Read closely on the water!
- 4 cups powdered sugar, sifted (Sifting is non-negotiable; nobody wants lumps!)
- 1/2 cup meringue powder
- 1/2 teaspoon vanilla extract
- 6 to 8 tablespoons water (or milk, but water makes it dry harder)
My one little tip: start with just 6 tablespoons of liquid. You can always add more a tiny bit at a time, but boy, is it tough to take it back out once it gets too runny!
How to Make Icing That Sets Firm: Step-by-Step Instructions
Alright, listen up, because this mixing process is where we build the strength needed for that perfect set. If you rush this, you end up with a sloppy mess, and nobody wants that! We are going to make one big batch, and then divide it up to get two different consistencies we need for successful cookie decorating icing.
- First things first: get your sifted powdered sugar and the meringue powder into your biggest mixing bowl. Give them a quick whisk just to marry them together before we add the wet stuff.
- Now, pour in that vanilla extract and start with just 6 tablespoons of water. Don’t dump it all in at once; we’re building slowly here!
- Grab your electric mixer—this is one time where the hand mixer is your best friend. Start it on low speed until everything comes together without turning your kitchen into a sugar cloud. Then, crank it up to medium-high. You need to beat this for a solid 3 to 5 minutes! This whipping action is crucial for structure.
- When it looks smooth and you can lift the whisk out and the icing holds a stiff peak that looks proud, you’ve got your outline consistency ready. If it seems way too stiff, add water just one teaspoon at a time.
- Now for the flood. Take the amount of icing you plan to color or use immediately and move it to a separate bowl. We thin this slightly for filling in the centers. Add 1 to 2 more tablespoons of water, mixing gently until it flows easily off a spoon.
- If you’re coloring, use gel coloring now! Liquid color is too watery and will ruin the texture we just worked so hard to create.
- Color your batches, then start decorating. Use that stiff icing consistency to draw the border around the edge of your cut-out cookie. Be neat!
- Let those outlines sit for at least 30 minutes. Seriously, step away. They need to firm up before you move on.
- Once the outline is firm to the touch, grab your thinner flood icing and gently fill in the middle. Use a toothpick or a scribe tool to push the icing right up to the outline border.
Achieving Outline and Flooding Consistency for Cookie Decorating Icing
This is where beginners often get turned around, so let’s nail this down. Your outline consistency needs to be stiff—it should look like whipped cream when you pull the mixer beater out, holding a definite peak that doesn’t slump. That’s what gives you those sharp edges.
The flooding consistency is much looser. We want it flowing easily. If you drizzle a ribbon of this thinner icing across the surface, it should smooth itself out and disappear back into the bowl within about 10 seconds. That smooth leveling action means it’s perfect for filling in those outlined spaces without breaking through the walls you built. It’s all about texture control for the best cookie decorating icing!
The Drying Process for a Durable Cookie Frosting
You can’t rush the hardening part if you want success. Once your cookies are flooded, they need time alone on the counter. We are talking several hours—I always aim for overnight if I can manage it. If the surface is still tacky the next morning, just wait longer!
This long air-dry is what makes the meringue powder do its job and gives you that hard, durable cookie frosting. Patience here means you can stack them up without them sticking together, which is the goal when you’re making holiday treats or gift cookies.

If you follow these steps while mixing, you absolutely guarantee yourself an icing that sets firm every single time. That’s the secret!
Check out some of my favorite classic chocolate chip cookies recipes when you need a break from decorating!
Tips for Success with Your Sugar Cookie Icing Recipe
You have the recipe and the method, but let me give you a few quick nuggets of wisdom that I definitely learned the hard way so you don’t have to! Mastering this sugar cookie icing recipe is all about the little details. These tips take your batch from ‘good’ to ‘gift-worthy’ in my book.
First, when you’re coloring your icing, please, please, please stick to gel food coloring. Liquid colors you buy at the grocery store are mostly water. If you add enough liquid dye to get a deep color—say, a rich Christmas red—you’ve just thinned out your icing! That flood consistency suddenly becomes too runny, and you’ll have icing bleeding right off the cookie! Gel colors are concentrated pigment with almost no liquid, so you get vibrant results without destroying that perfect texture we spent five minutes whipping up.
Second, about that gloss I keep promising! For the absolute shiniest finish once it dries hard, try swapping out your regular vanilla extract for clear vanilla extract. You lose that slight brown tint that opaque vanilla can sometimes leave behind in white icing, giving you a cleaner, brighter, glossy cookie icing.
Finally, don’t stress if you only use half the batch right away. Unused icing travels well! Keep it stored airtight at room temperature—I just plop mine into a Ziploc bag, squeeze out all the air, and zip it tight. It will get stiff, but don’t toss it! When you’re ready to use the rest tomorrow, just wake it up with a few drops of water and give it a quick whisk by hand. It’s like bringing an old friend back to life before trying out those easy dumpling sauce dipping experiments!
Ingredient Notes and Simple Powdered Sugar Icing Substitutions
Let’s talk swaps, because I know we all bake with what we have! When people ask me about the ingredients in this recipe, especially if they are used to classic Royal Icing, there’s usually a little confusion. I want to clear that up fast so you can get that perfect set every time.
That meringue powder? It’s the star here. It’s what lets us make an icing without corn syrup that still hardens beautifully. If you only have plain egg whites, you can absolutely make a true Royal Icing, but you need to adjust things. Raw egg whites are moisture-heavy and sometimes carry bacteria risk that meringue powder mitigates. If you go the egg white route, you basically shift over to a traditional, thicker easy tzatziki sauce recipe style—keep the powdered sugar ratio the same, but you need much less liquid, and you often have to beat it longer to try and drive out that moisture for hardening.
But unless you are specifically aiming for that fragile, crackly shell of true Royal Icing, stick with the meringue powder batch we made! It’s just more user-friendly for the home baker who needs that durable cookie frosting for gifting. This is the simplest way to get that smooth finish that sets firm without fussing over pasteurization or whipping times quite so intensely. It keeps things reliable for all my busy friends out there!
Frequently Asked Questions About This Sugar Cookie Icing Recipe
I know you’re probably heading back into the kitchen to try this out, but just in case you have a rogue thought bouncing around, here are the answers to the FAQs I get the most about getting this sugar cookie icing recipe right!
Can I use this easy cookie frosting recipe for detailed piping work?
Absolutely, you can! That’s why we make two consistencies. For piping tiny details or borders, you need the stiffest mixture we made—the one that holds a sharp, proud peak when you lift your whisk out. That’s your outline consistency. If you make sure you let those piped lines dry for about 30 minutes before you start flooding the center, you can do wonderfully intricate work that stays exactly where you pipe it. It’s the key to looking like a pro baker!
How long does it take for this icing without corn syrup to dry completely?
This is the burning question when you’re making cookies you want to gift or stack! Since this is an icing without corn syrup, it relies solely on air drying to harden. For a full, rock-solid shell that won’t crack when stacked or smudge in a box, you need patience. We are talking several hours minimum, but honestly, if you can leave your decorated cookies out overnight on the counter, that’s when you know they are truly done and ready for wrapping. Don’t try to speed it up in the fridge!
Is this the same as a classic royal icing recipe for cookies?
That’s a great question! It’s very close, but not exactly the same thing. A classic royal icing recipe for cookies usually uses raw egg whites for structure. This recipe uses meringue powder instead. Meringue powder pre-stabilizes that structure, meaning it’s much easier for us home bakers to handle, it’s safer since we aren’t using raw egg whites, and it gives us that highly desirable glossy finish that truly hardens. If you need that *specific* ultra-hard crackle of traditional Royal Icing, you might want to try a recipe using egg whites, but for reliable, durable, and easy cookie decorating icing, this recipe is my go-to standard.
If you have any other pressing questions about our baking systems, feel free to reach out via our contact page!
Serving Suggestions for Decorated Cookies
Now that you have a batch of cookies covered in this amazing, rock-hard, glossy topping, the fun part begins: showing them off! Because this icing sets so beautifully firm, you don’t have to stress about presentation the way you do with softer frostings. This is where the ‘gift-ready’ aspect of this recipe really pays off.
If you’re making these for a bake sale or to drop off at a neighbor’s house, you can stack them right into plastic wrap or clear cellophane bags without worrying about them smearing together. I always use simple twine and a nice tag—it makes even the simplest star cookie look like a bakery purchase. Remember always to make sure the icing is completely dry before wrapping, though. A little patience goes a long way!

These sturdy cookies also pair wonderfully with almost any beverage you can think of because the icing flavor is clean and sweet. They are fantastic dipped halfway into a hot cup of cocoa, or served alongside a rich, savory main course just to balance out the palate. Speaking of pairings, if you’re moving onto dinner next, you absolutely must try my maple mustard pork tenderloin recipe for a sweet and savory contrast!
For holiday parties, I sometimes arrange the finished cookies on a tiered platter alongside fruit. The clean, bright colors of the icing look stunning against fresh berries or green grapes. Because this glaze doesn’t weep or slide off, it really holds up beautifully on display all afternoon long!
Storage and Reheating Instructions for Leftover Cookie Icing
So, you made a huge batch—good for you! That’s smart baking. It’s always better to have too much of this fantastic icing than not enough. If you didn’t use up all your colored batches or the leftover white base, don’t toss it! This recipe is quite friendly for leftovers, which is a huge plus when you’re running a busy kitchen.
For any unused icing that you haven’t put on cookies yet, keeping it airtight is the essential step. I usually load the remaining icing into small airtight containers. You definitely don’t want to refrigerate it, though. Seriously, keep it at room temperature. Cold air makes the sugar seize up and clump together, making it a nightmare to remix later on.
If you open the container the next day or two later and the icing looks super stiff or hard in the middle—don’t panic! That just means the moisture evaporated a tiny bit. All you need to do is add a few drops of water at a time—literally, just a few drops—and give it a good, slow hand-whisk until it comes back to life. If you needed it for flooding and it’s now too stiff, just whisk in a tiny bit more water until you get that smooth, 10-second level time again. That’s how we stretch our ingredients here at Cheffinity; efficiency is everything!
For more background on how we test things to ensure they work in a real-life, somewhat chaotic kitchen environment, you can always read up on our mission over on the about page. We always aim for foolproof techniques!
Estimated Nutritional Data for This Sugar Cookie Icing Recipe
Because this sugar cookie icing recipe is so simple—mostly powdered sugar, right?—it’s important to remember that the nutrition is concentrated in the sugar content! When we look at the data for a standard serving size (about 1/4 cup of the prepared icing), you can see that it’s definitely a treat, not a health food staple. We test these recipes for amazing flavor and consistency, not for low-carb counts, so keep that in mind!
This is just baseline data, so keep in mind that the exact numbers can swing wildly depending on the brand of powdered sugar you use or if you decide to sneak in a few extra drops of vanilla or use milk instead of water. It’s an estimate, folks, but a helpful one for keeping track!
- Serving Size: 1/4 cup icing
- Calories: 180
- Sugar: 45g
- Sodium: 10mg
- Fat: 0g
- Protein: 1g
- Carbohydrates: 45g
There you have it! Pure, delicious sweetness designed to harden perfectly on your cookies. Enjoy every bite!
PrintFoolproof Sugar Cookie Icing Recipe That Hardens Perfectly & Dries Glossy

Learn how to make easy sugar cookie icing that sets solid and dries with a smooth, glossy finish. This recipe is ideal for decorating cut-out cookies for gifting or stacking.
- Prep Time: 15 min
- Cook Time: 0 min
- Total Time: 15 min
- Yield: Covers approximately 2 dozen medium cookies 1x
- Category: Baking
- Method: Mixing/Decorating
- Cuisine: American
- Diet: Vegetarian
Ingredients
- 4 cups powdered sugar, sifted
- 1/2 cup meringue powder
- 1/2 teaspoon vanilla extract
- 6 to 8 tablespoons water (or milk)
Instructions
- In a large bowl, combine the sifted powdered sugar and meringue powder. Mix them together briefly with a whisk.
- Add the vanilla extract and 6 tablespoons of water to the dry ingredients.
- Beat the mixture with an electric mixer on low speed until combined, then increase the speed to medium-high and beat for 3 to 5 minutes until the icing is smooth and holds stiff peaks. This is your outline consistency.
- If the icing is too thick for outlining, add water one teaspoon at a time until you reach the desired stiffness.
- For flooding consistency, add 1 to 2 more tablespoons of water until the icing flows smoothly when drizzled from a spoon, leveling out in about 10 seconds.
- Divide the icing into bowls for coloring, if desired. Use gel food coloring for best results.
- Outline your cookies using the stiff icing consistency. Let the outline dry for at least 30 minutes until firm.
- Flood the outlined areas with the thinner icing consistency. Gently spread the icing to the edges with a scribe tool or toothpick.
- Allow the cookies to dry completely at room temperature for several hours, or overnight, until the icing is hard and glossy.
Notes
- For icing without corn syrup, this meringue powder recipe provides the necessary structure to harden perfectly.
- To achieve a very glossy finish, use a small amount of clear vanilla extract instead of standard vanilla extract.
- If you need a faster-drying icing for intricate work, consider using a true Royal Icing recipe that incorporates egg whites instead of meringue powder.
- Store unused icing in an airtight container at room temperature for up to two days; add a few drops of water and re-mix if it becomes stiff.
Nutrition
- Serving Size: 1/4 cup icing
- Calories: 180
- Sugar: 45
- Sodium: 10
- Fat: 0
- Saturated Fat: 0
- Unsaturated Fat: 0
- Trans Fat: 0
- Carbohydrates: 45
- Fiber: 0
- Protein: 1
- Cholesterol: 0