
Oh, I totally get it. That sinking feeling when you pull a tray out of the oven expecting those glorious, towering, golden giants, and instead, you get sad, flat, slightly soggy discs. Happens to the best of us! But listen, making a truly fantastic **Yorkshire pudding**—crispy on the outside, impossibly light and airy inside—isn’t magic. It’s just knowing the right technical tricks. That’s why I’m sharing my foolproof method here at Cheffinity. As I share more about our mission here, you’ll see that we believe dinner shouldn’t feel like a high-stakes performance. We focus on effective systems, and this recipe for classic Yorkshire puddings is a total time-saver that delivers maximum comfort and height every single time. If you need reliable results without the stress, you’re in the right spot.
- Why This is the Best Yorkshire Pudding Recipe You Will Ever Use
- Ingredients for Your Foolproof Yorkshire Puddings
- Essential Equipment for Making Yorkshire Puddings
- How to Make Yorkshire Puddings: Step-by-Step Instructions
- Yorkshire Pudding Tips and Tricks for a Traditional British Side Dish
- Variations on the Classic Yorkshire Pudding Recipe
- Storage and Reheating Instructions for Yorkshire Puddings
- Estimated Nutritional Data for Yorkshire Pudding
- Share Your Homemade British Comfort Food Success
Why This is the Best Yorkshire Pudding Recipe You Will Ever Use
I promise you, this is the **Best Yorkshire Pudding** recipe you’ll ever need. Why am I so confident? Because we address the two main enemies of the perfect pudding: cold batter hitting lukewarm fat. That’s the quickest way to get flat Yorkshire puddings, but this method is totally **foolproof Yorkshire puddings** proofed against that problem. We rely on pure food science—the contrast between the resting batter and the screaming hot fat—to force that spectacular rise.
Achieving Crispy Yorkshire Puddings and Fluffy Yorkshire Puddings
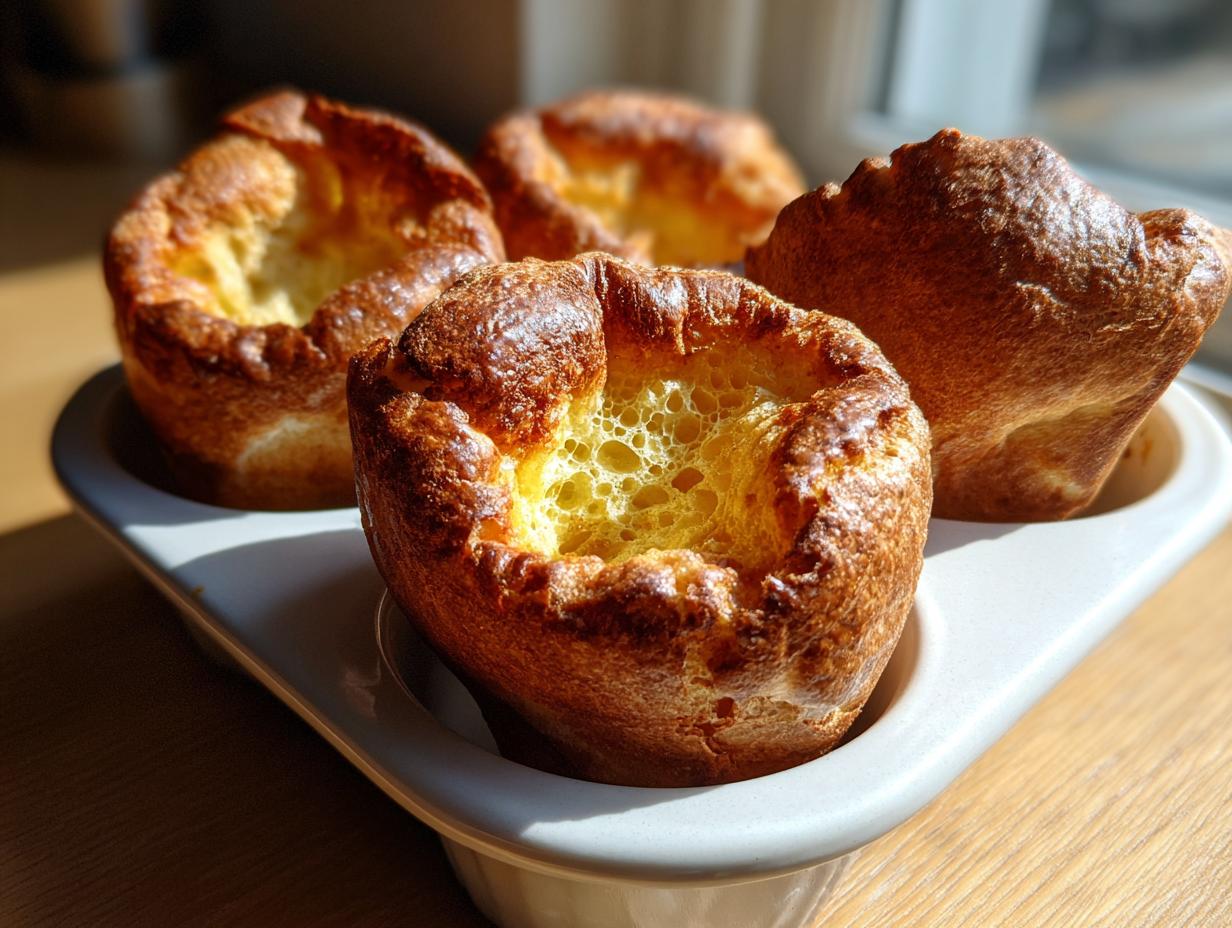
The dream texture is a deeply golden, shatteringly crispy outside that cups perfectly, surrounding an interior that’s light and airy, almost like a cloud. That’s the hallmark of a **crispy Yorkshire puddings** that melts in your mouth. You get this contrast only by utilizing an oven temperature of 450 degrees F. Trust me on the heat; it’s non-negotiable for that golden brown result.
Ingredients for Your Foolproof Yorkshire Puddings
The beauty of these **Yorkshire Pudding Recipe** treats is how simple the ingredient list is! Seriously, you probably have everything in your pantry right now. We need just four core things for the batter, plus the essential fat for baking. You’ll need 1 cup of all-purpose flour, 1 cup of whole milk, 2 large eggs, and half a teaspoon of salt. For the tin, we use 4 tablespoons of beef dripping or a neutral vegetable oil. Remember, this fat is everything—it locks in the moisture and creates the puff!
Ingredient Notes and Substitutions for Yorkshire Pudding Batter
If you’re making meat-free versions, don’t even think about skimping on the fat; just swap the beef dripping for a flavorless vegetable oil or sometimes even melted butter, though dripping is traditional. Whole milk is a must here; skim milk just doesn’t carry the richness we need for that fluffy texture. Also, if you want one giant, impressive pudding instead of 12 individual ones, just use a 9×13 inch dish and bump up that fat amount to about 1/4 cup. Easy adjustments for your **easy Yorkshire pudding batter**!
Essential Equipment for Making Yorkshire Puddings
You don’t need a fancy stand mixer or anything too specialized for these. We are all about making delicious things without buying a million gadgets, right? For this batch of **individual Yorkshire puddings**, you absolutely need a muffin tin—specifically, a standard 12-hole tin works perfectly according to this recipe. Make sure your tin is heavy-bottomed, as it holds heat much better when it goes into that roaring hot oven.

Aside from the tin, I always grab a good, sturdy bowl for mixing the batter, and I highly recommend a decent whisk. Trying to mix this silky smooth batter with only a fork just results in frustrating lumps and arm fatigue! If you’re prepping ahead and making a huge batch of side dishes, you might want to get your zucchini fritters batch done first, but keep this Yorkshire pudding tin clean and ready for the fat!
Also, and this is important for safety, grab some good, thick oven gloves or mitts. When that fat is smoking hot, you shouldn’t be fumbling around opening the oven door. Work confidently!
How to Make Yorkshire Puddings: Step-by-Step Instructions
Okay, let’s get serious about the process. Getting those **puffy popovers** is all about two things: the batter consistency and the temperature shock. You can’t rush either step! Even if you’re just whipping up a quick side dish for your roast beef, you need to follow the resting rule. This easy **Yorkshire pudding batter** needs time to settle down and hydrate properly, which is what gives us that final airy lift in the oven.
Pudding Batter Secrets: Mixing and Resting
First things first: we build flavor and structure gently. You must sift your flour and salt together first—this keeps things light! Make a well in the center, crack those eggs in, and start whisking the eggs into the flour slowly around the edges. Then, and this is where you need patience, slowly pour in the whole milk while you keep whisking. Ignore any tiny lumps; we do not want to overwork this batter. Next, you MUST let it rest. Seriously, set a timer for at least 30 minutes at room temperature, or even pop it in the fridge for a few hours if you’re prepping way ahead. Those **pudding batter secrets** truly unlock height!
The Hot Fat Technique for Perfect Yorkshire Pudding Rise
While the batter rests, get your tin loaded up with the fat—beef dripping, remember?—and shove it into the oven when you preheat it to 450°F (230°C). We want that fat to be shimmering and just beginning to smoke before the batter even hits it. As soon as the batter is ready, you have to work fast! Pull that screaming hot tray out, pour the batter quickly and evenly into each cup (only fill it about a third full!), and get it straight back into the oven! Whatever you do, do not open that door for the first 20 minutes. That trapped steam is what creates the magic for that amazing **Yorkshire pudding rise**.
If you want to see this technique in action from another great home cook, check out some tips that align with this method over at this great resource. Don’t forget, after that initial bake time, you can add a pinch of sugar or another savory sauce later, like my easy dumpling sauce, but only once they are puffed!
Yorkshire Pudding Tips and Tricks for a Traditional British Side Dish
So, you’ve nailed the batter rest and you’ve got the fat smoking hot—fantastic! But what if they still don’t pop up perfectly? Sometimes you need a few more **Yorkshire Pudding Tips and Tricks** to troubleshoot your **Traditional British Side Dish**. The number one mistake I see people make is using a batter that’s too thick. If your batter sits more like pouring paint than thin cream, it won’t lift properly. Add a splash more milk until it flows easily. Another common issue is opening the door too soon; resist that urge for at least 20 minutes, or you’ll deflate the whole batch.
Serving Suggestions for Your Golden Brown Puddings
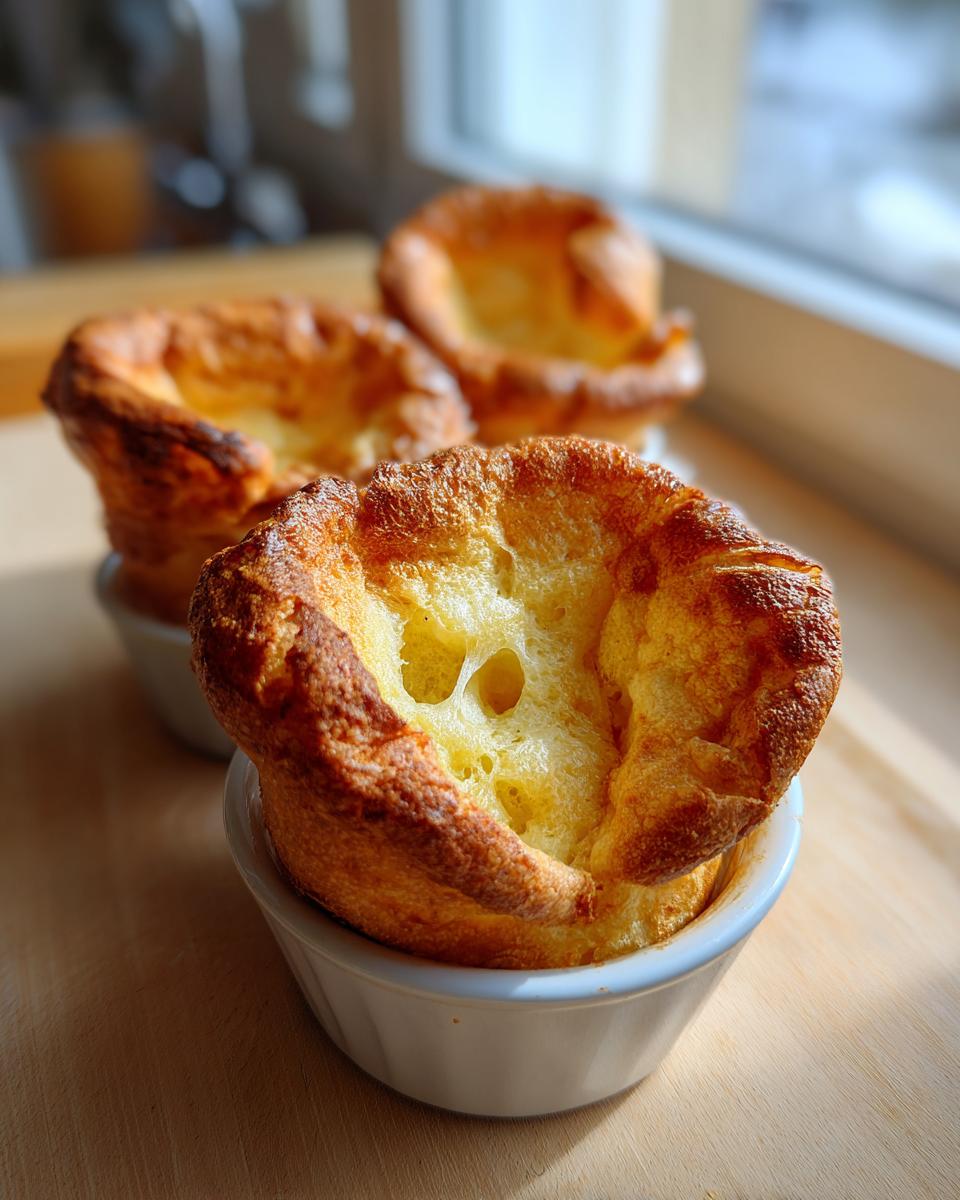
Once you have those gorgeous, tall, **golden brown puddings**, they are practically begging for gravy! Obviously, these are the essential accompaniment to any proper roast dinner—beef is the traditional partner, but they are wonderful with chicken or even lamb. Make sure your gravy is rich and hot when you serve them so they have something warm to soak up immediately. I love balancing the richness by serving them alongside something green, like tenderstem broccoli, or my classic shepherd’s pie filling if I’m making them as a main course side!

If you are still battling a slight slump, I highly recommend checking out this guide on getting perfect lift; sometimes just seeing another seasoned cook explain the heat element makes all the difference!
Variations on the Classic Yorkshire Pudding Recipe
While I am religious about keeping the core method the same for that lift, I know life throws curveballs, and sometimes you need options! This recipe is designed for **individual Yorkshire puddings**—the perfect portion size, really—but you can absolutely adapt it. If you’re feeding a huge crowd, remember that a 9×13 dish loaded with the same amount of batter works, but you’ll see a slightly lower profile since the heat penetration is different across one large surface area.
Now, I also hear lots of chatter online about celebrity recipes, like the famous **Gordon Ramsay Yorkshire Pudding** method. Honestly, they all boil down to the same foundation: *hot fat and a thin batter*. He emphasizes fat temperature, just like I do. If you are looking for huge volume like you see in those professional kitchen photos, just ensure your fat is truly smoking before pouring!
I also get asked a lot about making **Gluten Free Yorkshire Pudding** versions. It can be done! If you need to swap out the wheat flour, I really recommend sticking to a commercial 1-to-1 gluten-free blend initially, as gluten-free flours can sometimes absorb liquid differently. You might need a tiny bit more milk or an extra minute of chilling time for the batter to adjust. For a great resource on making that swap work, you should check out the tried-and-true tips over here.
Of course, these aren’t just for beef! They are brilliant alongside mashed potatoes—especially if you’re making my garlic parmesan mashed potatoes—so feel free to customize your roast dinner menu!
Storage and Reheating Instructions for Yorkshire Puddings
Look, sometimes even after making these glorious puddings, there are leftovers, or maybe you just need to make them ahead of time for a big gathering. Dealing with leftovers from a **quick weeknight dinners** staple can be tricky because the minute they cool, they start to lose that beautiful crisp texture we worked so hard for. The great news is that these are incredibly resilient if you store them right!
First, make sure they are completely cool before you seal them up. If you put warm Yorkshire puddings into a container, you are essentially steaming them inside, and we are working against everything we love about a crunchy exterior! Once they’ve cooled down on the counter, transfer them right into an airtight container. They’ll keep perfectly well in the fridge sealed up for two to three days. Don’t try to freeze them for long periods; the texture just doesn’t survive the thawing process very well.
Now, for reheating—this is where you save the day! You absolutely, 100%, cannot rely on the microwave. A microwave will turn your glorious, **crispy Yorkshire puddings** into sad, squishy sponges, and we simply won’t have that. The only way to bring them back to their former fluffy glory is high heat in a dry oven. Set your oven to about 400°F (200°C). Pop the puddings directly onto a wire rack set over a baking sheet. This allows air to circulate underneath, crisping the bottom layer too! These are perfect for an easy weeknight meal.
Bake them for about five to eight minutes. You’ll know they are ready when you hear that slight crackle when you touch them and they feel light as air again. They come out smelling almost as good as they did fresh out of the oven. This simple trick means you can prep these ahead of time for your big Sunday roast feast and still serve them piping hot! It really helps when you’re managing a huge meal like that, doesn’t it?
Estimated Nutritional Data for Yorkshire Pudding
Since we are all about keeping things straightforward here at Cheffinity, I want to give you a ballpark idea of what’s in one of these beauties. Remember, these numbers are just estimates based on the standard 12-pudding batch using the ingredients listed—your actual totals will vary based on exactly how much fat you use in the tin!
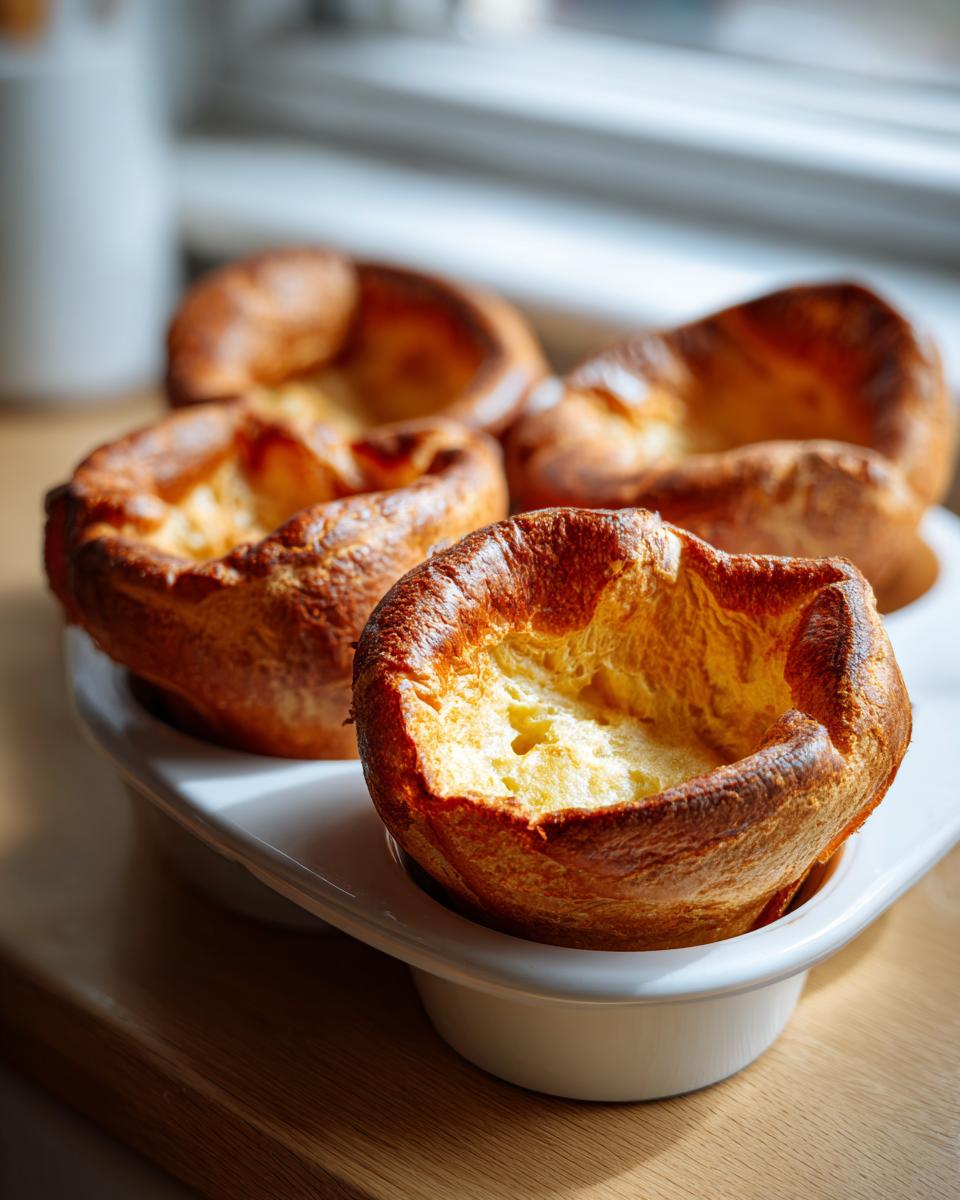
When you look at one of these golden delights, you might think they are just empty air, but they pack a nice little punch of necessary fuel for tackling the rest of your big roast dinner. Eating a couple of these after your roast beef is pure, unadulterated homemade British comfort food.
- Serving Size: 1 pudding
- Calories: 120
- Fat: 6g
- Saturated Fat: 2g
- Carbohydrates: 13g
- Protein: 5g
- Sugar: 1g
- Sodium: 150mg
See? Not bad at all for something that tastes this indulgent. They use basic pantry staples, which is why this recipe is also super cost-effective if you’re worried about prices! It’s high comfort food quality without the expensive fuss or the need for specialized ingredients.
Share Your Homemade British Comfort Food Success
Alright, now that you have the full system for making incredible, high-rising Yorkshire puddings, I absolutely need to know how it went! Did you get that magnificent puff? Did you manage to pull them out of the oven without peeking too soon? Please don’t be shy! Head down to the comments below and tell me everything. I love reading your successes, especially when you tell me this recipe finally solved that tricky bit of your Sunday roast preparation.
If you loved this foolproof method, please give the post a quick 5-star rating—it really helps other busy cooks find this guide! And if you snapped a picture of those perfect, golden edges cradling all that delicious gravy, tag us on social media! We cherish seeing our readers’ **homemade British comfort food** come to life in your kitchens.
We built Cheffinity to take the stress out of getting a fantastic meal on the table, and nothing makes me happier than hearing how a recipe like this made your week easier. If you have any other questions or just want to share a different way you serve them, don’t hesitate to reach out via the contact page. Happy baking, and enjoy every bite of that amazing crispiness!
PrintThe Perfect Foolproof Yorkshire Pudding: Crispy Outside, Fluffy Inside

Make light, airy, and perfectly crisp Yorkshire puddings every time. This classic British side dish uses simple pantry ingredients and is ideal for your Sunday roast or holiday dinner.
- Prep Time: 10 min
- Cook Time: 25 min
- Total Time: 35 min
- Yield: 12 individual puddings 1x
- Category: Side Dish
- Method: Baking
- Cuisine: British
- Diet: Vegetarian
Ingredients
- 1 cup all-purpose flour
- 1 cup whole milk
- 2 large eggs
- 1/2 teaspoon salt
- 4 tablespoons beef dripping or vegetable oil (for the tin)
Instructions
- Place a 12-hole muffin tin or a large roasting tin into the oven. Add about 1 teaspoon of beef dripping or oil into each cup. Preheat the oven to 450°F (230°C). Heating the fat until it is smoking hot is key to a good rise.
- While the fat heats, prepare the batter. Sift the flour and salt into a large bowl. Make a well in the center.
- Crack the eggs into the well. Begin whisking the eggs, gradually incorporating the flour from the sides.
- Slowly pour in the milk while continuously whisking until you have a smooth, thin batter, similar in consistency to thin cream. Do not overmix; a few small lumps are acceptable.
- Let the batter rest at room temperature for at least 30 minutes, or chill it in the refrigerator for up to several hours. Resting improves the final texture.
- Once the oven and fat are very hot, carefully remove the tin from the oven. The fat should be shimmering or just starting to smoke. Work quickly to avoid losing heat.
- Pour the batter evenly into the hot fat, filling each cup about one-third full. Work fast to keep the fat hot.
- Immediately return the tin to the hot oven. Do not open the oven door for the first 20 minutes of cooking.
- Bake for 20 to 25 minutes, or until the puddings are well-risen, deep golden brown, and crispy.
- Serve immediately with roast beef and gravy.
Notes
- For the best rise, the batter must be cold and the fat must be smoking hot when you pour the batter in.
- Use beef dripping for the most traditional flavor, but vegetable oil works well if you need a vegetarian option.
- This recipe makes individual Yorkshire puddings. For a large, single pudding, use a 9×13 inch baking dish and increase the fat to 1/4 cup.
Nutrition
- Serving Size: 1 pudding
- Calories: 120
- Sugar: 1
- Sodium: 150
- Fat: 6
- Saturated Fat: 2
- Unsaturated Fat: 4
- Trans Fat: 0
- Carbohydrates: 13
- Fiber: 0
- Protein: 5
- Cholesterol: 50