

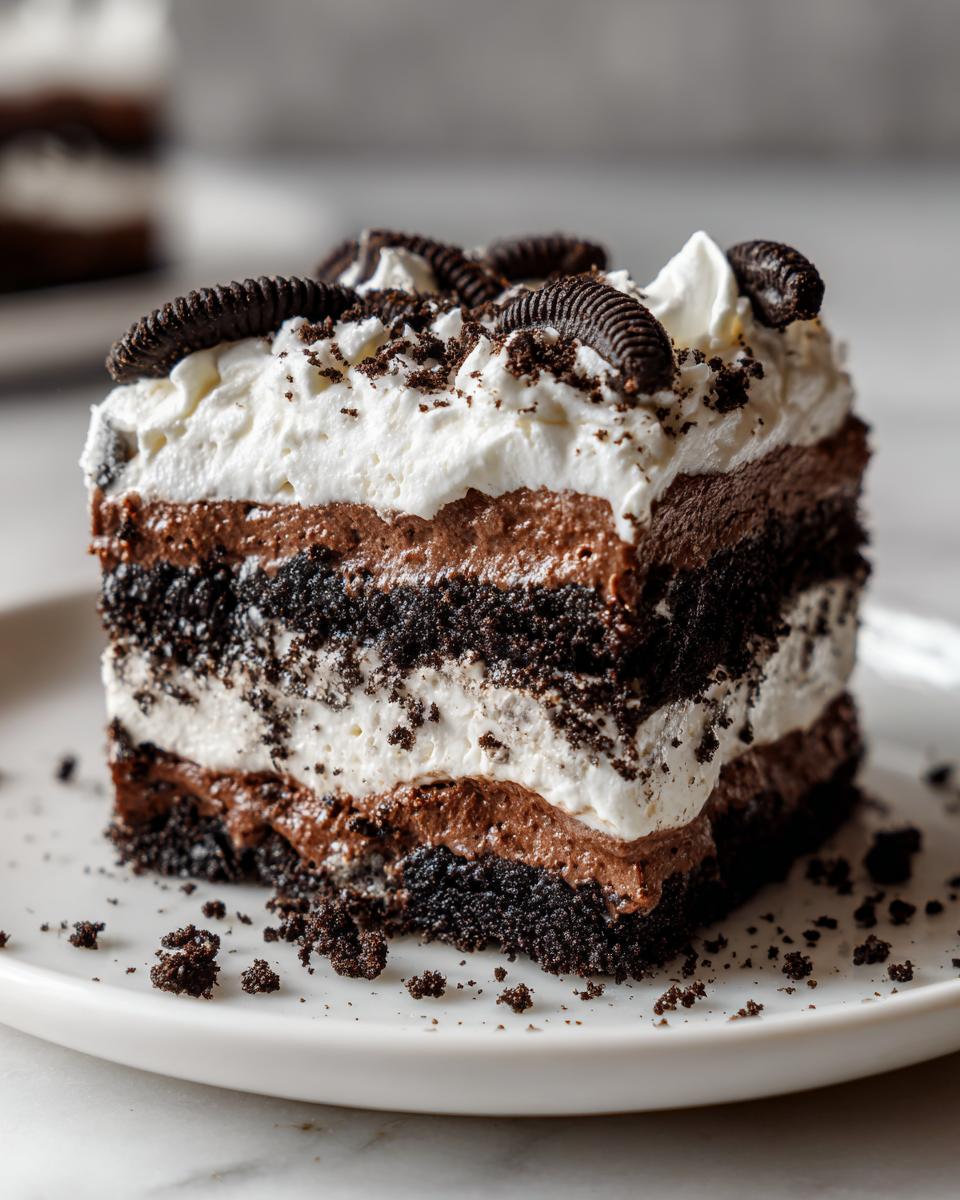
If you’re staring down a busy weeknight or planning a party where you need maximum ‘wow’ factor for minimum oven time, I have the ultimate rescue mission for you. Forget complicated baking because we are diving straight into pure, creamy nostalgia! This recipe for the Ultimate No-Bake Oreo Dirt Cake isn’t just dessert; it’s a staple that I, Ava Sinclair, streamlined from childhood memories into the efficient, delicious treat it is today. It uses simple pantry heroes to create layers that everyone, especially the kids, will dig right into. When you need something reliably fantastic, check out our collection of delicious dessert recipes, but start right here!
- Why This No Bake Oreo Dirt Cake is Your New Family Favorite Dessert
- Essential Ingredients for the Ultimate Dirt Cake
- Step-by-Step Instructions for Your No Bake Dirt Cake
- Serving Suggestions for Your Dirt Cups
- Tips for Success with This Classic American Dessert
- Ingredient Notes and Substitutions
- Storage and Reheating Instructions
- Frequently Asked Questions About Oreo Dessert
- Share Your Thoughts on This Creamy Dessert Recipe
Why This No Bake Oreo Dirt Cake is Your New Family Favorite Dessert
Honestly, this dirt cake is the dessert I turn to when my calendar looks terrifying. It’s the definition of a make ahead dessert, meaning you do zero work when company shows up! It’s such an easy party dessert because it feeds a crowd instantly, and trust me, it’s wildly kid friendly dessert approved. I’ve made this for everything from last-minute school potlucks to full-blown birthday blowouts, and it always disappears first.
Quick Assembly for the Dirt Cake
You’ll see in the timings that the active prep is only about 25 minutes. That’s it! You aren’t waiting for anything to bake or cool down overly long. This is hands-down one of the fastest, most impressive quick dessert recipe you’ll ever keep in your back pocket. You just mix, layer, and chill. Simple as that!
The Creamy Layers of This Dirt Cake
This isn’t just sugar and crushed cookies, friends. The secret weapon that elevates this above basic pudding—and this is where my systematic approach comes in—is the cream cheese base. That’s what gives us that luxurious, slightly tangy structure, making it a genuinely excellent creamy dessert recipe. It firms up perfectly during the chill time, so every single scoop holds its shape.
I always make time to check out easy breakfast ideas too, because who doesn’t love simple starts to the day, but nothing beats the satisfaction of this no-bake wonder!
Essential Ingredients for the Ultimate Dirt Cake
Okay, let’s talk about what goes into making this decadent dream happen! Since this is a no bake chocolate dessert, the quality of your simple components really shines through. We aren’t baking anything away, so you want your ingredients ready to go straight into the mix. Make sure your butter and cream cheese are truly soft—room temperature, not microwave-warmed—otherwise, you’ll end up fighting lumps, and nobody needs that!
Here is what you need to gather for the full experience:
- 1 package (14.3 ounces) Oreo cookies (All of them, filling included!)
- 1 package (8 ounces) cream cheese, softened perfectly
- 1 cup unsalted butter, softened beyond reproach
- 1 cup powdered sugar
- 1 container (12 ounces) frozen whipped topping, thawed (the light stuff!)
- 2 packages (3.9 ounces each) instant chocolate pudding mix
- 3 cups cold milk (Use cold milk, seriously!)
- 1 container (8 ounces) frozen whipped topping, thawed (This is the top coat)
- Gummy worms, because what’s dirt without worms?
You can find amazing recipes for things like Jalapeño Popper Dip, but nothing beats this quick dessert when you need something sweet!
Crushing the Oreos for Perfect Dirt Cake Texture
This is arguably the most important (and loudest!) step. You want that perfect, fine, soil-like texture—not chunky gravel!
Take all those glorious Oreos, filling and all, and toss them into a heavy-duty zip-top freezer bag. Then, grab a rolling pin or maybe even the bottom of a sturdy saucepan. Smash them up! You need them fine, like actual loose earth. Once they look suitably muddy, pull out about 2 cups of those crumbs and set them aside immediately. That reserved batch is just for the final, dusty topping layer, so don’t mix it into the filling!
Step-by-Step Instructions for Your No Bake Dirt Cake
Alright, let’s get this thing built! Since this is a layer-ed pudding dessert, the sequence matters, but don’t stress—it’s so forgiving. The whole assembly phase flies by, especially since we already crushed our cookies. Remember, we are aiming for layers that set up beautifully so you get that perfect bite of cream and cookie every time. If you want to see how I tackle other quick meals during the week, check out my tips for quick weeknight dinners!
Creating the Cream Cheese Filling Base
This is where the richness happens. Grab your biggest mixing bowl. You’re going to start by whipping together that softened cream cheese, the softened butter, and the powdered sugar. I insist on using that electric mixer here! You want this mixture almost ridiculously smooth—no little chunks of cream cheese hiding! Beat it until it looks pale, light, and fluffy enough to spread easily. Once that base is perfect, gently fold in one container of your thawed whipped topping. Be gentle; we want to keep those air bubbles in there!
Assembling the Layered Pudding Dessert
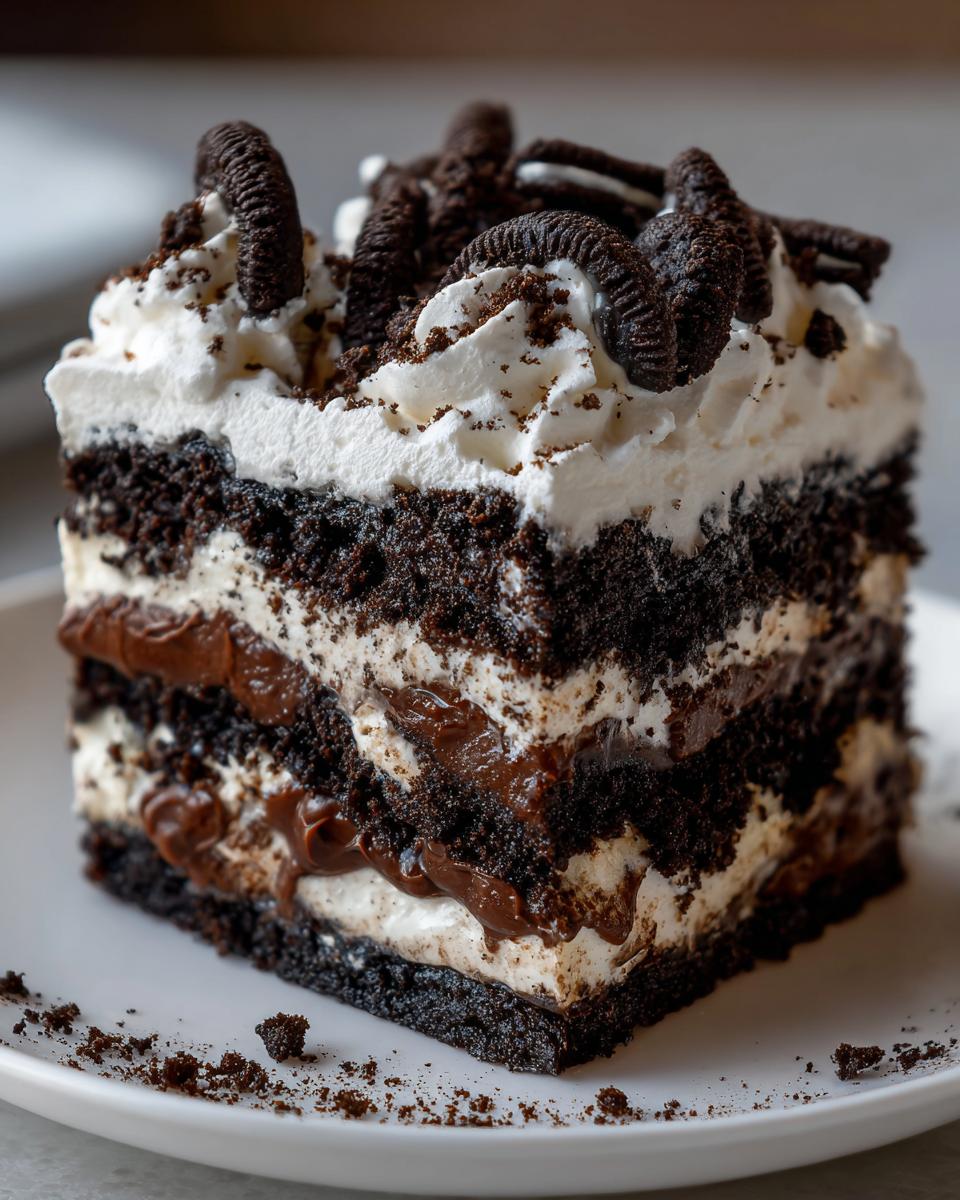
Now it’s time for the star: the pudding. Whisk up your instant chocolate pudding with the cold milk until it starts thickening up nicely—that usually takes just two minutes, but don’t stop mixing! Then, you’ll gently fold that thickened pudding into your cream cheese mixture until everything is uniform. Don’t beat it hard here; just enough to combine.
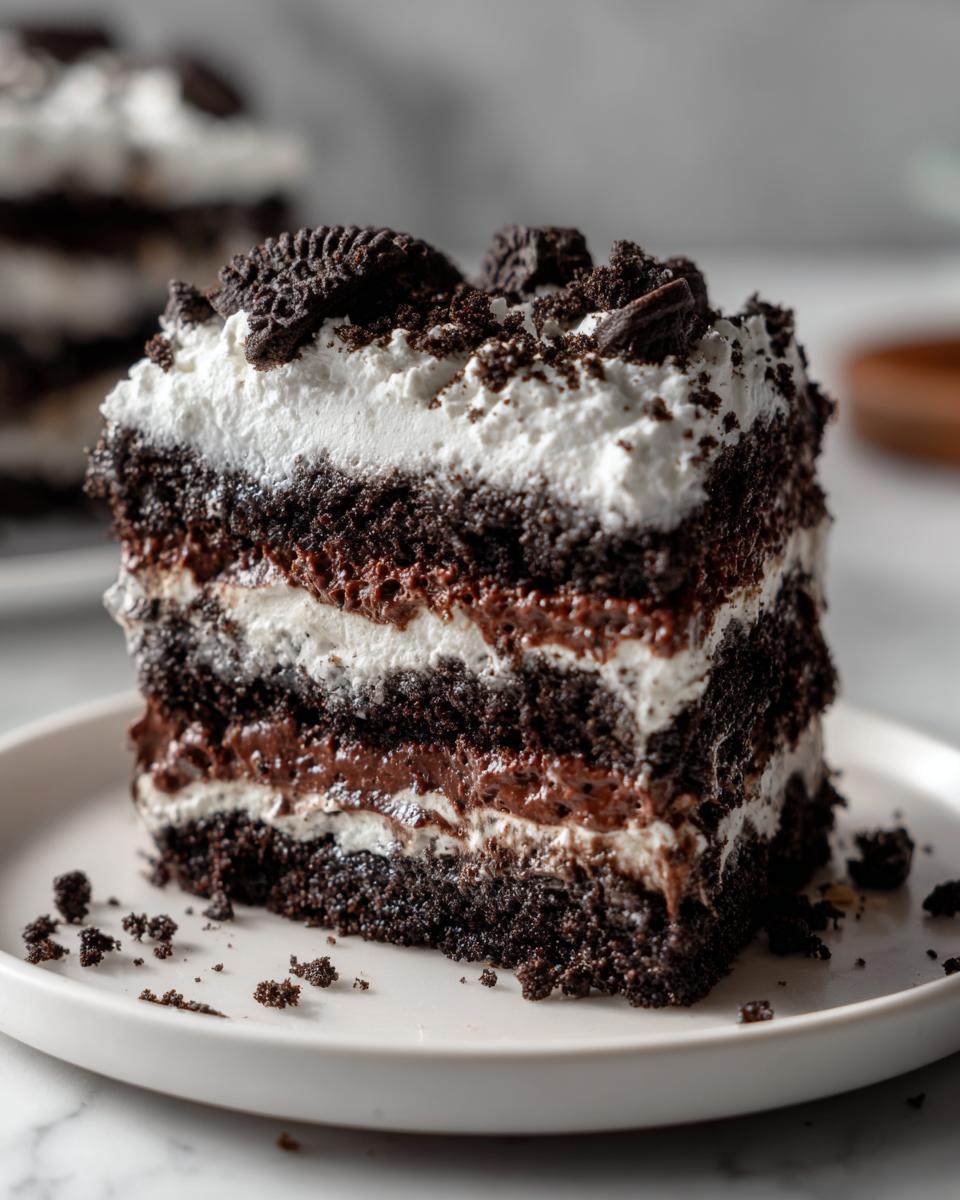
For our 9×13 inch dish, here’s the order: Spread half those crushed Oreos across the bottom—that’s your first layer of “dirt.” Then dollop half of your creamy filling right on top and spread it gently. Repeat that: the rest of the crushed cookies, followed by the rest of the cream filling. Make sure the top layer of cream is relatively smooth. Cover this tightly with plastic wrap—make sure it’s not touching the top of the filling—and tuck it into the fridge. It must chill for at least 4 hours, but trust me on this: overnight is when this cream cheese dessert really hits its stride!
Serving Suggestions for Your Dirt Cups
While I adore making this dessert in a big 9×13 pan for parties (it looks gorgeous when you slice into it!), sometimes you just need something portion-controlled, especially when the kids are rushing the dessert table. That’s where making individual Dirt Cups comes in, and it really lets you play up the fun!
If you want to go the cup route—which is fantastic for picnics or just stopping people from hovering over the main dish—grab some small, clear plastic cups or even little terracotta pots (make sure they are food safe, please!). You just assemble the exact same ingredients, but you layer them right inside those individual cups.
This is where you get to lean hard into the theme! Since everyone gets their own little serving, you can push those gummy worms right into the top layer of ‘dirt’ on every single cup. It makes for such a fun presentation, and frankly, it makes portion control easy because everyone just grabs their own.

If you are looking for more ideas on desserts that travel well, pop over and see what else we have listed in our delicious dessert recipes section. But in the meantime, enjoy showing off those fantastic Gummy Worm Desserts!
Tips for Success with This Classic American Dessert
Even though this is a no bake pudding cake, there are a few tiny, chef-approved tricks I use to make sure it sets up perfectly every time. One thing I always do is check the expiration date on my instant pudding mix! If it’s past its prime, it won’t set up right, and then you end up with that sad, runny mess in the fridge—we absolutely can’t have that with this Classic American Dessert.
Also, don’t skimp on the chilling! I know waiting is the hardest part, but this dessert needs time for the flavors to mingle and for that cream cheese filling to firm up around those cookie pieces. For the best structure, I always recommend giving it a full overnight rest in the refrigerator. You can find more about my philosophy of efficient cooking over at the Cheffinity about page, but trust me on the chilling!
Make Ahead Dessert Timing
This is truly the ultimate make ahead dessert. While you *can* serve it after the mandatory four-hour chill, the flavor is honestly ten times better on day two. When it sets overnight, the moisture from the pudding seeps just slightly into the Oreo crumbs, creating this incredible, dense, fudgy texture throughout the layers. It transforms!
Plus, if you make it the day before, you free up your party day entirely for setting out snacks or, you know, relaxing! It’s ready when you are, which is exactly what busy home cooks like us need. To see how another great baker approaches this classic, check out this resource on Oreo Dirt Cake.
Ingredient Notes and Substitutions
Since this recipe is so straightforward—it’s basically just assembling fantastic no-bake components—I want to be really clear about the ingredients so you get that perfect texture we talked about. Trust is huge for me here because if the pudding doesn’t set, the whole thing goes sideways! I always appreciate when recipes lay out substitution options, so here are my thoughts on keeping this simple cookie dessert perfect.
First up: the whipped topping. I used the store-bought frozen kind because it’s stable, incredibly light, and it folds beautifully into the cream cheese mixture. If you wanted to make your own stabilized homemade whipped cream, you absolutely can, but you would need to add a stabilizer like gelatin or pudding mix to it, which just adds extra steps we are trying to avoid! For a true weeknight hero, stick to the tub!
Now, let’s talk pudding. We call for chocolate pudding because I think it really completes the dark, rich ‘dirt’ look we are aiming for, matching up nicely with the Oreos. However, if you aren’t a huge dark chocolate fan, or maybe you just ran out of the chocolate mix, you can totally swap it for instant vanilla pudding. That gives you what some folks call a “white dirt” base, which is still delicious, though sometimes it gets called a no bake pudding cake variation rather than the classic deep chocolate.
If you are looking elsewhere for ideas on a truly simple version of this dessert, you might see recipes that only use four ingredients, but those often skip the cream cheese/butter mixture, which is what gives us that superior structure. You can explore one such recipe for a classic take here, but just remember that our version is richer!
The key thing here—especially if you are making this for a crowd or as an easy party dessert—is that the instant pudding MUST be cold milk, and the pudding needs a good two-minute whisking time before you fold it into anything else! That mechanical action is what activates the thickening agents.
Storage and Reheating Instructions
Since this dirt cake is almost entirely dairy and whipped topping based, keeping it cool is vital for both safety and texture. The good news is this is a fantastic make ahead dessert! Once assembled (after the final layer of whipped topping goes on), cover that 9×13 dish tightly—I mean *really* tight—with plastic wrap, and tuck it into the refrigerator.
It does fantastic sitting in the cold for up to four days. I’ve found that day three is often the absolute peak because the moisture has fully married the cookie crumbs, making the whole thing wonderfully soft and rich. Just make sure you cover it well, or the edges of the whipped topping might start absorbing weird fridge smells. Yuck!
Now, about reheating—please don’t even try it! Since this is a classic no bake chocolate dessert built on stabilized fillings, heat will just turn our beautiful, firm layers into a soupy disappointment, especially where those whipped toppings are concerned. If you happen to freeze leftovers (which I don’t recommend for more than a week), you need to let them thaw slowly overnight in the refrigerator. Do not try to rush it on the counter, or you’ll weep when the structure collapses.
Serving it straight from the fridge keeps that creamy dessert recipe texture spot-on. It holds its shape nicely when cold, which is perfect for serving slices or scooping those individual dirt cups!
Frequently Asked Questions About Oreo Dessert
I knew you’d have questions! When you’re dealing with a nostalgic favorite like this, details matter, especially when you want it to be the best Oreo dessert at the party. Addressing the little things upfront saves you time and heartbreak later. My goal is to make sure your dirt cake sets up flawlessly!
Can I use a different cookie besides Oreos in this dessert?
That’s a bold question, but I admire the creativity! Here’s the thing: the classic, deep, rich crunch of the Oreo wafer *is* what makes this a true dirt cake. It’s what gives us that perfect contrast to the creamy filling underneath. That said, if you absolutely had to substitute (maybe you’re baking for someone with a cream filling allergy, or you’re out of the full cookie), you could try chocolate wafer cookies. Those are thin and crumbly, which works okay. Even Nilla Wafers are sometimes used in variations for a lighter, almost cheesecake-like flavor, but honestly, you lose that essential dark ‘dirt’ color and flavor profile. Stick to Oreos for the best result!
What is the history of this easy party dessert?
It’s funny how this simple dessert has such widespread popularity! While no single person can claim ownership of the original recipe, the versions that became famous—the creamy, layered ones—really took off in the late 1980s and early 90s across the American Midwest. It just exploded as the perfect, low-effort easy party dessert because it travels well, feeds a ton of people, and it’s inherently fun. It’s one of those truly great, unsung Classic American Desserts!
I always love hearing where people first tried theirs! If you need to reach out with a specific query about the proportions or method in this recipe, feel free to use our contact page. And for another take on making those great party treats, check out this recipe inspiration over here.
Share Your Thoughts on This Creamy Dessert Recipe
So, there you have it! The whole scoop on achieving the most perfect, creamy, no-bake dirt cake imaginable. I truly hope this recipe saves your next party, potluck, or spontaneous craving for something sweet and chocolatey!
Now, tell me about your experience! I built this site to be a place for real cooks tackling real-life dinner (and dessert!) dilemmas, and your feedback helps everyone else cooking from Cheffinity. Did you go big with the 9×13 layered setup, or did you whip up a batch of individual dirt cups for the kids?
Leave me a rating below—five stars means I successfully kept your weeknights easy! And don’t forget to snap a picture, especially if you went wild with those gummy worms. Sharing your photos helps build this wonderful community we have here. We all learn from what works best in different kitchens!
If you have any questions at all about substituting that pudding flavor or getting that topping just right, feel free to drop a comment; I read every single one. If you want to know more about how we handle user data and privacy for our community members, you can read our privacy policy, but know that engaging with the recipes is always the main goal!
PrintUltimate No-Bake Oreo Dirt Cake

Make this easy, no-bake Oreo Dirt Cake featuring creamy layers of pudding, cream cheese filling, and crushed Oreos. It is a classic American dessert perfect for parties or as individual dirt cups with gummy worms.
- Prep Time: 25 min
- Cook Time: 0 min
- Total Time: 4 hours 25 min
- Yield: 12 servings 1x
- Category: Dessert
- Method: No Bake
- Cuisine: American
- Diet: Vegetarian
Ingredients
- 1 package (14.3 ounces) Oreo cookies
- 1 package (8 ounces) cream cheese, softened
- 1 cup unsalted butter, softened
- 1 cup powdered sugar
- 1 container (12 ounces) frozen whipped topping, thawed
- 2 packages (3.9 ounces each) instant chocolate pudding mix
- 3 cups cold milk
- 1 container (8 ounces) frozen whipped topping, thawed (for topping)
- Gummy worms, for decoration
Instructions
- Separate the Oreo cookies. Place the cream filling aside. Place the cookie wafers into a large zip-top bag and crush them finely using a rolling pin until they resemble dirt. Set aside about 2 cups of the crushed cookies for the top layer.
- In a large bowl, beat the softened cream cheese, softened butter, and powdered sugar together until the mixture is smooth and creamy.
- Fold in one container of the thawed whipped topping until just combined.
- In a separate bowl, whisk together the instant chocolate pudding mix and cold milk until the mixture thickens, about 2 minutes.
- Gently fold the pudding mixture into the cream cheese mixture until fully incorporated.
- To assemble the dirt cake in a 9×13 inch dish, spread half of the remaining crushed Oreos on the bottom.
- Spread half of the creamy filling mixture evenly over the cookie layer.
- Repeat the layers: remaining crushed Oreos, then the remaining creamy filling.
- Cover the dish and chill in the refrigerator for at least 4 hours, or preferably overnight, to allow the layers to set.
- Before serving, spread the second container of thawed whipped topping over the top layer. Sprinkle the reserved 2 cups of crushed Oreos over the whipped topping to create the ‘dirt’ effect.
- Insert gummy worms into the top layer for decoration. Serve cold.
Notes
- For individual servings, layer the ingredients in clear plastic cups to make ‘Dirt Cups’.
- You can substitute vanilla pudding for chocolate pudding if you prefer a lighter cream layer.
- If you do not have time to chill overnight, chill for a minimum of 4 hours before serving.
Nutrition
- Serving Size: 1 slice
- Calories: 450
- Sugar: 45
- Sodium: 350
- Fat: 28
- Saturated Fat: 15
- Unsaturated Fat: 13
- Trans Fat: 0.5
- Carbohydrates: 48
- Fiber: 2
- Protein: 5
- Cholesterol: 55