
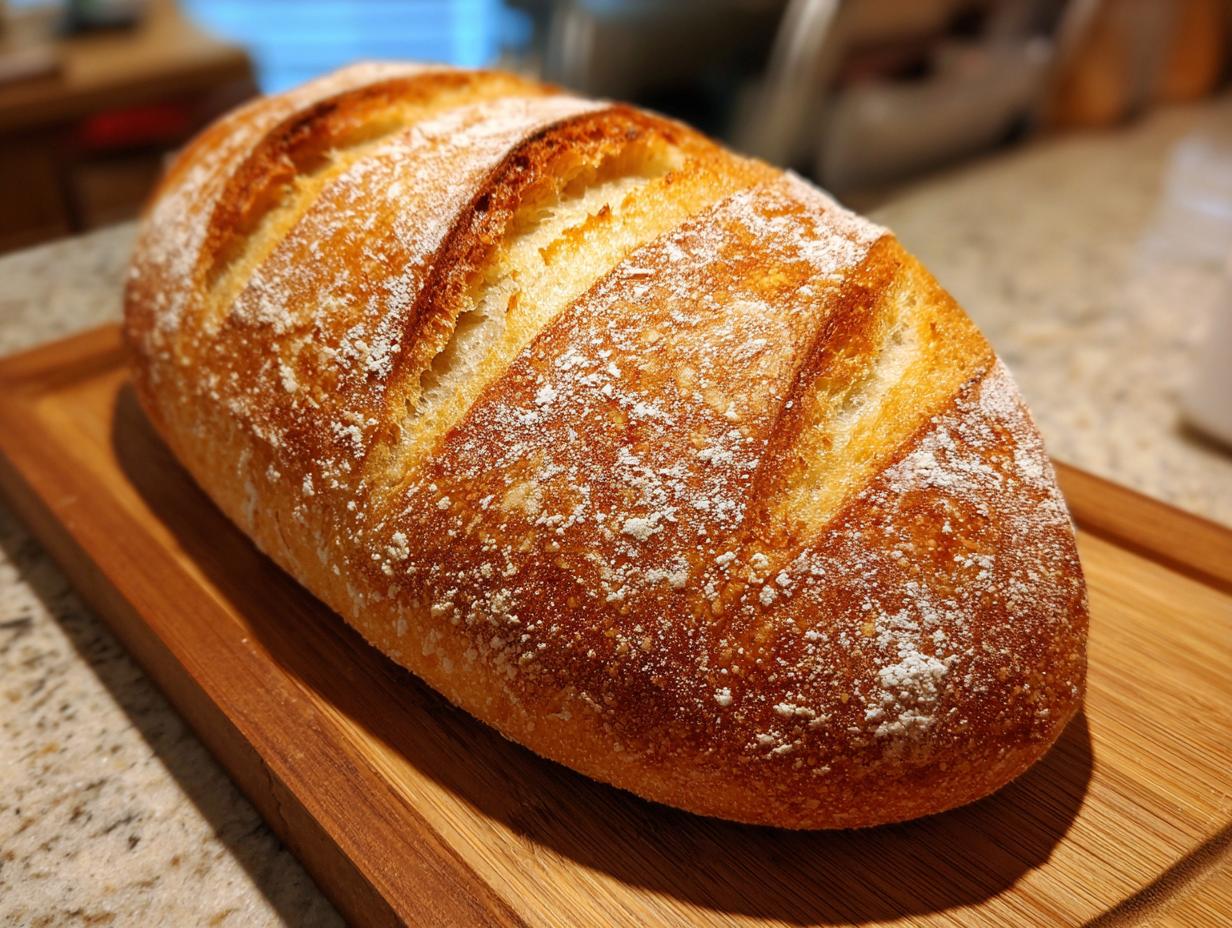
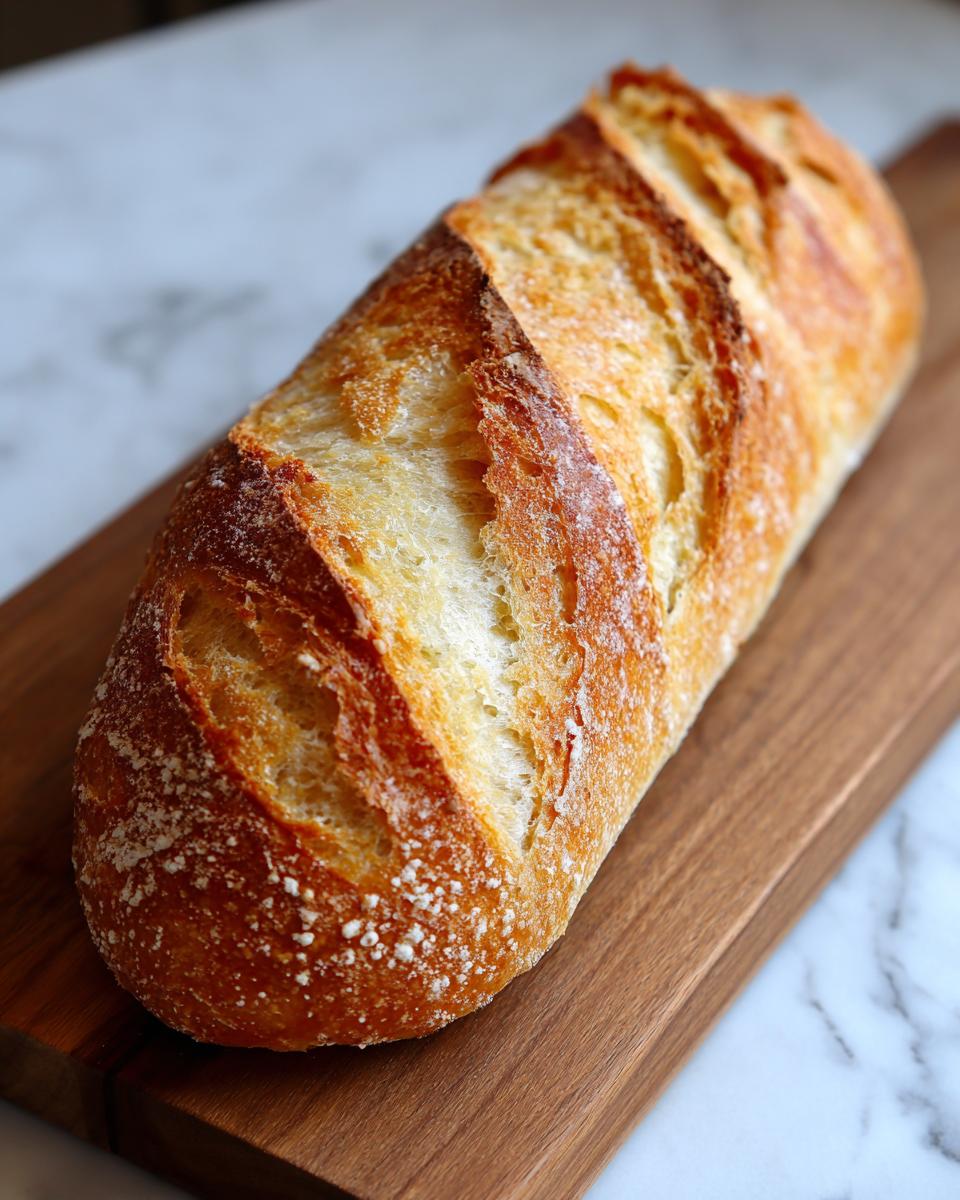
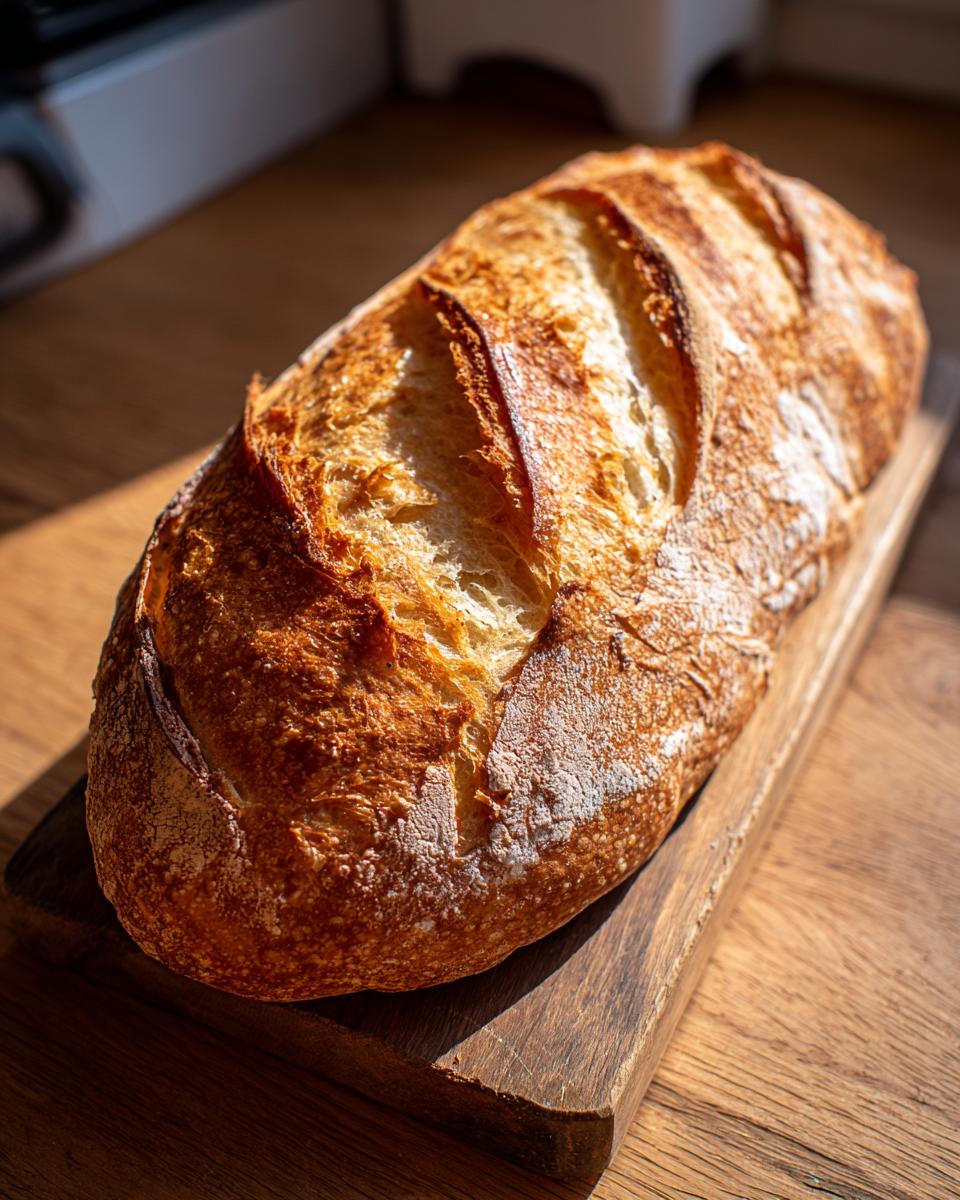
Are you tired of settling for soggy, flavorless bread when all you really want is that satisfying crackle of a true, bakery-style loaf? I totally get it. For years, I thought achieving that perfect **french bread** meant complicated processes, overnight fermentation, and a dozen hard-to-find ingredients. But here at Cheffinity, we’re all about solving the weeknight dilemma! That’s why I reworked Grandpa’s old yeast-risen recipe to create this absolutely incredible loaf using just four simple ingredients. Trust me, getting that amazing crust and airy interior is way easier than you think, and it’s perfect for serving alongside any of our quick weeknight dinners. Let’s bring the best of the bakery right onto your dinner table without stressing your schedule!
- Why This 4-Ingredient french bread Recipe Is Your New Go-To
- Ingredients for Classic Crusty Homemade french bread
- How to Prepare Your Bakery Style french bread at Home
- Tips for Success with Your Homemade french bread Recipe
- Ingredient Notes and Substitutions for french bread
- Storage and Reheating Instructions for Leftover french bread
- Serving Suggestions for Your Freshly Baked french bread
- Frequently Asked Questions About Making french bread
- Estimated Nutritional Data for this french bread
Why This 4-Ingredient french bread Recipe Is Your New Go-To
When you’re staring down a busy schedule, you need recipes that deliver maximum flavor for minimal effort. This is honestly the **Homemade French Bread Recipe** I reach for every single time because it just *works*. It manages to tick every box without asking for much in return.
- It uses only four staple ingredients—flour, water, yeast, and salt. No weird additions needed!
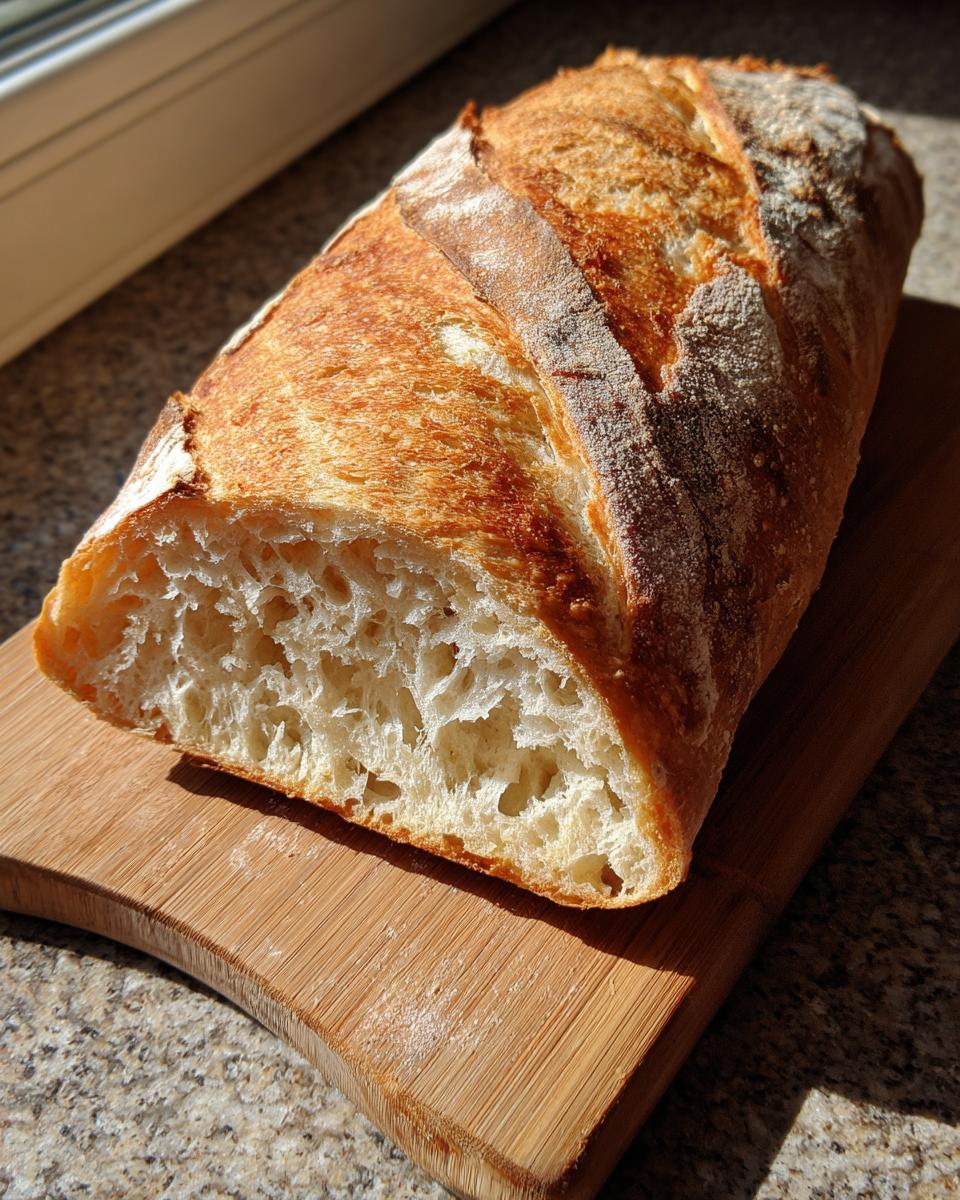
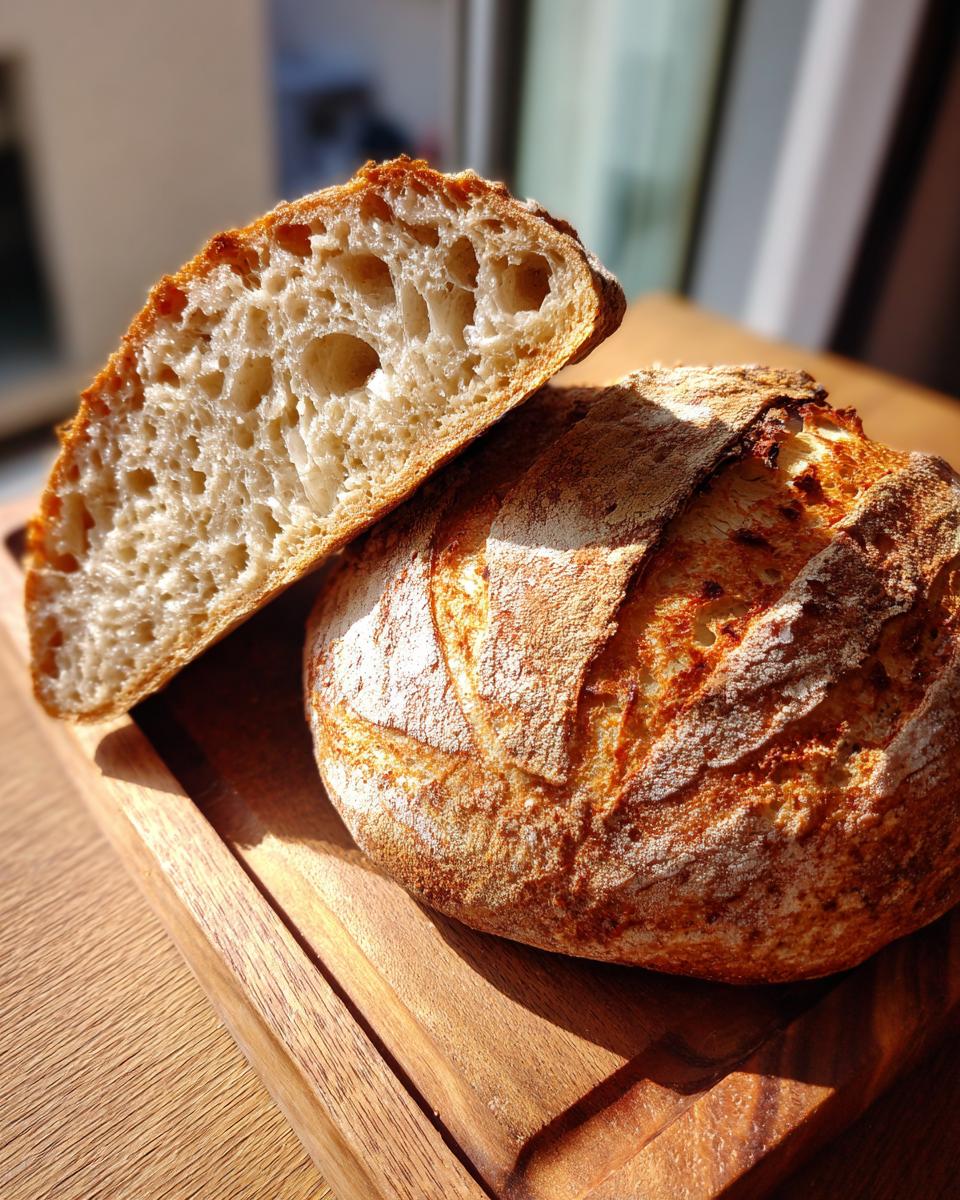
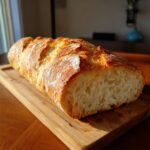
- You get that highly sought-after bakery result: a genuinely crispy, crackly crust that sings when you slice it.
- The interior crumb is beautifully soft and airy, making it perfect for dipping.
- It’s genuinely **Easy French Bread for Beginners**. If you can mix, knead a little, and bake, you can nail this loaf.
- The total active time is super short, meaning you can have fresh bread on the table faster than it takes to walk to the store.
Ingredients for Classic Crusty Homemade french bread
Part of what makes this recipe so brilliant is cutting out the fat and sugar that often weigh down store-bought loaves. We are sticking to the basics here, which is how the best traditional breads start. Precision matters with yeast, so make sure you get that water temperature just right so the yeast wakes up happily!
- 3 cups all-purpose flour
- 1 1/2 teaspoons salt
- 1 teaspoon instant yeast (Yes, use instant, not active dry!)
- 1 1/2 cups warm water (aim for 105-115°F—test it with your finger; it should feel warm, not hot)
How to Prepare Your Bakery Style french bread at Home
Okay, this is where the magic really happens! Don’t panic when you see the steps; they are straightforward. Remember, Ava says success is measured in minutes saved, and this recipe saves us from making complex bread doughs. The kneading is short—just 5 to 7 minutes on the counter until it feels smooth. If you push down on the dough and it springs back slowly, you’ve got that perfect gluten structure ready to work for you! I know we keep things simple here, but for a really complex flavor that mimics long fermentation, sometimes a tiny bit of complex sauce is needed elsewhere in the week, like with my easy dumpling sauce. But for this bread? Just focus on the dough!
Mixing and First Rise for Perfect french bread Dough
First, just whisk the dry stuff together, then dump in the water and mix until you have a shaggy mess. That’s what we want! Put it in an oiled bowl, cover it, and let it sit in a warm spot. This is where flavor builds for that truly **Authentic French Baguette Recipe** taste. If you’re in a rush and need a **Quick French Bread Recipe Under 2 Hours**, try to give it at least one full hour, but if you can let it go for 1.5 hours, the complexity of the flavor really deepens. You’re looking for it to double in size—it should feel billowy and soft when you gently poke it.
Shaping and Second Rest for Your french bread Loaves
Gently deflate that beautiful blob of dough and divide it into two. Now, you need to shape these into long, narrow loaves. Try to tuck the edges under to build a little surface tension—this helps them hold their classic baguette shape later. Once shaped, you must let them rest for 30 minutes on your baking surface. Don’t skip this rest! It relaxes the dough so it scores nicely later and gets that beautiful oven spring.
Creating Steam for a Truly Crispy french bread Crust
This secret step is non-negotiable if you want that crisp, crackly shell! Before you shape anything, you need to get your oven screaming hot—450°F—with your baking stone or heavy sheet pan already inside for 30 minutes. You also need that shallow pan on the bottom rack. Once you slide your scored loaves onto the hot surface, pour a cup of *boiling* water into that bottom pan and shut the door fast! That blast of steam keeps the outer layer soft just long enough for the bread to puff up huge before the crust hardens. It’s the heart of any good **Crusty Bread Tutorial**.
Tips for Success with Your Homemade french bread Recipe
Learning to bake **french bread** is all about understanding the environment, not just the recipe steps! Since we are aiming for that fantastic homemade artisan result, I want to share the little tweaks that make my loaves consistently great. This knowledge is key for anyone looking for an **Easy French Bread for Beginners** recipe—it gives you control over the final texture.
First, let’s talk crust control. If you want that incredibly loud, crackly, rustic crust like a true baguette, you absolutely MUST use the steam method we discussed, and maybe even spray the oven walls early on. However, if you’re planning to make **Soft Fluffy French Bread** for something like thick sandwiches? Just skip the water pan entirely! The dryer heat will dry out the crust faster, leaving that tender interior soft all the way through.
And please, don’t skip the scoring just because you’re new to this. Those three diagonal slashes you make right before the bread goes into the oven aren’t just for looks! They are essentially planned fault lines. They allow the loaf to expand exactly where you want it, giving you beautiful ‘oven spring’ and preventing your loaf from bursting open randomly on the side. Think of it as guiding your bread into its best shape. If you love serving this alongside creamy sides, you should totally check out how amazing it is dipped into my garlic parmesan mashed potatoes!
Ingredient Notes and Substitutions for french bread
Isn’t it great that this recipe is based on just four pillars? Flour, water, salt, and yeast. That simplicity is what makes it such a phenomenal **Simple Yeasted Bread** base. But that doesn’t mean we can’t talk tweaks! I know everyone’s pantry looks a little different, especially when we are trying to get this crusty **french bread** out of the oven quickly.
The biggest variable here is the yeast, since I called for instant yeast. Instant yeast is fantastic because you can just mix it right in with the dry ingredients like we did, and it gets right to work. If you only have active dry yeast—which I totally understand, since that’s what my grandma always had—you need to wake it up first. Don’t just dump it in with the flour!
To use active dry yeast, you would take about half a cup of that 1.5 cups of water and warm it up slightly warmer—maybe 110°F or so—and stir your teaspoon of active dry yeast and maybe a tiny pinch of sugar into that water. Let it sit for 5-10 minutes until it gets foamy and bubbly on top. That foam means your yeast is alive and ready to rise your dough! Once it’s foamy, add that mixture to the rest of your dry ingredients, just like normal.
Now, for the flour: since this recipe is meant to be quick and easy, all-purpose flour works beautifully to give you that soft interior. But, if you are really trying to push the boundaries and capture that chewy texture of a true artisan loaf, you could try swapping out one cup of the all-purpose for bread flour. Bread flour has higher protein, which equals more gluten development, leading to a much chewier texture. Keep the water the same, though; higher protein flour sometimes needs a touch more hydration. It’s just one small change, but it really deepens the eating experience!
Storage and Reheating Instructions for Leftover french bread
Now, I know what you’re thinking. If this crusty **french bread** is *this* good, how can I stand the thought of leftovers? Well, lucky for us, this bread keeps better than the squishy supermarket stuff, but you definitely need to treat that crust right if you want it to sing the next day!
My absolute number one rule for storage is this: do not, under any circumstances, put your day-old loaf into a plastic ziploc bag or an airtight container right away. That perfect, crackly crust took skill (and steam!) to achieve, and plastic will suck every bit of that crispness right out of it overnight, leaving you with spongy bread!
For a quick reheat, I aim for the counter. If you just have half a loaf left, maybe wrap it loosely in a clean kitchen towel or put it into a paper bag. That keeps the interior soft without trapping too much steam against the crust. If you need to keep it for more than a day, then yes, you have to seal it up airtight, but expect that crust to be soft.
But here is the best part—you can bring that crust back to life! Honestly, reheating is my favorite way to re-enjoy it. Preheat your oven to 350°F. If you baked this as a full baguette, you can even lightly spritz the outside with a little water right before putting it back in. Bake it for just 5 to 7 minutes. When you pull it out, that lovely crunch will be back! It’s like getting a free second day of **Homemade French Bread Recipe** goodness. If you’re looking for other great bread ideas, I always check out what they’re doing over at Chef Straw Blend for inspiration.
If you want a softer texture for sandwiches instead of a total crust revival, you can just gently wrap the pieces in foil before heating. Either way, saving this bread is easy, but eating it all on the first day is definitely more fun!
Serving Suggestions for Your Freshly Baked french bread
Okay, you’ve pulled that gorgeous, deeply golden **french bread** out of the oven, and now it’s cooling. The smell alone is making your stomach growl, right? While tearing into it immediately with good quality butter is a perfectly acceptable (and encouraged!) tradition, let’s talk about how this versatile loaf can anchor an entire meal. Since this crusty bread sings when it’s dipped into something rich, it makes planning dinner so much easier!
My favorite thing to do, especially on a chilly night, is to serve slices alongside something hearty where the bread can sop up all those delicious liquids. Think about a thick, rich stew or a big bowl of chili—you absolutely need something crusty to sweep the bowl clean. Seriously, if you’re looking for an amazing partner for this bread, you have to try my easy chili recipe—it needs this bread!
But it doesn’t just work for soups! This **Homemade French Bread Recipe** is the ideal blank canvas for appetizers too. Forget those flimsy crackers; thick, toasted rounds of this baguette style loaf make the best bruschetta. You can brush the slices with a little olive oil, toast them until they are just golden, and then load them up.
- Classic tomato and basil topping? Yes, please, every time.
- A simple rub of fresh garlic clove after toasting is incredible.
- Don’t forget simple avocado mash with a sprinkle of flaky salt—so good!
Having this artisan-style bread ready means you always have a fantastic side dish or starter in about 25 minutes of actual oven time. It just makes weeknights feel a little more special, which is exactly what we need!
Frequently Asked Questions About Making french bread
I know that when you’re attempting **bakery style bread at home**, a few questions pop up immediately. We’ve covered the basics, but let’s tackle the specific worries that pop up between measuring flour and pulling that golden loaf out of the oven. Don’t stress if you need to adjust the timeline; that’s part of real-life cooking!
Can I make this a soft and fluffy french bread loaf instead of crusty?
Absolutely! The crispness comes entirely from that steam bath we create in the oven. If you prefer a softer exterior, just skip the little shallow pan of hot water during baking. Baking in a dryer environment will result in a softer crust surrounding that lovely, tender interior. It’s an easy shift for making perfect **Soft Fluffy French Bread** for sandwiches.
How do I get the authentic baguette shape if I don’t have fancy tools?
You don’t need any fancy equipment for shaping! After the first rise, gently divide your dough. Dust your counter lightly with flour and start rolling and stretching it gently with your hands until it’s long and narrow—think the length of your baking sheet. If the dough keeps shrinking back, just let it rest uncovered for about 10 minutes. That resting period relaxes the gluten so you can stretch it out without fighting it. This simple method works great for my **Classic French Baking** approach.
Is there any way to speed up this recipe even more than written?
We already made this a **Quick French Bread Recipe Under 2 Hours**, but if you’re in a real pinch, you can try reducing the first rise time to about 45 minutes in a very warm spot, like inside an oven that’s just barely warm (and turned OFF!). However, I have to warn you: the flavor won’t be as deep as when you let the yeast work slowly. If you need guaranteed speed, you might check out other quick recipes, like the one they have over at Modern Meal Makeover, though I still think my steam method wins on crust quality!
My bread didn’t score well; what went wrong?
That usually means one of two things! Either your dough hadn’t rested long enough during that second 30-minute rest (so the dough was too springy and tight to cut), or your oven wasn’t hot enough when you slid the bread in. Remember, we preheat the stone/pan for 30 minutes at 450°F. A blazing hot surface gives the dough the shock it needs for that beautiful puff!
If you find yourself with leftovers that you want to turn into something else amazing—maybe bread pudding or croutons—definitely check out how I transform them into easy apple crumble topping sometimes!
Estimated Nutritional Data for this french bread
I’ve included the general estimate for this **french bread** recipe below. Now, you know how I feel about precision in the kitchen—it’s important, but when it comes to baking something this rustic, things can shift based on how much water the flour in your pantry actually absorbed that day! Please take these numbers as a helpful guideline rather than gospel.
These figures are based on an estimated 20 slices across two loaves, so your mileage might vary slightly depending on how thick you like to slice your **Homemade French Bread Recipe**!
- Serving Size: 1 slice (approx 1/10 loaf)
- Calories: 155
- Sugar: 0.5g
- Sodium: 300mg
- Fat: 0.5g
- Saturated Fat: 0.1g
- Unsaturated Fat: 0.4g
- Trans Fat: 0g
- Carbohydrates: 32g
- Fiber: 1g
- Protein: 5g
- Cholesterol: 0mg
Just remember, this is an estimate! The best part about making your own **Simple Yeasted Bread** is knowing exactly what went into it, even if the final macros are slightly different based on your own measurement style!
PrintClassic Crusty Homemade French Bread (Baguette Style)
Bake bakery-style French bread at home. This recipe produces a loaf with a crisp, crackly crust and a soft, airy interior. It is simple enough for beginners and uses basic ingredients.
- Prep Time: 20 min
- Cook Time: 25 min
- Total Time: 1 hour 50 min
- Yield: 2 loaves 1x
- Category: Bread
- Method: Baking
- Cuisine: French
- Diet: Vegetarian
Ingredients
- 3 cups all-purpose flour
- 1 1/2 teaspoons salt
- 1 teaspoon instant yeast
- 1 1/2 cups warm water (about 105-115°F)
Instructions
- Mix the flour, salt, and yeast together in a large bowl.
- Add the warm water and mix until a shaggy dough forms.
- Turn the dough out onto a lightly floured surface and knead for 5 to 7 minutes until the dough is smooth.
- Place the dough in a lightly oiled bowl, cover it, and let it rise in a warm place for 1 to 1.5 hours, or until doubled in size. (For a quicker bake, aim for 1 hour.)
- Gently punch down the dough and divide it into two equal pieces.
- Shape each piece into a long, narrow loaf (baguette shape).
- Place the shaped loaves on a baking sheet lined with parchment paper or a baker’s couche. Cover loosely and let them rest for 30 minutes.
- Preheat your oven to 450°F (232°C) with a baking stone or heavy baking sheet inside for at least 30 minutes. Place a shallow pan on the bottom rack for steam.
- Just before baking, use a sharp knife or lame to make three diagonal slashes across the top of each loaf.
- Carefully slide the loaves onto the hot stone or baking sheet. Pour 1 cup of hot water into the shallow pan on the bottom rack to create steam, and quickly close the oven door.
- Bake for 20 to 25 minutes, or until the crust is deep golden brown and sounds hollow when tapped.
- Transfer the French bread to a wire rack to cool completely before slicing.
Notes
- For a softer crust loaf, omit the steam pan during baking.
- If you need a quick bake, reduce the first rise time to 45 minutes, but the texture may be less complex.
- To achieve a very crisp crust, spray the oven walls with water a few times during the first 10 minutes of baking.
Nutrition
- Serving Size: 1 slice (approx 1/10 loaf)
- Calories: 155
- Sugar: 0.5
- Sodium: 300
- Fat: 0.5
- Saturated Fat: 0.1
- Unsaturated Fat: 0.4
- Trans Fat: 0
- Carbohydrates: 32
- Fiber: 1
- Protein: 5
- Cholesterol: 0