
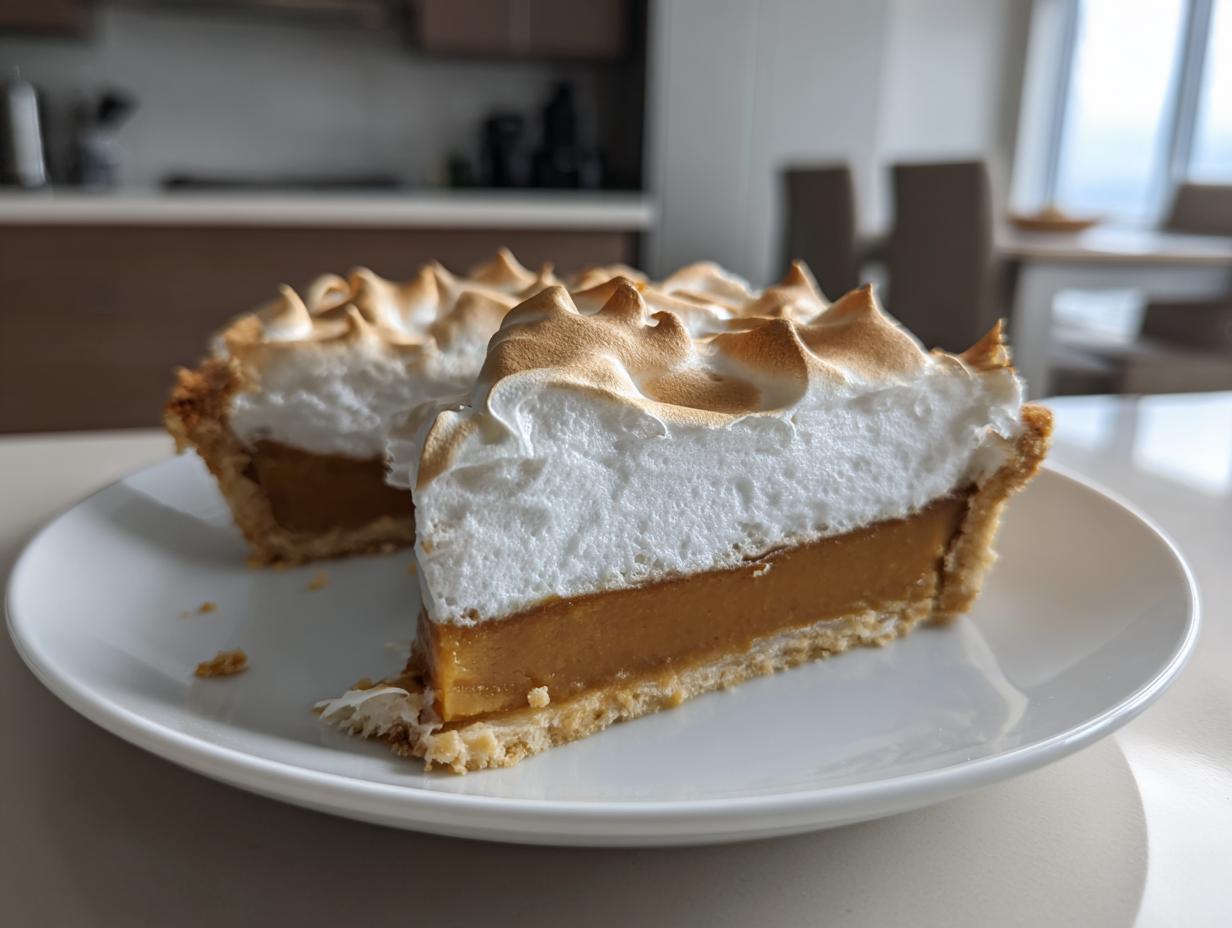
Oh, does anything beat that moment when you slice into a truly nostalgic dessert, and the smell of caramelized sugar just fills the room? If you’re hunting for that perfect, comforting slice of heaven, stop right now because I’ve got the absolute best butterscotch pie recipe for you. This isn’t just any pie; this is the recipe for a rich, creamy, homemade butterscotch dessert, made completely from scratch. When I started Cheffinity, my goal was taking those beautiful, comforting classics from my mom’s quick-paced kitchen and making them work for our busy lives today. This velvety pie is proof that Ava Sinclair believes you never have to compromise on that incredible, slow-cooked flavor, even on a weeknight!
- Why This Creamy Butterscotch Pie Recipe is Your New Favorite Homemade Butterscotch Dessert
- Gathering Ingredients for the Best Butterscotch Pie Recipe
- Ingredients for Classic Homemade Butterscotch Pie
- Step-by-Step Instructions for Making This Butterscotch Pie
- Tips for Success with Your Butterscotch Pie
- Variations: From No Bake Butterscotch Pie to Dolly Parton Dessert Recipe
- Storage and Reheating Instructions for Your Decadent Pie Recipes
- Frequently Asked Questions About Making Butterscotch Pie
- Estimated Nutritional Data for This Sweet Dessert Pie
Why This Creamy Butterscotch Pie Recipe is Your New Favorite Homemade Butterscotch Dessert
Forget those packets! If you want that deep, complex flavor that tastes exactly like childhood holidays, you have to go from scratch. This recipe delivers a creamy butterscotch pie recipe that sings, all thanks to real ingredients doing the heavy lifting. This is your go-to for the absolute best butterscotch pie recipe.
- The filling is intensely flavorful because we caramelize the brown sugar right in the pan.
- It’s ridiculously smooth—it melts in your mouth, just like a high-end confection.
- It turns basic pantry staples into one of the most decadent pie recipes you’ll ever serve.
If you’re looking for other easy-but-fancy homemade desserts, check out my collection of delicious dessert recipes!

Achieving That Perfect Old Fashioned Butterscotch Pudding Pie Texture
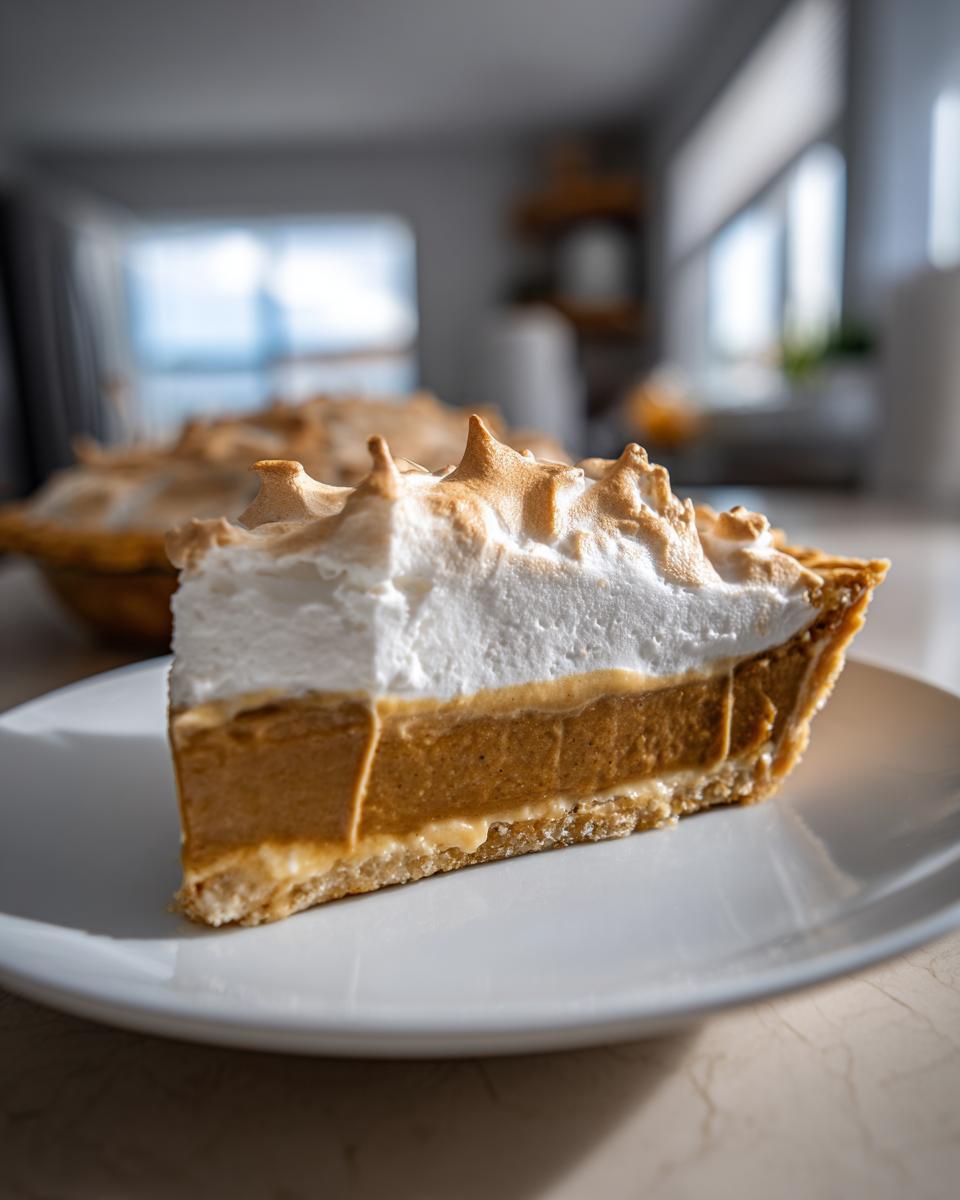
The secret to calling this an old fashioned butterscotch pudding pie is skipping the quick mixes entirely. We use egg yolks to create a natural richness and density you just can’t fake. Slowly cooking the custard builds structure without becoming tough, giving you that satisfying, silky-smooth pudding texture that holds its slice perfectly.
Gathering Ingredients for the Best Butterscotch Pie Recipe
Okay, I know we are making a filling totally from scratch, but please don’t let that scare you! When I first started making this, I was racing against the clock, trying to serve something special for one of those chaotic family dinners. The great news is that every ingredient here is something you likely already have or can easily grab on a quick run. This fits perfectly into everyone’s need for easy holiday baking because the ingredient list is straightforward, especially if you’re short on time.
Precision in measurement is key here, though, especially with the sugars and cornstarch; these form the structure, so grab your measuring cups and let’s be exact! We need that beautiful dark flavor, so make sure you pack the light brown sugar firmly into the cup. That little bit of compaction really helps us achieve that deep, caramelized base flavor that defines a great homemade butterscotch dessert.
Ingredient Notes and Substitutions for Your Rich Butterscotch Filling
Let’s talk specifics so your rich butterscotch filling sets up perfectly. First, the crust: use whatever makes life easiest for you! If you want to use a store-bought, pre-baked 9-inch crust, go for it. If you have time, nothing beats a flaky homemade crust, but don’t stress over it.
For the dairy, I always call for whole milk and heavy cream because they ensure that silky texture for a truly decadent pie recipe. However, if you’re trying to lighten it up just *a touch*, you can substitute the heavy cream with a higher quality half-and-half, but I can’t promise the same luxurious mouthfeel. Remember, the meringue requires a completely clean, grease-free bowl—I mean spotless! Any hint of fat, and your beautiful peaks won’t form correctly. Trust me on the clean bowl rule!
Ingredients for Classic Homemade Butterscotch Pie
Here is the rundown of everything you need to get this incredible, from scratch pie filling going. I’ve written this list out based on what I use every single time I make this pie for holiday gatherings. Having these assembled beforehand is the key to keeping the whole process stress-free and ensuring this cooks up fast for a perfect sweet dessert pie!
It feels important to separate this into two parts: the filling that holds all that caramelized brown sugar goodness, and the cloud-like meringue that goes on top.
For the Filling:
- 1 pre-made or homemade 9-inch pie crust (baked until golden and totally cool—this is important!)
- 1 cup packed light brown sugar
- 1/2 cup granulated sugar
- 1/4 cup cornstarch
- 1/2 teaspoon salt
- 1 1/2 cups whole milk
- 1/2 cup heavy cream
- 4 large egg yolks, lightly beaten
- 4 tablespoons unsalted butter, cut into small pieces
- 1 teaspoon pure vanilla extract
For the Meringue Topping (The Fluffy Cloud!):
- 3 large egg whites (make sure there is zero yolk in them!)
- 1/4 teaspoon cream of tartar (this is the stabilizer that keeps the meringue sturdy)
- 6 tablespoons granulated sugar
Step-by-Step Instructions for Making This Butterscotch Pie
Now we get to the fun part—the part where smelling butterscotch fills your entire house! This whole process moves pretty quickly once you get the rhythm down, so have everything measured out and ready to go. Remember, we are aiming for that amazing butterscotch pie filling that makes everyone ask for your secrets. It all happens right at the stovetop.
First things first: make absolutely sure your 9-inch pie crust is baked and sitting completely cool on the counter. If it’s even warm, it will melt your beautiful filling later.
We’ll get started on the base for your easy holiday baking success right now!
Mastering the Rich Butterscotch Filling
The first real action happens in a medium saucepan. Dump in all your dry items first: the brown sugar, the granulated sugar, cornstarch, and salt. Give those a good whisk together. I like to mix the dry stuff first so the cornstarch gets evenly distributed and doesn’t clump up later on.
Next, slowly whisk in the whole milk and heavy cream until everything looks like one smooth, pale liquid. Now, put this pot over medium heat. This is where you need to pay attention! You must stir constantly—don’t even glance at your phone for a minute! We need that mixture to thicken up really well and start bubbling before we stop cooking. That usually takes about 8 to 10 minutes. If you see it starting to stick to the bottom, just dial the heat back a bit. We are building that foundational flavor for your from scratch pie filling here.
Creating the Perfect Butterscotch Cream Pie with Meringue Topping
Once that base is thick and bubbly, we have to deal with the egg yolks. In a separate little bowl, lightly beat your 4 egg yolks. This next step is critical, so listen closely: Tempering! Slowly, slowly, take about one cup of that hot sugar mix and whisk it into the yolks while you whisk the yolks continuously. If you pour too fast, you’ll get scrambled eggs instead of luxury!
Once the yolks are warmed up, pour that whole tempered mixture back into the saucepan with the remaining filling. Stir constantly over medium-low heat for just one or two more minutes until it gets very thick. Do not let it boil once those yolks are in! Once it’s thick, pull it off the heat immediately. Stir in the 4 tablespoons of butter until melted and shiny, followed by the vanilla. Pour this glorious, hot filling right into your cooled pie crust!
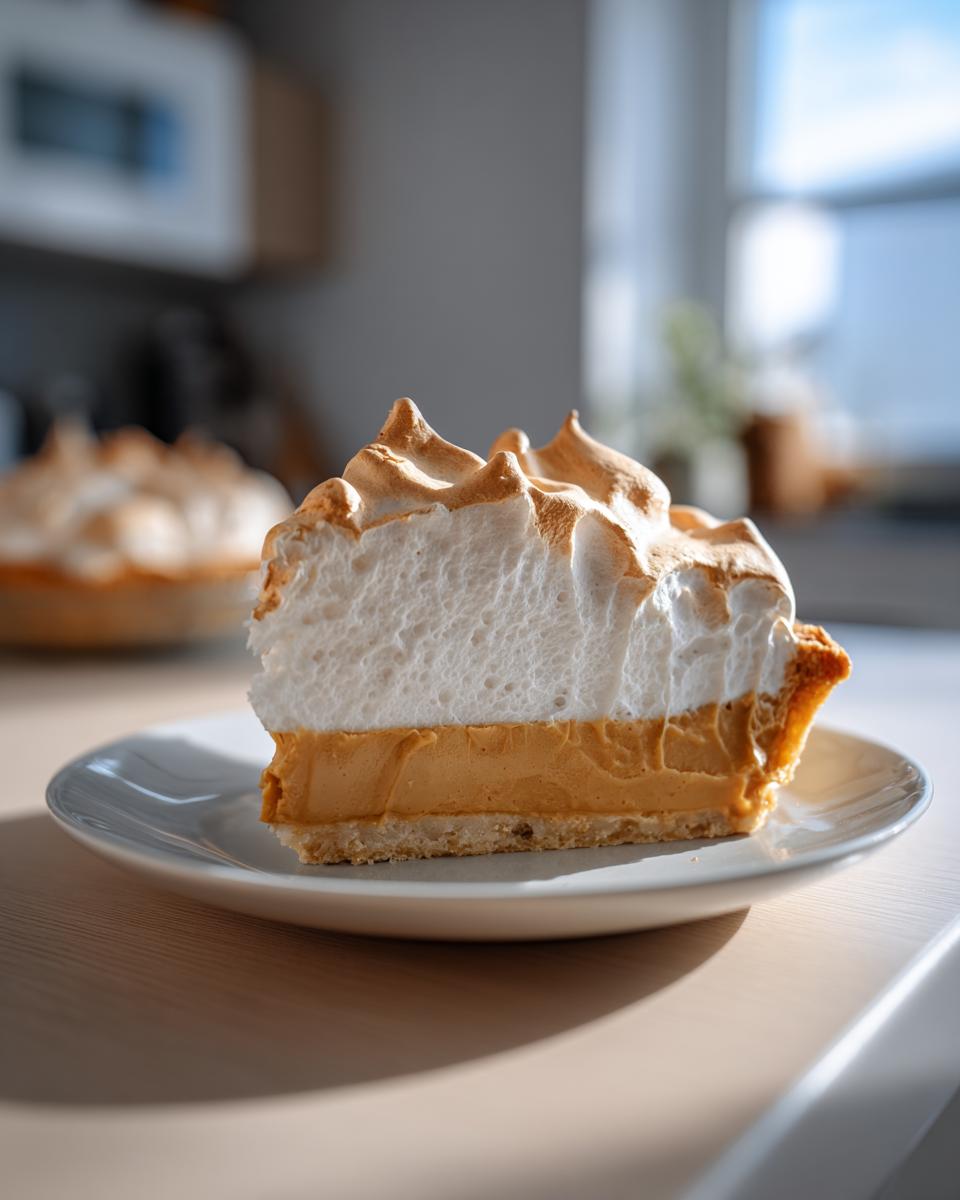
Now for the meringue, the classic crowning jewel for your butterscotch cream pie with meringue! In a bowl that is spotless—I mean zero grease, seriously—beat those 3 egg whites and the cream of tartar until they form soft peaks. Now, add the 6 tablespoons of sugar slowly, sprinkling it in while the mixer is running. Keep beating until you get stiff, glossy peaks. Spread that lovely meringue right over the hot filling, making sure it seals all the way to the edge of the crust. Pop that into a 350°F oven for about 10 to 12 minutes until the tips are gorgeously golden brown.
Tips for Success with Your Butterscotch Pie
Baking a spectacular butterscotch pie isn’t about luck; it’s about knowing the little tricks that fussy cooks use! If you want that signature silky texture for your smooth pudding pie, you must whisk absolutely constantly while the stovetop mixture is thickening. If you walk away for even thirty seconds, you risk scorching that beautiful caramelized sugar on the bottom of the pan.
I learned one tough lesson years ago: I once rushed the tempering step, resulting in little bits of cooked egg floating around! Be patient when slowly introducing the hot liquid to the yolks.
For the meringue, here’s the secret to stopping that dreaded weeping: make sure that hot filling is sealing the crust edges completely before you spread the meringue on top. That barrier traps the moisture inside. If you want more inspiration for those show-stopping endings, check out my collection of delicious dessert recipes!
Variations: From No Bake Butterscotch Pie to Dolly Parton Dessert Recipe
Gosh, I absolutely love that this classic recipe is so adaptable! While I stand by my meringue-topped, stovetop-cooked masterpiece, I totally get it—sometimes you need something quick, or maybe you just don’t want to mess with egg whites. That’s where the magic of the no bake butterscotch pie comes in handy! This recipe is incredibly easy to pivot into a chilled treat perfect for when the oven is already full.
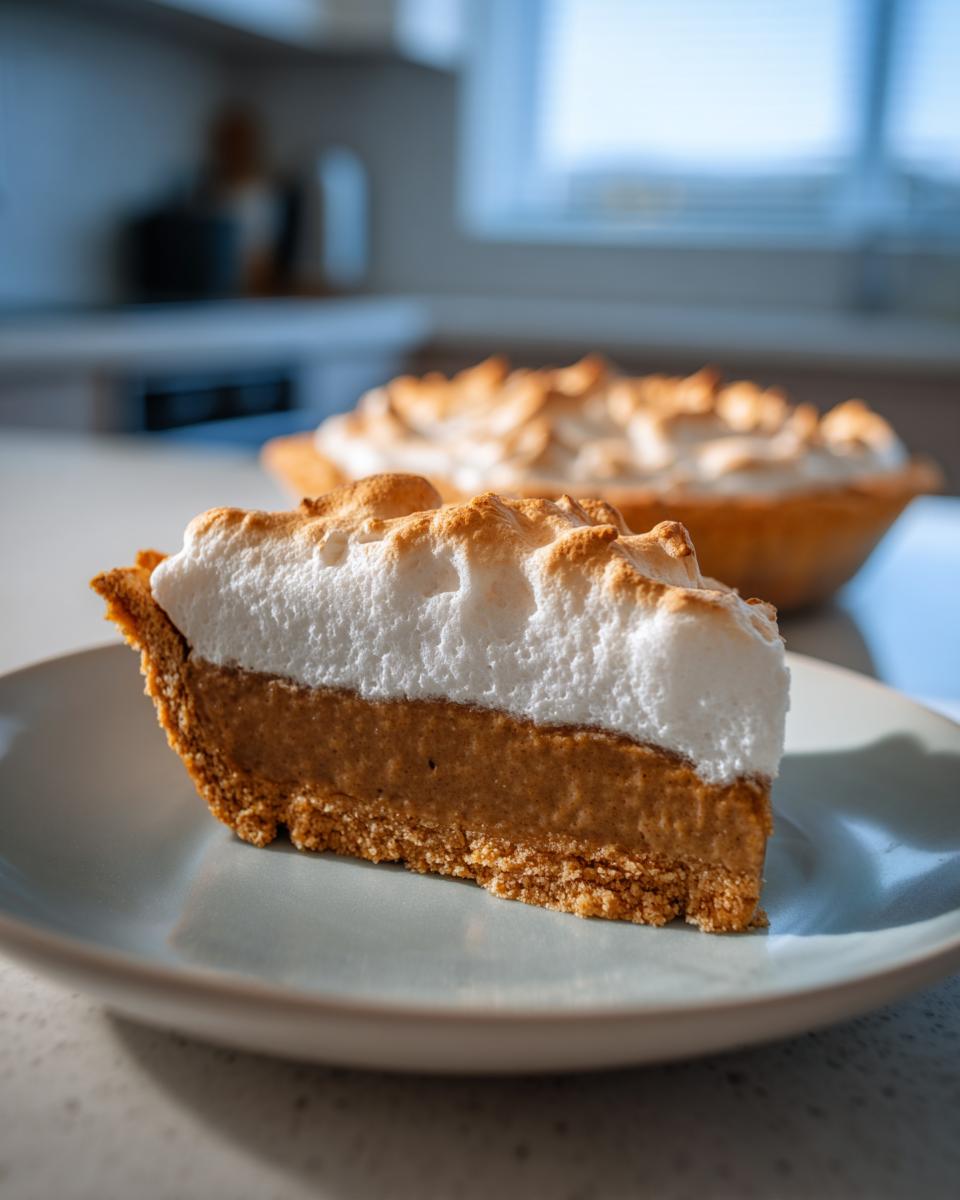
To switch this to a quick chilled dessert, you skip steps 5 through 12 entirely. Ditch the pre-baked crust requirement, too! You’ll want to use a sturdy one, like a graham cracker crust butterscotch pie shell. After cooking and cooling your delicious filling (Steps 1 through 4), chill it until it’s almost fully set—maybe an hour in the fridge.
Then, instead of making that lovely baked meringue, stabilize some heavy whipped cream. See, whipping cream whips up so much nicer than egg whites for a no-bake version! Fold the cooled filling into the whipped cream gently until you get a light, airy texture. Press this into your graham cracker crust and chill it for at least four hours until it’s totally firm. It’s an entirely different, but equally delicious, experience!
And speaking of legendary desserts, you can’t search for this flavor without bumping into the famous Dolly Parton dessert recipe! That version is pure Southern comfort, often using pudding mixes to keep it fast. Mine uses more brown sugar and extra care to get that deep, caramelized flavor, but both aim for that same nostalgic satisfaction. It really shows how much we all love rich, sweet holiday pie options!
If you’re curious about other simple, no-fuss bakes we have on the site, you’ve got to check out my recipe for easy no-bake grasshopper pie recipe. It’s another one that skips the oven entirely!
Storage and Reheating Instructions for Your Decadent Pie Recipes
We’ve made it! We’ve poured the filling, nailed that meringue, and it looks like a showstopper. But, just like any great custard-based dessert, how you handle the leftovers matters immensely for keeping that texture just right. Since this is such a rich filling, leftovers are definitely a thing, which is great for a quick dessert later in the week!
The absolute number one rule for this butterscotch pie is chilling. Because we used actual egg yolks to thicken that filling, it needs several hours in the fridge—at least 3 hours, but overnight is even better—to fully set up. If you try to slice it warm, well, you’re going to end up with a soupy mess, and who wants that after all that stirring?
Once set, cover the pie loosely with plastic wrap. I find if the plastic touches the meringue, it gets sticky and peels off when you take it away. You want to avoid that! Cover it loosely, and it should stay perfect in the refrigerator for about 3 to 4 days. It’s an amazing quick chilled dessert for later!
Now, about reheating—and this is important, especially if you went all-out with that beautiful homemade meringue. Do not stick a meringue-topped pie in the oven or microwave to warm it up. That heat will cause the meringue to weep massive tears of syrupy liquid, and the whole top will deflate. Honestly, meringue pies are best served cool. Let the pie sit out on the counter for about 30 minutes before you plan to serve any slices. Just letting the chill come off slightly will bring out the deep butterscotch flavor without compromising that lovely, light meringue texture.
If you made the no-bake version, that one absolutely must stay chilled the entire time. It keeps just as long in the fridge, but it relies on the cold to maintain its structure. Enjoy those nostalgic pies all week long!
Frequently Asked Questions About Making Butterscotch Pie
I know sometimes reading a super detailed recipe like this can bring up a few last-minute technical questions. That’s totally fine! That means you care about making this the absolute best pie possible. Here are some of the things I always get asked about when people are diving into making their own butterscotch pie.
Can I use instant pudding mix instead of making the rich butterscotch filling from scratch?
You absolutely *can* if you are in a bind and just need an easy butterscotch pie ready fast! However, the whole reason we are following this recipe is to capture that deep, caramelized flavor from cooking down the brown sugar and yolks. If you use pudding mix, you’ll get a fine, quick chilled dessert, but you won’t get the rich, complex taste that defines this old fashioned butterscotch pudding pie. Stick with the scratch method for the real deal!
What is the best way to prevent the meringue on my butterscotch pie from shrinking or weeping?
This is the classic custard pie worry, but it’s usually easy to fix! There are two non-negotiable rules here. First, the filling must be piping hot when you spread that meringue on top. The heat of the filling actually starts baking the bottom of the egg whites right away, locking them in place. Second, you must seal the deal! Make sure the meringue touches the crust all the way around the edge. If there’s a gap, the filling underneath cools and steam builds up, forcing the meringue to pull away and weep those sad, sugary tears. Don’t let that happen!
Is this considered one of the best Thanksgiving pie options?
Oh, without a doubt! In my family, any pie that has that deep, comforting, caramelized sugar flavor automatically lands on the table for major holidays. This style of butterscotch pie is deeply traditional, making it one of those wonderful nostalgic pies that everyone recognizes and loves. It offers such a fantastic, rich alternative to the usual pumpkin or pecan, making it a top contender among the best Thanksgiving pie options for festive tables!
Estimated Nutritional Data for This Sweet Dessert Pie
Now, because this is a truly homemade, rich dessert featuring butter and cream, we do need to talk fuel! I want to be perfectly clear: this nutritional breakdown is an estimate based on the full recipe I use here, including the standard meringue topping. If you switch to a graham cracker crust or use low-fat milk, those numbers will definitely change.
This is not health food, folks; this is pure, unadulterated comfort for your table, easily fitting in among your favorite sweet dessert pies. But here are the core numbers you need to know per slice:
- Calories: About 410
- Fat: Around 20g (with 12g being saturated from the butter and cream)
- Carbohydrates: 58g (yes, that’s where all that lovely sugar lives!)
- Protein: 7g
- Sugar: Approximately 45g
I always say, when you make something this delicious, the nutrition label is just there for bragging rights about how much butter you managed to fit into a slice! Enjoy every single bite of this marvelous butterscotch pie.
PrintClassic Homemade Creamy Butterscotch Pie
You can make this rich, old-fashioned butterscotch pie from scratch. This recipe delivers a smooth, decadent filling perfect for any gathering or holiday dessert table.
- Prep Time: 20 min
- Cook Time: 25 min
- Total Time: 2 hours 45 min
- Yield: 8 servings 1x
- Category: Dessert
- Method: Stovetop and Baking
- Cuisine: American
- Diet: Vegetarian
Ingredients
- 1 pre-made or homemade 9-inch pie crust (baked)
- 1 cup packed light brown sugar
- 1/2 cup granulated sugar
- 1/4 cup cornstarch
- 1/2 teaspoon salt
- 1 1/2 cups whole milk
- 1/2 cup heavy cream
- 4 large egg yolks, lightly beaten
- 4 tablespoons unsalted butter, cut into pieces
- 1 teaspoon vanilla extract
- For Topping: 3 large egg whites
- For Topping: 1/4 teaspoon cream of tartar
- For Topping: 6 tablespoons granulated sugar
Instructions
- Prepare your 9-inch pie crust according to your preferred method and let it cool completely.
- In a medium saucepan, whisk together the brown sugar, granulated sugar, cornstarch, and salt.
- Gradually whisk in the whole milk and heavy cream until smooth.
- Cook the mixture over medium heat, stirring constantly, until it thickens significantly and begins to bubble. This takes about 8 to 10 minutes. Reduce the heat slightly if it starts to scorch.
- In a separate small bowl, lightly beat the egg yolks. Temper the yolks by slowly whisking about 1 cup of the hot sugar mixture into the yolks.
- Pour the tempered yolk mixture back into the saucepan with the remaining sugar mixture. Cook over medium-low heat, stirring constantly, for 1 to 2 minutes until the filling is very thick. Do not let it boil after adding the yolks.
- Remove the pan from the heat. Stir in the butter pieces until melted and smooth, then stir in the vanilla extract.
- Pour the hot butterscotch filling immediately into the cooled, pre-baked pie crust.
- Prepare the meringue: In a clean, grease-free bowl, beat the egg whites and cream of tartar with an electric mixer until soft peaks form. Gradually add the 6 tablespoons of sugar, beating until stiff, glossy peaks form.
- Spread the meringue evenly over the hot filling, making sure the meringue touches the edges of the crust all around to prevent shrinking.
- Bake the pie in a preheated 350°F oven for 10 to 12 minutes, or until the meringue is lightly golden brown.
- Cool the pie completely on a wire rack for at least 3 hours before slicing. Chill thoroughly before serving for the best texture.
Notes
- For a no-bake option, substitute the pre-baked crust with a graham cracker crust and use a stabilized whipped topping instead of meringue.
- To achieve a silky-smooth filling, whisk continuously, especially when the mixture begins to thicken.
- If you want a Dolly Parton dessert variation, some versions use a pudding mix base, but this from-scratch method provides a richer flavor.
Nutrition
- Serving Size: 1 slice
- Calories: 410
- Sugar: 45g
- Sodium: 250mg
- Fat: 20g
- Saturated Fat: 12g
- Unsaturated Fat: 8g
- Trans Fat: 0.5g
- Carbohydrates: 58g
- Fiber: 1g
- Protein: 7g
- Cholesterol: 120mg