
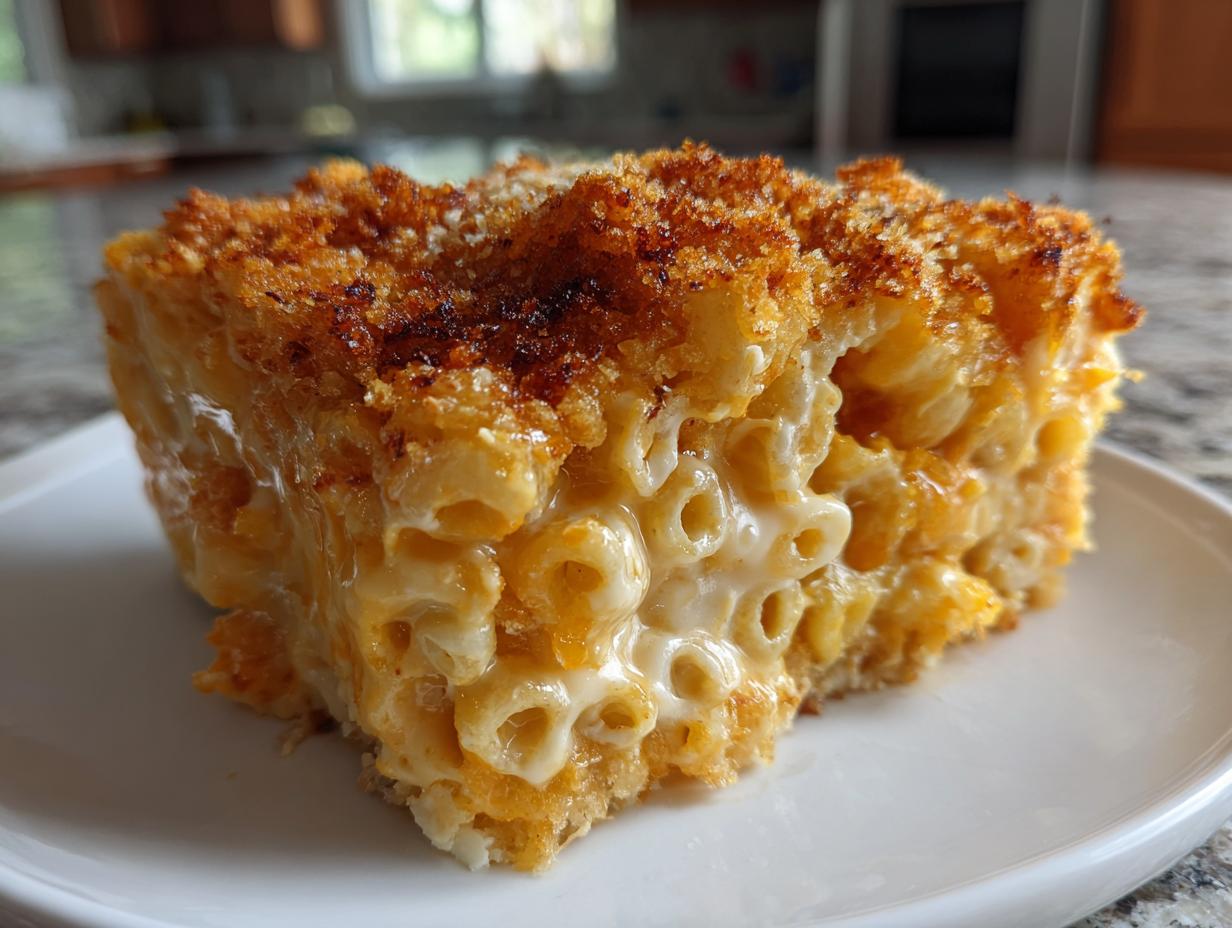
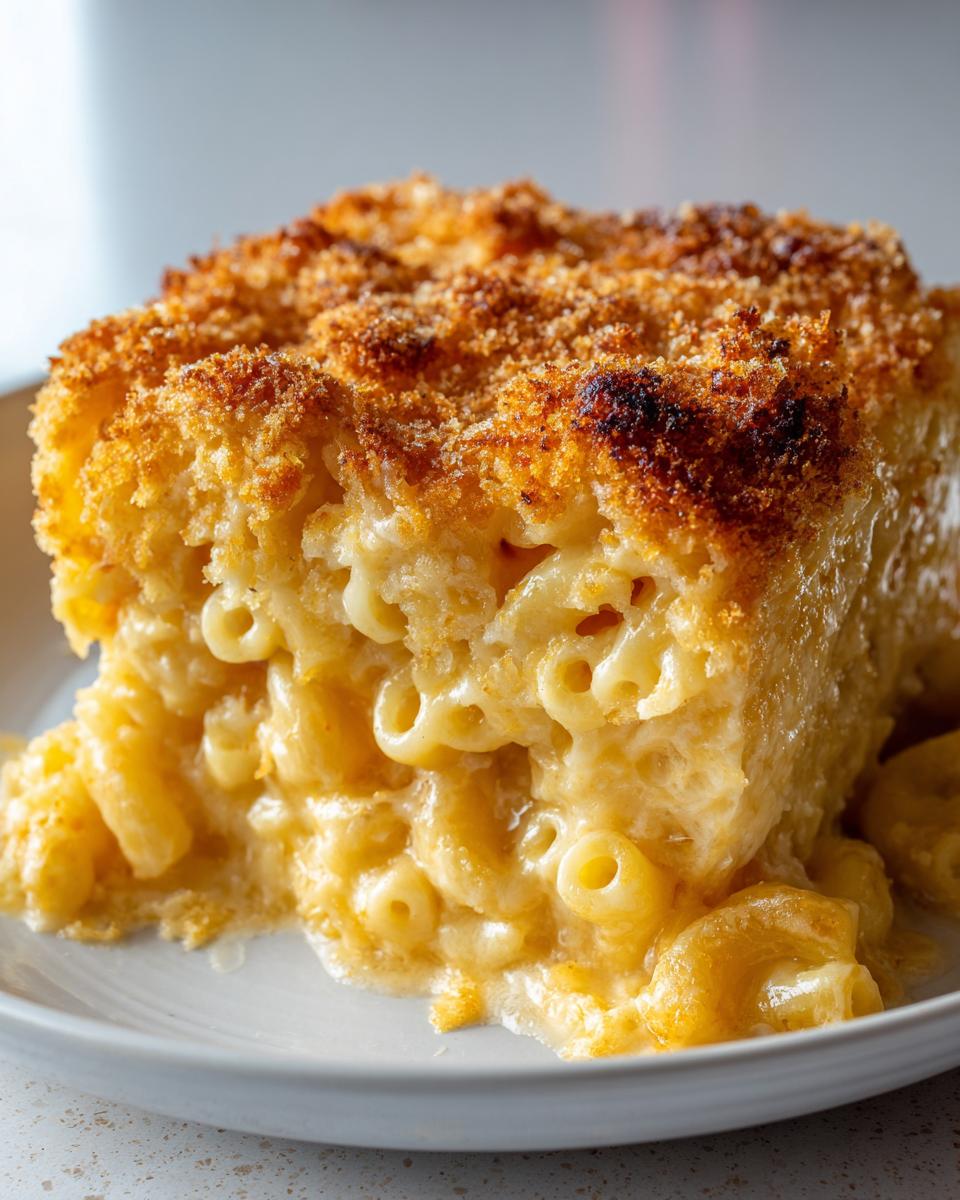
It starts with that familiar kitchen timer ticking down after a long day, right? You stare into the fridge, and the question screams at you: “What’s for dinner?” For too long, that usually meant dumping out boring leftovers or reaching for something that wasn’t quite satisfying. That’s exactly why I, Ava Sinclair, started Cheffinity—to ditch the compromise! We believe you deserve an amazing, deeply comforting meal without spending hours over the stove. This isn’t just any casserole; this baked mac and cheese recipe is my solution for ultimate comfort food. We nail that perfect contrast every time: an unbelievably creamy interior that melts in your mouth, topped with a satisfyingly crunchy, golden crust. This recipe has been rigorously tested in my own chaotic family kitchen because I know real life doesn’t wait for complicated cooking.
- Why This Is Your Ultimate Creamy Baked Mac and Cheese Recipe
- Ingredients for the Perfect Baked Mac and Cheese Recipe
- How to Make Baked Mac and Cheese: Step-by-Step Instructions
- Pro Tips for the Best Mac and Cheese Recipe
- Making This Baked Mac and Cheese Recipe Ahead of Time
- Serving Suggestions for Your Cheesy Pasta Bake
- Frequently Asked Questions About Our Baked Mac and Cheese Recipe
- Nutritional Estimates for This Baked Mac and Cheese Recipe
- Share Your Family Dinner Ideas
Why This Is Your Ultimate Creamy Baked Mac and Cheese Recipe
I get asked all the time how to make mac and cheese that doesn’t dry out in the oven. Simple: this method nails the texture every single time. It’s designed to be your go-to solution for big gatherings or just putting a smile on your kids’ faces.
- It’s the definition of ultimate comfort food, offering that rich flavor you crave.
- We get that essential textural contrast: gooey inside, crispy top!
- It’s surprisingly quick, making it perfect for weeknight family dinner ideas.
- You can easily dress it up or down, making it ideal for potlucks or holiday side dishes.
If you want something similar but fun for a weeknight, check out my recipe for an easy cheesy pasta bake—but trust me, this baked version is worth the extra 10 minutes of topping prep!
Ingredients for the Perfect Baked Mac and Cheese Recipe
Let’s talk ingredients, because this is where the magic for your rich cheese sauce recipe starts! The single most important thing you can do is grate your cheese fresh—seriously, don’t cheat yourself by using the pre-shredded stuff. Those anti-caking agents ruin the creaminess we are aiming for.
- 1 pound elbow macaroni
- 6 tablespoons unsalted butter, divided
- 1/2 cup all-purpose flour
- 4 cups whole milk, warmed
- 1 teaspoon dry mustard powder
- 1/2 teaspoon smoked paprika
- 1/4 teaspoon black pepper
- 1 teaspoon salt, plus more for pasta water
- 1/4 teaspoon cayenne pepper (optional, but I always add it!)
- 8 ounces sharp cheddar cheese, freshly grated
- 4 ounces Gruyère cheese, freshly grated
- 4 ounces Monterey Jack cheese, freshly grated
- 1 cup panko breadcrumbs
- 2 tablespoons melted butter (for topping)
How to Make Baked Mac and Cheese: Step-by-Step Instructions
Alright, this is where we turn those beautiful ingredients into the best mac and cheese recipe you’ve ever had. Don’t stress about the sauce; it’s all about building the layers step-by-step. Think of this as assembling the ultimate comfort food casserole. If you want to master sauce-making in general, you should definitely check out my guide on making a homemade alfredo sauce recipe—the roux technique is the same!
Prep Work and Cooking the Pasta for Your Baked Mac and Cheese Recipe
First things first, get your oven warming up to 375°F (190°C) and make sure you grease that 9×13 baking dish. Now, the pasta! Salt your water generously—it needs to taste like the ocean a little bit. Cook those elbow macaroni until they are just shy of done, what we call ‘al dente.’ I mean it: drain them a full minute early because they are going to keep cooking in the oven! Drain them really well and set them aside while we tackle the sauce.
Creating the Rich Cheese Sauce Recipe Base
This roux step is everything for that famous creamy baked mac and cheese texture! You melt 6 tablespoons of butter in a large pot over medium heat. Whisk in the flour right away and cook it, stirring constantly, for about two minutes. We’re just cooking out the raw flour taste, not browning it! Then, slowly, slowly whisk in the warm milk. If you dump it all in at once, you’ll get lumps, and that’s a headache I learned to avoid years ago. Keep stirring until it coats the back of a spoon nicely—that means it’s thickened up perfectly.
Melting the Cheese and Combining for the Baked Mac and Cheese Recipe
Safety tip here is crucial: Take the pan completely off the heat before you add your spices and, most importantly, the cheese! Adding cheese when the liquid is still boiling hot can make it seize up and turn grainy. Stir in your mustard powder, paprika, salt, and pepper. Then, start adding your grated cheddar, Gruyère, and Jack cheese in small handfuls. Wait until the first batch is totally melted and silky smooth before you add the next one. Once your magnificent, rich cheese sauce recipe is done, gently fold in your drained pasta until every piece is coated. Pour that creamy goodness into your prepared dish.
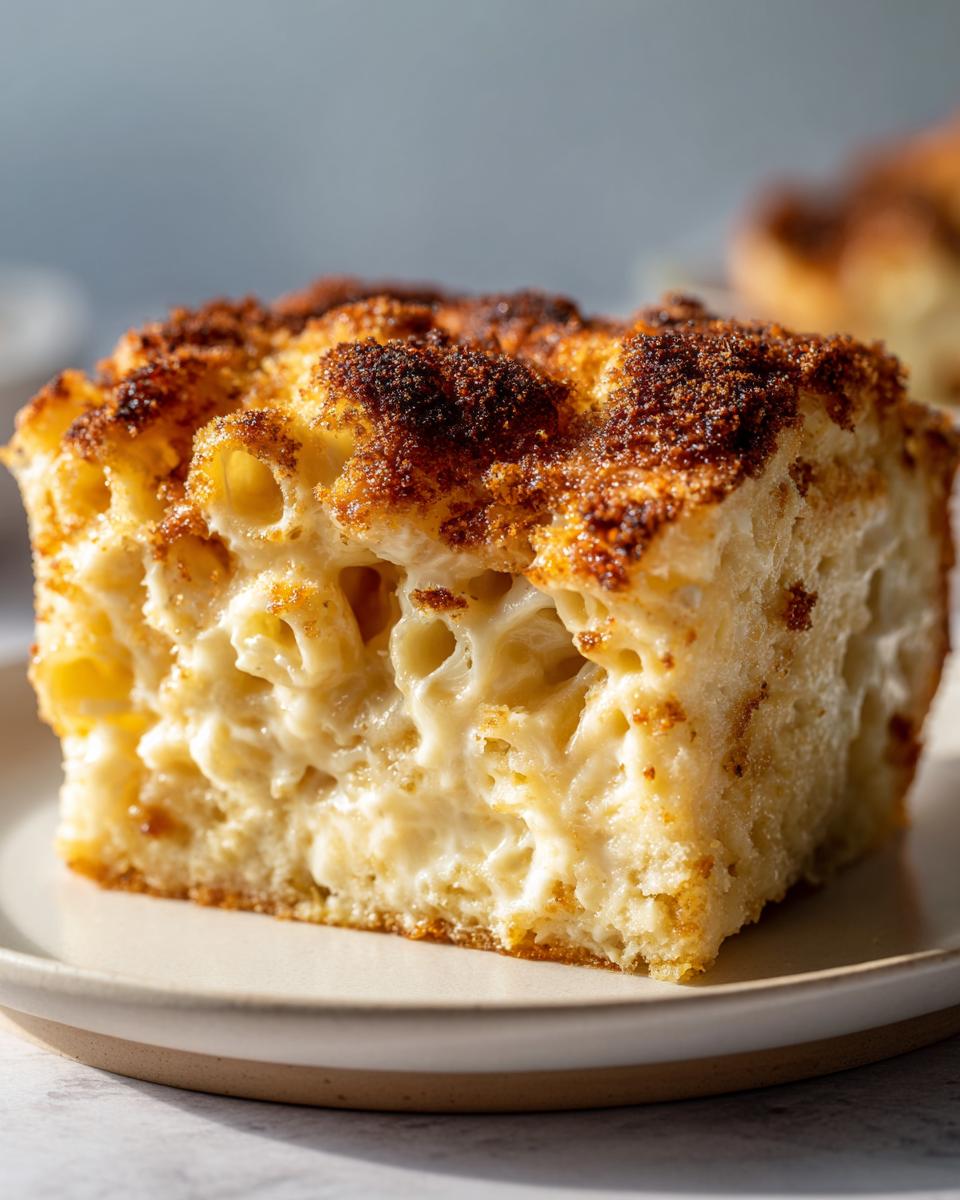
Achieving the Golden Brown Casserole Top and Baking
Time for the crunch! In a little bowl, toss your panko breadcrumbs with the 2 tablespoons of melted butter. Don’t skimp here; this is what gives you that beautiful golden brown casserole top! Sprinkle that buttery panko evenly over the entire pasta surface. Pop it into the oven for about 20 to 25 minutes. You want to see the edges bubbling happily before you pull it out. Then, this is the hardest part: let it rest for five minutes! This helps the sauce settle so it doesn’t run everywhere when you cut into it. You can see a gorgeous example of a finished dish like this over at this link!
Pro Tips for the Best Mac and Cheese Recipe
Okay, listen up—I’ve tinkered with this so you don’t have to! If you want truly spectacular results, the cheese selection is where you need to focus your energy. Forget the bag; grating your own cheese is non-negotiable for that smooth, velvety sauce texture. I find that using a combination of flavor punch and good meltiness is key. That sweet spot for me is relying heavily on sharp cheddar baked mac for that classic tang, balanced out by the Gruyère.
When you’re building your sauce, remember that little bit of dry mustard? It doesn’t make it taste like mustard, I promise! It just magically amplifies the cheese flavor. It’s one of those little secrets that turns a good cheesy pasta bake into something truly special. And for the topping? If you want extra texture on that golden crust, mix a spoonful of grated Parmesan in with your panko! You can discover more tips on keeping that topping crisp (which is a real challenge!) over at this link. Honestly, once you master the cheese base, you’ll be set for any creamy horseradish sauce or casserole!
Making This Baked Mac and Cheese Recipe Ahead of Time
I know, I know! Sometimes the best-laid dinner plans get completely derailed by real life. That’s why I always tell people this easy baked macaroni recipe is secretly great for prepping ahead. The beauty of this dish is that it holds up really well, which makes it perfect for busy weeknights or getting a head start on a holiday menu. It’s one of those brilliant family dinner ideas because you can handle the labor when you have the energy.
You can assemble the entire thing—pasta mixed with the sauce, topping sprinkled on top—and keep it in the fridge. Just cover it tightly with plastic wrap or foil. I usually aim to keep it refrigerated for no more than 24 hours; any longer and I find the pasta starts soaking up too much moisture, and it loses that beautiful, bubbly texture we worked so hard to create.
Now, the adjustment you *must* make is baking time. If you’re pulling it straight from the cold fridge, it needs a jump start. You can’t just bake it straight through, or the top will burn before the center warms up enough. I always add an extra 10 to 15 minutes to the baking time when cooking from cold. Keep an eye on it, though! After that extra time, it should look bubbly and golden, just like fresh. This kind of planning is why I love recipes that can be partly made in advance, much like how I prep dough for my easy no-knead artisan bread!
Serving Suggestions for Your Cheesy Pasta Bake
You have this glorious, decadent comfort food casserole bubbling hot on the counter—now what? Since this mac and cheese is incredibly rich, you really need something bright and crisp to cut through all that cheesy goodness. Trust me, piling more heavy stuff on top just makes everyone feel sluggish!
When I serve this for a weeknight family dinner idea, I always throw together a sharp, tangy salad. Something vinegary is the perfect foil. Have you tried my super fast easy tangy cabbage salad? It’s crunchy, sharp, and comes together while the mac and cheese is resting. That’s efficiency!
If you need a cooked side dish, skip the mashed potatoes this time around. Instead, go for something green and slightly charred. Roasted Brussels sprouts or broccoli tossed with just a little olive oil and salt are fantastic. Or, if you’re feeling lazy but want something green, my baked parmesan zucchini
adds a little texture without competing with the main event. Honestly, anything that gives your palate a reset after a big bite of that sharp cheddar is going to work beautifully. I get all sorts of questions about making sure this casserole turns out perfect every time, especially when it’s destined to be a star holiday side dish! Don’t worry if you’ve messed up a cheese sauce before; we’ll fix that right now. You need flavor and melt! I insist on a blend. The sharp cheddar baked mac is our flavor backbone, but you need a good melting agent to keep things smooth—think Gruyère or good Monterey Jack. These blend beautifully and keep the sauce velvety, which is what gives you that truly *creamy baked mac and cheese*. And remember what I always say: bag shreds are full of starch that stops them from melting right. Always grate fresh! Of course you can! While elbow macaroni is the classic choice for holding onto that rich sauce we make, this is an easy baked macaroni recipe, so we should be flexible! Any short pasta shape will work. I actually love using cavatappi or shells because those little ridges and cups trap even more of that cheesy goodness. They make every forkful extra satisfying.Frequently Asked Questions About Our Baked Mac and Cheese Recipe
What is the best cheese blend for creamy baked mac and cheese?
Can I use different pasta shapes in this easy baked macaroni recipe?
How do I ensure the topping stays crispy on my baked mac and cheese recipe?
This is my favorite part, and keeping it crunchy is key! The buttered panko is your best friend here because it toasts up so fast. For the crispiest finish on your golden brown casserole top, make sure you aren’t over-baking the dish. We only bake long enough for the sauce to bubble. If you notice the top browning too fast while the middle is still cold, just slide an oven rack up a level halfway through. That little bit of extra heat directly under the topping finishes it off fast without drying out the pasta underneath!
Nutritional Estimates for This Baked Mac and Cheese Recipe
Now, I know when we’re making something as absolutely top-tier delicious as this ultimate comfort food casserole, we aren’t really thinking about the calorie count while stirring the cheese sauce! But I always get asked about the nutrition, so here they are. Remember, these numbers are estimates based on the specific ingredients I list, so if you swap out the whole milk for skim, or use a different cheese blend, things will shift around a bit!
Every time I whip up this creamy baked mac and cheese, I just focus on the smiles it brings, but here’s the general breakdown for one serving:
- Serving Size: 1 serving
- Calories: 650
- Sugar: 5g
- Sodium: 750mg
- Fat: 38g
- Saturated Fat: 22g
- Unsaturated Fat: 16g
- Trans Fat: 1g
- Carbohydrates: 55g
- Fiber: 3g
- Protein: 28g
- Cholesterol: 110mg
It’s definitely a splurge meal, which is why it works so well for holidays or those times you truly need that big, satisfying hug in a dish. Enjoy it, because you’ve earned it after mastering such a great baked mac and cheese recipe!
Share Your Family Dinner Ideas
Whew! We made it through the ultimate comfort food challenge together, and I hope your kitchen smells amazing right now. Now that you have mastered this show-stopping baked mac and cheese recipe, I really want to hear about it!
Did you stick exactly to the three-cheese blend, or did you throw in something unexpected, like a smoked Gouda? I’m always tweaking things, especially when planning for quick weeknight dinners—maybe you found a way to bake this faster?
Please leave a comment below and give this recipe a rating! Let me know if you served it as a potluck favorite or as the star of your holiday table. Tag me on social media when you post a picture of your golden, bubbly bake; seeing your family enjoy these recipes is truly why I do all this testing! Happy cooking, everyone!
PrintUltimate Creamy Baked Mac and Cheese with a Golden, Crunchy Topping
You need a satisfying, easy baked mac and cheese recipe that delivers a rich, creamy interior and a crisp, golden-brown topping. This recipe is perfect for family dinners, potlucks, or as a holiday side dish.
- Prep Time: 15 min
- Cook Time: 30 min
- Total Time: 45 min
- Yield: 6 servings 1x
- Category: Casserole
- Method: Baking
- Cuisine: American
- Diet: Vegetarian
Ingredients
- 1 pound elbow macaroni
- 6 tablespoons unsalted butter, divided
- 1/2 cup all-purpose flour
- 4 cups whole milk, warmed
- 1 teaspoon dry mustard powder
- 1/2 teaspoon smoked paprika
- 1/4 teaspoon black pepper
- 1 teaspoon salt, plus more for pasta water
- 1/4 teaspoon cayenne pepper (optional)
- 8 ounces sharp cheddar cheese, freshly grated
- 4 ounces Gruyère cheese, freshly grated
- 4 ounces Monterey Jack cheese, freshly grated
- 1 cup panko breadcrumbs
- 2 tablespoons melted butter (for topping)
Instructions
- Preheat your oven to 375°F (190°C). Lightly grease a 9×13 inch baking dish.
- Cook the elbow macaroni according to package directions until just al dente (about 1 minute less than recommended). Drain the pasta well and set aside.
- In a large saucepan over medium heat, melt 6 tablespoons of butter. Whisk in the flour and cook for 1 to 2 minutes, stirring constantly, to create a roux. Do not let it brown.
- Gradually whisk in the warm milk until the mixture is smooth. Continue to cook, stirring frequently, until the sauce thickens enough to coat the back of a spoon (about 5 to 8 minutes).
- Remove the saucepan from the heat. Stir in the dry mustard powder, smoked paprika, pepper, salt, and cayenne pepper, if using.
- Add the grated sharp cheddar, Gruyère, and Monterey Jack cheeses to the sauce in handfuls, stirring until each addition is completely melted and smooth before adding the next. This creates your rich cheese sauce recipe.
- Add the cooked, drained macaroni to the cheese sauce and stir gently until the pasta is fully coated. Pour the mixture into the prepared baking dish.
- In a small bowl, toss the panko breadcrumbs with 2 tablespoons of melted butter. Sprinkle the breadcrumb mixture evenly over the top of the macaroni and cheese.
- Bake for 20 to 25 minutes, or until the sauce is bubbly and the topping is golden brown. Let it rest for 5 minutes before serving this ultimate comfort food.
Notes
- For the best flavor, always grate your cheese fresh. Pre-shredded cheese contains anti-caking agents that prevent smooth melting.
- This recipe works well as a holiday side dish or a main course for a family dinner.
- If you are making this ahead of time, assemble the dish, cover it, and refrigerate for up to 24 hours. Add 10 to 15 minutes to the baking time if baking from cold.
Nutrition
- Serving Size: 1 serving
- Calories: 650
- Sugar: 5
- Sodium: 750
- Fat: 38
- Saturated Fat: 22
- Unsaturated Fat: 16
- Trans Fat: 1
- Carbohydrates: 55
- Fiber: 3
- Protein: 28
- Cholesterol: 110