
If you’ve ever felt that creeping disappointment when your homemade chocolate chip cookie spreads into a thin, crispy lace instead of the thick, glorious mound you envisioned, you are definitely not alone. That’s exactly the frustration I faced trying to recreate those irresistible bakery-style cookies right here in my own chaotic kitchen! This is the recipe I finally settled on—it’s the absolute best because it consistently delivers those thick, chewy centers and those perfectly golden, slightly crisp edges we all crave. As someone who built Cheffinity solving real-life dinner dilemmas, I promise you, I have rigorously tested every variable here to ensure this is a truly reliable bake. Forget the frustration; this is the one that simply works every single time, giving you that truly gourmet homemade flavor you deserve.
- Why This Is the Ultimate chocolate chip cookie recipe (Texture Secrets Revealed)
- Ingredients for the Perfect chocolate chip cookie
- How to Make Your Best homemade chocolate chip cookies
- Ingredient Notes and Substitutions for your chocolate chip cookie
- Troubleshooting Common chocolate chip cookie Issues
- Serving Suggestions for Buttery chocolate chip cookies
- Storage and Reheating Instructions for Your chocolate chip cookie Batch
- Frequently Asked Questions About the chocolate chip cookie Recipe
- Estimated Nutritional Data for This chocolate chip cookie
Why This Is the Ultimate chocolate chip cookie recipe (Texture Secrets Revealed)
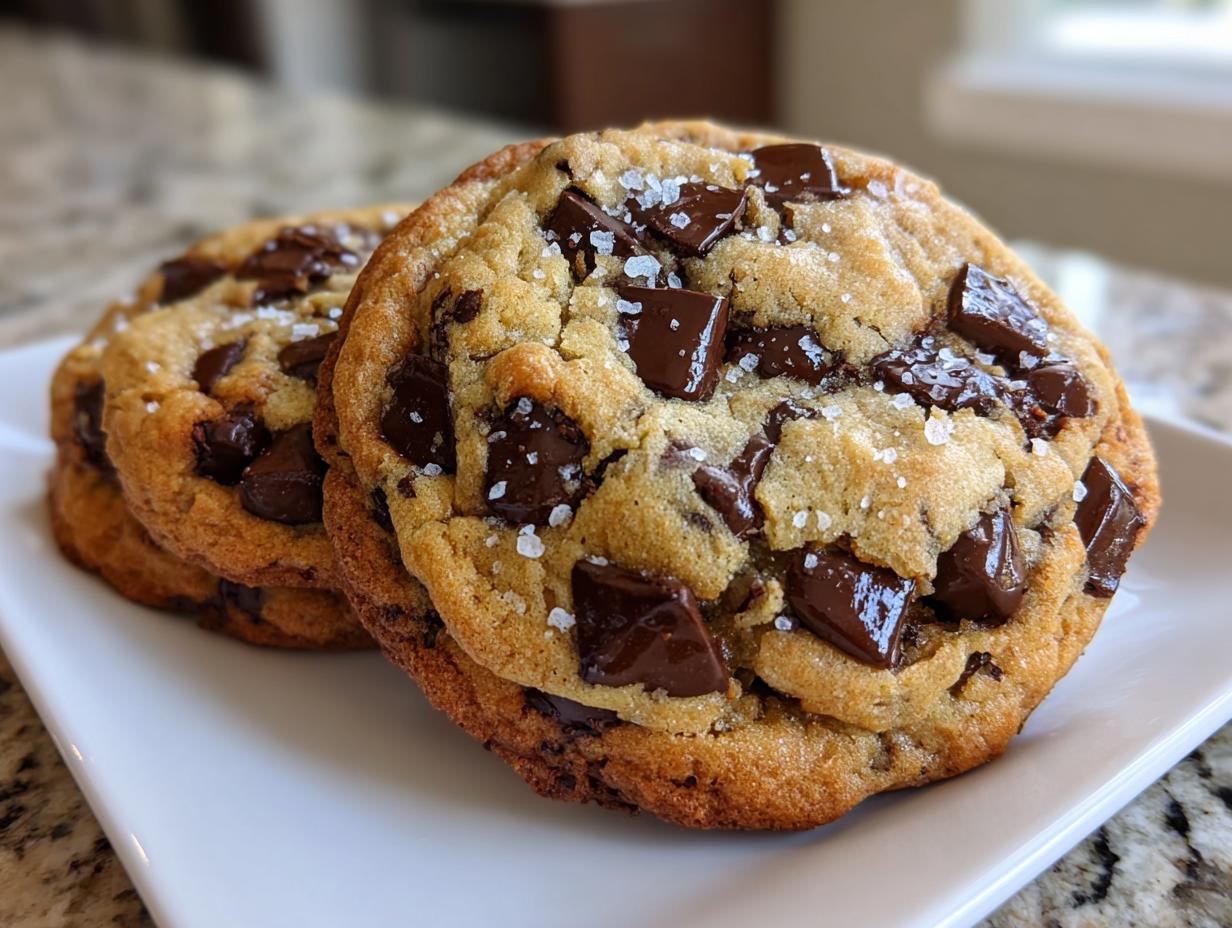
Look, I’ve thrown out more flat, sad discs of dough than I care to admit while chasing that bakery-style perfection. What makes this the ultimate chocolate chip cookie recipe is that we’re prioritizing texture over everything else. We aren’t relying on weird ingredients; we’re relying on specific processes that I’ve hammered out over months of testing. The goal is always those soft and chewy cookies with wonderful, rich buttery flavor. The two non-negotiables here are using melted butter instead of softened—it changes the protein structure—and giving the dough ample time to chill. Trust me, skipping that chill time is the fastest way to disappointment.
Achieving Bakery Style chocolate chip cookies Thickness
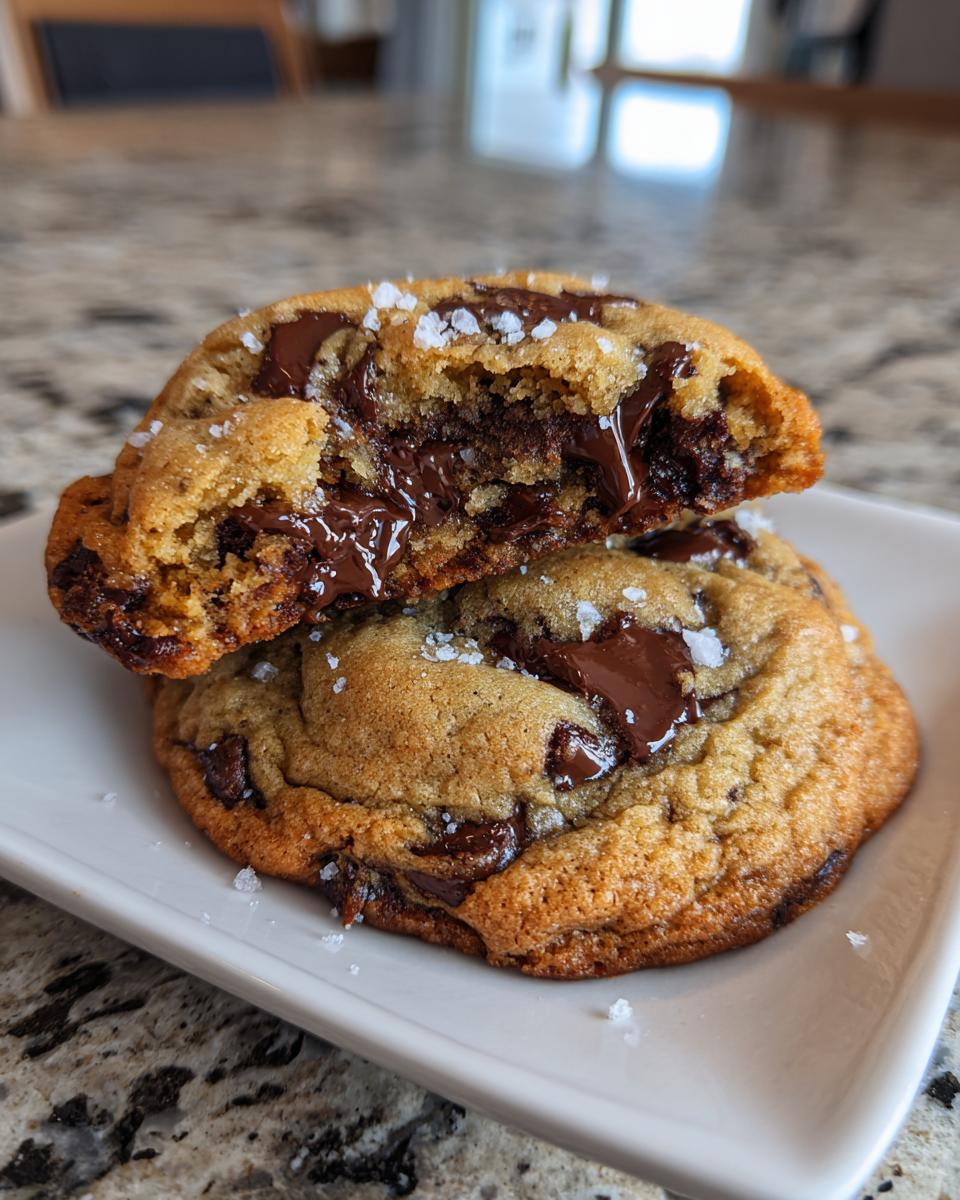
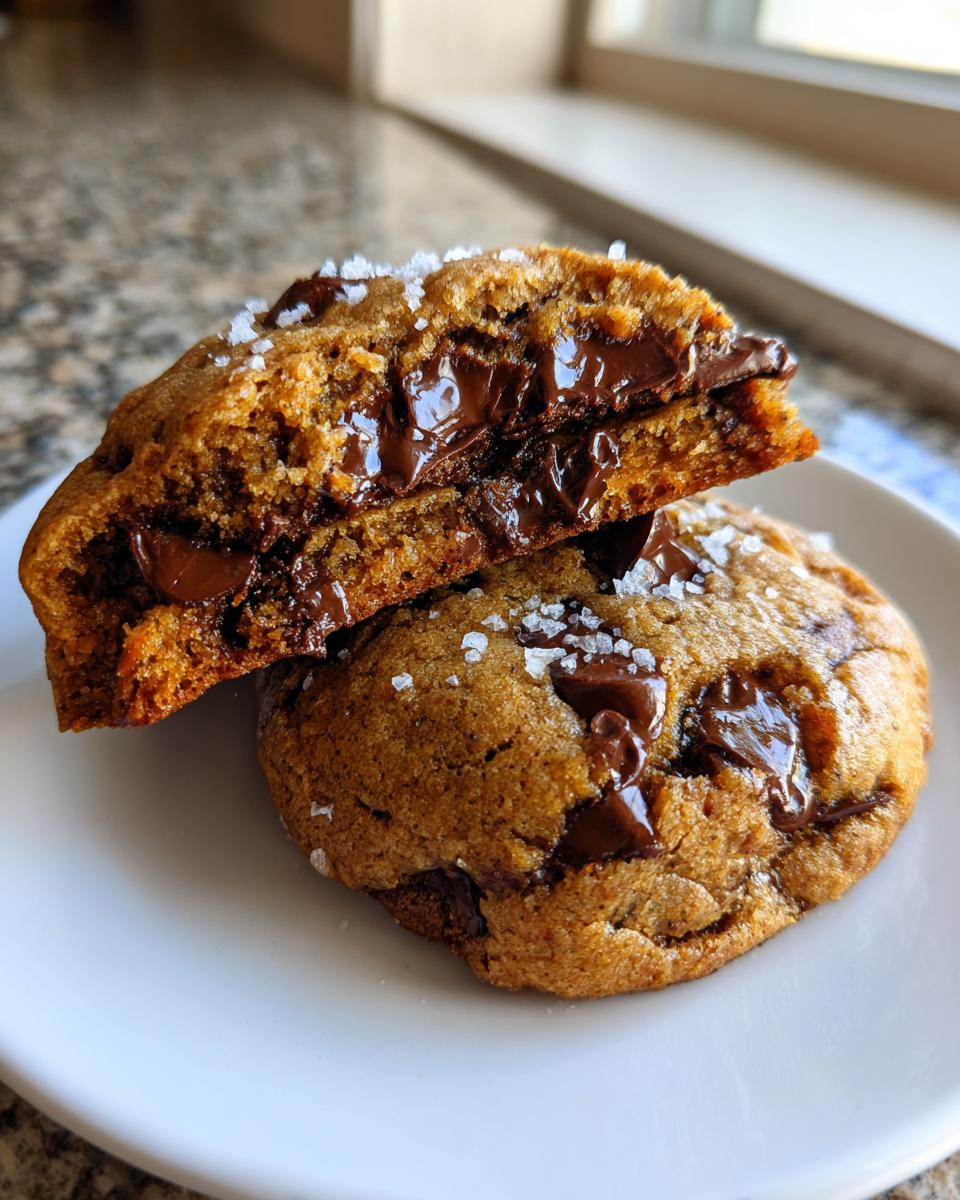
Thickness is what separates a good cookie from a truly great one! The secret to those thick chocolate chip cookies that don’t immediately melt into puddles is twofold. First, we use melted butter, which hydrates the flour differently than creamed butter. Second, when you scoop, don’t be afraid to use a lot of dough! If you want that huge bakery look, take two scoops of dough and gently stack them on top of each other before you drop them on the sheet. They bake up tall and stay thick in the center—it’s my favorite little trick!
Ingredients for the Perfect chocolate chip cookie
Okay, let’s talk about what goes into these masterpieces. You need good quality stuff because, honestly, these cookies don’t have a lot of hiding places for mediocre ingredients to lurk. Since this whole recipe hinges on texture and buttery flavor, precision here is vital. You’ll notice we don’t use creamed butter, which is a huge part of why these turn out so wonderfully chewy!
Here’s what you need to gather up for this perfect batch. Make sure your eggs are at room temperature—it helps them mix in properly with the melted butter, trust me on this one!
- 1 cup (2 sticks) unsalted butter, melted and slightly cooled
- 1 cup packed light brown sugar
- 1/2 cup granulated sugar
- 2 large eggs, room temperature
- 1 tablespoon vanilla extract
- 2 1/4 cups all-purpose flour
- 1 teaspoon baking soda
- 1/2 teaspoon salt
- 1 1/2 cups semi-sweet chocolate chips (or a mix of chips and chunks)
- Flaky sea salt, for topping (optional)
How to Make Your Best homemade chocolate chip cookies
Now for the part where we turn these beautiful ingredients into the no-fail chocolate chip cookie method! This is where people sometimes rush, but getting this timing right is key to an easy chocolate chip cookie recipe that looks like it came from a high-end bakery. First things first: get that oven heating to 350°F (175°C) and line your trays with parchment paper—it makes cleanup a breeze and ensures even baking.
We start by mixing the wet ingredients in one bowl until they look silky smooth. Then, watch carefully when we introduce the flour mixture! When you add the dry ingredients to the wet, mix only until you *just* don’t see streaks of flour anymore. My biggest rule, which I learned from watching my mom handle everything in a hurry, is: stop mixing the second it comes together! Overmixing activates the gluten, and that’s how you get tough, cakey cookies, not soft ones. After folding in all those chocolate chips, that dough needs a good rest before baking.
- Whisk together the melted butter, brown sugar, and granulated sugar in a large bowl until fully combined.
- Beat in the eggs one at a time, mixing well after each addition. Stir in the vanilla extract.
- In a separate bowl, whisk together the flour, baking soda, and salt.
- Gradually add the dry ingredients to the wet ingredients, mixing on low speed until just combined. Do not overmix.
- Fold in the chocolate chips using a spatula.
- Cover the dough and chill in the refrigerator for at least 30 minutes, or up to 24 hours, for the best texture.
- Preheat your oven to 350°F (175°C). Line baking sheets with parchment paper.
- Scoop the dough into balls, about 3 tablespoons each, and place them 2 inches apart on the prepared sheets. For thicker cookies, stack two dough balls together.
- Bake for 10 to 13 minutes, or until the edges are golden brown but the centers still look slightly underbaked.
- Remove from the oven and immediately sprinkle the tops with flaky sea salt, if using.
- Let the cookies cool on the baking sheet for 5 minutes before transferring them to a wire rack to cool completely. Enjoy exploring other great recipes while they set!
The Importance of Chilling the chocolate chip cookie Dough
Seriously, don’t skip this step! Chilling is non-negotiable if you want those thick, bakery-style results. When the dough rests, the flour has time to fully hydrate, and the fats firm up. This means the cookies spread much less in the oven, locking in that glorious thickness. You absolutely need a minimum of 30 minutes in the fridge, but honestly, if you can manage up to 24 hours, the flavor deepens beautifully, too!
Ingredient Notes and Substitutions for your chocolate chip cookie
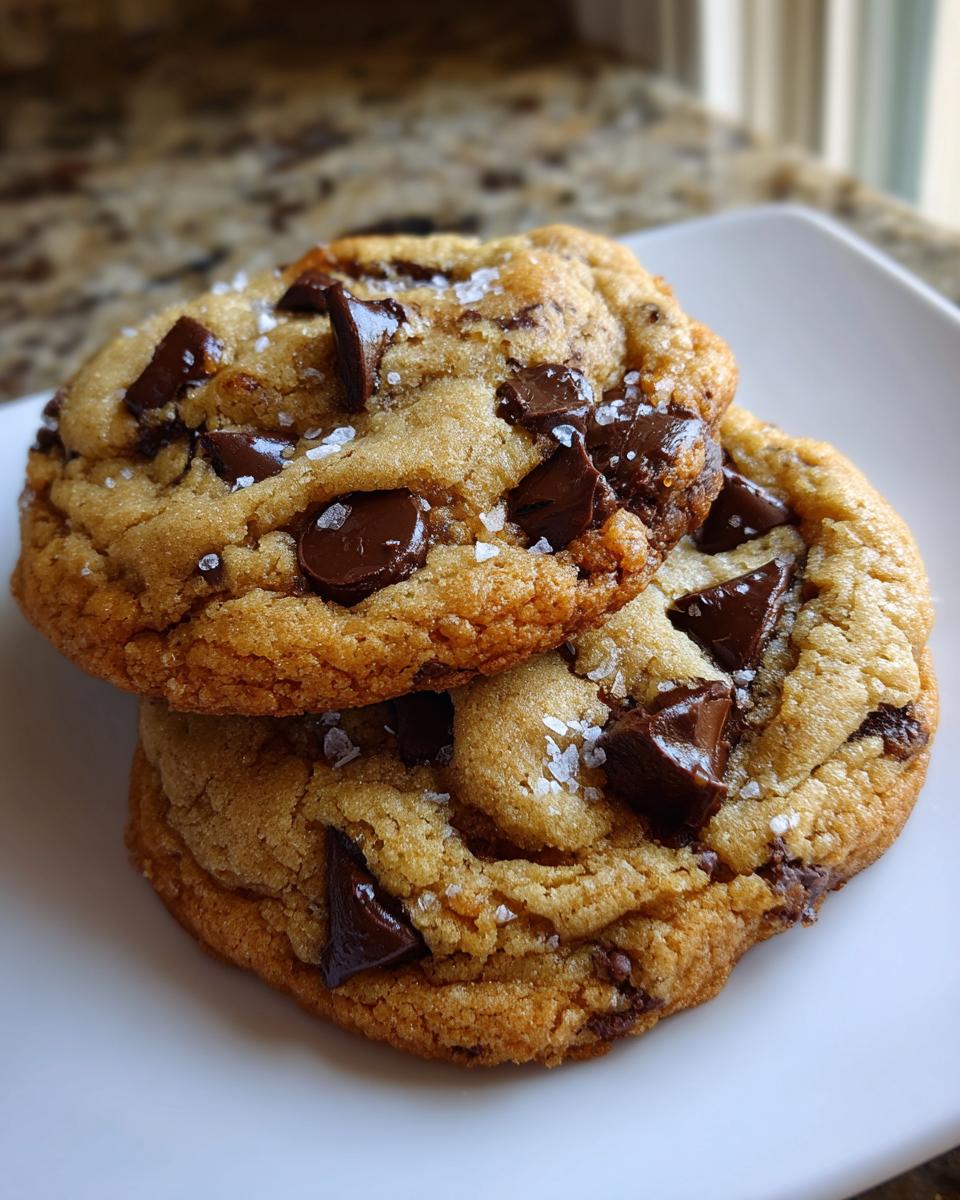
When you’re aiming for the best, you have to treat the ingredients with respect. For a truly buttery chocolate chip cookie, the brown sugar is your best friend. We use a high ratio of brown sugar to white sugar here because that molasses content keeps the edges delightfully chewy and adds a depth of flavor that plain white sugar just can’t touch—it cuts through the richness of the butter perfectly!
And please, use good quality chocolate chips! Since there aren’t a million additions crowding the flavor profile, the chocolate really sings. If you happen to only have salted butter on hand, just skip adding the extra salt in the dry mix; just make sure to use that flaky sea salt on top for the finish.
For an extra burst of flavor, sometimes I like adding just a tiny drizzle of homemade chocolate syrup right along with the vanilla—it sounds weird, but it boosts the chocolate intensity!
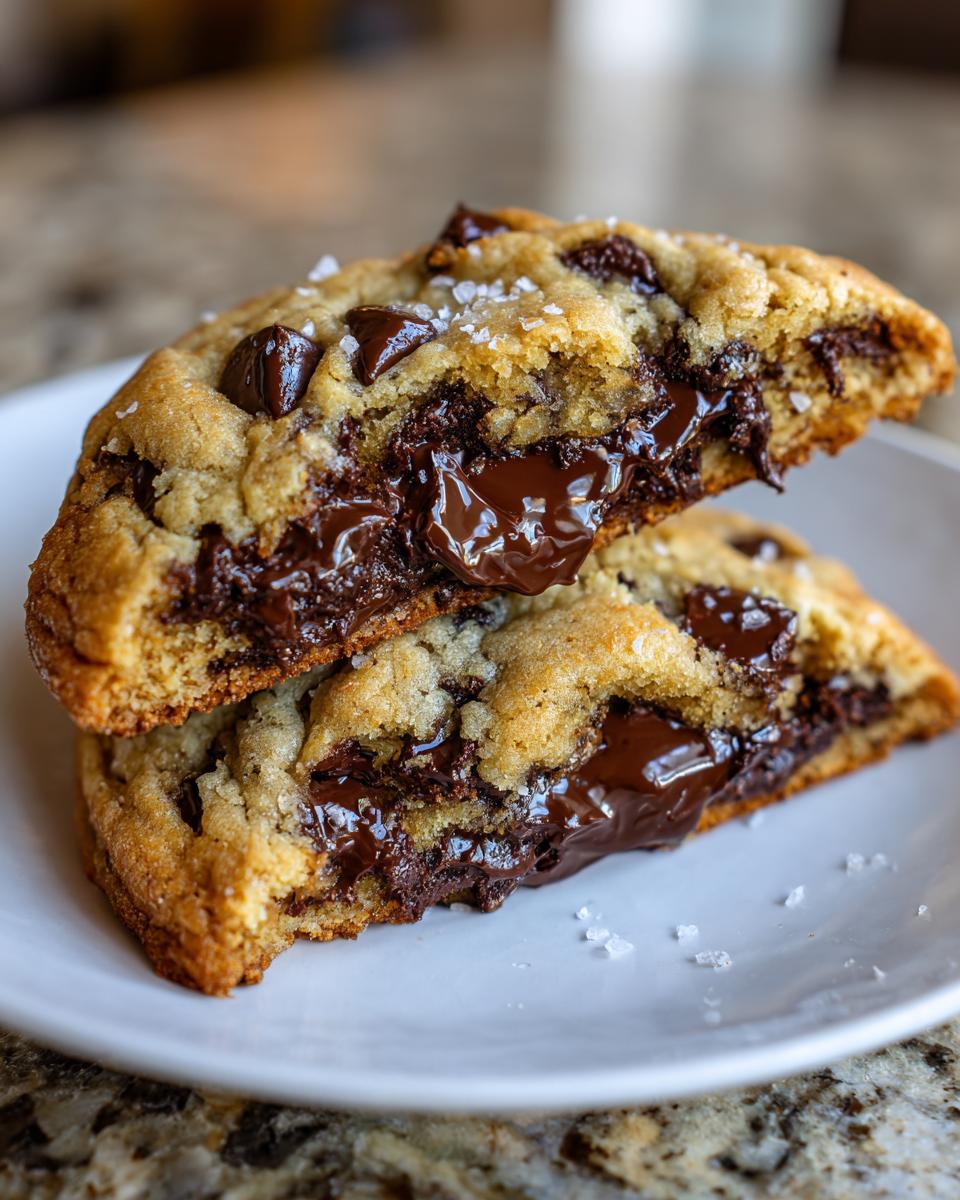
Choosing Chocolate for Gooey Center cookies
If you want those gooey center cookies we talked about, you have to think beyond just standard chips! I highly recommend using a mix. Use half standard semi-sweet chips and half chopped chocolate bars or discs. The bar chocolate melts differently, creating those lovely pools of molten chocolate that you just can’t get with chips alone.
Troubleshooting Common chocolate chip cookie Issues
It happens to the best of us! Baking is science, but sometimes the oven gods just aren’t on your side. If you find your cookies spreading way too thin, that usually means you skipped chilling the dough, or maybe your butter wasn’t cooled enough after melting. The fix? Scoop them back onto the plastic wrap and chill them for a solid hour before trying again!
Are your centers ending up too cakey instead of gooey? Nine times out of ten, that’s a sign you overmixed after adding the flour. Remember what I said about stopping when the streaks disappear? If you see that happening, stop immediately! For edges that burn before the center is set, try pulling them out just shy of done—they finish cooking on that hot baking sheet after you pull them out. They’ll set up perfectly as they cool!
Serving Suggestions for Buttery chocolate chip cookies
Once these divine buttery chocolate chip cookies cool just enough to handle, the real fun begins! Honestly, they are perfect all by themselves, but pairing them just elevates them into an event. I’m a traditionalist—nothing beats a towering stack of these fresh from the oven with an ice-cold glass of milk. The cold milk hits that warm, gooey center and it’s pure heaven.
If coffee’s more your speed, these rich cookies are fantastic for dipping! The dark roast really cuts through the sweetness beautifully. If you are making a bigger spread of desserts, try serving them alongside a scoop of vanilla bean ice cream for a simple, classic ice cream sandwich. Trust me, you won’t need anything else!
Storage and Reheating Instructions for Your chocolate chip cookie Batch
The worst thing after baking a perfect chocolate chip cookie is finding out it hardened into a rock the next day! To keep them soft and chewy, you have to keep the air out. Store leftovers in a genuinely airtight container at room temperature. If you want to keep them soft for a week or more, tuck a small slice of bread in with them—it keeps the moisture balance perfect!
If you want to save some for later, just let them cool completely first, then pop them into a freezer bag. When that craving hits, just toss a few frozen cookies onto a baking sheet and warm them up at about 350°F for about 5 to 7 minutes. They come out gooey and fresh again—it’s the ultimate quick batch fix!
Frequently Asked Questions About the chocolate chip cookie Recipe
This is where I answer all the little questions that pop up when you’re diving into a new favorite bake! I’ve seen every problem imaginable during my testing, so maybe your question is already covered here. If not, drop one in the comments!
Can I skip chilling the dough for these soft and chewy cookies?
Oh, I know the craving is real, and you want your chocolate chip cookie *now*! But honestly, if you skip chilling, you’re trading that amazing thick, chewy texture for a flat, greasy one. Chilling is what gives us those beautiful bakery style chocolate chip cookies. At the very least, put the dough in the freezer for 20 minutes if you absolutely can’t wait 30 minutes in the fridge!
What happens if I use only granulated sugar instead of brown sugar?
If you swap all the brown sugar for white sugar, you’ll end up with flatter, crisper cookies rather than the soft, gooey result we want. Brown sugar has molasses, which keeps things moist and adds that necessary chewiness. Think of it as essential for achieving the best homemade chocolate chip cookies!
I actually want thinner, crispier cookies—what do I change?
That’s not the goal of this recipe, but I get it! If you prefer an ultra-thin, crispy cookie, skip the chilling time entirely, and use softened (not melted) butter. You can also flatten the dough balls slightly before baking. That will encourage spreading, giving you the opposite effect of this recipe’s thickness!
Can I make these cookies vegan or gluten-free?
Since this particular recipe relies heavily on the structure provided by those two eggs and the way melted butter interacts with standard flour to create our chewy centers, I haven’t rigorously tested substantial vegan or gluten-free swaps yet. You might want to check out my easy dessert recipes section for options that are designed to handle those ingredient changes better from the start!
Estimated Nutritional Data for This chocolate chip cookie
Now, I’m not a nutritionist, so please take all of this with a grain of salt—or maybe a dash of flaky sea salt sprinkled on top of your warm cookie! This information is based purely on the standard ingredient measurements listed above and is meant as a helpful estimate for those tracking their intake. We are talking about the chocolate chip cookie you just made, which is truly the ultimate comfort food baking experience, so let’s not sweat the small stuff too much!
Each cookie in this batch yields a wonderfully satisfying treat. Here’s the approximate breakdown per one standard serving (one cookie):
- Calories: 220
- Sugar: 18g
- Fat: 12g (with about 7g being saturated fat)
- Carbohydrates: 28g
- Protein: 3g
- Sodium: 110mg
Remember, if you use milk chocolate instead of semi-sweet, or if you stack your dough balls for extra thickness—like I showed you how to do—these numbers will shift a little bit. But hey, they are worth every single calorie when they taste this good!
PrintThe Ultimate Bakery-Style Chocolate Chip Cookie Recipe
Make the best homemade chocolate chip cookies that are thick, chewy in the center, and slightly crisp at the edges. This easy recipe delivers gourmet, buttery flavor.
- Prep Time: 15 min
- Cook Time: 12 min
- Total Time: 47 min
- Yield: 18 cookies 1x
- Category: Dessert
- Method: Baking
- Cuisine: American
- Diet: Vegetarian
Ingredients
- 1 cup (2 sticks) unsalted butter, melted and slightly cooled
- 1 cup packed light brown sugar
- 1/2 cup granulated sugar
- 2 large eggs, room temperature
- 1 tablespoon vanilla extract
- 2 1/4 cups all-purpose flour
- 1 teaspoon baking soda
- 1/2 teaspoon salt
- 1 1/2 cups semi-sweet chocolate chips (or a mix of chips and chunks)
- Flaky sea salt, for topping (optional)
Instructions
- Whisk together the melted butter, brown sugar, and granulated sugar in a large bowl until fully combined.
- Beat in the eggs one at a time, mixing well after each addition. Stir in the vanilla extract.
- In a separate bowl, whisk together the flour, baking soda, and salt.
- Gradually add the dry ingredients to the wet ingredients, mixing on low speed until just combined. Do not overmix.
- Fold in the chocolate chips using a spatula.
- Cover the dough and chill in the refrigerator for at least 30 minutes, or up to 24 hours, for the best texture.
- Preheat your oven to 350°F (175°C). Line baking sheets with parchment paper.
- Scoop the dough into balls, about 3 tablespoons each, and place them 2 inches apart on the prepared sheets. For thicker cookies, stack two dough balls together.
- Bake for 10 to 13 minutes, or until the edges are golden brown but the centers still look slightly underbaked.
- Remove from the oven and immediately sprinkle the tops with flaky sea salt, if using.
- Let the cookies cool on the baking sheet for 5 minutes before transferring them to a wire rack to cool completely.
Notes
- Chilling the dough is key for achieving thick, bakery-style cookies that do not spread too much.
- Use high-quality chocolate chips for the best melt and flavor.
- For extra chewiness, slightly underbake the cookies; they will continue to set on the hot pan.
Nutrition
- Serving Size: 1 cookie
- Calories: 220
- Sugar: 18g
- Sodium: 110mg
- Fat: 12g
- Saturated Fat: 7g
- Unsaturated Fat: 5g
- Trans Fat: 0g
- Carbohydrates: 28g
- Fiber: 1g
- Protein: 3g
- Cholesterol: 35mg