
When the air gets that first real chill, there’s nothing—and I mean nothing—that beats the smell of warm, spiced apples baking. It just hits different, right? If you’re like me, and you can’t spend hours messing around after a long day, you need an apple crisp recipe that delivers on pure, old-fashioned comfort without the fuss. That’s exactly what I perfected here. When I started Cheffinity, it was because I knew we needed these simple, time-saving triumphs based on the real home cooking I learned while my mom was working those crazy nursing shifts. This crisp is proof that you can get that amazing, cozy dessert on the table fast.
Forget complicated pastry or fancy techniques. This is the real deal, ready in minutes, and it’s built for weeknights. Click here to jump right into the magic!
- Why This Is The Best Old Fashioned apple crisp recipe
- Gathering Ingredients for Your apple crisp recipe
- How to Make This easy baked apple dessert
- Tips for a Foolproof apple crisp recipe
- Serving Suggestions for Your warm apple dessert recipe
- Storage and Reheating Instructions for apple crisp recipe
- Frequently Asked Questions About This classic apple crisp recipe
- Nutritional Estimates for Your apple crisp recipe
- Share Your Homemade Comfort Dessert Experience
Why This Is The Best Old Fashioned apple crisp recipe
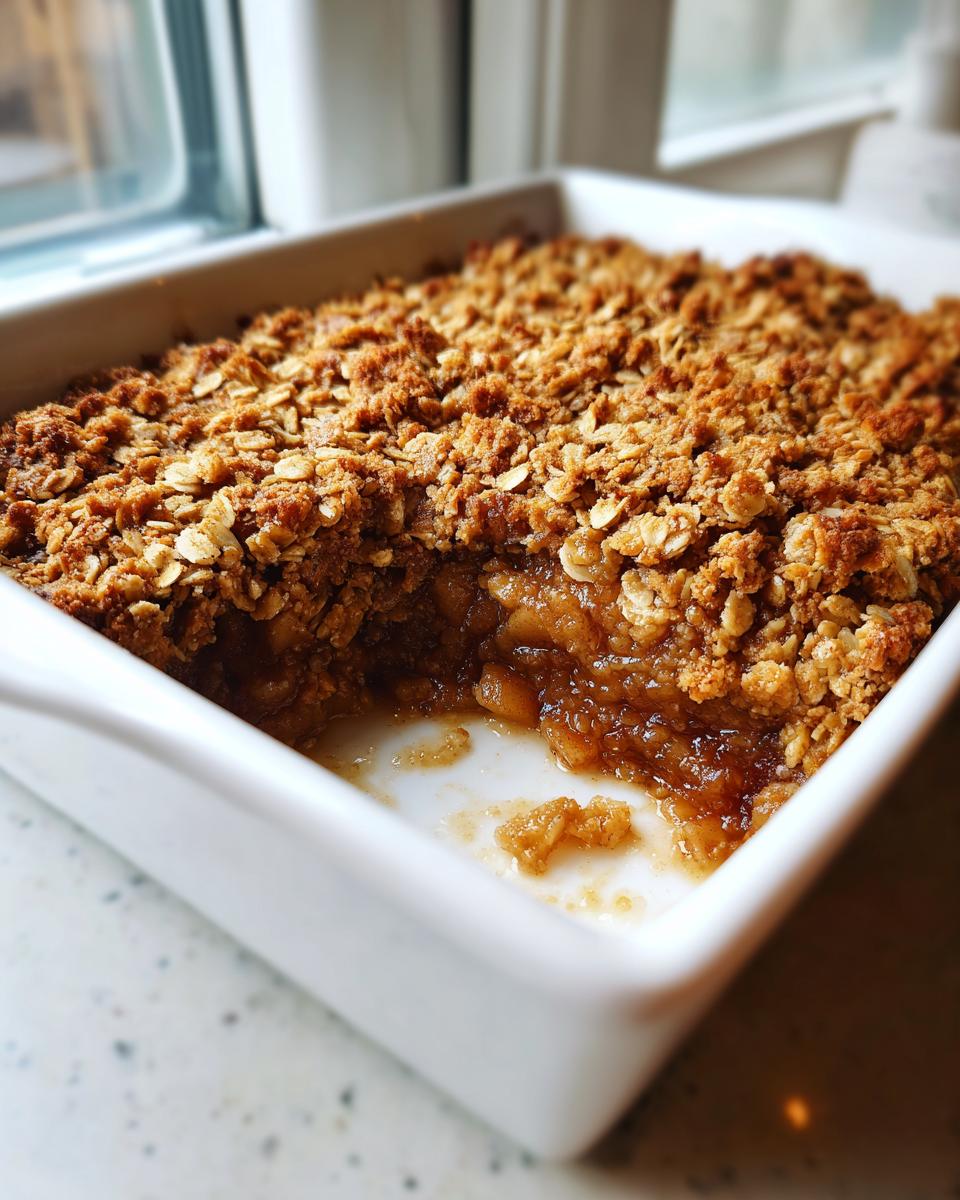
I’ve baked dozens of crisp variations, trying everything from almond flour to streusel secrets, but I always come back to this one. Why? Because it nails the texture balance you want in a classic apple crisp recipe. We aren’t messing around with delicate crumbs here. This is engineered for comfort, meaning tender apples that melt right in your mouth beneath the crunchiest, most buttery oat layer you’ve ever had. This is hands-down the best apple crisp ever because we tested it relentlessly in my chaotic home kitchen until it was foolproof.
When you need a home-cooked dessert that actually feels like a treat but doesn’t demand your entire evening, this is the one to turn to. If you love simple desserts, swing by our main delicious dessert recipes page for more inspiration!
Quick Prep Time for Your apple crisp recipe
This is where we win back your evening! Seriously, you can get this entire thing assembled before your coffee finishes brewing. We are talking about a hands-on prep time of just 15 minutes, tops. That’s what makes this such a fantastic quick apple dessert recipe when an unexpected craving hits you mid-week. Less time prepping means more time enjoying that warm cinnamon spice.
The Signature Buttery Oat Topping recipe
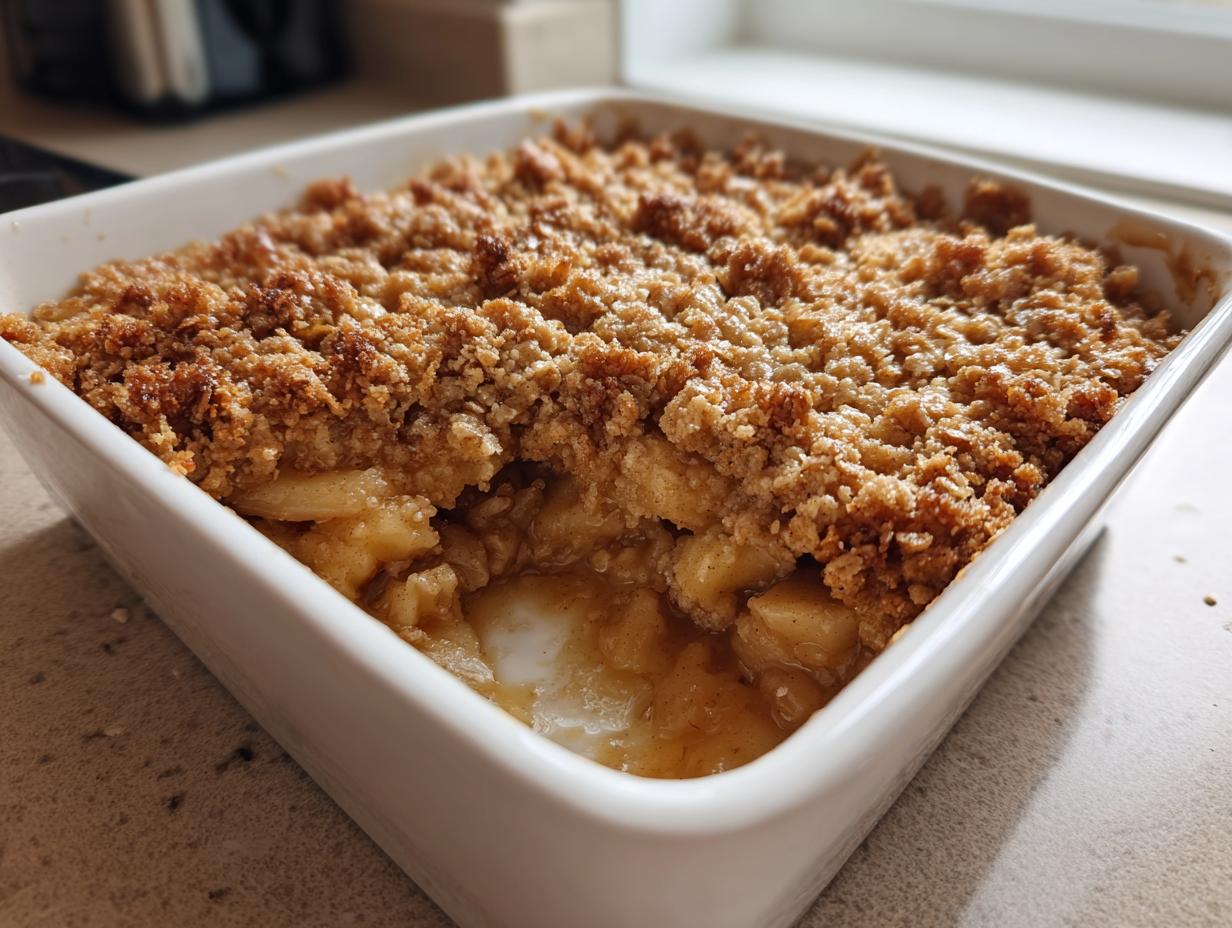
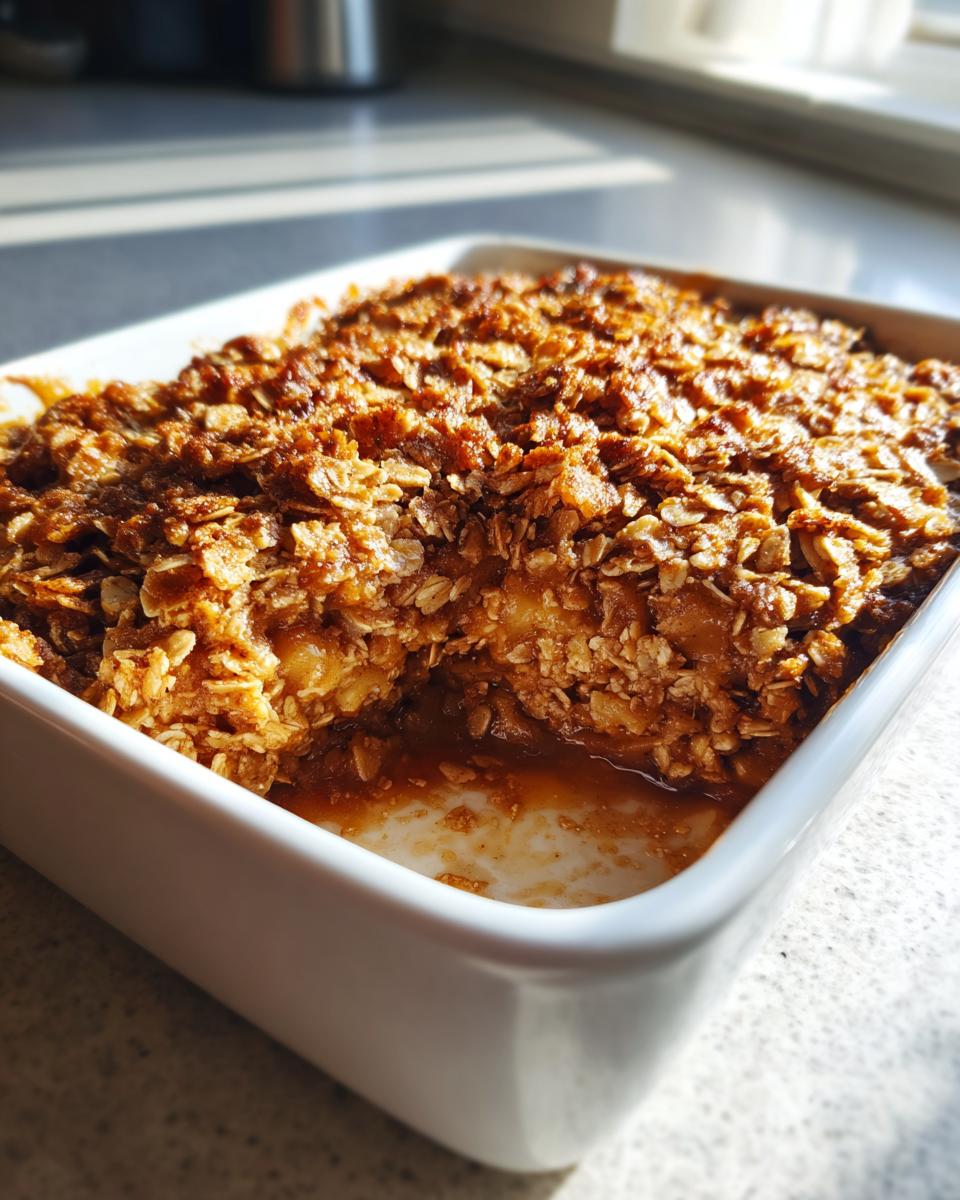
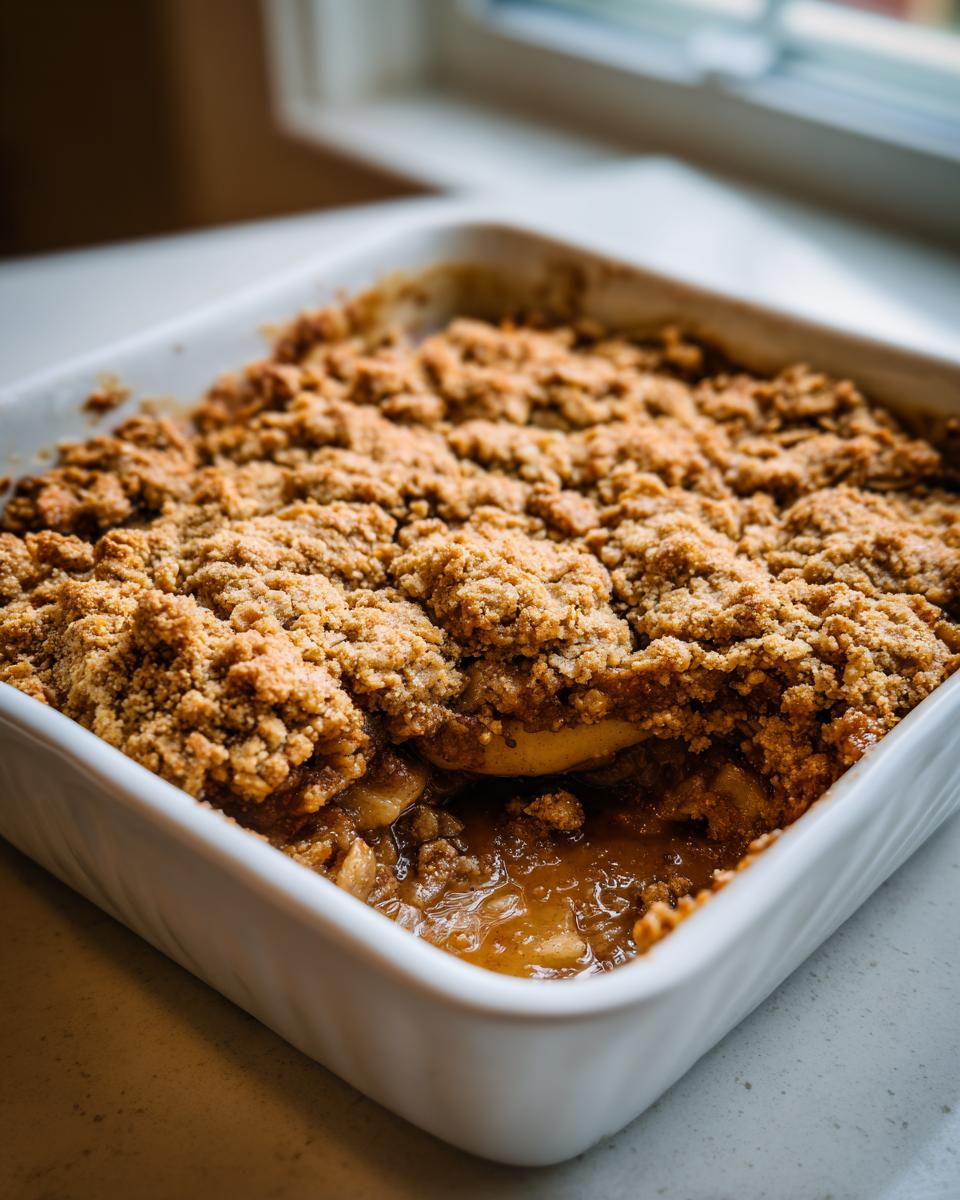
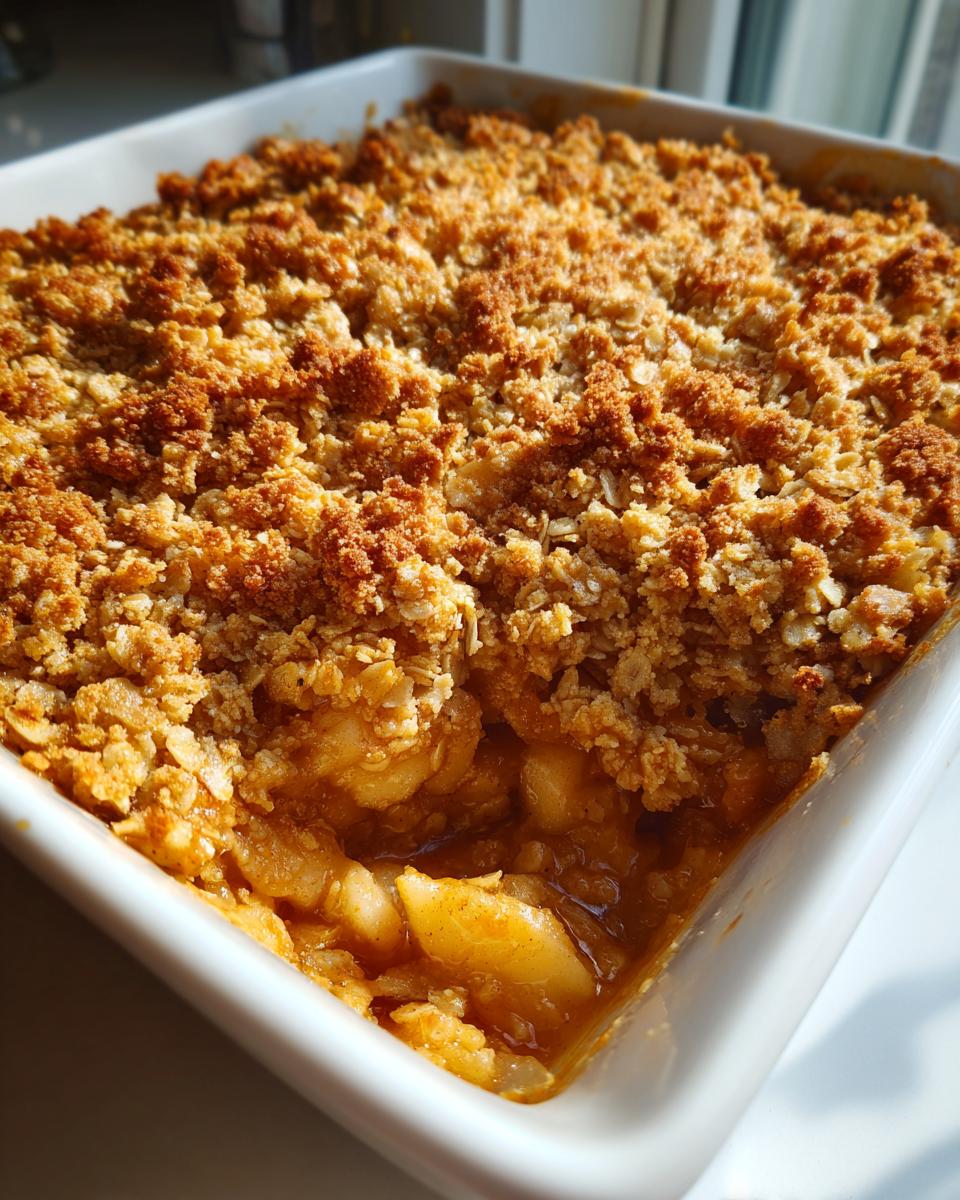
Listen, the filling is important, but the topping? That’s the star! Our secret is using very cold butter cut into small cubes. When you cut that cold butter into the sugars and oats, you create little pockets. Those pockets are what explode into that glorious, almost sandy, crunchy texture when they bake. It’s the hallmark of a superior buttery oat topping recipe, and it never gets soggy on the bottom layer, which is a baking miracle, right?
Gathering Ingredients for Your apple crisp recipe
Part of the joy of this old fashioned apple crisp is that you probably have most of this in your pantry right now. We stick to simple, quality ingredients because, remember, Cheffinity is about making things easy! For the apples, I usually grab six medium ones—a mix of tart like Granny Smith and something sweeter like Honeycrisp really keeps the flavor interesting.
The real key, though, is that topping mixture. Make sure you use 1/2 cup of *cold* unsalted butter cut into little cubes. Don’t soften it! That cold butter is essential for creating those distinct, crunchy layers we talked about. Everything else is just standard spices and sugars—nothing fussy, I promise.
How to Make This easy baked apple dessert
Okay, let’s get this baked apple dessert into the oven! Getting this easy baked apple dessert done is truly simple, which is why it’s become my go-to for satisfying those fall cravings without stress. First things first: make sure your oven is humming along at 375 degrees Fahrenheit, and grease up that 8×8 baking dish. Trust me, nobody wants to scrape baked apples off the bottom!
We’ll tackle the apples first, then the topping, and then it’s go-time. If you need more quick ideas, check out my guide to quick weeknight dinners—this crisp fits right in!
Preparing the Cinnamon Spiced Apples
In a big bowl, toss those beautiful sliced apples with the granulated sugar, that tiny bit of flour, the cinnamon, the nutmeg, and the lemon juice. That little bit of lemon is my expert trick; it keeps the apples bright and stops them from turning dull brown while they nap under that topping. You just want to gently toss them until every slice is coated in that lovely spice mix. Then, spread them out evenly in that greased dish—that’s the base layer for your apple crisp recipe.
Creating the Perfect Buttery Oat Topping
Next up is the best part! In a separate bowl, mix your dry topping ingredients: the flour, brown sugar, oats, cinnamon, and salt. Now, the technique here is important for how to make apple crisp that stays crunchy. Take your *cold* butter pieces and use your fingertips or a pastry blender to work it into that mix. You’re not making dough; you’re aiming for coarse crumbs, like gravel, with some pieces of butter still visible. Stop mixing right when they look pea-sized! If you mix too much, those butter pockets melt together, and you end up with a hard cookie layer instead of a crisp.
Sprinkle that topping generously over the apples. Then, slide it in the oven for about 35 to 45 minutes. You’ll know it’s done when the apples are bubbling up all thick and gooey around the edges, and the topping looks deep golden brown. Seriously, the smell in your house will be incredible!
Tips for a Foolproof apple crisp recipe
Even though this is designed to be easy, I always share these little secrets I picked up from testing this old fashioned apple crisp dozens of times. It’s about removing any guesswork so you always get that perfect result. We’re aiming for a truly foolproof apple crisp recipe here, which mostly comes down to temperature and ingredient choice. I’ve learned that even the smallest tweak can make a big difference in that final, cozy experience.
If you want to know more about the strategy behind keeping things simple but delicious here at Cheffinity, you can always check out our About page!
Choosing the Right Apples for Your apple crisp recipe
Don’t just grab any apple in sight! For the best texture—the one where the apples are tender but haven’t completely dissolved into mush—you really need a mix. I always use at least two types. Granny Smith apples are fantastic because they hold their shape well and offer that necessary tart punch to cut through all the sweet butter topping.
Then, mix those with something sweeter, like Honeycrisp or Fuji. This combination ensures you get that complex flavor and textural variety that makes the filling as interesting as the topping. It stops the whole dessert from tasting flat!
Serving Suggestions for Your warm apple dessert recipe
This crisp is honestly delicious all by itself, still warm from the oven, filling your whole house with that wonderful smell, but let’s be honest—it’s begging for enhancement! When I pull this warm apple dessert recipe out, the very first thing I grab is the vanilla ice cream. There is no negotiating this step in my house. The contrast between that steaming, cinnamon-spiced filling and the cold, melting vanilla is just heaven on a spoon.
My kids are total ice cream purists when it comes to this crisp. If you are serving this after a big dinner or for guests, though, you can certainly dress it up a bit. A simple dollop of freshly whipped cream works beautifully, especially if you lace the cream with just a tiny splash of bourbon for the adults—don’t tell the kids! Sometimes, I’ll even drizzle a little caramel sauce over the ice cream just to push it over the top into full-blown, decadent territory. Whatever you decide, make sure you serve it right away so you get that perfect textural contrast!
For more comforting ideas that make weeknights feel special, take a look at the rest of my delicious dessert recipes collection!
Storage and Reheating Instructions for apple crisp recipe
So, what happens if you actually have leftovers of this amazing apple crisp recipe? Because it’s a homemade comfort dessert, it lasts wonderfully! Once it cools completely, grab an airtight container and pop the leftovers in the fridge. It’ll keep nicely for about three days, which gives you a few days of easy dessert ready to go.
But here’s the absolute crucial tip for reheating: Skip the microwave! That thing makes the topping go sad and soft. Instead, spread the leftover crisp on a baking sheet and heat it in a 350-degree oven for about 10 minutes, or until it’s steamy warm. That quick blast of dry heat brings that buttery oat topping right back to life!
Frequently Asked Questions About This classic apple crisp recipe
It’s funny how one simple dessert can bring up so many questions! When I was perfecting this recipe, I discovered a few things that trip people up, so I wanted to put those answers right here to help you get that perfect, cozy result every time. If you’ve got more questions after trying this, shoot me a line. For general kitchen strategy, always check out our healthy lunch recipes section for more ways to keep things efficient!
Can I use different kinds of fruit in this apple crisp recipe?
Absolutely, you can! This structure is wonderful for so many fall apple desserts. Pears work beautifully alongside apples, or you can swap out half the apples for blackberries or blueberries if you want a little burst of tartness. Just remember this—if you use fruit that releases a lot more water than apples, like softer berries, you might need to give it an extra 5 to 10 minutes in the oven, or even dust the fruit layer with a tiny bit more flour to help it thicken up. It’s all about adapting for that perfect gooey filling!
What is the best way to make the topping less soggy in my apple crisp recipe?
This is the eternal struggle, isn’t it? The key to avoiding a sad, soggy topping in your apple crisp recipe comes down to two main points. First, you must use very, very cold butter, and you have to cut it in quickly so it stays cold. If the butter melts even a little before it hits the oven, you lose that crucial pocket structure that crisps up. Second, resist the urge to mix the topping too much! You want it crumbly, not pasty. If your kitchen is super warm, try blending the dry ingredients, then popping the whole bowl into the freezer for about 10 minutes right when you are slicing your apples. That chilling action locks in the crispness!
Nutritional Estimates for Your apple crisp recipe
I always keep my recipes focused on taste and ease, because when you’re whipping up a homemade comfort dessert, you aren’t usually worried about counting calories! That said, I ran the numbers on my standard batch so you have a general idea. If you use this recipe, it comes out to roughly 350 calories per serving, with about 18 grams of fat.
Please remember these are just estimates, like all nutrition facts are! The sugar content will change based on what apples you select and how much sugar you decide to sprinkle on top. These values are based on my standard measurements, so treat them as a helpful starting point rather than gospel truth!
Share Your Homemade Comfort Dessert Experience
Okay, now it’s your turn! I’ve given you my absolute favorite, tried-and-true apple crisp recipe—the one that sings true autumn comfort every single time. I really want to see how this homemade comfort dessert turns out in your kitchen. Did you follow the steps exactly? Did you sneak a taste before the 15-minute cool-down (I won’t tell!)?
Please take a moment to leave a rating below. More importantly, tell me about your experience in the comments! Did this stack up against those other fall apple desserts you’ve made? I love hearing which apples you chose or if you tried adding a pinch of cardamom instead of nutmeg. Your feedback helps me keep testing and ensuring Cheffinity delivers the best, easiest recipes out there.
If you love this, don’t hesitate to check out my go-to list for easy breakfast ideas for a fast start tomorrow! And if you’re curious about other famous bakes, check out this great recipe inspiration over at this link. Happy baking!
PrintThe Best Old Fashioned Apple Crisp Recipe With Buttery Oat Topping

You need a simple, comforting dessert for fall or any night. This classic apple crisp recipe features tender, cinnamon-spiced apples beneath a golden, buttery oat topping. It is quick to prepare and always a crowd-pleaser.
- Prep Time: 15 min
- Cook Time: 40 min
- Total Time: 55 min
- Yield: 6 servings 1x
- Category: Dessert
- Method: Baking
- Cuisine: American
- Diet: Vegetarian
Ingredients
- 6 medium apples (like Granny Smith or Honeycrisp), peeled, cored, and sliced
- 1/4 cup granulated sugar
- 1 tablespoon all-purpose flour
- 1 teaspoon ground cinnamon
- 1/4 teaspoon ground nutmeg
- 1 tablespoon lemon juice
- 1/2 cup all-purpose flour (for topping)
- 1/2 cup packed light brown sugar (for topping)
- 1/2 cup old-fashioned rolled oats (for topping)
- 1/2 teaspoon ground cinnamon (for topping)
- 1/4 teaspoon salt (for topping)
- 1/2 cup (1 stick) cold unsalted butter, cut into small pieces
Instructions
- Preheat your oven to 375 degrees Fahrenheit. Lightly grease an 8×8 inch baking dish or a similar 1.5-quart casserole dish.
- In a large bowl, combine the sliced apples, granulated sugar, 1 tablespoon flour, 1 teaspoon cinnamon, nutmeg, and lemon juice. Toss gently until the apples are evenly coated.
- Pour the apple mixture into your prepared baking dish and spread it into an even layer.
- In a separate medium bowl, prepare the topping. Combine the 1/2 cup flour, brown sugar, oats, 1/2 teaspoon cinnamon, and salt. Mix these dry ingredients with a fork.
- Cut the cold butter pieces into the dry topping mixture. Use your fingers or a pastry blender to cut the butter in until the mixture resembles coarse crumbs with some pea-sized pieces remaining. Do not overmix.
- Sprinkle the buttery oat topping evenly over the apples in the baking dish.
- Bake for 35 to 45 minutes, or until the topping is golden brown and the apple filling is bubbling thickly around the edges.
- Let the apple crisp cool on a wire rack for at least 15 minutes before serving. This allows the filling to set slightly.
- Serve warm, ideally with vanilla ice cream.
Notes
- For the best texture, use a mix of tart and sweet apples.
- If you want a slightly crispier topping, chill the topping mixture for 10 minutes before sprinkling it over the apples.
- This easy baked apple dessert pairs well with a scoop of vanilla ice cream or a dollop of whipped cream.
Nutrition
- Serving Size: 1 serving
- Calories: 350
- Sugar: 30g
- Sodium: 150mg
- Fat: 18g
- Saturated Fat: 11g
- Unsaturated Fat: 7g
- Trans Fat: 0g
- Carbohydrates: 48g
- Fiber: 5g
- Protein: 4g
- Cholesterol: 45mg