
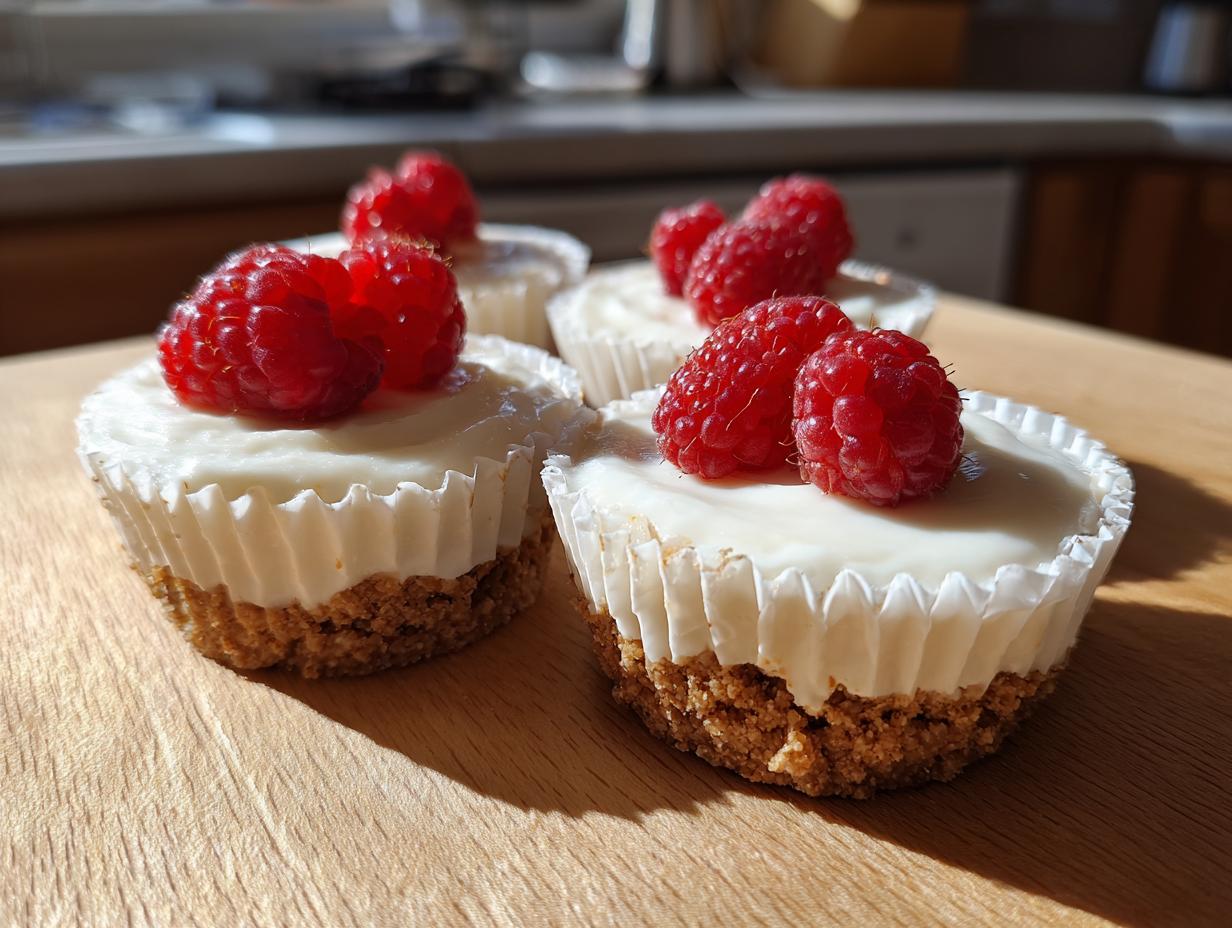
It’s late, you’ve had a crazy day, but *someone* mentioned needing a perfect little sweet treat for tomorrow’s gathering. Sound familiar? Trust me, I get it. That’s why Ava Sinclair built Cheffinity—to get rid of the stress that comes with cooking when life is running at a million miles an hour. Forget complicated water baths and worrying about cracks; this is my absolute go-to recipe for incredibly creamy **mini cheesecake** cups. They are bite-sized, they require zero oven time, and honestly, they look ten times fancier than the effort you put in. We’re talking effortless elegance, perfect for any party or just when you need that quick dessert fix.
This recipe is pure Cheffinity magic. It uses simple ingredients, takes about 20 minutes of active time, and delivers that rich, satisfying cheesecake flavor we all crave, making it one of the very best dessert recipes for making ahead.
- Why This No-Bake Mini Cheesecake Recipe Works for Busy Cooks
- Gathering Your Ingredients for Perfect Mini Cheesecake Cups
- Step-by-Step Instructions for Easy Mini Cheesecakes
- Tips for Success with No Bake Mini Cheesecakes
- Creative Mini Cheesecake Toppings Ideas
- Make Ahead and Storage for Your Individual Cheesecakes
- Serving Suggestions for Mini Cheesecake Bites
- Frequently Asked Questions About Making Mini Cheesecake
- Nutritional Estimates for This Simple Cheesecake Recipe
Why This No-Bake Mini Cheesecake Recipe Works for Busy Cooks
When you’re fighting that weeknight scramble, you need smart recipes, not complicated ones. This no-bake style is exactly what Ava always champions for real-life kitchens.
- No Oven Required! Seriously, zero heating up the kitchen, which is a lifesaver in the summer.
- Seriously Quick Prep: You’re done mixing in under 20 minutes. That means more time back in your day.
- Perfect Portions: They are naturally grab-and-go, making them an incredible easy dessert for parties without needing plates or forks.
- Make-Ahead Masterpiece: Chill them the day before you need them; they get better overnight! Talk about a quick cheesecake dessert solution.
Gathering Your Ingredients for Perfect Mini Cheesecake Cups
Okay, let’s haul out the goods! Since this is a no-bake recipe, the quality of what we put in matters a lot because we don’t have the oven to smooth out any odd texture issues later. You only need three parts: the crust, the creamy filling, and, of course, the fun topping part!
We are aiming for 12 perfect **mini cheesecake** treats, so make sure you have your muffin tin ready with liners (that’s step one in the instructions!).
Here is everything you need:
For the Graham Cracker Crust:
- 1 1/2 cups graham cracker crumbs
- 1/4 cup granulated sugar (This gives the crust just a little crunch and sweetness!)
- 6 tablespoons unsalted butter, melted
For the Creamy Filling:
- 16 ounces cream cheese, softened
- 1 cup powdered sugar
- 1 teaspoon vanilla extract
- 1/4 cup heavy cream
Optional Toppings (The Fun Part!):
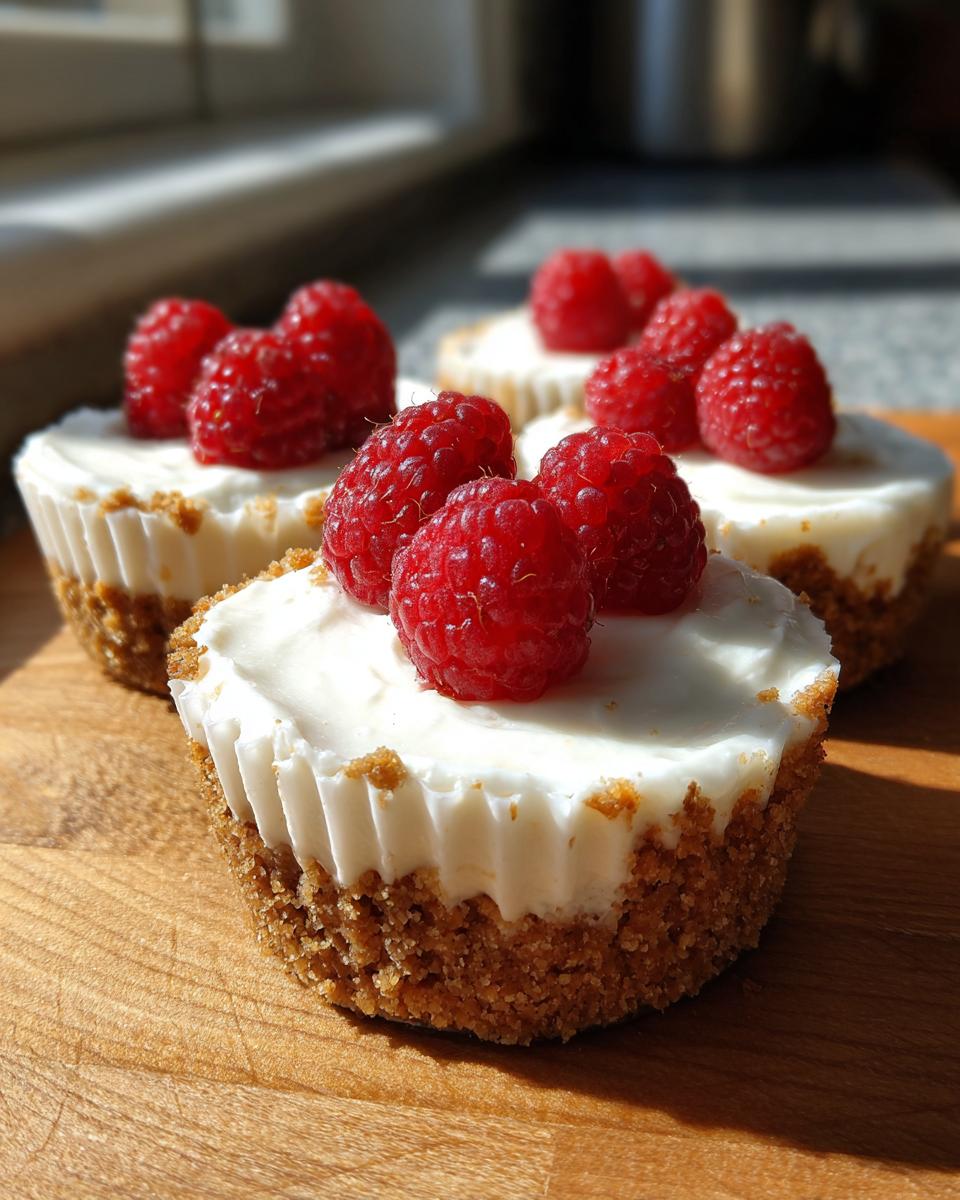
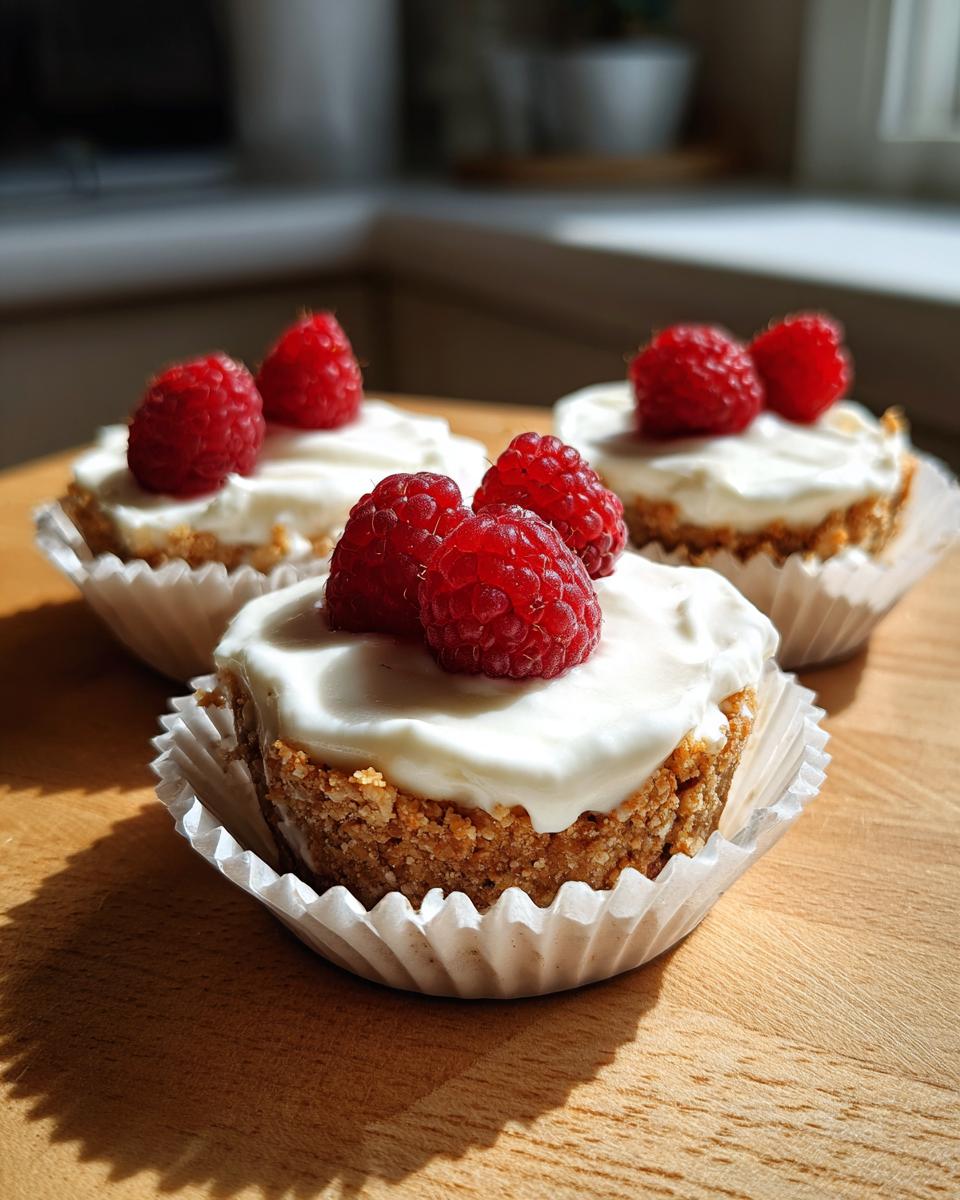
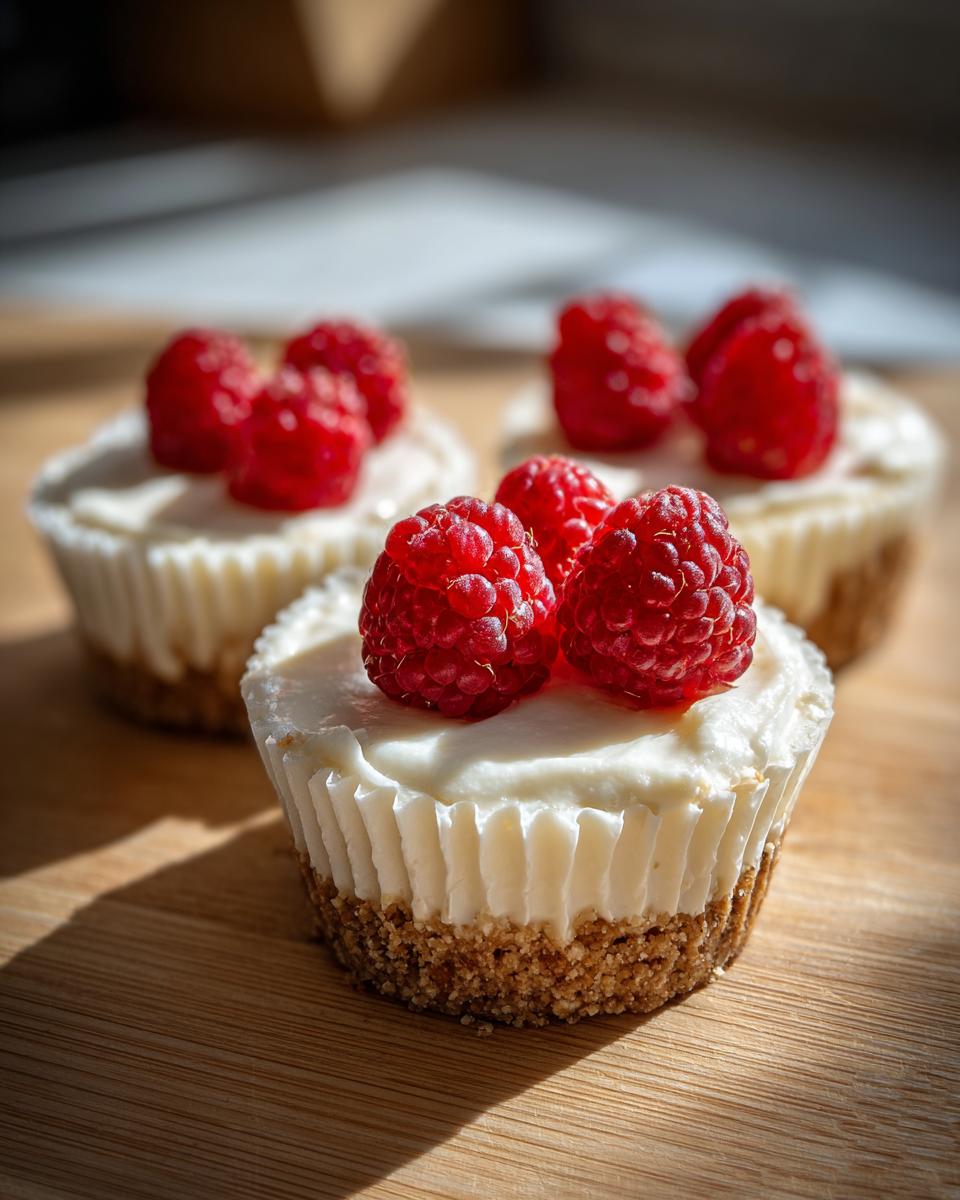
- Fresh berries (strawberries or raspberries are my favorites!)
- Chocolate sauce
- Caramel sauce
Ingredient Notes and Substitutions for Your Mini Cheesecake Recipe
Just a couple of quick reminders on these items before we start mixing. If you skip these tips, you might end up with lumps, and nobody wants a lumpy dessert!
First, that cream cheese—it absolutely *has* to be softened. I mean fully soft, room temperature soft. If it’s even a little cold when you start beating it, you’re going to see little cream cheese pebbles in your filling later. Take it out a good hour before you plan to start mixing!
For the crust, the recipe calls for graham cracker crumbs, which I love because they give you that classic tang. But if you’re in a real pinch, totally swap those graham crackers out for crushed vanilla wafers. They work beautifully and give you a slightly different, buttery flavor profile. Just crush ’em up finely!
The heavy cream is what keeps this filling light and almost mousse-like, since we aren’t using any eggs or baking soda. Don’t skimp on it!
Step-by-Step Instructions for Easy Mini Cheesecakes
Alright, this is where we put those beautiful ingredients to work! Since this recipe is all about making things simple—remember, zero minutes cook time here!—we need to focus on technique in the mixing stages so these **mini cheesecakes** set up perfectly solid and sliceable. We’re aiming for the best flavor combination, and if you’re looking for more sweet ideas, check out our full roundup of delicious dessert recipes!
We are moving fast, but don’t rush the chilling! That’s the secret to getting them firm enough to serve when it’s party time.
Preparing the Graham Cracker Crust for Your Mini Cheesecake
First things first, get your muffin tin lined with those paper cups. You’re going to mix up your crust ingredients: the crumbs, the extra sugar, and the melted butter. Stir it all together until it looks like wet sand. You know, the perfect consistency that holds together when you squeeze it in your hand.
Now, divide that crumb mixture evenly among the 12 cups. Here is the most important part for this step: press it down *hard*. I like to use the back of a small glass or a measuring cup to really compact that crust into the bottom of the liner. A firm base means your crust won’t crumble when people pick up their dessert!
Once they are all pressed down nicely, pop that whole tin into the freezer. We’re talking 10 to 15 minutes minimum while you whip up the filling. Being able to say your prep time is only 20 minutes is fantastic, but you have to trust the freezing process for structure!
Mixing the Creamy Filling for Perfect Mini Cheesecakes
Time for the filling. Remember what I said about that softened cream cheese? If it’s ready, this is going to come together in minutes. Start by putting that softened cream cheese into a clean bowl, and beat it on medium speed until it’s completely lump-free and light. Scrape down the sides! We want zero rogue chunks of cold cheese hanging around.
Next, add your powdered sugar slowly, a little bit at a time, mixing thoroughly after each addition. If you dump it all in at once, it’s going to puff up and make a mess, or worse, leave you with gritty spots. Keep scraping those sides!
Once that base is totally smooth, drizzle in the vanilla and the heavy cream. Mix this just until everything comes together and looks light and just barely fluffy. Seriously, stop mixing when it’s combined. Over-beating this final mixture in a **mini cheesecake** recipe introduces too much air, and sometimes that can make the filling a little too soft when it sets. We want that unbelievably **creamy mini cheesecakes** texture, not a cloud!
Spoon or pipe that filling evenly over your chilled crusts. Then, patience! Pop them back into the fridge—not the freezer this time—for at least four hours. But honestly, if you can let these chill overnight, they firm up beautifully and are ready for any party!
Tips for Success with No Bake Mini Cheesecakes
Even though we’re skipping the oven, getting that perfect, melt-in-your-mouth texture in these **mini cheesecakes** still requires a few smart moves. Think of these as the final little nudges that take your dessert from good to absolutely unforgettable. We want that flawless, **creamy mini cheesecakes** consistency every single time, right?
My biggest piece of advice, always, is to respect the chill time. If you try to serve these before that minimum four-hour mark, they are going to be too soft. You’ll end up with a mess on your plate instead of the perfect individual serving!
Here are the things I always double-check because they make a huge difference:
- Don’t Scrape the Bottom: When you’re pressing that crust in, stop right when the graham cracker mixture hits the paper liner. If you press too hard down the sides of the liner, it can make them physically stick when you try to peel the paper away later. We want clean release!
- Pipe for Perfection: If you have a piping bag handy, use it! Filling the cups with a large star tip gives you an immediate professional look, plus it helps distribute the filling evenly without stirring up the crust underneath. If you don’t have one, just use a large spoon and carefully level the top with the back of another spoon.
- Full Fat is Your Friend: Stick to full-fat cream cheese for this recipe. The lower-fat versions have more water, and guess what extra water does in a no-bake dessert? It keeps things soft, spreadable, and prevents that rich, dense set we are aiming for. Be dedicated to the full-fat brick!
If you loved how easy this process was, you might want to check out some more layered flavor combinations, like our snickerdoodle cheesecake recipe—it uses similar techniques to achieve amazing creaminess without baking, too!
Remember that minimum 4-hour chill time. If you can manage overnight, even better. That cold time allows the heavy cream to stabilize the filling just enough so they hold their shape beautifully when you bring them out for the party.
Creative Mini Cheesecake Toppings Ideas
What I love most about these little individual cheesecakes is that they come out of the fridge looking perfectly plain and lovely—a blank canvas, really! This is where we can get creative and really personalize them. Since we kept the filling itself classic and straightforward, the toppings can really sing. This is your chance to tailor these beauties for whatever event you’re bringing them to. These ideas will definitely tackle those mini cheesecake toppings ideas you might have!
Don’t stress about making a complicated sauce from scratch because, remember, we are aiming for easy here. Sometimes the simplest toppings are the ones people go back for again and again!
Try one of these flavor profiles for your next batch:
The Classic Chocolate Lover’s Dream
This is the simplest route! Once your chilled cups are ready, just drizzle on a store-bought or homemade chocolate sauce. If you happen to have some mini chocolate chips or even some shaved dark chocolate, a little sprinkle right on top of the sauce gives it depth and texture. It’s rich, it’s familiar, and it disappears fast at any gathering.
Bright and Tangy Fresh Fruit Salsa
If you want something that cuts through the richness of the cream cheese, use this method. Chop up a mix of fresh, brightly colored fruit—I usually do strawberries, blueberries, and maybe a few finely diced kiwi pieces. Toss that fruit gently with just a tiny squeeze of fresh lime juice and maybe half a teaspoon of sugar if your fruit is tart. Spoon about a teaspoon of this fruit mix right on top of each cup. It looks stunning, especially after being chilled overnight!

Salted Caramel Swirl
Caramel and cheesecake are a match made in heaven, right? I usually buy a good quality jar of thick caramel sauce. Don’t heat it up too much, or it’ll just run right off the top! Spoon a small dollop onto the center of the filling, and then take a toothpick and gently swirl it outward. Sprinkle just a few tiny flakes of sea salt over the top while the caramel is still tacky. That saltiness elevates the entire dessert—it’s my favorite trick for making store-bought things taste homemade.
Peanut Butter Swirl
For a slightly different vibe, try mixing about two tablespoons of your favorite smooth peanut butter with one teaspoon of milk to thin it out just a touch. It should be pourable but still thick. Drizzle this over the filling and use a thin knife to make cute little swirls before chilling. This one is especially good if you skip the sugar in the crust and use vanilla wafers instead—it tastes almost like a Reese’s cup!
Make Ahead and Storage for Your Individual Cheesecakes
This is the part that makes this recipe a total winner for me! When planning party food, nobody wants to be fussing with whipping up dessert right before the doorbell rings. That’s why these **mini cheesecakes** shine brightest as true make ahead desserts. They actually taste better the second day, and that’s a huge win in my book!
Since they don’t have any eggs or traditional baking that changes their structure over time, they hold up incredibly well in the fridge. This is perfect for busy parents or anyone trying to reduce stress before a big gathering!
How Long Do No Bake Mini Cheesecakes Last?
Once these **mini cheesecakes** are fully chilled and set—and remember, we want at least four hours, but overnight is best—you can cover that muffin tin loosely with plastic wrap and stick it right in the refrigerator. They will stay perfectly delicious for up to three days. I’ve tested this several times, and the crust stays crisp enough and the filling stays incredibly creamy. Just be aware that if you add a fresh fruit topping too early, that fruit might start to weep a little juice after about 24 hours. For that reason, I always save the delicate toppings for the day of serving!
Can You Freeze These Individual Cheesecakes?
Yes, you absolutely can freeze them, which is great news if you need a completely stress-free breakfast or snack later on! However, you need to prepare them correctly for the freezer, which is different from the fridge storage.
First, make sure they are completely firm from the fridge. Then, you need to freeze the toppings separately, or skip them entirely before freezing. If you freeze them with toppings like caramel or fresh berries, they can get hard or mushy when thawing.
Place the plain **mini cheesecake** cups (still in their liners on the tray) into the freezer until they are rock hard—about an hour. Then, you can stack them gently in an airtight, freezer-safe container, separating the layers with parchment paper so they don’t stick together. They freeze beautifully for up to a month!
Thawing Frozen Mini Cheesecakes
When you realize you need dessert tomorrow or the next day, pull them out of the freezer and place them, still covered, into the refrigerator. Don’t rush it! Give them about 6 to 8 hours, or just let them thaw overnight in the fridge. When they are fully thawed, they will be back to their perfectly creamy self, ready for you to add your sauces, chocolate shavings, or fresh fruit right before you serve them for your gathering!
Serving Suggestions for Mini Cheesecake Bites
So, you’ve got your chilled, perfect little **bite sized cheesecake** treats ready to go. Now we talk presentation, because even the easiest dessert deserves to look like you spent all day on it! Since these are amazing for parties, we want to make sure they look intentional and inviting on the dessert table. Think about what else you’re serving—are you aiming for sweet and savory, or just pure sugar heaven?
These little wonders are stellar because they don’t require any plating fuss. They sit beautifully right in their little paper liners, making them one of the absolute best desserts for gatherings because people can just grab and go.
Here are a few ways I like to arrange them to make the spread look amazing:
- Tiered Stand Showcase: If you own a small tiered serving stand, place the cheesecakes on the bottom layer, perhaps leaving some plain and others topped with brighter sauces like raspberry. The height draws the eye immediately.
- The Crumb Border: If you have any extra graham cracker crumbs left over—maybe you used vanilla wafers instead—sprinkle a thin ring of the crumbs onto the serving platter before setting the cheesecakes down. It frames the whole display nicely. If you’re feeling extra, mix a few finely chopped nuts into that border crumb mix for texture!
- Contrasting Colors: Think about the theme of your event. If you have a lot of rich chocolate desserts, make sure these bright, creamy cups are placed near something pale or colorful, like bowls of fresh, bright green mint leaves or that mixed berry topping we talked about. The contrast is what makes the dessert table pop.
- Coffee Pairing: Because they are perfectly portioned, these are wonderful alongside coffee or espresso. Set up a small station near the coffee maker; they are a natural pairing for that after-dinner digestif moment. People love having a single-serving dessert alongside their warm drink!
These little jewels look fantastic sitting next to savory bites, too, so don’t be afraid to mix them onto the same appetizer table. Their sweet, cool flavor is the perfect palate cleanser between heavier appetizers!
Frequently Asked Questions About Making Mini Cheesecake
I know when I’m trying a new recipe, especially a **mini cheesecake** one, my brain immediately jumps to all the potential pitfalls! It’s better to ask now than to find out during chilling time, right? Cheffinity readers always have the best pre-emptive questions, and I want to make sure you feel totally confident making these **cheesecake bites recipe**.
Here are the ones I hear most often about making these simple, no-bake treats.
Can I use a different crust besides graham crackers for my mini cheesecake?
Oh, absolutely! That’s one of the joys of these **individual cheesecakes**—they are super adaptable. If you don’t have graham crackers or just want a textural change, my favorite substitution is vanilla wafer cookies. They crush up just as easily and give you a slightly sweeter, almost buttery base. You can also go for a clean, store-bought shortcut like shortbread cookies, too. Just remember the ratio: you need about 1 1/2 cups of crumbs total, and you still mix it with the melted butter until it holds its shape.
What is the easiest way to get the finished mini cheesecakes out of the liners?
This is crucial for presentation, especially when you’re serving them at a party! Because these **no bake mini cheesecakes** use paper liners, peeling them off can sometimes tear the edges of the crust or even slightly compress the filling if you’re being too rough. My trick here is to never take them out cold directly from the fridge!
Let the tray sit out on the counter for about 10 minutes before serving. This lets the filling warm up *just* enough to loosen its grip on the paper liner. Then, gently grab the edge of the paper cup and slowly peel it down and away from the side. If you pressed your crust firmly in the first place—like we talked about in the crust section—the liner should peel off cleanly, leaving you with a perfect little cylinder!
Can I add flavorings or extracts directly into the filling?
Yes, and this is how you turn a great recipe into *your* signature recipe! The base filling is really just cream cheese, sugar, and cream, so it loves extra flavor. Since the recipe only calls for vanilla, you have endless room to play. If you want a more complex flavor profile, try adding things like:
- Lemon Zest: Try zesting one whole lemon into the filling right along with the vanilla extract. It gives it a lovely, bright note that pairs wonderfully with berry toppings.
- Almond Extract: Swap out half of the vanilla extract for almond. It adds a rich, almost marzipan-like depth that feels very sophisticated.
- A Touch of Espresso: Dissolve a teaspoon of instant espresso powder in the heavy cream before adding it to the mixture. This transforms it into a subtle coffee flavor that pairs perfectly with chocolate sauce toppings.
Just remember that extracts and zest are strong, so start small! You can always add more, but you can’t take it out once it’s mixed in, especially since we aren’t baking it off!
Need to ask me something else about making sure these turn out perfectly? Don’t hesitate to reach out through our contact page!
Nutritional Estimates for This Simple Cheesecake Recipe
I always hesitate a little bit when people ask for nutritional facts, because honestly, these are treats! They are meant for special occasions and satisfying those sweet cravings we talked about. But I know many of you are tracking things, so I ran the numbers based on standard supplier measurements for the ingredients we used in this recipe. Please take these figures as a helpful guideline, not gospel truth!
The estimates below are calculated based on the recipe yielding 12 servings. Remember, if you load up heavily on the caramel sauce or add extra cookie toppings, those numbers will shift a bit. This is a snapshot of the base **mini cheesecake** without the optional toppings, keeping with Ava’s philosophy: great flavor first, tracking second!
Here’s the breakdown per **individual cheesecake**:
- Serving Size: 1 Piece (Based on 12 servings)
- Calories: Approximately 280
- Total Fat: 19g (with 11g being saturated fat)
- Carbohydrates: 24g
- Sugar: 22g
- Protein: 4g
- Cholesterol: 55mg
Just a quick heads-up: Since this recipe uses full-fat cream cheese and butter to ensure that incredible texture, the fat content is what really helps create that rich mouthfeel we love. These aren’t meant to be an everyday snack, but they are the perfect, manageable dessert for your next gathering!
PrintEasy No-Bake Mini Cheesecake Cups for Parties

Make creamy, bite-sized mini cheesecakes without turning on your oven. This simple recipe uses a graham cracker crust and is perfect for gatherings or quick desserts.
- Prep Time: 20 min
- Cook Time: 0 min
- Total Time: 4 hr 20 min
- Yield: 12 servings 1x
- Category: Dessert
- Method: No-Bake
- Cuisine: American
- Diet: Vegetarian
Ingredients
- 1 1/2 cups graham cracker crumbs
- 1/4 cup granulated sugar (for crust)
- 6 tablespoons unsalted butter, melted
- 16 ounces cream cheese, softened
- 1 cup powdered sugar
- 1 teaspoon vanilla extract
- 1/4 cup heavy cream
- Optional toppings: fresh berries, chocolate sauce, caramel sauce
Instructions
- Prepare your muffin tin by lining 12 cups with paper liners.
- Combine graham cracker crumbs and 1/4 cup granulated sugar in a bowl. Pour in the melted butter and mix until the crumbs are evenly moistened.
- Press about 1 1/2 tablespoons of the crumb mixture firmly into the bottom of each paper liner to form the crust. Place the tin in the freezer while you prepare the filling.
- In a large bowl, beat the softened cream cheese with an electric mixer until smooth. Scrape down the sides of the bowl.
- Gradually add the powdered sugar to the cream cheese mixture, beating until fully combined and smooth.
- Mix in the vanilla extract and heavy cream until the filling is light and creamy. Do not overmix.
- Spoon or pipe the cheesecake filling evenly over the chilled crusts in the muffin liners.
- Refrigerate the mini cheesecakes for at least 4 hours, or until firm. For best results, chill overnight.
- When ready to serve, top each mini cheesecake with your choice of toppings like fresh berries or chocolate sauce.
Notes
- For an even quicker crust, you can use vanilla wafers instead of graham crackers.
- If you want a slightly tangier flavor, substitute 2 tablespoons of the heavy cream with fresh lemon juice.
- These individual cheesecakes are excellent for make ahead desserts; they keep well in the refrigerator for up to three days.
Nutrition
- Serving Size: 1 cup
- Calories: 280
- Sugar: 22
- Sodium: 180
- Fat: 19
- Saturated Fat: 11
- Unsaturated Fat: 8
- Trans Fat: 0
- Carbohydrates: 24
- Fiber: 0
- Protein: 4
- Cholesterol: 55