
There’s nothing quite like that first bake when spring produce starts showing up at the market, and for me, that means rhubarb! That beautiful tartness just begs to be sweetened up and topped with something wonderfully crunchy. But let’s be honest, getting the sweet and tart balance just right in a fruit crisp can be tricky, right? That’s why I’m excited to share what I call the Best Rhubarb Crisp Recipe. It’s built on the same core ideas my mom used—efficiency and real flavor—but streamlined for our crazy weeknights. This is a tested, reliable formula that guarantees that jammy, bubbly filling topped with the crispiest oat topping you can imagine. If you love exploring these easy comfort bakes, you’ll want to check out all my other delicious dessert recipes too. Trust me, this makes getting a fantastic homemade dessert on the table simple, not stressful.
- Why This Easy Rhubarb Crisp Recipe Works for Busy Cooks
- Ingredients for the Best Rhubarb Crisp Recipe
- Step-by-Step Instructions for Your Classic Rhubarb Crisp
- Tips for the Perfect Tart and Sweet Crisp
- Rhubarb Crisp Variations and Ingredient Swaps
- Serving Suggestions for Your Homemade Rhubarb Dessert
- Storage and Reheating Instructions for Rhubarb Crisp
- Frequently Asked Questions About Making Rhubarb Crisp
- Estimated Nutritional Data for This Seasonal Rhubarb Treat
Why This Easy Rhubarb Crisp Recipe Works for Busy Cooks
When I was developing these systems for the kitchen, desserts were often the first thing to get cut when time was tight. Who has an hour to fuss with fussy pie crusts? That’s why this Easy Rhubarb Crisp is a hero recipe in my book. It clocks in at only 15 minutes of prep time. Seriously! That’s faster than waiting for takeout to arrive.
We focus on just two bowls, which keeps cleanup minimal too. This is truly a Beginner Baking Dessert because the topping mixing is forgiving—you want it crumbly, not perfect. It delivers that amazing flavor payoff of a classic, baked fruit dessert without needing complicated techniques. If you’re looking to simplify those weeknight wins, you definitely need to check out my roundup of quick weeknight dinners for inspiration!
Ingredients for the Best Rhubarb Crisp Recipe
When I build one of my go-to comfort recipes, I make sure every ingredient earns its spot. For this Classic Rhubarb Crisp, we need just two bowls of simple items. The key here, as with all seasonal fruit baking, is tasting your rhubarb first. That’s why the 1 cup of granulated sugar is always adjustable—you control the final sweet and tart pop. Don’t panic about the measurements; they are precise so you get that perfect mix every time.
For the Tart Rhubarb Filling
- 4 cups fresh rhubarb, chopped (Make sure you get a good four cups—this fruit cooks down!)
- 1 cup granulated sugar (You might add a tiny bit more if your stalks are super sour, but start here.)
- 2 tablespoons all-purpose flour (This thickens up those juices beautifully.)
- 1 teaspoon vanilla extract
For the Buttery Crumble Topping
This topping is what makes it a true crisp rather than a crumble—it needs those oats for serious crunch! Remember, the butter needs to be cold, straight from the fridge.
- 1/2 cup all-purpose flour (for topping)
- 1/2 cup rolled oats (Use the old-fashioned kind for the best structure.)
- 1/2 cup packed light brown sugar (Hello, depth of flavor!)
- 1/4 teaspoon ground cinnamon (Just a hint to warm things up.)
- 1/4 teaspoon salt
- 1/2 cup (1 stick) cold unsalted butter, cut into small pieces
Step-by-Step Instructions for Your Classic Rhubarb Crisp
Okay, let’s get baking! The beauty of this Classic Rhubarb Crisp is that it’s made in stages, but none of the stages are complicated. We’re keeping things straightforward so you can focus on that gorgeous, crunchy texture we all crave. It comes together so fast. If you love easy baked fruit, you should peek at my apple crisp recipe for another great option!
Preparing the Filling and Oven Setup
First things first: get that oven hot! You want it at 375°F (190°C). While it’s warming up, lightly grease that 8×8 baking dish you chose. Now for the filling: grab a bowl and toss that chopped rhubarb with the granulated sugar, the 2 tablespoons of flour, and the vanilla. You only need to toss it gently to coat everything evenly. Don’t mash the rhubarb! Pour this sweet and tart mixture right into your prepared dish. That’s the easy part done!
Making the Crispy Oat Topping
Time to tackle the star of the show—the topping! In a separate bowl, whisk together all the topping dry ingredients: the remaining flour, your oats, the brown sugar, cinnamon, and salt. This is where the magic happens. Add those little cubes of cold butter. Use a pastry blender or even just your fingers to cut that butter in. You’re looking for coarse, uneven crumbs. If you mix it too much, you get a paste, and we want distinct buttery bits for that signature Buttery Crumble Topping, okay?
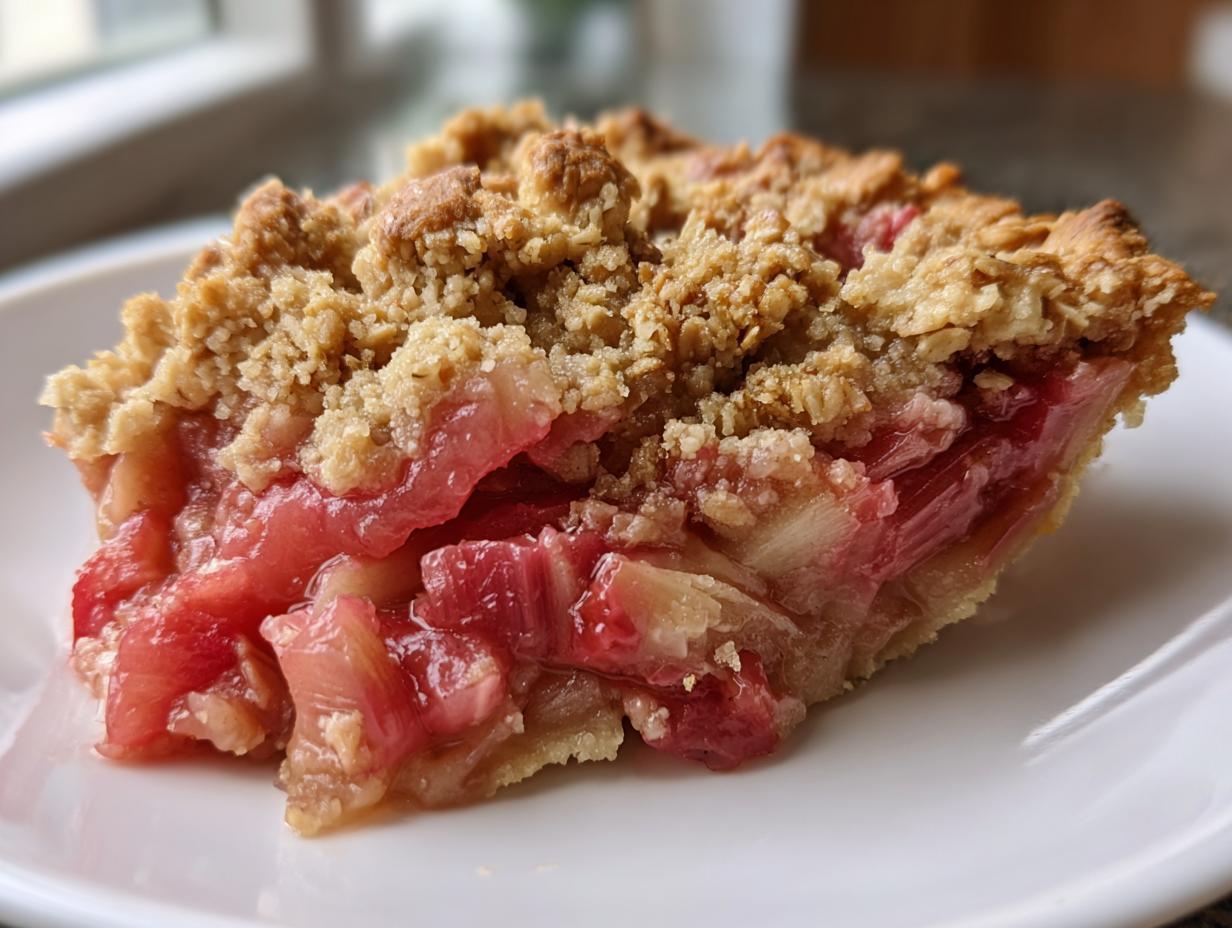
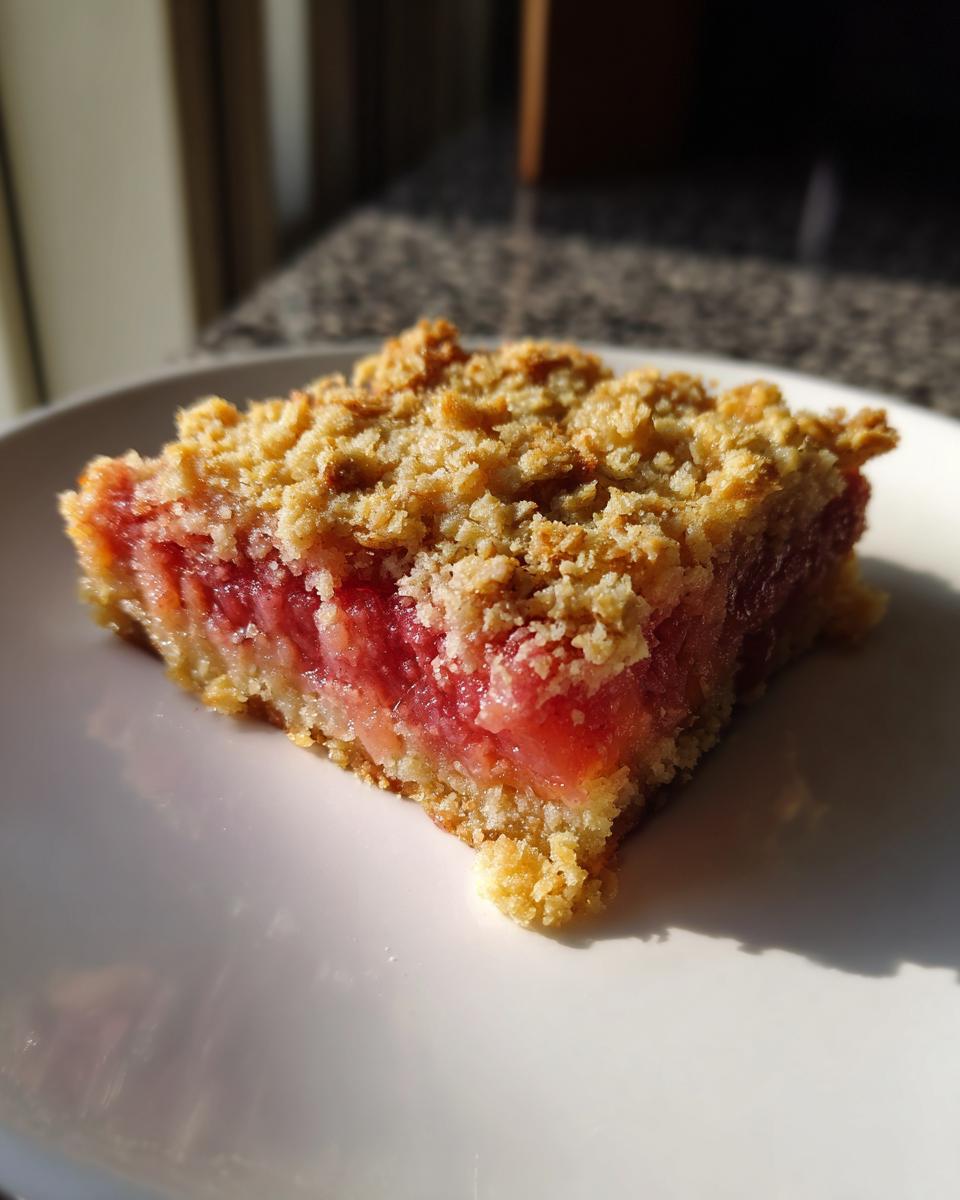
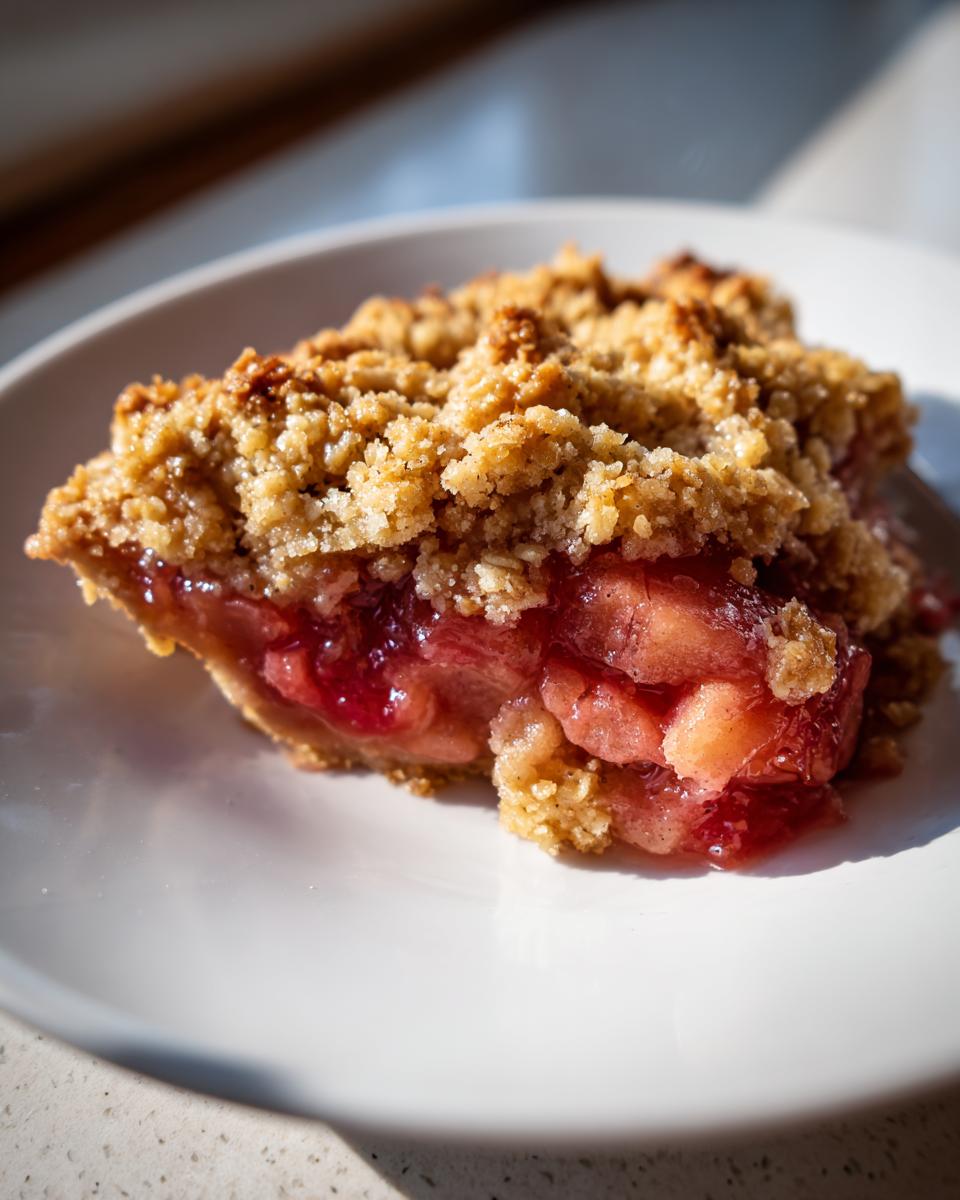
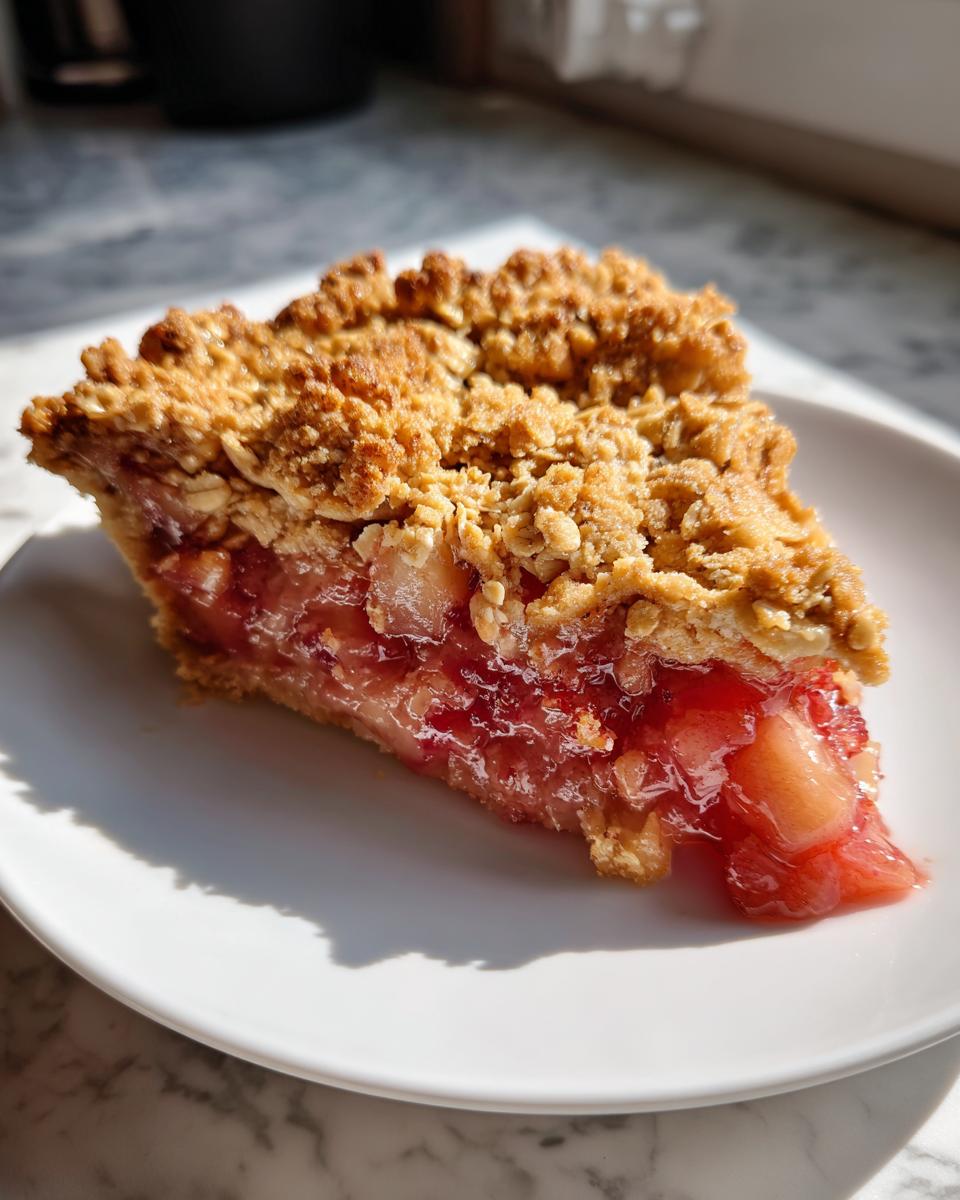
Baking and Resting the Rhubarb Crisp
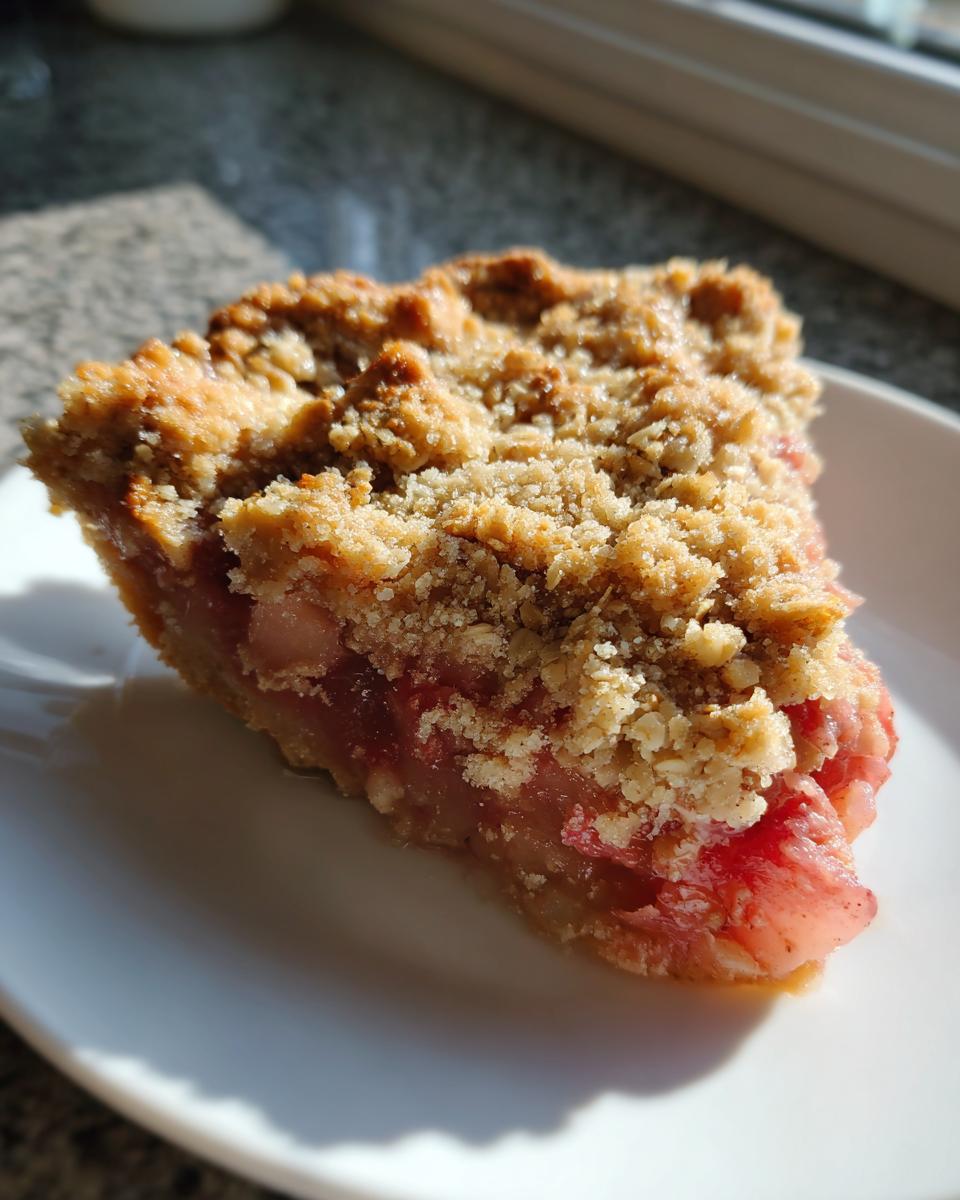
Sprinkle that glorious oat mixture right over the top of the rhubarb, but don’t push it down—we want air for crisping! Pop it into the hot oven for about 35 to 45 minutes. You’ll know it’s ready when the topping is beautifully golden brown and you see the fruit juices bubbling thick around the sides. Super important step: pull it out and let it rest for at least 15 minutes before cutting into it. If you skip this, your filling will run everywhere. Let it set up, then dig in!
Tips for the Perfect Tart and Sweet Crisp
Since this is a Classic Rhubarb Crisp, we need to ensure we hit that perfect sweet-and-tart profile every single time. When you’re at the market, look for rhubarb stalks that are firm and vibrant red or pink—avoid anything limp. That firmness means less water, which equals less soupiness when baking!
Now, let’s talk crunch for our Oat Topping Crisp. The absolute non-negotiable step here is using very cold, cubed butter. If your kitchen is warm, pop the butter pieces into the freezer for five minutes before you start mixing the topping. When you cut that butter into the dry mixture, those little frozen pockets melt slowly in the oven, creating steam and making the topping extra crispy rather than clumpy. It’s a small technique that makes a huge difference in achieving that satisfying bite!
Rhubarb Crisp Variations and Ingredient Swaps
Even though this recipe is my treasured Classic Rhubarb Crisp, I love mixing things up, especially when I see beautiful berries available. If you want to ease into the tartness, try the Strawberry Rhubarb Crisp Variation listed in my notes. Just take out half the rhubarb and sub in some sweet strawberries—it’s divine!
If you’re feeling a little fancier and want to elevate this Seasonal Rhubarb Treat, try browning your butter for the topping. Seriously, melt the butter slowly until it smells nutty and turns a lovely amber color. Let it cool slightly, then proceed with cutting it into your dry topping mixture. You won’t believe how easy it is to make your crisp feel professionally made! Don’t forget, these simple swaps let you enjoy this dessert all season long.
Serving Suggestions for Your Homemade Rhubarb Dessert
Knowing how to serve the final product is almost as important as the bake itself! This is pure Comfort Food Dessert territory, so treat it right. The best way, in my book, is warm, just slightly cooled from the oven—remember that 15-minute rest is golden.
You absolutely have to pair it with a big scoop of good quality vanilla ice cream. The cold creaminess melting into that warm, tart fruit and buttery topping? That temperature contrast is everything. If you’re feeling extra fancy, maybe skip the ice cream and try a generous drizzle of homemade caramel sauce—I have a super easy one in my snickerdoodle cookie post that works wonders here too. Enjoy every spoonful!
Storage and Reheating Instructions for Rhubarb Crisp
Okay, so you have leftovers—which means you made this amazing Easy Rhubarb Crisp too well! Don’t worry about saving it; it keeps beautifully. You can store it covered on the counter at room temperature for a day, but if you have more than half left, tuck it into the fridge. I usually keep mine in its original baking dish, covered tightly with foil.
The key to leftovers is the reheat, right? We want that topping crunchy again! Skip the microwave—that makes everything soft. Instead, pop a serving back into a toaster oven or a 350°F oven for just about five to seven minutes. That little blast of dry heat brings the crunch right back. If you’re looking for other make-ahead favorites, you have to check out my mini cheesecake recipe—they are perfect for prepping ahead!
Frequently Asked Questions About Making Rhubarb Crisp
I get so many questions once people try this recipe, which is fantastic! It shows how much everyone loves a great Seasonal Rhubarb Treat. Here are the things I hear most often when people are tackling their first batch of this Easy Rhubarb Crisp.
If you are hunting for more ways to round out your meal planning, I have some great ideas in my collection of healthy lunch recipes, but let’s stick to dessert for now!
Can I use frozen rhubarb in this Easy Rhubarb Crisp?
Oh, absolutely! I know fresh sometimes isn’t an option. If you are using frozen rhubarb, don’t bother thawing it first. Just toss it with the sugar and flour straight from the freezer. Because it starts colder and releases more liquid, you might need to bump that baking time up by about 5 to 10 minutes to ensure it’s bubbling thick. It still turns out great!
What is the key to a crunchy Oat Topping Crisp?
This is the million-dollar question for any crisp! The absolute secret is the temperature of the butter in your Buttery Crumble Topping. It must be ice cold and already cut into small pieces. Then, when you combine it with the dry ingredients for that Oat Topping Crisp, use your fingers or a pastry blender gently—you are not making dough. You want distinct, small pebbles of butter coated in flour and oats. Those pockets create steam and give you that perfect crunch!
For more classic takes on this dessert, you can always look at what others are doing, like the great tips found over at this bakery blog, but honestly, our simple method works consistently!
Estimated Nutritional Data for This Seasonal Rhubarb Treat
Because we’re focused on real, whole ingredients, this Seasonal Rhubarb Treat feeds the soul, but it’s still helpful to see what we’re working with! Please remember that these figures are just estimates, calculated based on the specific ingredients listed in the recipe. Your brand of flour or the exact sugar content of your rhubarb stalks can change things slightly, so use this as a guideline, not a strict rule.
I always say that if you’re making something this delicious from scratch, you shouldn’t stress over exact numbers. Just focus on enjoying that Buttery Crumble Topping!
- Calories: Approximately 350 per serving
- Sugar: Around 35g (Remember, a good chunk of this comes naturally from the fruit and brown sugar!)
- Total Fat: About 18g
- Carbohydrates: Roughly 48g
- Protein: About 4g
This is hearty stuff! It’s meant to be a satisfying dessert, perfect when served warm after a lighter spring meal. If you’re cutting back on sweetness, remember you can easily reduce the granulated sugar in the filling! That’s the beauty of making your own Homemade Rhubarb Dessert.
PrintEasy Classic Rhubarb Crisp Recipe with Buttery Oat Topping
Make this easy rhubarb crisp for a perfect balance of sweet and tart flavors. The buttery oat topping stays crunchy, making this a comforting spring dessert.
- Prep Time: 15 min
- Cook Time: 40 min
- Total Time: 55 min
- Yield: 6 servings 1x
- Category: Dessert
- Method: Baking
- Cuisine: American
- Diet: Vegetarian
Ingredients
- 4 cups fresh rhubarb, chopped
- 1 cup granulated sugar (adjust based on rhubarb tartness)
- 2 tablespoons all-purpose flour
- 1 teaspoon vanilla extract
- 1/2 cup all-purpose flour (for topping)
- 1/2 cup rolled oats
- 1/2 cup packed light brown sugar
- 1/4 teaspoon ground cinnamon
- 1/4 teaspoon salt
- 1/2 cup (1 stick) cold unsalted butter, cut into small pieces
Instructions
- Preheat your oven to 375°F (190°C). Lightly grease an 8×8 inch baking dish.
- In a medium bowl, combine the chopped rhubarb, granulated sugar, 2 tablespoons of flour, and vanilla extract. Toss gently to coat. Pour this filling mixture into the prepared baking dish.
- In a separate bowl, prepare the topping. Combine the remaining 1/2 cup flour, rolled oats, brown sugar, cinnamon, and salt. Mix these dry ingredients well.
- Cut in the cold butter pieces using a pastry blender or your fingertips until the mixture resembles coarse crumbs. Do not overmix; you want distinct buttery pieces.
- Sprinkle the oat topping evenly over the rhubarb filling in the baking dish. Press lightly.
- Bake for 35 to 45 minutes, or until the topping is golden brown and the fruit filling is bubbling thickly around the edges.
- Let the crisp cool for at least 15 minutes before serving. This allows the filling to set properly.
Notes
- For a Strawberry Rhubarb Crisp Variation, substitute 2 cups of the rhubarb with 2 cups of fresh or frozen strawberries.
- If you prefer a richer topping flavor, use brown butter instead of cold butter in the topping mixture.
- Serve this comfort food dessert warm with vanilla ice cream for the best experience.
Nutrition
- Serving Size: 1 serving
- Calories: 350
- Sugar: 35g
- Sodium: 150mg
- Fat: 18g
- Saturated Fat: 11g
- Unsaturated Fat: 7g
- Trans Fat: 0g
- Carbohydrates: 48g
- Fiber: 4g
- Protein: 4g
- Cholesterol: 45mg