

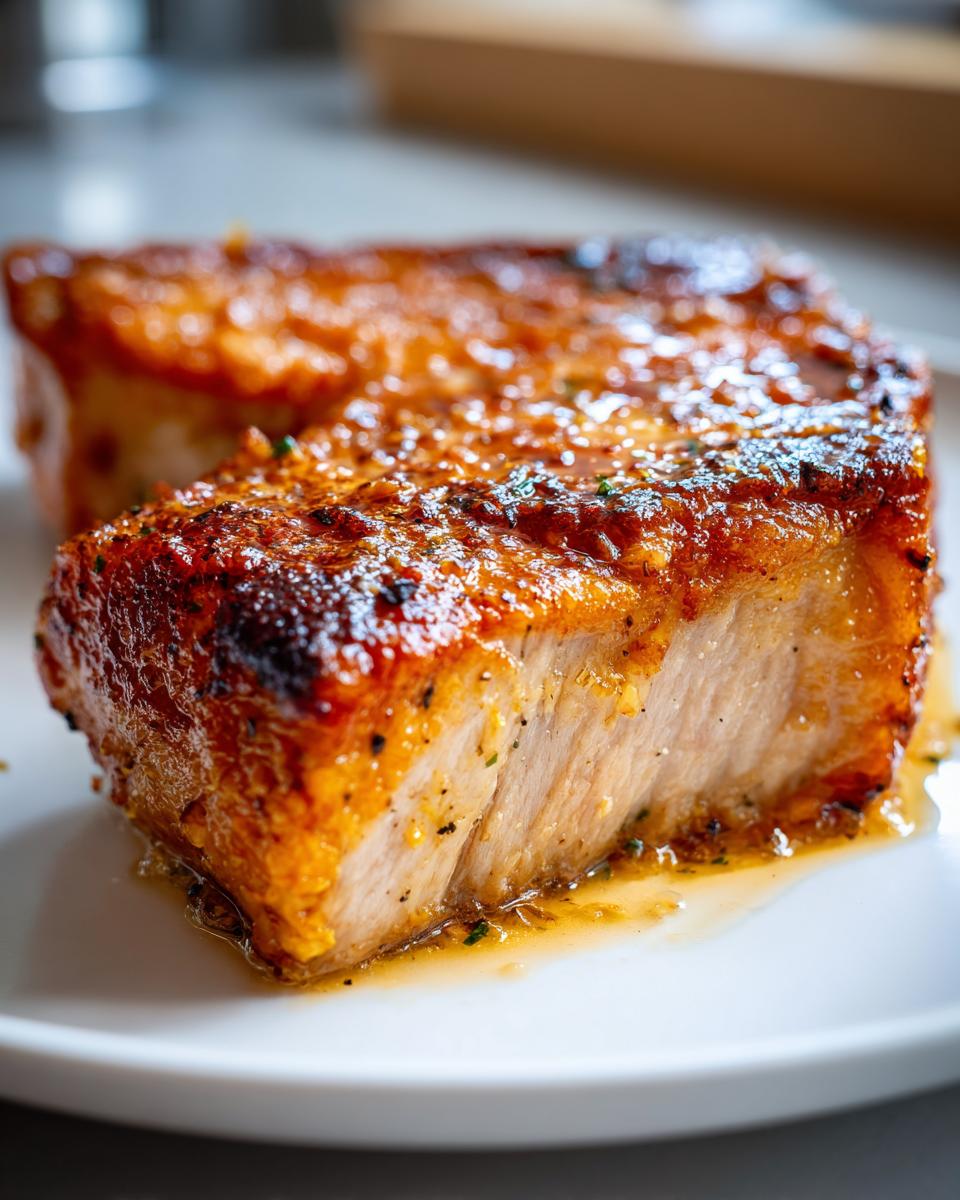
I know the panic. You pull that chicken breast out of the oven, ready for a quick, healthy protein, and what do you get? Something dry, chalky, and frankly, depressing. That’s why Ava Sinclair founded Cheffinity—to stop the compromise between fast food and flavorful food! I am so excited to share my absolute favorite solution: the Foolproof Garlic Butter Baked Chicken Breast. Seriously, this is a 30-minute meal that delivers the juiciest, most tender results you’ve ever had from a standard baked chicken breast. We stress-test every recipe here so you can spend less time stressing about dinner and more time enjoying it. Trust me, this technique is a game-changer for weeknights.
- Why This Garlic Butter Baked Chicken Breast Recipe Guarantees Juiciness
- Ingredients for the Best Baked Chicken Breast
- Simple Steps to Prepare Your Garlic Butter Baked Chicken Breast
- Tips for Perfect Oven Baked Poultry Every Time
- Meal Prep Chicken: Storing Your Baked Chicken Breast
- Serving Suggestions for Your Quick Chicken Dinner
- Frequently Asked Questions About How to Cook Chicken Breast
- Estimated Nutritional Data for Garlic Butter Baked Chicken Breast
- Share Your Weeknight Chicken Ideas
Why This Garlic Butter Baked Chicken Breast Recipe Guarantees Juiciness
Look, the main reason people hate cooking chicken breasts is simple: they get dry. Period. But that’s because most recipes skip the two small steps that make all the difference in delivering a truly juicy baked chicken breast. This isn’t just luck; it’s mechanical precision applied to food. We treat this like a foolproof chicken recipe because these techniques ensure every piece comes out tender, not towel-dry.
- We manage thickness, not just temperature.
- We respect the meat’s need to relax after being hot!
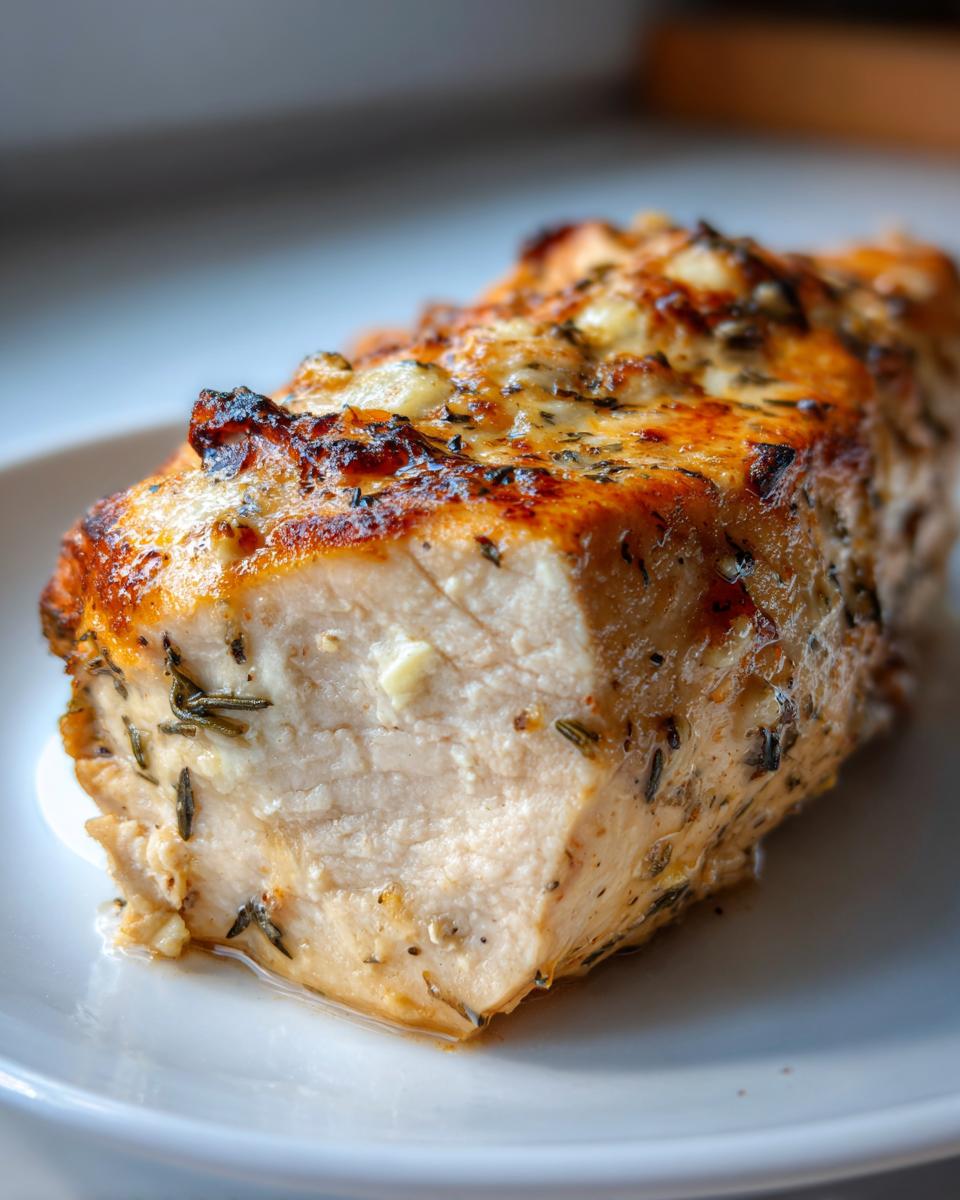
The Importance of Pounding for Even Cooking
You absolutely must pound your chicken breasts. I know, it sounds aggressive, but hear me out. Chicken breasts are naturally thick on one end and thin on the other. If you bake them as-is, the thin end gets tough while you wait for the thick end to hit temperature.
Taking just two minutes to bang them out to an even 3/4-inch thickness means the heat hits everything at once. It’s the non-negotiable trick for achieving genuinely tender chicken breast in the oven without burning the edges. Please don’t skip this step!
The Crucial 5-Minute Rest for Moist Chicken Breast in Oven
This is where most cooks fail after getting through the pounding step. When that chicken hits 165°F, the juices inside are practically screaming to escape! If you carve it immediately, all that delicious moisture floods your cutting board instead of staying in the meat.
That essential 5-minute rest is when the muscle fibers relax and reabsorb those juices. You want those juices locked inside for a moist chicken breast in oven experience. I forgot this once for a quick dinner, and I swear I could hear the chicken weeping on my plate!
Ingredients for the Best Baked Chicken Breast
Okay, this recipe is simple, which is perfect for those busy nights when you need something fast and great. We aren’t messing around with 20 different spices here; we are using a few powerhouse ingredients to get maximum flavor since we’re aiming for a quick chicken dinner.
You’ll need four standard boneless, skinless chicken breasts to feed four people, but you can easily double this for planned lunches later in the week. For the garlic butter, please, please use real, good-quality unsalted butter if you can. That fat carries all the flavor—it’s what helps us achieve that restaurant-style result without all the fuss. Don’t compromise on the butter!
Here is exactly what you need for four servings:
- 4 boneless, skinless chicken breasts (aiming for about 6-8 oz each)
- 2 tablespoons olive oil
- 4 tablespoons unsalted butter, softened (This is key—it needs to be soft enough to mix easily!)
- 4 cloves garlic, minced (Don’t be shy with the garlic!)
- 1 teaspoon dried Italian seasoning
- 1/2 teaspoon salt
- 1/4 teaspoon black pepper
- 1/4 teaspoon paprika
- 1 tablespoon fresh parsley, chopped (This is just for color at the very end—it looks fancy!)
Simple Steps to Prepare Your Garlic Butter Baked Chicken Breast
Now that we have our perfectly pounded pieces and our glorious garlic butter mixed up, let’s put this baked chicken breast into action. You’ll see just how fast we can get this meal on the table—seriously, dinner is done before most takeout places would even get your order right! Remember, every step here is designed to maximize flavor while keeping things low effort for you. We want to make sure that when you’re looking for quick chicken dinner ideas, this recipe beats them all!
Preheating and Preparing the Baking Dish
First things first: crank that oven up! Set your oven to 400 degrees Fahrenheit (200 degrees Celsius). While that’s heating up, grab your baking dish. You want to lightly grease it or, even better, line it with parchment paper. Since we are all about a low effort dinner here, anything that makes cleanup a breeze is a win in my book!
Creating the Flavorful Garlic Butter Coating
Take your softened butter, minced garlic, dried Italian seasoning, salt, pepper, and paprika, and mix them together in a small bowl. You need to mix this until it’s completely, beautifully, fully incorporated—no streaks of plain butter allowed! Then, take that mixture and rub it all over both sides of your pounded chicken breasts. Get that glorious coat everywhere!
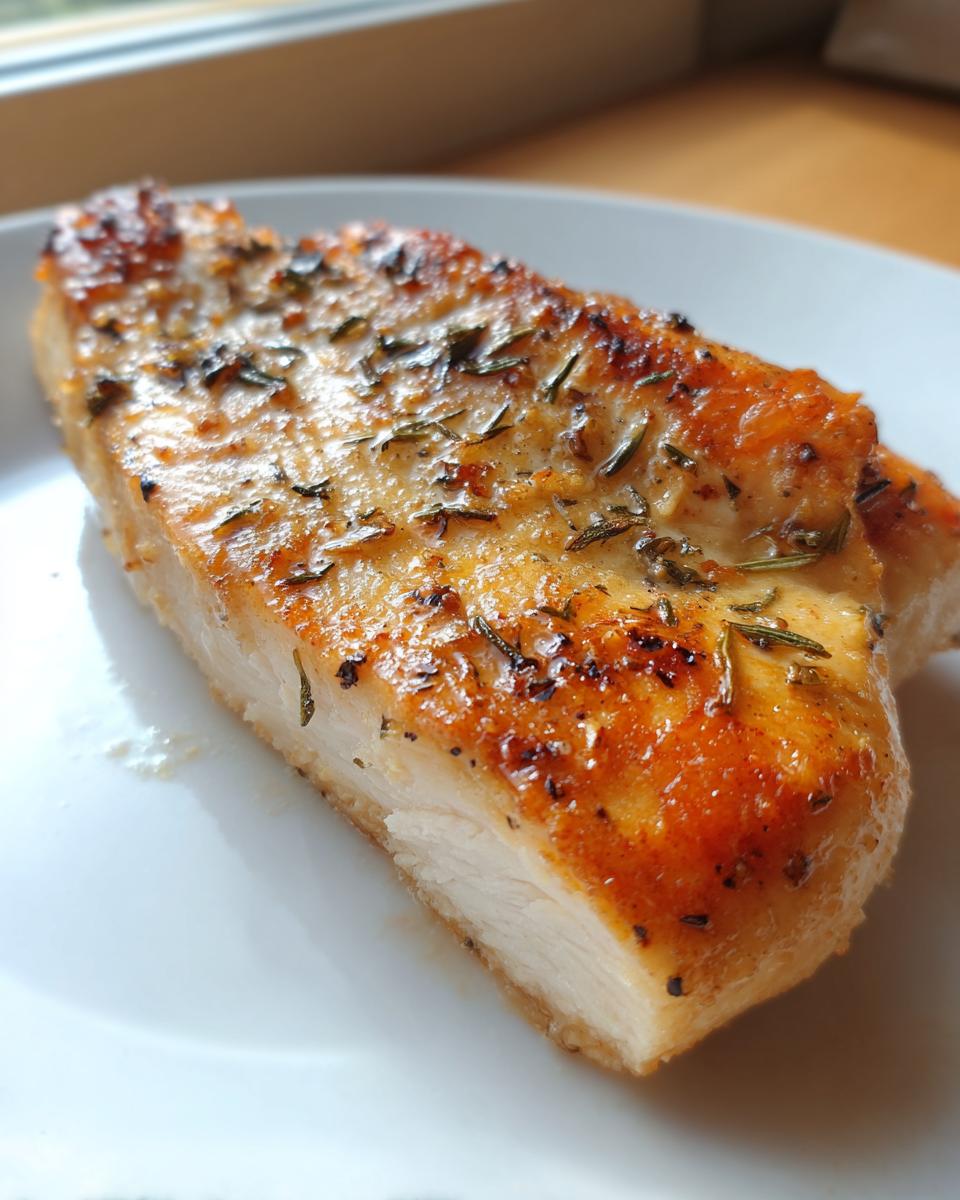
Baking Time and Temperature for Tender Chicken Breast
Lay the butter-coated chicken breasts in a single layer in that prepped dish. Now, they bake! Stick them in that hot oven for about 18 to 22 minutes. This time frame is the magic for getting a tender chicken breast. But here is the golden rule: use a meat thermometer. We aren’t guessing! Pull them out right when they hit exactly 165 degrees Fahrenheit at the thickest point. You can find my favorite instant-read thermometer over here: my favorite one. After that, remember to let them rest before slicing!
Tips for Perfect Oven Baked Poultry Every Time
Even with this foolproof chicken recipe, mastering oven baked poultry means knowing a few extra tricks. These little details are what take a good chicken breast to an absolutely delicious, restaurant-quality experience. I learned these lessons the hard way, mostly through trial and (sadly) dry-chicken error. I remember one busy Thursday night when I served this garlic butter chicken straight from the pan to the plates, thinking I was saving three extra minutes. Big mistake! The difference was shocking—it was good, sure, but it wasn’t that melt-in-your-mouth bite we are aiming for. That day taught me that the resting step is non-negotiable if you want the most moist chicken breast in oven possible.
If you want to level up effortlessly, check out some other great tips for making chicken shine over at Recipe Mom; she has some fantastic ideas for building flavor!
Brining for Maximum Moisture in Baked Chicken Breast
This is my secret weapon if I know I have guests or if I simply want to guarantee a fantastic outcome while I work on my easy Salisbury steak recipe on the side. You don’t need a complicated brine here, just a swim! Simply mix about 1 quart of cool water with 1 tablespoon of salt (a light brine). You soak your chicken breasts for about 30 minutes before you even start pounding them.
Why salt water? The salt actually helps the muscle fibers absorb and hold onto moisture during the baking process. It essentially pre-seasons the meat from the inside out, meaning you are sealing in more liquid than you are baking dry. Just make sure you pat them nice and dry before you rub on that garlic butter!
Adjusting for Thicker Cut Chicken Breast
Sometimes, you end up with those monstrous, unevenly thick chicken breasts. If yours are more like a mountain range than a flat piece of land, pounding them out (like we discussed) is the first step. But if they are genuinely over an inch thick, you might need a little extra help to keep things speedy for your quick chicken dinner goal.
My solution is to butterfly them or slice them horizontally to create thinner cutlets. It’s scary the first time, I know! Just take your sharpest knife, hold the breast steady, and slice right through the middle horizontally until you have two thinner pieces of equal thickness. This guarantees that the heat penetrates perfectly and you get that tender texture without overcooking the outside.
Meal Prep Chicken: Storing Your Baked Chicken Breast
One of the best parts about making this baked chicken breast recipe is how fantastically it holds up for leftovers. If you are anything like me, you want to get the cooking done once and enjoy the fruits of that labor all week long. That’s why this is such a superstar for meal prep chicken!
After you bake your chicken and, crucially, let all those juices settle during the resting period, you need to cool them down completely before putting them away. Never put hot meat directly into the fridge—that’s just begging for trouble and it ruins the texture.
Once fully cooled, dice or slice up your chicken breasts. Pop them into an airtight container—glass containers are my favorite because they reheat so nicely. You can safely keep this delicious garlic butter chicken in the refrigerator for up to four days. Think of it: lunch tomorrow is already sorted! It makes grabbing those simple chicken breast portions for salads or grain bowls totally painless. It solidifies that low effort dinner promise for days to come!
Serving Suggestions for Your Quick Chicken Dinner
Since we’ve poured so much goodness into that garlic butter, we want to pair it with sides that soak up the flavor without adding unnecessary fuss. Remember, the whole point of this recipe is maximizing flavor for minimum work, so we are keeping the sides speedy and straightforward. This makes it the perfect foundation for a truly healthy baked chicken plate, even with that rich butter coating!
When I’m serving this up fresh off the cooling rack, I usually think about something green and something starchy so we have a balanced plate ready in minutes. Here are my top picks that pair beautifully with that savory garlic flavor:
- Roasted Asparagus or Broccoli: Toss some fresh spears with a drizzle of olive oil, salt, and pepper, and roast them right alongside the chicken for the last 15 minutes. They pick up a little flavor from the chicken drippings, too! It’s classic and so easy.
- Quick Lemon Parmesan Orzo: If you want a quick starch, orzo cooks faster than pasta. Just boil it, drain it, and stir in a squeeze of fresh lemon juice and a handful of Parmesan cheese right away. The bright citrus cuts through the richness of the garlic butter perfectly.
- Simple Mashed Potatoes: If you have 10 extra minutes, you can make a dream side. I have a recipe for the creamiest mashed potatoes that use minimal steps—no boiling water for an hour required! The potatoes are just incredible for catching any leftover garlic butter sauce.
- A Simple Mixed Green Salad: Sometimes you just need crispness. Make a quick salad with baby spinach, cherry tomatoes, and cucumber. A light vinaigrette is all you need; the heavy lifting for flavor is already done by your chicken breast!
See? Whether you are putting together a quick lunch for tomorrow or finishing up a quick chicken dinner tonight, these sides make plating simple and satisfying!
Frequently Asked Questions About How to Cook Chicken Breast
I totally get it; sometimes you have questions that aren’t covered in the step-by-step guide. That’s why we put this section together. We want you to feel 100% confident that you are going to nail this recipe—whether it’s your first time or your twentieth time making a baked chicken breast!
What if I don’t have an oven? Can I use this Easy Oven Chicken method on the stovetop?
That’s a great question for those nights when you’re too short on time to wait for the oven to preheat! While this recipe is designed for the even, gentle heat of the oven, you can definitely adapt the flavor profile to the stovetop. You just won’t get the exact same finish. If you use a skillet, use medium heat, melt that garlic butter, and sear the chicken breast until browned on both sides, then lower the heat and cover the pan to finish cooking gently. It provides that amazing flavor, but you lose some of that uniform tenderness we work so hard for when we pound and bake, you know?
What is the safest internal temperature for baked chicken breast?
Food safety is key, always. For any poultry, the USDA standard is 165 degrees Fahrenheit (74 degrees Celsius). This is non-negotiable, but honestly, you should be pulling the chicken off the heat right around 160°F because resting will carry it up to that perfect safe temperature while keeping it juicy. Always, always rely on that meat thermometer—it’s the only way to guarantee you get the best baked chicken that’s both safe and delicious! We talk more about the thermometer because it’s absolutely essential for that perfect baked chicken breast.
Can I use frozen chicken breasts for this recipe?
Oh, please don’t! I have tried it once or twice out of pure desperation, and I promise you, it will ruin the texture of this specific recipe. Remember how we talked about the necessity of pounding the chicken to an even thickness? A frozen or partially frozen breast has a hard interior. While the outside cooks and gets tough, the inside stays icy or cooks unevenly. You simply can’t achieve that tender chicken breast result if you bake it from frozen. Please thaw them completely in the fridge overnight for the best results!
Estimated Nutritional Data for Garlic Butter Baked Chicken Breast
I always show this chart, but you have to take it with a grain of salt, right? Cooking is variable! This data should give you a fantastic ballpark idea of what you’re consuming when you make this baked chicken breast because we are using simple ingredients. Plus, if you’re tracking macros for your weekly goals, this data helps immensely!
Remember, these numbers are based on the recipe as written—using 6 oz raw chicken breasts and the exact amounts of butter and oil listed. If you weigh your portions differently, or if your chicken breasts just happen to be naturally higher in fat, things will shift slightly. It’s a guide, not a promise from the USDA lab!
| Nutrient | Amount Per Serving |
|---|---|
| Serving Size | 1 breast |
| Calories | 310 |
| Protein | 40g |
| Fat | 15g |
| Saturated Fat | 7g |
| Unsaturated Fat | 8g |
| Carbohydrates | 2g |
| Sugar | 1g |
| Fiber | 0g |
| Sodium | 350mg |
| Cholesterol | 110mg |
For those focusing on clean eating, you can see this is a genuinely healthy baked chicken option, heavy on the protein with very low sugar content. If you’re trying to cut back on fat for a specific day, remember that the butter and oil are the main contributors; feel free to trim back the butter slightly, though I promise you’ll notice the texture change!
Share Your Weeknight Chicken Ideas
We’ve talked about the science, the technique, and the importance of resting your meat, but now comes the best part: actually making it for dinner! I truly hope you give this Foolproof Garlic Butter Baked Chicken Breast a try this week. When you master this simple recipe, it doesn’t just solve one dinner; it solves countless weeknight chicken ideas because you’ll never look at chicken breasts with dread again.
When you get a chance to whip up a batch—maybe for your weekend meal prep chicken containers—I really want to hear what you think! Did you experiment with the brine? Did pounding the chicken actually change your perception of cooking it?
Head down to the comments section below and let me know how it went. Hearing from you, knowing that Cheffinity helped simplify one of your busy nights, that’s why Ava and I do all this testing and tasting. Happy cooking, friends. Enjoy that genuinely juicy chicken!
Print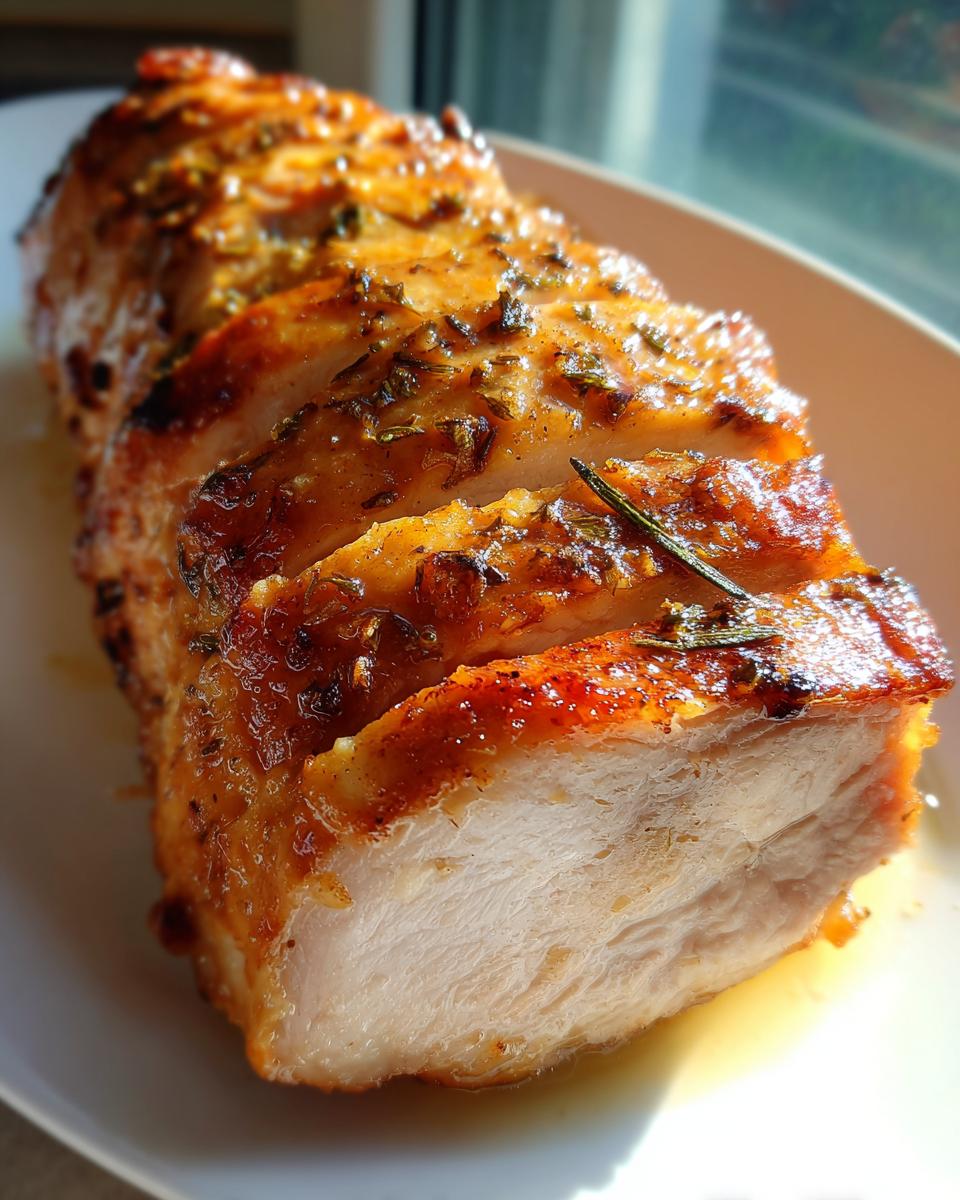
Foolproof Garlic Butter Baked Chicken Breast: The Juiciest 30-Minute Weeknight Dinner
This recipe delivers tender, moist baked chicken breast every time using a simple garlic butter coating. It is fast enough for a weeknight meal and perfect for meal prepping.
- Prep Time: 10 min
- Cook Time: 20 min
- Total Time: 30 min
- Yield: 4 servings 1x
- Category: Dinner
- Method: Baking
- Cuisine: American
- Diet: Low Fat
Ingredients
- 4 boneless, skinless chicken breasts (about 6–8 oz each)
- 2 tablespoons olive oil
- 4 tablespoons unsalted butter, softened
- 4 cloves garlic, minced
- 1 teaspoon dried Italian seasoning
- 1/2 teaspoon salt
- 1/4 teaspoon black pepper
- 1/4 teaspoon paprika
- 1 tablespoon fresh parsley, chopped (for garnish)
Instructions
- Preheat your oven to 400 degrees Fahrenheit (200 degrees Celsius). Lightly grease a baking dish or line it with parchment paper.
- Prepare the chicken: Place the chicken breasts between two sheets of plastic wrap or parchment paper. Use a meat mallet or rolling pin to pound the thicker end of the chicken breasts until they are an even thickness (about 3/4 inch). This step helps the chicken cook evenly and stay juicy.
- Make the garlic butter mixture: In a small bowl, combine the softened butter, minced garlic, Italian seasoning, salt, pepper, and paprika. Mix until fully incorporated.
- Coat the chicken: Rub the garlic butter mixture evenly over both sides of each chicken breast. Place the seasoned chicken breasts in the prepared baking dish in a single layer.
- Bake the chicken: Bake at 400 degrees Fahrenheit for 18 to 22 minutes. The exact time depends on the thickness of your chicken.
- Check for doneness: Use a meat thermometer to check the internal temperature at the thickest part. The chicken is done when it reaches 165 degrees Fahrenheit (74 degrees Celsius).
- Rest the chicken: Remove the chicken from the oven and let it rest on a cutting board for 5 minutes before slicing. This resting period is crucial for retaining moisture.
- Serve immediately, garnished with fresh parsley.
Notes
- For extra juiciness, you can lightly brine the chicken in salt water for 30 minutes before seasoning.
- If your chicken breasts are very thick (over 1 inch), consider slicing them horizontally to create thinner cutlets for faster, more even cooking.
- This chicken is excellent for meal prep; store cooled, sliced chicken in an airtight container in the refrigerator for up to 4 days.
Nutrition
- Serving Size: 1 breast
- Calories: 310
- Sugar: 1
- Sodium: 350
- Fat: 15
- Saturated Fat: 7
- Unsaturated Fat: 8
- Trans Fat: 0
- Carbohydrates: 2
- Fiber: 0
- Protein: 40
- Cholesterol: 110