
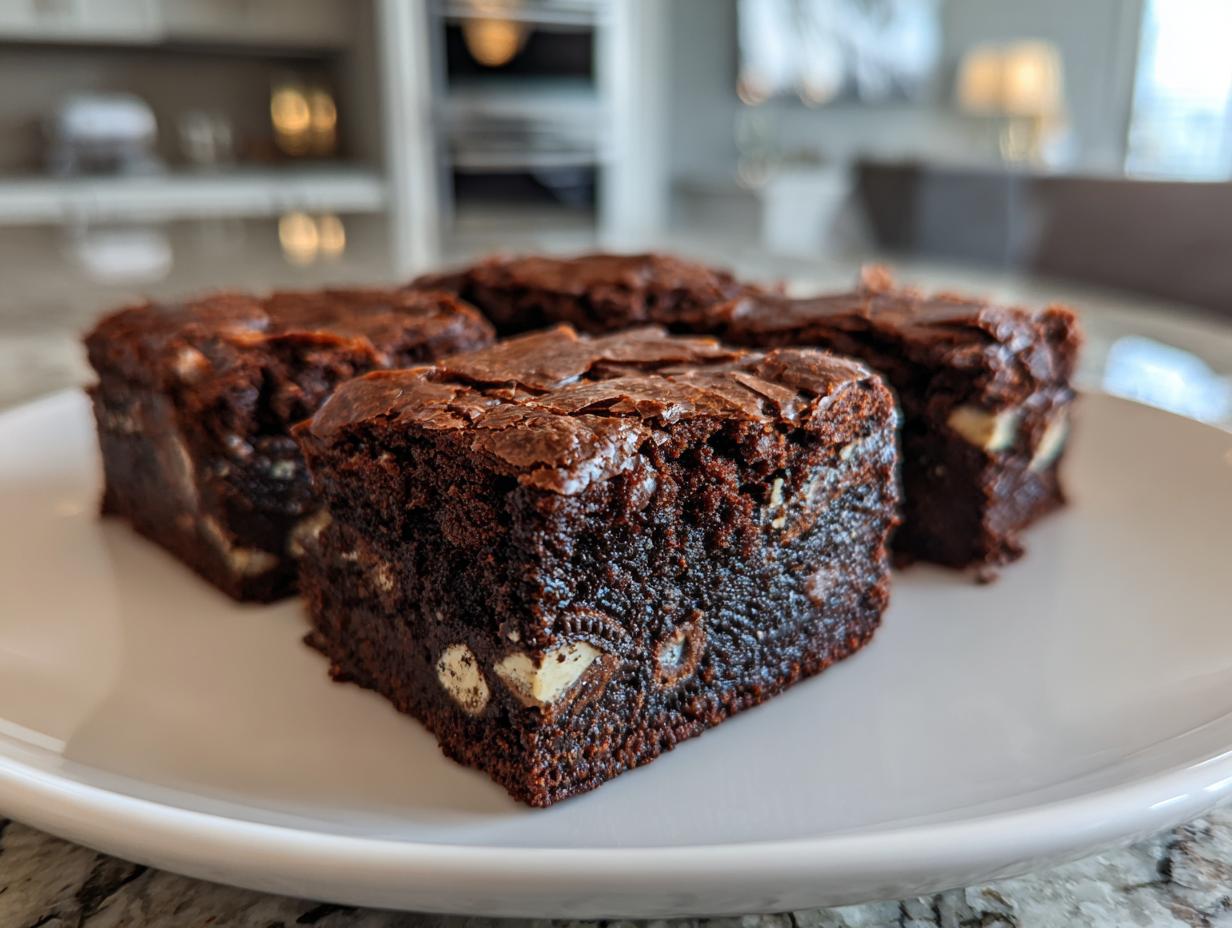
When that chocolate craving hits—you know the one, the deep, desperate need for something ridiculously rich—you can’t afford to wait around for a complicated recipe. That’s why here at Cheffinity, we focus on making real, decadent food accessible, even on a Tuesday night. My goal, following the philosophy Ava Sinclair champions, is to slash the fuss without sacrificing flavor. These Oreo Brownies are the answer to that craving. In just 10 minutes of prep, you whip up the Ultimate Fudgy Oreo Brownies with a Shiny Top. Forget dry, cakey bars; we are making pure, chewy chocolate perfection here.
These aren’t just good; they’re the benchmark for anyone looking for truly delicious dessert recipes. If you want fudgy, you’ve got fudgy. If you want speed, we deliver. Trust me, this batch will disappear before the pan even gets cool.
- Why This Recipe Delivers the Best Homemade Oreo Brownies (E-E-A-T Focused)
- Ingredients for Ultimate Fudgy Oreo Brownies
- How to Prepare Quick Chocolate Bake: Step-by-Step Oreo Brownies Instructions
- Ingredient Notes and Substitutions for Cookies and Cream Brownies
- Tips for Success When Making Chewy Chocolate Brownies with Oreos
- Serving Suggestions for Your Decadent Chocolate Desserts
- Storage and Reheating Instructions for Oreo Brownies
- Frequently Asked Questions About Making Oreo Brownies
- Share Your Experience Making These Indulgent Sweet Snack Bars
- Share Your Experience Making These Indulgent Sweet Snack Bars
Why This Recipe Delivers the Best Homemade Oreo Brownies (E-E-A-T Focused)
If you’re searching for the absolute best experience when it comes to these chocolate treats, I need you to trust the testing process. Ava Sinclair actually spent a few weeks perfecting the balance here, trying to get that perfect resistance—not cakey, not mushy, just that ideal chew. These oreo brownies nail it every single time because we are focused on the elements that truly matter for texture.
Here’s why this specific formula shines:
- Fudgy Texture Guaranteed: We keep the flour low and the fat high. This is non-negotiable for that dense, rich interior everyone craves.
- That Magical Shiny Top: Yes, it’s possible without any weird additives! The way we treat the sugar and butter initially is the secret handshake here.
- Speedy Results: Prep clocks in at just 10 minutes. That means you get an indulgent sweet snack without spending half your evening trapped in the kitchen.
When you follow these steps precisely, you aren’t just making brownies; you’re making the benchmark for homemade indulgence.
Ingredients for Ultimate Fudgy Oreo Brownies
I always tell people that for chocolate desserts, you can’t cheat the core components. Since we are foregoing a mix for that truly decadent chocolate dessert experience, quality matters. Don’t buy the cheap stuff here! We need deep chocolate flavor to balance out all that sweet Oreo crunch we’re about to add.
Make sure you have everything lined up before you start whisking. This recipe is lightning fast, so you want Zero scrambling once you get going—especially for that shiny top!
Here’s what you need for these phenomenal fudgy oreo brownies:
- 1 cup (2 sticks) unsalted butter, melted (This is the fat that gives you the chew!)
- 2 cups granulated sugar
- 4 large eggs
- 1 teaspoon vanilla extract
- 3/4 cup unsweetened cocoa powder (Use a good quality Dutch-processed if you have it for that darker color.)
- 1 cup all-purpose flour
- 1/2 teaspoon salt
- 1 cup semi-sweet chocolate chips (Don’t skip these; they melt into extra pockets of fudge.)
- 12 Oreo cookies, roughly chopped (I like breaking them into big chunks!)
That’s genuinely it. No mixer required for this easy oreo brownie recipe, which is why I love pulling this out when time is short!
How to Prepare Quick Chocolate Bake: Step-by-Step Oreo Brownies Instructions
Okay, setting up is half the battle won, especially when you need a quick chocolate bake. Preheat your oven to 350°F (175°C) first. Grab that 9×13 inch pan and line it with parchment paper—leave those big overhangs hanging over the sides! Seriously, this makes lifting those amazing oreo brownies out so much easier later, trust me.
Now, let’s make those fudgy layers. In a big bowl, whisk your melted butter and sugar together until they look light and totally combined. Then, one by one, whisk in the eggs until the mixture is smooth, followed by the vanilla. That initial vigorous whisking? That’s step one for the shine we want later!
Next, in a separate little bowl, just whisk your cocoa powder and flour together. Gently add this dry mix into your wet stuff. Mix only until you stop seeing streaks of flour. Stop! I mean it. Overmixing is the enemy of the fudgy texture we’re striving for.
Finally, gently fold in those chocolate chips and half of your chopped Oreos. Spread half the batter into your prepared pan. Sprinkle the rest of those cookies right over the top, and then gently spread the remaining batter over them. Pop it in the oven for about 25 to 30 minutes. Remember the goal: moist crumbs on the toothpick, not wet batter. That’s how you nail those chewy chocolate brownies with Oreos.
Achieving the Perfect Brownies with Shiny Top
The secret weapon? It’s all in that first step. You have to whisk the melted butter and sugar together until the mixture looks velvety and almost pale yellow before you even think about adding eggs. This dissolves the sugar crystals just enough so they rise to the top during baking, forming that delicate, crackly crust we all love. After the flour goes in, keep your stirring gentle and minimal; handle that batter like it’s fragile crystal!
Ingredient Notes and Substitutions for Cookies and Cream Brownies
Look, I know sometimes you have to make do with what’s in the pantry, but for these cookies and cream brownies, a few ingredient decisions really make the difference between ‘good’ and ‘must-hide-them-from-the-family’ good. First up, the cookies! If you can get your hands on the Double Stuf Oreos, please use them. That extra cream filling melts beautifully, adding another layer of sweet goo into the center of your bars.
Don’t stress too much about the cocoa powder if you only have standard unsweetened, but I’m telling you, Dutch-processed cocoa really deepens that chocolate flavor so it stands up smartly against all that sugar. It’s what gives you that truly decadent look.
Now, let’s talk about the pan size, because this changes everything about the final outcome. We designed this recipe for a 9×13 inch pan. This ratio lets the brownies bake up thinner, which guarantees that chewy-on-the-edges, fudgy-in-the-middle texture we are obsessed with. If you decide to use a smaller 8×8 inch pan, which gives you those incredible thick bars, you absolutely must increase your baking time by about 5 to 10 minutes.
If you go smaller, you move closer to that lava cake texture, which is delicious, but it’s definitely less of a traditional, sturdy brownie bar. Just keep an eye on the toothpick test if you change pans. If you pull them too early from a small pan, you’ll end up with a puddle!
Tips for Success When Making Chewy Chocolate Brownies with Oreos
Even with the perfect ingredients and the right whisking technique, the final moments before cutting can truly make or break your oreo brownies. If you’re aiming for that chewy center, you have to practice some restraint immediately after they come out of the oven. I know it’s torture, but listen to me on this one!
Here are the non-negotiables for getting that perfect texture in your chewy chocolate brownies with Oreos:
- Don’t Peek Too Early: Resist opening the oven door for the first 20 minutes. When you open it early, the temperature drops fast, and that lovely structure we built with the butter and sugar can suddenly collapse. Let them set up in the heat!
- The Cooling Rule is Sacred: I get it; you want to slice them right away. But if you cut them while they are hot, the entire center will ooze out, leaving you with gooey messes instead of sturdy, fudgy squares. Honestly, you need to let them cool completely in the pan on a wire rack. If you can chill them for an hour after they reach room temp, even better—that solidifies the structure. This rule is key for clean cuts.
- The Chop Matters: When you crush your Oreos, don’t blitz them into dust. You want a mix of fine crumbs and decent-sized chunks. The larger pieces give you that delightful textural surprise, that little *crunch* moment against all that rich fudge.
- A Touch of Coffee: This is a little trick Ava Sinclair encourages for any deep chocolate bake. Swap out one tablespoon of the liquid element (if you added any, though this recipe doesn’t require much) for a tablespoon of strong brewed coffee, or just dissolve the cocoa powder with hot coffee instead of water later. Coffee doesn’t make them taste like coffee; it just maximizes the richness of the chocolate flavor itself. It’s an easy way to elevate your chewy chocolate chip cookie cake cousin recipe, too!
Follow these steps, especially the cooling part, and you’ll have the most beautiful, chewy, perfectly textured best homemade oreo brownies you’ve ever made.
Serving Suggestions for Your Decadent Chocolate Desserts
You’ve done the hard work, you resisted cutting them too soon, and now you have these intensely fudgy, cookie-studded bars looking up at you from the cooling rack. Honestly, these decadent chocolate desserts are basically perfect all by themselves, right? They are so rich that sometimes I think they don’t even need anything else. Just a sharp knife and maybe a whole glass of milk!
But Ava Sinclair loves when we elevate a simple bake, right? We want that next-level experience, especially if these chocolate dessert bars are showing up at a party or serving as the final punctuation mark on a big family dinner. Keep it simple; let that chocolate shine!
Here are my favorite ways to serve these up:
- The Classic & Cold: Warm them up ever so slightly—just 15 seconds in the microwave gets the edges soft and gooey—and top with a big scoop of vanilla bean ice cream. The temperature contrast is just heaven.
- The Dusting: For a slightly classier look, a light, even dusting of powdered sugar before serving always looks elegant. It cuts the intense sweetness just a tiny bit.
- The Ultimate Drizzle: If you want to go all-in, you absolutely must drizzle them with a homemade chocolate sauce. It doubles down on the chocolate factor without competing with the Oreo flavor. I use my quick homemade chocolate syrup recipe when I’m feeling this indulgent.
- Fruit Contrast: If you need to pretend you’re balancing out the diet (we all do!), a few fresh raspberries or a slice of orange on the side provides a lovely little burst of acid to contrast the deep cocoa flavor.

No matter how you plate them, these indulgent sweet snacks are designed to be enjoyed slowly. Grab a napkin!
Storage and Reheating Instructions for Oreo Brownies
One of the best things about a fudgy brownie, honestly, is that they taste even better the next day! That slight aging process lets the flavors of the chocolate and the Oreos really settle into each other, often deepening that rich flavor. When it comes to storing these oreo brownies, we are keeping the moisture in at all costs to maintain that ideal texture.
First things first: cooling. You must let them cool completely before you even think about turning them into a container. If you wrap them up warm, you trap steam, and that steam turns the shiny top soft and gummy. Nobody wants a gummy top on their fudgy oreo brownies!
Once they are totally chilled and you’ve cut them into squares, layer them between sheets of parchment paper inside an airtight container. Yes, parchment really does help keep everything tidy and prevents sticking. Stored this way on the counter at room temperature, they stay fantastic for about four days. They are surprisingly sturdy!
Now, can you freeze these? Absolutely! This is my move when I’ve made a huge batch for a party and need to make them ahead of time. Wrap the cooled, cut squares tightly in plastic wrap—like, really aggressively wrap them—and then tuck them into a freezer-safe bag or container. They freeze beautifully for up to three months.
When you’re ready to eat one straight from the freezer, just let it sit on the counter for about 30 minutes to slightly thaw. That brings back that perfect, dense chewiness. You can also microwave an individual square for about 10 to 15 seconds if you want that fresh-from-the-oven gooey sensation. See? These chocolate dessert bars hold up perfectly over time!
Frequently Asked Questions About Making Oreo Brownies
I always get so many questions after people try these, which just tells me how much everyone loves a good decadent chocolate dessert! Since we’re talking about the best homemade oreo brownies here, let’s clear up some potential recipe hurdles so you can get that perfect texture immediately.
Here are the burning questions I hear most often about transforming scratch ingredients into these glorious cookies and cream brownies:
Can I use a box brownie mix instead of making them from scratch?
You certainly *can* use a box mix if you are in a real pinch, but you are going to miss out on that spectacular shiny top, and the texture won’t be quite as rich. Box mixes usually rely more heavily on leaveners, pushing them toward a cakier texture. If you must use a mix, I’d suggest cutting the liquid called for by about a quarter cup, folding in a whole cup of Oreos, and skipping the extra egg often called for on the box. You’ll still get a decent indulgent sweet snack, but it won’t quite rival the fudgy depth of this easy baking recipe dessert.
My brownies came out too fudgy—how do I make them chewier next time?
That’s the hardest “problem” to have, isn’t it? If they are *too* fudgy, it usually means they needed just a couple more minutes in the oven. For a truly chewy chocolate brownie with Oreos, the toothpick test needs to show moist crumbs clinging to it—not wet batter, but not clean, either. If yours came out wet, next time, just add 3 to 5 extra minutes to the bake time. Also, ensure you are using the 9×13 pan; a deeper pan yields a fudgier center because the heat takes longer to penetrate.
Can I add mint Oreos or other brownie variations?
Oh, yes, please! This base recipe is perfect for playing around. Mint Oreos are a phenomenal choice, especially around the holidays when we are all looking for festive holiday brownie recipes. If you swap in a flavored Oreo, you might want to use just plain dark chocolate chips instead of semi-sweet chips so the flavors don’t clash; we want that intense chocolate flavor to dominate!
How do I make this a one bowl oreo brownies recipe?
It gets pretty close! While I separate the cocoa/flour mix just to ensure they are clump-free, you can actually skip the second bowl. After you whisk the eggs and sugar, just sift the cocoa powder and flour straight over the wet ingredients. Then, gently fold everything together. This might require a little more careful folding to ensure no dry pockets hide out at the bottom, but it saves you washing a bowl! It’s perfect for when you need a no mixer brownie recipe on the fly.
Can I substitute cookie dough for part of the batter to make slutty brownies layers?
That’s dipping into the world of those famous layered bars! Yes, you absolutely can transition these into what some folks call slutty brownies recipe layers by adding a layer of prepared chocolate chip cookie dough underneath the batter, or even putting a thin layer of dough between the brownie base and the final Oreo sprinkle. However, you need to remember that cookie dough is dense! It acts like a thick buffer, so you will definitely need to increase your total baking time by at least 10 minutes, maybe more, depending on how much dough you add. Watch the edges first, as they will usually set before the thick middle layer cooks through.
What is the secret to getting that shiny top on my oreo brownies?
This is Ava’s favorite part! The crackly, shiny crust—or “shatter top”—comes down entirely to how you treat the sugar and fat first. You must vigorously whisk the melted butter and granulated sugar together until it looks smooth and slightly lighter in color *before* you add the eggs. You’re essentially creating a meringue-like film on the surface as it bakes. After the flour comes in, you must stop mixing quickly. If you develop the gluten too much by overmixing once the flour is in, that delicate sugar film breaks, and you lose your shine. It’s a delicate balance!
Share Your Experience Making These Indulgent Sweet Snack Bars
Alright, you’ve made them, they are cool (I hope!), and your kitchen smells like heaven. Now I need to know how they turned out! Did you get that perfect crackly top? Are they incredibly fudgy, or did you sneak in an extra layer of cookie dough?
Baking is sharing, and I love seeing your magnificent results. When you try this ultimate oreo dessert, take a picture! Tag us on social media so Ava Sinclair can see how you handled the batter. If you have any lingering questions or needed a substitution that worked brilliantly, drop it in the comments below. Your feedback really helps the whole Cheffinity community improve their own baking game!
Let me know what you think—did this satisfy that massive chocolate craving?
PrintUltimate Fudgy Oreo Brownies with a Shiny Top
Make these homemade Oreo brownies from scratch for a rich, dense, and chewy chocolate dessert. This easy recipe takes only 10 minutes to prep and yields brownies with a desirable shiny, crackly crust.
- Prep Time: 10 min
- Cook Time: 30 min
- Total Time: 40 min
- Yield: 16 servings 1x
- Category: Dessert
- Method: Baking
- Cuisine: American
- Diet: Vegetarian
Ingredients
- 1 cup (2 sticks) unsalted butter, melted
- 2 cups granulated sugar
- 4 large eggs
- 1 teaspoon vanilla extract
- 3/4 cup unsweetened cocoa powder
- 1 cup all-purpose flour
- 1/2 teaspoon salt
- 1 cup semi-sweet chocolate chips
- 12 Oreo cookies, roughly chopped
Instructions
- Preheat your oven to 350°F (175°C). Line a 9×13 inch baking pan with parchment paper, leaving an overhang on the sides for easy removal. Lightly grease the paper.
- In a large bowl, whisk the melted butter and sugar together until fully combined. This step helps create the shiny top.
- Whisk in the eggs one at a time until the mixture is smooth. Stir in the vanilla extract.
- In a separate bowl, whisk together the cocoa powder and flour. Gradually add the dry ingredients to the wet ingredients, mixing only until just combined. Do not overmix.
- Fold in the chocolate chips and half of the chopped Oreo cookies.
- Spread half of the batter evenly into the prepared pan. Sprinkle the remaining chopped Oreos over the batter. Top with the remaining batter, spreading gently.
- Bake for 25 to 30 minutes. A toothpick inserted near the edge should come out with moist crumbs attached, but not wet batter, for a fudgy texture.
- Let the brownies cool completely in the pan on a wire rack before lifting them out using the parchment overhang.
- Cut into squares. These cookies and cream brownies are best served at room temperature.
Notes
- For the best shiny top, do not overmix the batter after adding the flour. Whisking the sugar and butter well initially is key.
- Use Double Stuf Oreos for extra cookie flavor in your decadent chocolate desserts.
- If you prefer a thicker, chewier brownie, use an 8×8 inch pan instead and increase the baking time by 5 to 10 minutes.
Nutrition
- Serving Size: 1 square
- Calories: 310
- Sugar: 30
- Sodium: 150
- Fat: 18
- Saturated Fat: 10
- Unsaturated Fat: 8
- Trans Fat: 0.5
- Carbohydrates: 35
- Fiber: 1
- Protein: 3
- Cholesterol: 65