
Are you staring into the fridge right now, having the most intense craving for something crisp, tangy, and utterly satisfying? I know that feeling! That’s exactly where Ava Sinclair’s philosophy comes from: solving real-life dinner dilemmas, even when it’s just a snack craving. Forget complicated water baths; we’re getting straight to the good stuff with these Crunchy Refrigerator Dilly Beans. This is my absolute favorite, no-fuss recipe for making dilly beans that deliver instant sour-garlic perfection, like the efficient solutions Ava mastered for busy parents. You get all the flavor of a slow pickle, but they’re ready for snacking fast. Seriously, get those green beans ready! You can read more about Ava’s journey to streamline weeknight cooking over at Cheffinity.
- Why You Will Make These Refrigerator Dilly Beans Again and Again
- Gathering Ingredients for the Best Dilly Beans Recipe
- Essential Equipment for Making Perfect Dilly Beans
- How to Make Refrigerator Dilly Beans Step-by-Step
- Tips for Crunchy Pickled Vegetables and Perfect Dilly Beans
- Storage and Serving Suggestions for Homemade Dill Pickles
- Frequently Asked Questions About Dilly Beans
- Nutritional Information for These Tangy Snack Recipe
- Share Your Best Dilly Beans Results
Why You Will Make These Refrigerator Dilly Beans Again and Again
If you’re looking for an easy pickle recipe that skips the pressure of canning, this is your winner. Seriously, these refrigerator dilly beans are a game-changer for busy evenings. They are ready so quickly!
- No complicated canner setup is needed—just a saucepan and your fridge.
- They are the ultimate crunchy pickled vegetables for snacking straight from the jar.
- You get that intensely tangy snack recipe flavor you crave, almost instantly!
We’ve kept the technique simple so you can use them in everything from packed lunches to healthy lunch recipes.
Gathering Ingredients for the Best Dilly Beans Recipe
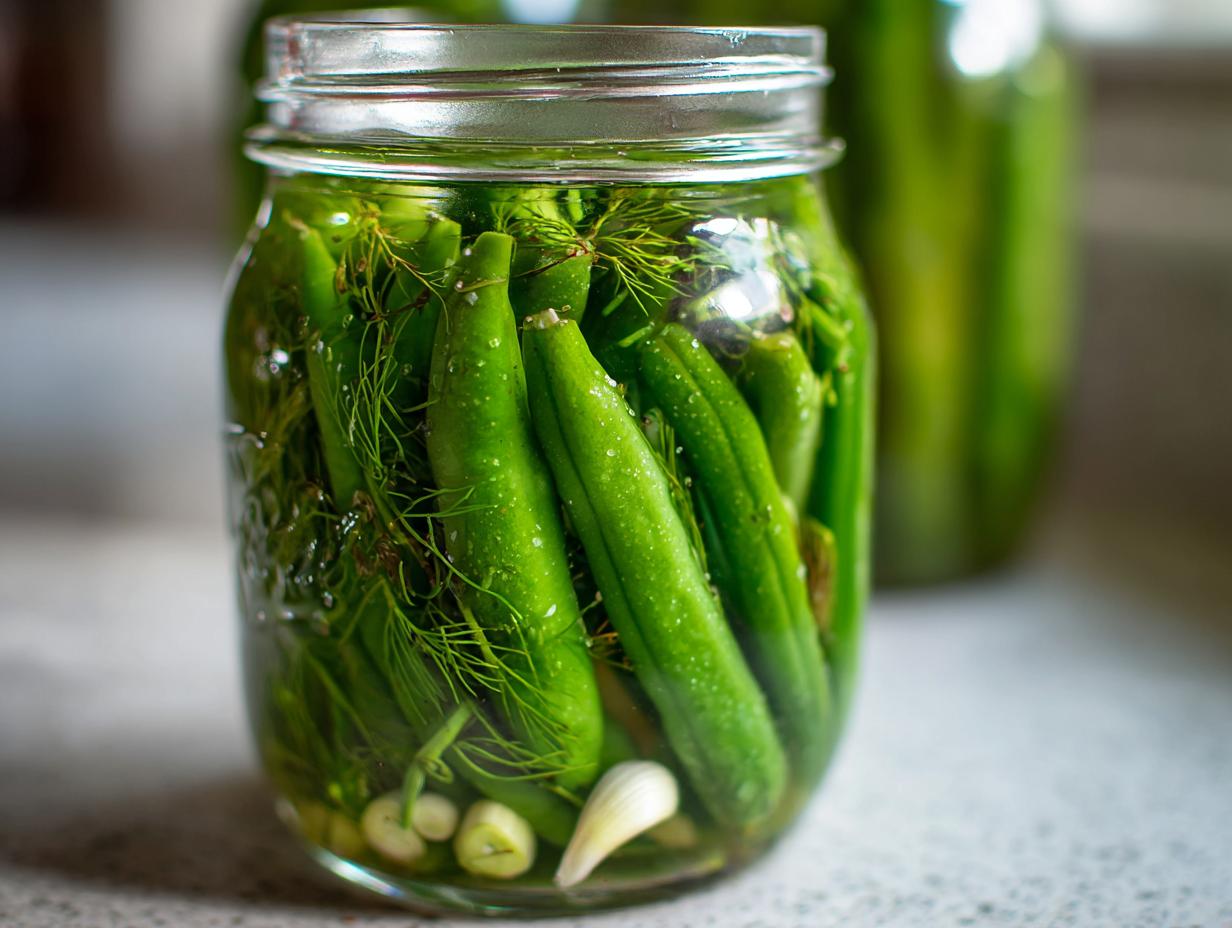
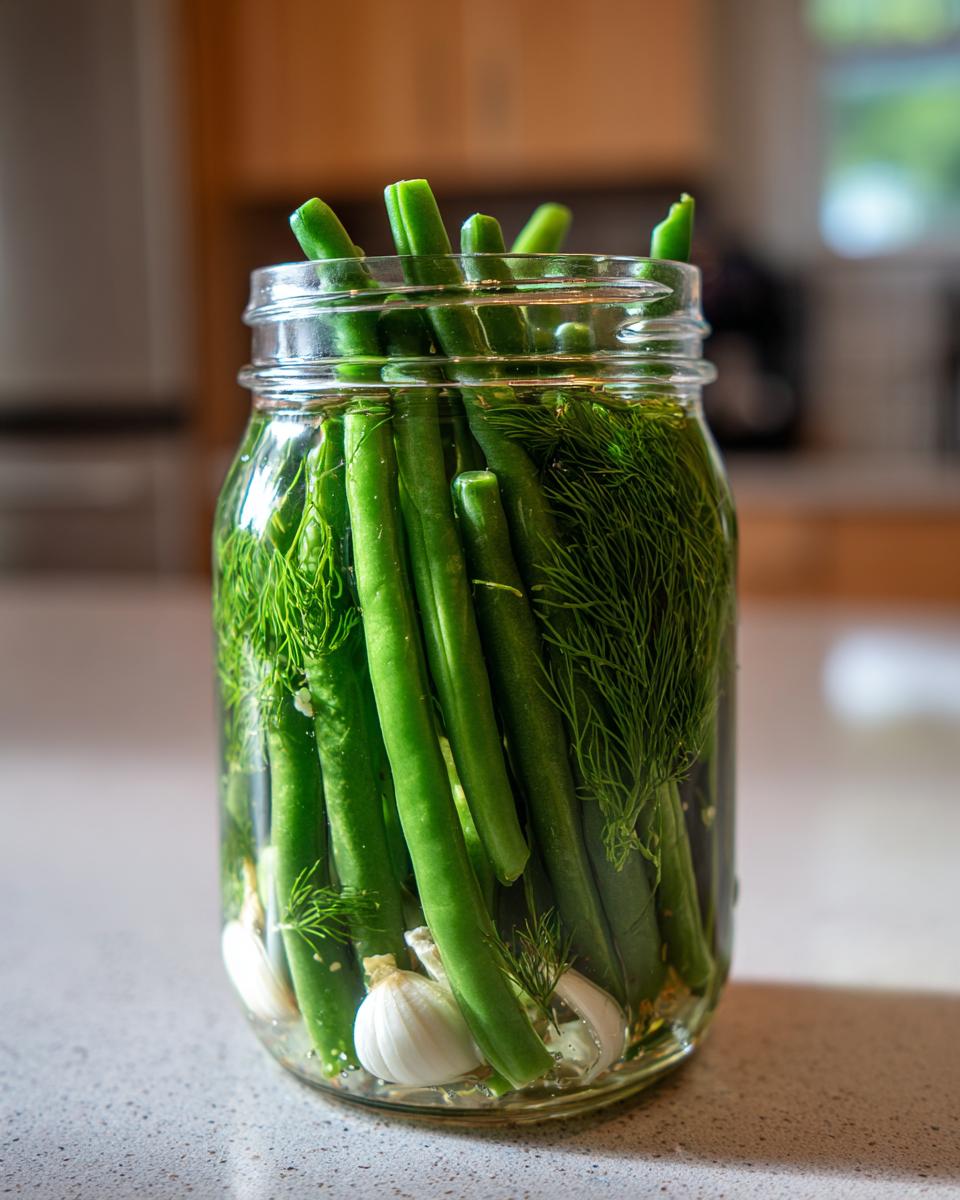
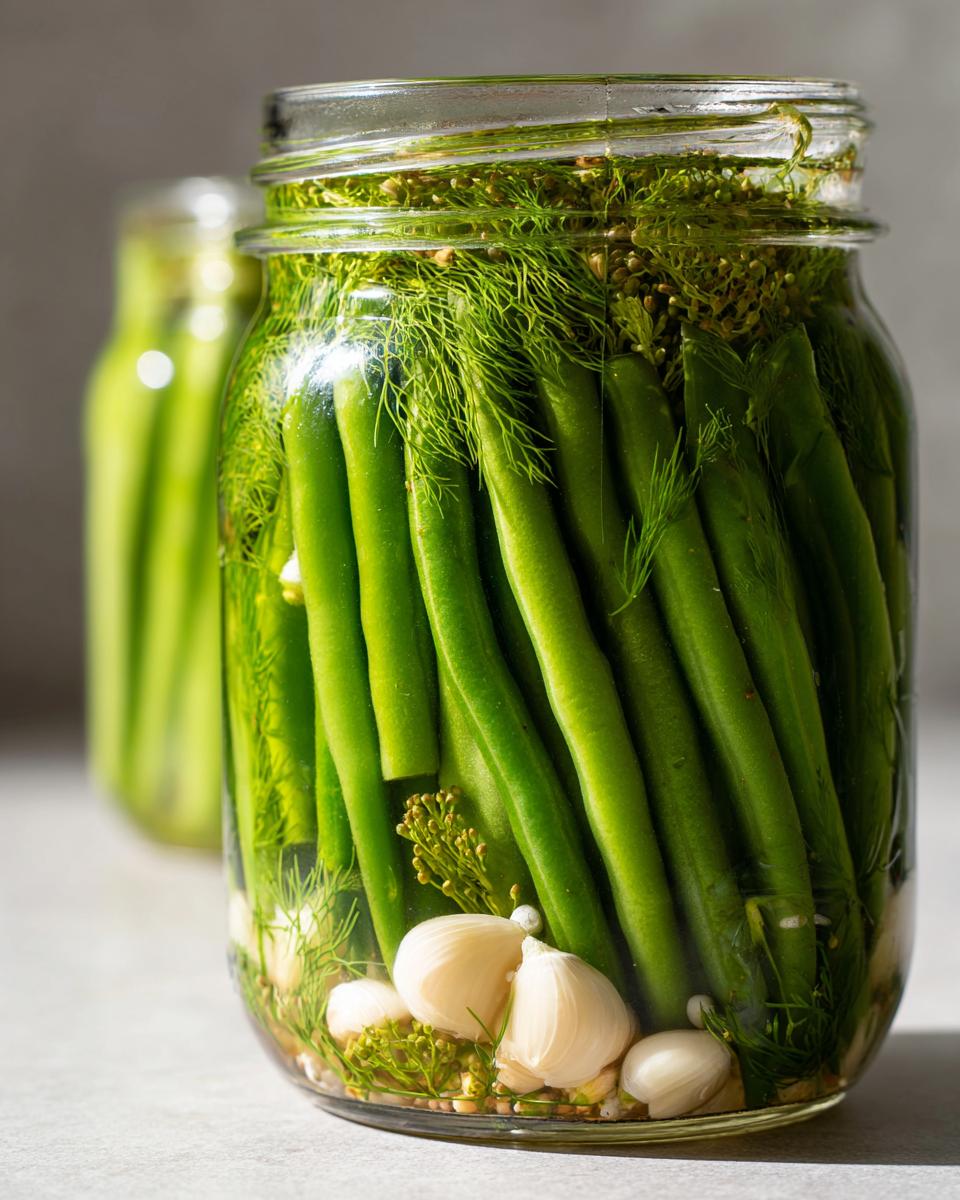
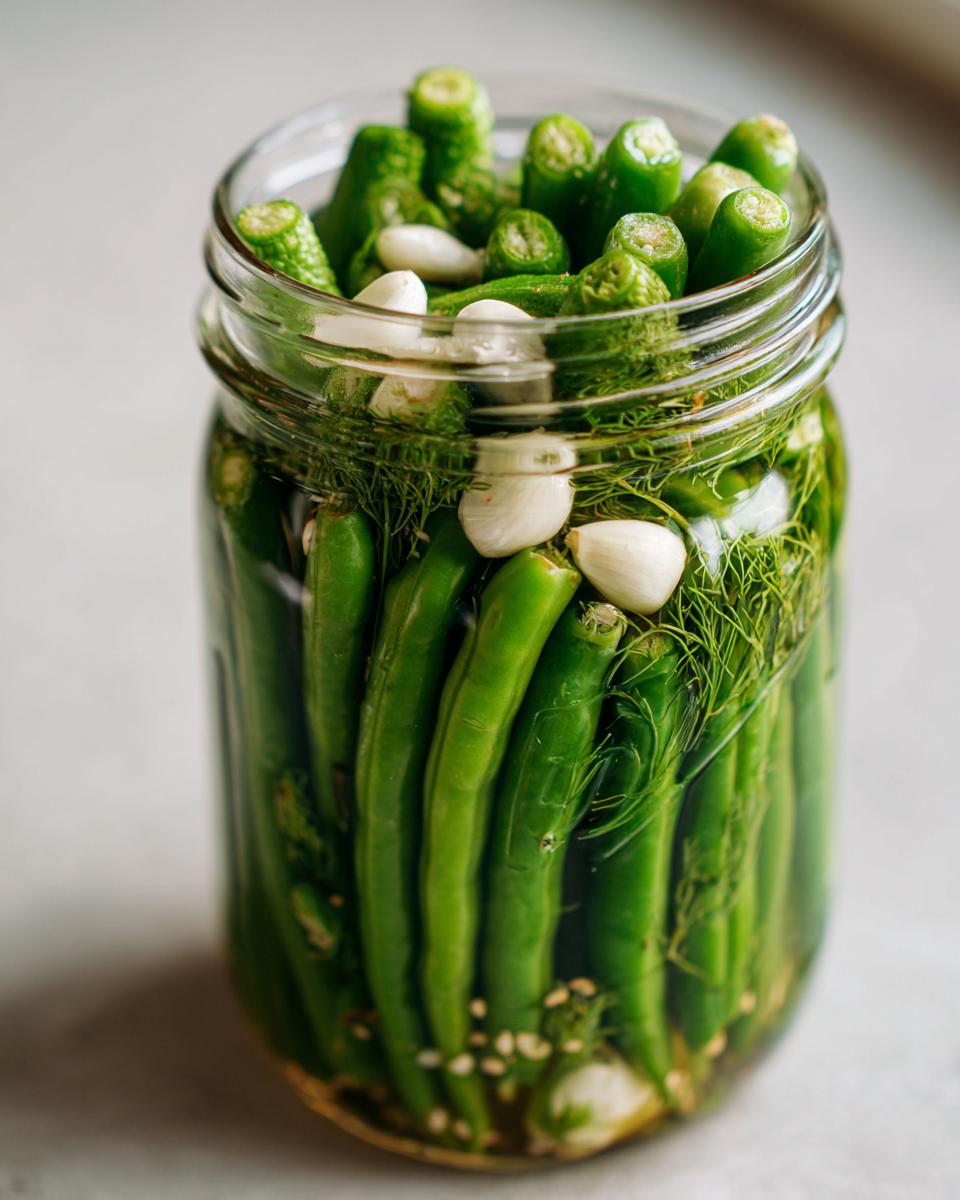
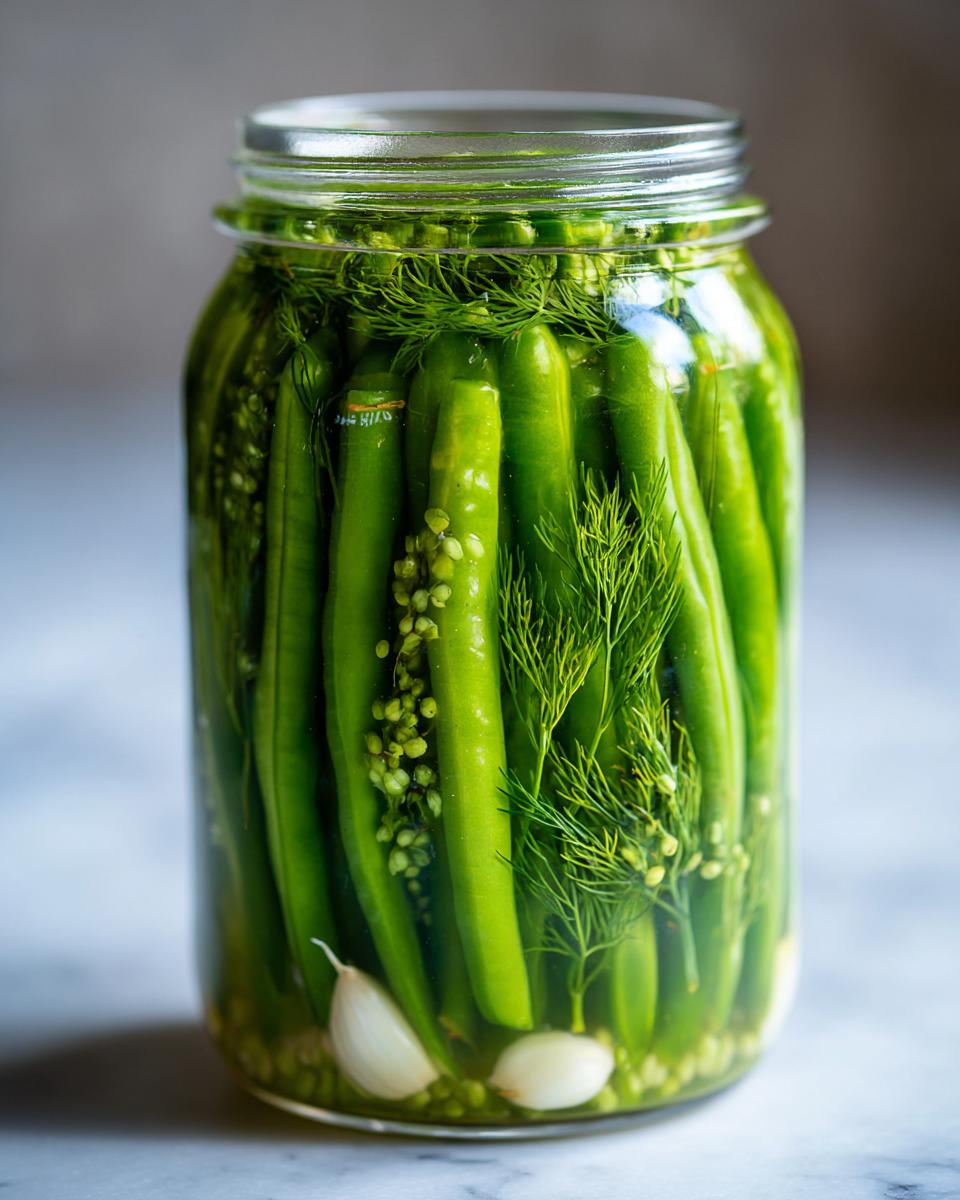
Okay, let’s talk ingredients! The success of any good batch of dilly beans really hinges on what you toss into that hot brine. Listen, since these are quick refrigerator pickles, we aren’t aiming for long-term storage, but we absolutely need that amazing crunch. That means fresh, crisp green beans are non-negotiable! You’ll want to trim those ends off and pack them tightly so they stay submerged and snappy. The other flavors—garlic, dill, and spice—are what make these *my* favorite homemade dill pickles.
Ingredients for Crunchy Dilly Beans
- 2 pounds fresh green beans, ends trimmed
- 4 cloves garlic, peeled and halved
- 1 teaspoon mustard seeds
- 1 teaspoon whole black peppercorns
- 1/2 teaspoon red pepper flakes (optional, for spicy dilly beans)
- 4 cups water
- 2 cups white vinegar (5% acidity)
- 1/4 cup pickling salt
- 4 large fresh dill heads or 4 tablespoons fresh dill seed
Essential Equipment for Making Perfect Dilly Beans
You don’t need a massive setup for this recipe, thankfully! Because we are going the refrigerator route, we skip the water bath canner, which saves us a ton of counter space. But you still need to make sure your equipment is clean and ready to go before those beans even hit the pot. If you’re organized, this whole process flies by! Getting the right gear ready upfront means zero frantic searching when the brine is boiling hot.
Here’s the simple list of what you need on hand:
- Four clean, pint-sized canning jars with lids and bands. Make sure those jars are sparkling!
- One medium saucepan for heating up that magical brine.
- A measuring cup set—accuracy matters when you’re making quick pickles!
- Something to tamp the beans down gently, like the handle of a wooden spoon.
- A ladle or heat-safe measuring cup for pouring the hot liquid safely.
How to Make Refrigerator Dilly Beans Step-by-Step
Now comes the fun part! Making these delicious dilly beans doesn’t take much time at all—maybe 10 minutes of actual hands-on work before you let the fridge do the heavy lifting. Remember, since these are refrigerator pickles, we are focusing on fast flavor infusion rather than shelf stability. Just make sure you follow these steps exactly so those beans stay wonderfully crunchy and soak up all that garlicky, vinegary goodness. You can check out some of our tips for speeding up dinner prep in general over at our quick weeknight dinners guide, but honestly, this recipe is already lightning fast!
Prepare Jars and Pack Green Beans
First things first: you need to wash those pint jars really well. Since this recipe relies on refrigeration, cleanliness is key to keeping things fresh for weeks. Don’t worry about sterilizing them like you would for true canning; just hot, soapy water and a good rinse is perfect for these quick pickles. Once they’re clean, start trimming the tough ends off your green beans. Pack them vertically into the jars as tightly as you can without smashing them. You want them standing upright because they look great and pack more efficiently that way.
Creating the Flavorful Brine for Your Dilly Beans
Time to make the brine that transforms those veggies! In your saucepan, combine the water, the vinegar, and that pickling salt. Toss it over medium-high heat and bring it to a full, rolling boil. You absolutely must stir it while it heats up to make sure that salt dissolves completely. If you skip this, your pickles won’t be seasoned correctly! Once everything is dissolved and boiling hard, turn the heat off immediately. We need that liquid hot when we pour it over the flavorings in the jars.
Filling Jars and Sealing Refrigerator Dilly Beans
Carefully ladle your hot brine over the beans in each jar. Go slow near the top so you don’t splash! You need to leave about half an inch of space right at the top—that’s called headspace, and it’s important even for refrigerator dilly beans. Gently tap the outside of the jars on the counter a few times to coax out any air bubbles trapped around the beans. If the liquid level drops below that half-inch mark, just top it up with a little more hot brine. Wipe the rims super clean, put the lids on fingertip tight, and then let them sit on the counter until they cool down to room temperature. Once they are cool, straight into the fridge they go!
Tips for Crunchy Pickled Vegetables and Perfect Dilly Beans
Getting those perfect, snappy dilly beans isn’t just luck; it comes down to a couple of key things Ava stressed in her notes. First, and I cannot say this enough, you must use the freshest, crispiest green beans you can find. If they look limp at the store, skip them! Those beans are going to stay that way once they hit the vinegar, so start crunching them before they even hit the jar. Seriously, this makes the difference between okay pickled vegetables and truly amazing ones.
Second, don’t be shy about customizing your flavor! If you want an extra kick with your tangy snack recipe, ramp up those red pepper flakes for fantastic spicy dilly beans. You can also swap out the dill heads for dried dill seed if you don’t have the fresh stuff on hand—it still works beautifully. For more great ideas on simple pickling that fits right into a busy schedule, check out our page on easy pickle recipe insights.
Storage and Serving Suggestions for Homemade Dill Pickles
The hardest part about making these amazing dilly beans is waiting for them to finish! You absolutely have to taste-test them after 24 hours, but honestly? They need at least 48 hours for the brine to really penetrate and make them tangy and delicious. I always try to sample one—just to check the seal, of course—around the two-day mark. After that initial wait, you’re good to go! Because this is a refrigerator pickle recipe and not a canned one, you need to keep them chilled.
They stay perfectly crisp and ready to eat in the fridge for about a month. If they start looking cloudy or you notice any funky smells, toss them, but usually, they disappear long before that happens!
So, what do you eat with these crunchy little gems? Honestly, everything! They are fantastic straight out of the jar when you need a salty, vinegary fix. But where they really shine is brightening up a plate. They bring the perfect punch to any platter—think amazing addition to your next charcuterie board snacks or piled high next to a grilled sandwich. You can even chop them up and mix them into tuna salad for an extra layer of flavor. Trust me, once you have these homemade dilly beans on hand, you’ll find a million ways to use them!
Frequently Asked Questions About Dilly Beans
Are these dilly beans supposed to be canned or refrigerated?
This specific recipe is for refrigerator dilly beans, which means no water bath canning is required! That makes them one of the easiest pickle recipes out there. You just bring the brine to a boil, pour it over, and pop them in the fridge. If you were looking for shelf-stable pickles, that involves a whole different sterilization process, but I prefer this quick method for immediate results!
How long do I have to wait before eating my homemade dill pickles?
While you technically *could* try one in 12 hours, that’s just not fair to the beans! For the best flavor that truly sinks in, wait a minimum of 48 hours. If you can hold out until the end of the week, that’s even better for flavor depth. They generally stay super snappy and delicious for about a month stored in the cold.
My beans aren’t crunchy! How to make dilly beans snap?
Oh, that’s the worst feeling! Usually, it means the beans weren’t fresh enough to start with, or you used too much heat on the brine initially. I always recommend trimming the beans, plunging them into ice water for about 15 minutes before packing, and only boiling the brine just long enough to dissolve the salt. That shock to the system really helps maintain that satisfying crunch.
Can I turn this into a proper canned dilly beans recipe?
You certainly can adapt this recipe, but you’d need to modify the quantities for processing time in a boiling water bath canner safely. For this specific recipe, to keep it simple, I strongly recommend sticking to the refrigeration method. If you’ve got questions about canning processes in general, you can always reach out to us via the contact page!
Nutritional Information for These Tangy Snack Recipe
I know some folks are really focused on what they’re putting into their bodies, even when we’re talking about quick snacks like these vinegary beauties. Since we skip the heavy oils and sugars you find in some store-bought versions, these pickled green beans come out super light. Keeping things efficient and nourishing is totally in line with the Cheffinity philosophy, right?
Keep in mind that these numbers are just estimates based on the brine ratios and the fresh ingredients we used. Every batch might vary slightly depending on how much salt the beans actually soak up, but overall, it gives you a great baseline!
Here is what you can generally expect per serving size:
- Serving Size: 4 ounces
- Calories: 25
- Fat: 0g
- Protein: 1g
- Total Carbohydrates: 5g
- Fiber: 2g
- Sugar: 1g
- Sodium: 450mg (Yes, it’s salty—it’s a pickle!)
- Cholesterol: 0mg
Share Your Best Dilly Beans Results
Well, that’s it! You have officially made incredible, crunchy, garlicky goodness that didn’t require you to haul out the big canner. I’m so excited for you to taste these refrigerator pickles!
Now, I genuinely want to know what you think. Did you try increasing the pepper flakes for a fiery batch, or did you stick to the classic dill and garlic flavor? Drop down below and leave a quick star rating for the recipe. Your feedback really helps other home cooks decide if this is the right quick pickle recipe for them, and honestly, it helps me know what Ava should focus on next!
If you snapped a picture of your jars—maybe they’re sitting on your counter or already making an appearance on a sandwich—please share it on social media and tag us! Seeing your home kitchen success is what this whole thing is really about. We appreciate you trusting us with your preserving efforts!
Before you go, just a quick reminder that we keep all user feedback and information confidential, which you can check out in our privacy policy if you’re curious. Now go eat those snappy pickles!
PrintCrunchy Refrigerator Dilly Beans: The Easiest No-Canning Recipe for Tangy, Garlicky Pickles
Make the best homemade dilly beans with this quick refrigerator pickle recipe. These pickled green beans are crunchy, tangy, and ready fast without the need for canning.
- Prep Time: 20 min
- Cook Time: 5 min
- Total Time: 25 min
- Yield: 4 pints 1x
- Category: Side Dish
- Method: Refrigerator Pickling
- Cuisine: American
- Diet: Vegetarian
Ingredients
- 2 pounds fresh green beans, ends trimmed
- 4 cloves garlic, peeled and halved
- 1 teaspoon mustard seeds
- 1 teaspoon whole black peppercorns
- 1/2 teaspoon red pepper flakes (optional, for spicy dilly beans)
- 4 cups water
- 2 cups white vinegar (5% acidity)
- 1/4 cup pickling salt
- 4 large fresh dill heads or 4 tablespoons fresh dill seed
Instructions
- Prepare the jars: Wash four pint-sized canning jars and lids thoroughly. Set aside.
- Pack the jars: Divide the trimmed green beans evenly among the jars, packing them tightly vertically.
- Add flavorings: Place 1 garlic half, 1/4 teaspoon mustard seeds, 1/4 teaspoon peppercorns, and 1/8 teaspoon red pepper flakes (if using) into each jar. Add one dill head or 1 tablespoon of dill seed to each jar.
- Make the brine: In a medium saucepan, combine the water, vinegar, and pickling salt. Bring the mixture to a rolling boil over high heat, stirring until the salt dissolves completely.
- Fill the jars: Carefully pour the hot brine over the beans in each jar, leaving 1/2 inch of headspace at the top. Ensure all beans are submerged.
- Remove air bubbles: Gently tap the jars to release any trapped air bubbles. Add more brine if necessary to maintain the 1/2 inch headspace.
- Seal and cool: Wipe the rims clean. Place the lids on the jars and screw on the bands until fingertip tight. Let the jars cool on the counter for several hours.
- Refrigerate: Once cooled, place the jars in the refrigerator. Your dilly beans will be ready to eat in 24 to 48 hours, but the flavor improves after one week. Store in the refrigerator for up to one month.
Notes
- For a spicier batch, increase the red pepper flakes to 1/2 teaspoon per jar.
- If you do not have fresh dill heads, use dried dill seed or fresh dill sprigs for flavor.
- These are refrigerator pickles; they do not require water bath canning for shelf stability.
- For the crunchiest pickled vegetables, use very fresh, crisp green beans.
Nutrition
- Serving Size: 4 ounces
- Calories: 25
- Sugar: 1
- Sodium: 450
- Fat: 0
- Saturated Fat: 0
- Unsaturated Fat: 0
- Trans Fat: 0
- Carbohydrates: 5
- Fiber: 2
- Protein: 1
- Cholesterol: 0