
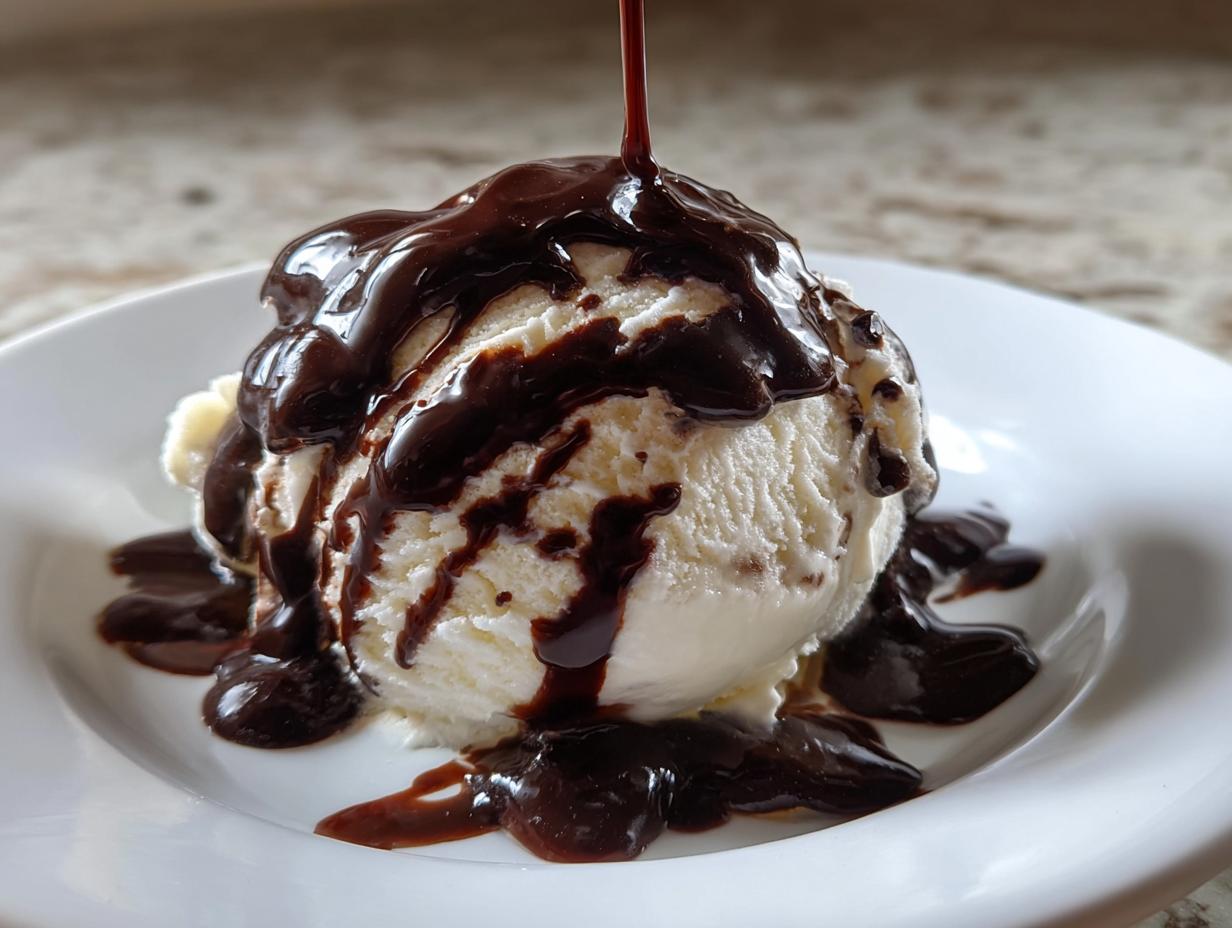
Are you still bringing home that same bottle of thin, sugary stuff from the grocery store? Seriously, let’s put that down. We made a promise here at Cheffinity that we wouldn’t compromise on flavor just because life gets crazy, and that includes our sweets! This is the **Ultimate Quick & Easy Homemade Chocolate Syrup**—and trust me, it’s richer than anything you buy pre-made. We’re talking about that absolute best homemade syrup, ready in under ten minutes using ingredients already hiding in your pantry. If you’re looking for a seriously decadent dessert drizzle that sticks to your ice cream instead of sliding off, you’ve found the right place for your new go-to chocolate syrup. You can find more sweet inspiration in our collection of delicious dessert recipes.
- Why This Homemade Chocolate Syrup Recipe Beats Store-Bought Brands
- Ingredients for Your Quick Chocolate Syrup Using Pantry Ingredients
- How to Make This 10 Minute Chocolate Sauce
- Tips for the Best Homemade Chocolate Syrup Recipe
- Versatile Usage for Your Easy Chocolate Sauce
- Storage and Keeping Your Pantry Staple Chocolate Syrup
- Frequently Asked Questions About Homemade Syrup
- Estimated Nutritional Data for This Rich Chocolate Topping
- Share Your Decadent Dessert Drizzle Creations
Why This Homemade Chocolate Syrup Recipe Beats Store-Bought Brands
Look, I respect efficiency, but I won’t respect flavor compromises. That stuff in the bottle? It’s usually full of stabilizers and syrups that make it taste… one-dimensional. When you make your own chocolate syrup, you control the quality entirely. We are reaching for that ultra-smooth chocolate drizzle texture that store brands just can’t replicate without sticking chemicals in there.
When you whip this up yourself in minutes, you get something genuinely special. You get real flavor, not just sweet brown water. It’s how we live the Cheffinity life—maximum flavor, minimum fuss. I believe in using real ingredients, always.
- You get true, deep cocoa flavor, not that weird cooked taste.
- The texture is noticeably richer, perfect for melting over hot things.
- You control the sweetness level, avoiding unnecessary fillers.
Achieving That Rich Chocolate Topping Flavor
The absolute biggest difference maker here is what’s *not* in it. We skip all that corn syrup junk! That’s why this ends up as a fantastic no corn syrup chocolate sauce. We are just using actual sugar and high-quality cocoa powder. That means the flavor of the chocolate itself really shines through. It’s truly the best homemade syrup you’ll ever pour.
Ingredients for Your Quick Chocolate Syrup Using Pantry Ingredients
This is where the magic of simplicity shines! You won’t need a single specialty store run for this batch. It’s all about using your chocolate syrup using pantry ingredients that are probably waiting in your cupboards right now. We need five things total to make about a cup and a half of rich topping. It’s fast, it’s easy, and you’ll be stunned by how good it tastes.
- 1 cup granulated sugar
- 1 cup unsweetened cocoa powder
- 1 cup water
- 1 teaspoon vanilla extract
- Pinch of salt
Ingredient Clarity and Notes
See? Barely anything! Because we start with pure cocoa powder, this is essentially the recipe for chocolate syrup from cocoa powder. If you’re looking to make a vegan chocolate syrup, you’re already set, assuming your granulated sugar doesn’t use bone char in its processing where you live—just double-check that quick!
How to Make This 10 Minute Chocolate Sauce
Okay, this is the best part! Remember how I said this is a real life, chaotic-kitchen recipe? Because the total time from grabbing the pot to turning off the heat is only about ten minutes, you can whip this up right when that ice cream craving hits. Forget waiting! We’re moving fast here to create the base for your perfect chocolate syrup.
First, grab that saucepan. We’re combining the sugar, the cocoa powder, and the water. Get whisking immediately! You have to whisk constantly until everything looks uniform and smooth before the heat even comes on, or you’ll get those frustrating gritty lumps. This whole process is built for speed, like one of my quick weeknight dinners, but for dessert!
The Stovetop Method for Smooth Chocolate Drizzle
Now, set that pot over medium heat. Keep whisking! You need to dissolve all that sugar completely. Once it starts getting warm, watch it carefully. We are looking for a gentle simmer, not a raging boil. If it starts bubbling violently, pull it back immediately—rapid boiling can scorch the cocoa and ruin that luxurious flavor we want. Just let it bubble softly for about one minute while you keep stirring. That brief period is what slightly thickens the sauce for that beautiful texture.
Cooling and Thickening Your Chocolate Syrup
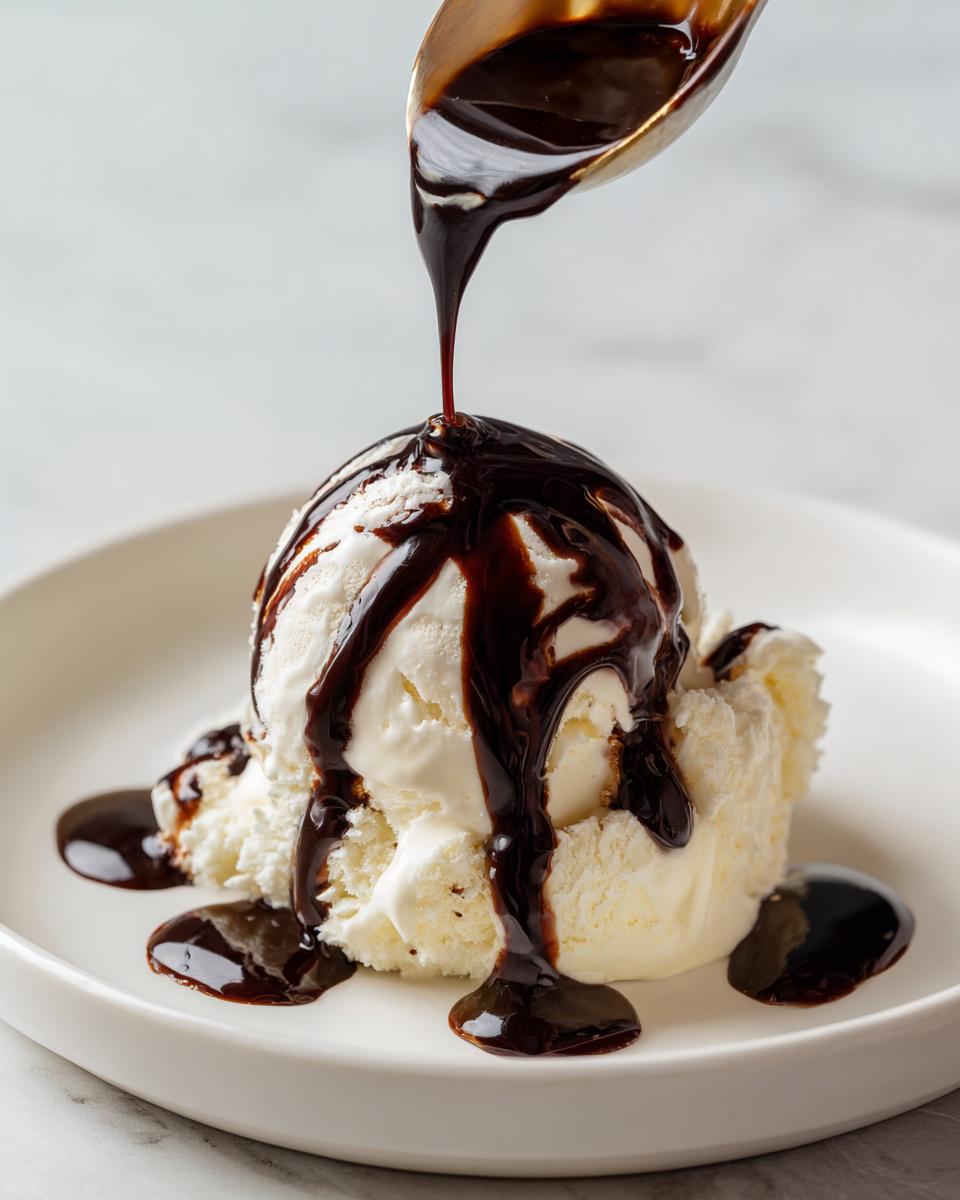
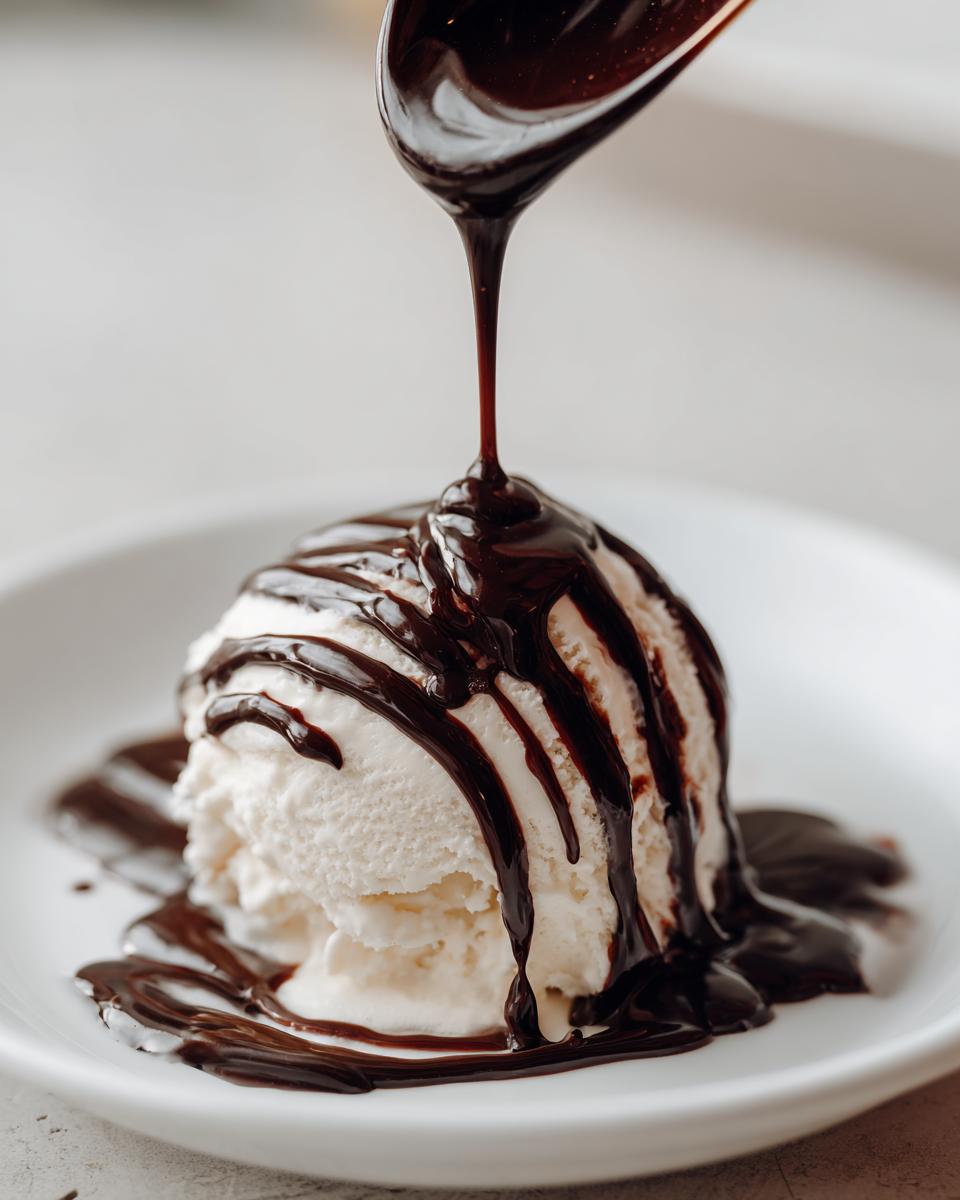
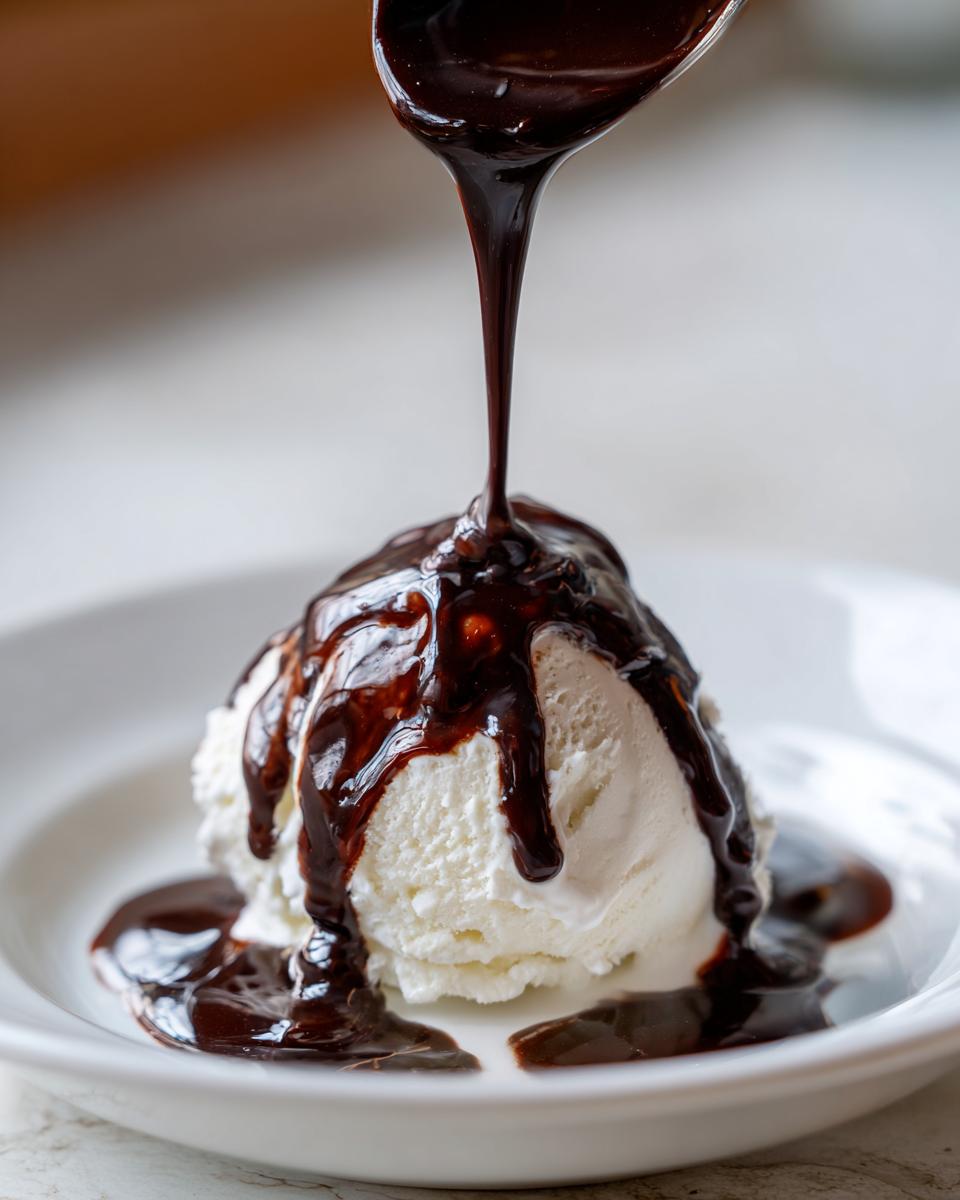
Once that minute is up, yank the pan right off the burner. That’s it for cooking! Now, stir in your vanilla extract and that tiny pinch of salt—the salt really wakes up the chocolate, trust me. The secret to getting that amazing smooth chocolate drizzle consistency is cooling. It will look thin right now, almost like hot cocoa, but don’t panic! As this rich chocolate syrup cools down completely, it magically thickens up. This recipe yields about 1.5 cups, so pour it into your storage jar once it hits room temperature.
Tips for the Best Homemade Chocolate Syrup Recipe
Even though this recipe is quick, the texture sometimes needs fine-tuning depending on what you’re using it for. This advice comes from making batches for everything from hot coffee to cold ice cream! Remember, even the best homemade chocolate syrup can benefit from a quick tweak right before pouring.
Don’t stress if it seems a little too thin when you first make it. That’s normal, because it’s hot! But if you’ve let it cool and it’s still more watery than you like, you can always pour it back into the saucepan and simmer it again over low heat for just another minute or two. Watch it closely, though—we want thick, not burnt!
Adjusting Thickness for Different Uses
How thick you want your chocolate syrup really depends on the application. For a rich ice cream topping recipe, you want it thick and slow-moving. For making a simple chocolate milk syrup, you might want it thinner so it incorporates easily into cold milk without clumping. If you made it too thick for milk, just whisk in a tablespoon or two of hot water until it flows smoothly. See? Total control over your favorite chocolate syrup!
Versatile Usage for Your Easy Chocolate Sauce
Now that you have this incredible, rich chocolate syrup cooling down, the real fun begins! Since we made an easy chocolate sauce that’s so much better than the store-bought stuff, you’ll want to use it on everything. Forget saving it for special occasions; this is a pantry staple meant for daily enjoyment. It’s fantastic drizzled generously over pancakes, stirred into Greek yogurt, or used as the base for your homemade chocolate pudding. We want you to start using this today!
The best part about making your own is customizing it for hot drinks, too. You can make a super decadent mocha or just add a swirl to your evening coffee. Check out some fun ways to incorporate chocolate into breakfast ideas on our Easy Breakfast Ideas page for inspiration. This chocolate syrup is the workhorse your dessert drawer needs.
Making Chocolate Milk Syrup
If you need to whip up chocolate milk fast, this syrup is perfect because it dissolves way better than powder. The general rule I use, based on what we noted for storage, is to start with 2 to 3 tablespoons of this homemade chocolate syrup for every 8 ounces of cold milk. Taste it after two tablespoons, though! Everyone likes their chocolate milk a little different. If you’re trying to make the best mocha at home, use a bit less syrup and add a shot of espresso, just like the pros do—you can get some great ideas for that over at Creator’s of Coffee.

Storage and Keeping Your Pantry Staple Chocolate Syrup
The best part about making this is you don’t have to use it all at once! This is truly a pantry staple chocolate syrup meant to last. Since we didn’t use any weird preservatives, we just need to keep it happy in the fridge. Use a nice, clean, airtight container—a mason jar works perfectly here. If you keep it sealed tight and refrigerated, your homemade chocolate syrup should stay absolutely fantastic for up to three weeks. If you’re ever concerned about something—like for gifting—always check out our Terms of Use page for general guidance, but honestly, this stuff is simple!
Frequently Asked Questions About Homemade Syrup
I get so many questions when people try this for the first time! Honestly, once you taste this rich chocolate topping, you’ll wonder why you ever bothered with the jarred stuff. Here are the super common things people ask me about getting their homemade chocolate syrup recipe just perfect. If you have other questions, don’t hesitate to reach out via our Contact page!
Can I make this a sugar free chocolate syrup recipes version?
Oh, absolutely! If you’re cutting way back on sugar, you can swap the granulated sugar for your favorite granular substitute, like erythritol or monk fruit blends. Just remember this key tip from my testing lab: sugar substitutes often don’t dissolve or interact with heat the same way cane sugar does. You might need to cook it for a tiny bit longer, or you might find it thins out more than expected. Be prepared to cool it down first to see the true consistency.
Why is my chocolate topping grainy?
That terrible grainy texture is the number one mistake in making any kind of chocolate simple syrup for coffee or desserts! It almost always means the sugar didn’t fully dissolve before you hit a boil. Remember how I stressed constant whisking? You have to keep stirring until you can no longer feel grit at the bottom of the pot when you drag your whisk across it. That complete dissolution is key to that luxuriously smooth chocolate drizzle!
Is this recipe better than Hershey’s syrup?
In my honest opinion? Yes, a thousand times yes. We are talking about true, deep cocoa flavor without any artificial thickeners or corn syrup. This homemade chocolate syrup is undeniably better than Hershey’s syrup because the ingredients are fresher! You’re getting a much more decadent dessert drizzle experience because you aren’t tasting fillers; you’re tasting pure chocolate goodness. If you’re tired of the commercial versions, give this a shot—it’s fantastic for making that perfect, rich chocolate topping.
Estimated Nutritional Data for This Rich Chocolate Topping
Now, I know none of us are making this ultra-indulgent chocolate syrup because we’re counting carbs, but hey, transparency is part of the Cheffinity system! Since we’re using simple pantry ingredients, you know exactly what’s going into this smooth chocolate drizzle. These numbers are based on the recipe yield, so keep in mind they are just estimates based on the basic components we used.
This data is calculated based on a serving size of two tablespoons of the final, cooled product, which is perfect for a swirl over brownies or for mixing into a single glass of hot chocolate. It’s good to know what you’re working with as you decide how many scoops of ice cream you need to top!
- Serving Size: 2 Tablespoons
- Calories: 95
- Sugar: 18g
- Sodium: 1mg
- Fat: 0.5g
- Saturated Fat: 0.3g
- Unsaturated Fat: 0.2g
- Trans Fat: 0g
- Carbohydrates: 24g
- Fiber: 1g
- Protein: 1g
- Cholesterol: 0mg
There you have it! Real data for your real-life homemade chocolate sauce. Don’t let the sugar number scare you; it’s high because we skipped the corn syrup and used real sugar instead. That’s the trade-off for flavor, and honestly, it’s one I’m willing to make.
Share Your Decadent Dessert Drizzle Creations
Alright, I’m genuinely so excited for you to try this! You’ve just made what I consider one of the most essential pantry staple chocolate syrups in existence, and I want to know everything about how you used it. Did you make a marathon session of chocolate milk? Did you drench your favorite homemade brownies in that beautiful decadent dessert drizzle? Did it save your evening when you realized you were out of the store-bought stuff?
Hop down in the comments below and give this recipe a rating! Seriously, hearing how much time this saved you in the kitchen is what keeps me innovating here at Cheffinity. If you took a picture of your perfect ice cream topping recipe in action—maybe drizzled over pancakes or swirled dramatically into a morning mocha—please share it! We’re building this community together, one easy, real-ingredient win at a time. If you have any last-minute questions, you can always hit us up via the Contact page!
PrintThe Ultimate Quick & Easy Homemade Chocolate Syrup (Richer Than Store-Bought!)

Stop buying syrup! Make this rich, smooth homemade chocolate syrup in under 10 minutes using simple pantry ingredients. This easy chocolate sauce is better than Hershey’s and perfect for ice cream, milk, or coffee.
- Prep Time: 5 min
- Cook Time: 5 min
- Total Time: 10 min
- Yield: About 1.5 cups 1x
- Category: Dessert Topping
- Method: Stovetop Cooking
- Cuisine: American
- Diet: Vegetarian
Ingredients
- 1 cup granulated sugar
- 1 cup unsweetened cocoa powder
- 1 cup water
- 1 teaspoon vanilla extract
- Pinch of salt
Instructions
- Combine the sugar, cocoa powder, and water in a small saucepan.
- Place the saucepan over medium heat. Whisk constantly until the sugar is completely dissolved and the mixture is smooth. Do not let it boil rapidly.
- Bring the mixture to a gentle simmer, continuing to whisk for about 1 minute. This step helps thicken the syrup slightly.
- Remove the saucepan from the heat.
- Stir in the vanilla extract and salt until combined.
- Allow the chocolate syrup to cool completely. It will thicken further as it cools.
- Pour the cooled syrup into an airtight container for storage.
Notes
- For a vegan chocolate syrup, confirm your sugar source is vegan-friendly.
- This recipe makes a smooth chocolate drizzle that is naturally gluten free.
- Store this pantry staple chocolate syrup in the refrigerator for up to three weeks.
- To make chocolate milk syrup, use 2-3 tablespoons per 8 ounces of cold milk.
Nutrition
- Serving Size: 2 Tablespoons
- Calories: 95
- Sugar: 18g
- Sodium: 1mg
- Fat: 0.5g
- Saturated Fat: 0.3g
- Unsaturated Fat: 0.2g
- Trans Fat: 0g
- Carbohydrates: 24g
- Fiber: 1g
- Protein: 1g
- Cholesterol: 0mg