

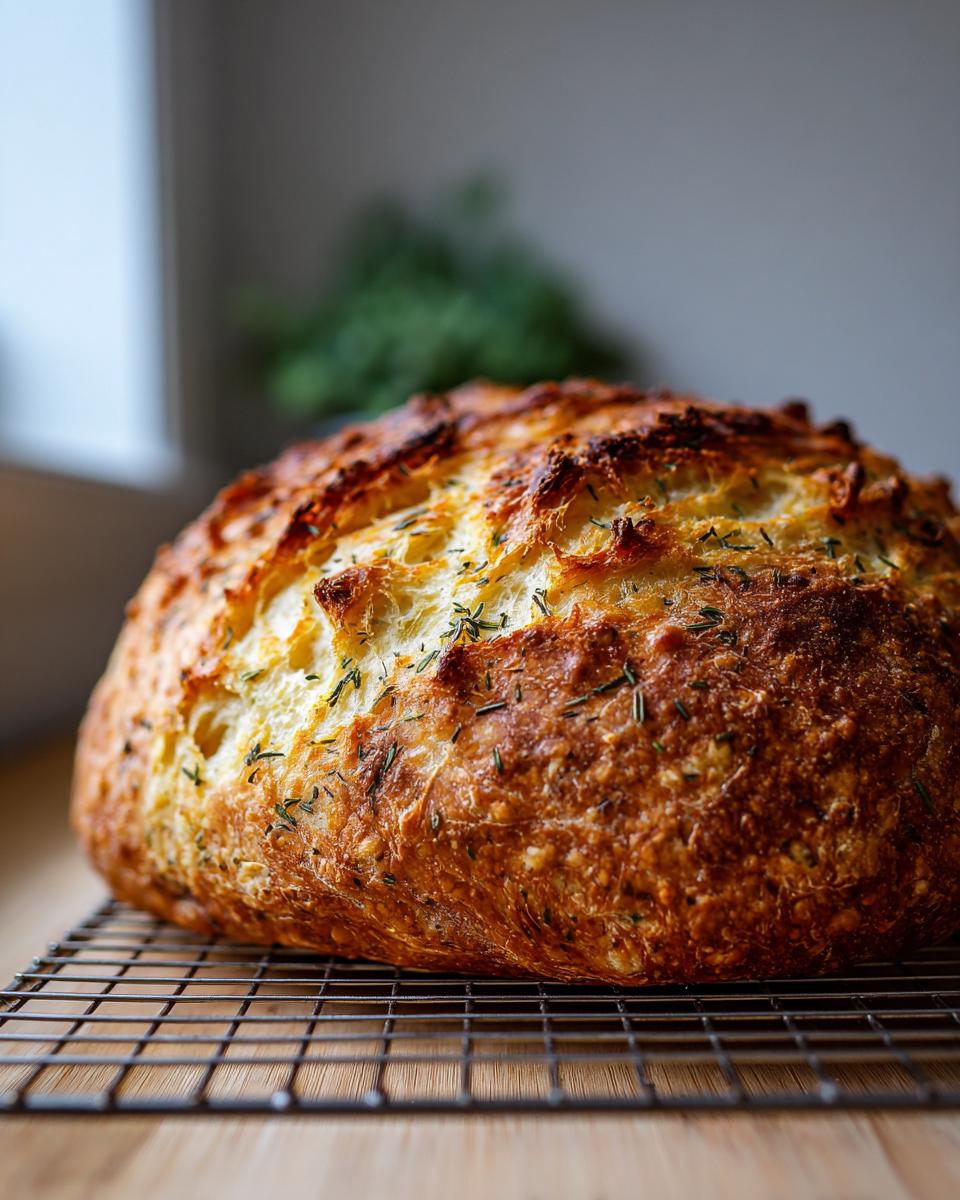
It feels like every busy evening comes down to that familiar choice, right? Do we spend an hour making something amazing, or do we cave and grab takeout? Here at Cheffinity, Ava Sinclair built this whole thing on the idea that you shouldn’t have to compromise on flavor just because time is short. That’s why I am so excited about this Italian herb and cheese bread. It’s the perfect savory side that smells incredible while it bakes, or it makes the best, sturdy base for a sandwich loaf the next day. It’s real food, made simple, exactly how Ava believes weeknight meals should be. If you’re looking for more ways to reclaim dinner time, check out our guide to quick weeknight dinners! Seriously, the bread machine does all the heavy lifting for you!
- Why This Italian Herb and Cheese Bread Machine Loaf Works for Busy Nights
- Ingredients for Your Italian Herb and Cheese Bread
- Step-by-Step Instructions for Bread Machine Herb Bread
- Tips for Making the Best Italian Herb and Cheese Bread
- Serving Suggestions for Your Garlic Herb Bread
- Storage and Reheating Instructions for This Sandwich Loaf
- Frequently Asked Questions About Italian Herb and Cheese Bread
- Nutritional Estimates for Cheesy Dinner Bread
- Share Your Italian Herb and Cheese Bread Success
Why This Italian Herb and Cheese Bread Machine Loaf Works for Busy Nights
Listen, I get it. You’re tired, and the last thing you want is a complicated recipe. What I love about this loaf is the payoff versus the effort. It’s one of my favorite easy bread machine recipes because you dump it in, walk away, and come back to the smell of an Italian bakery! This recipe packs so much flavor in, making it fantastic for dipping or slicing thick for a midnight snack.

- It’s hands-off for nearly three hours—pure magic.
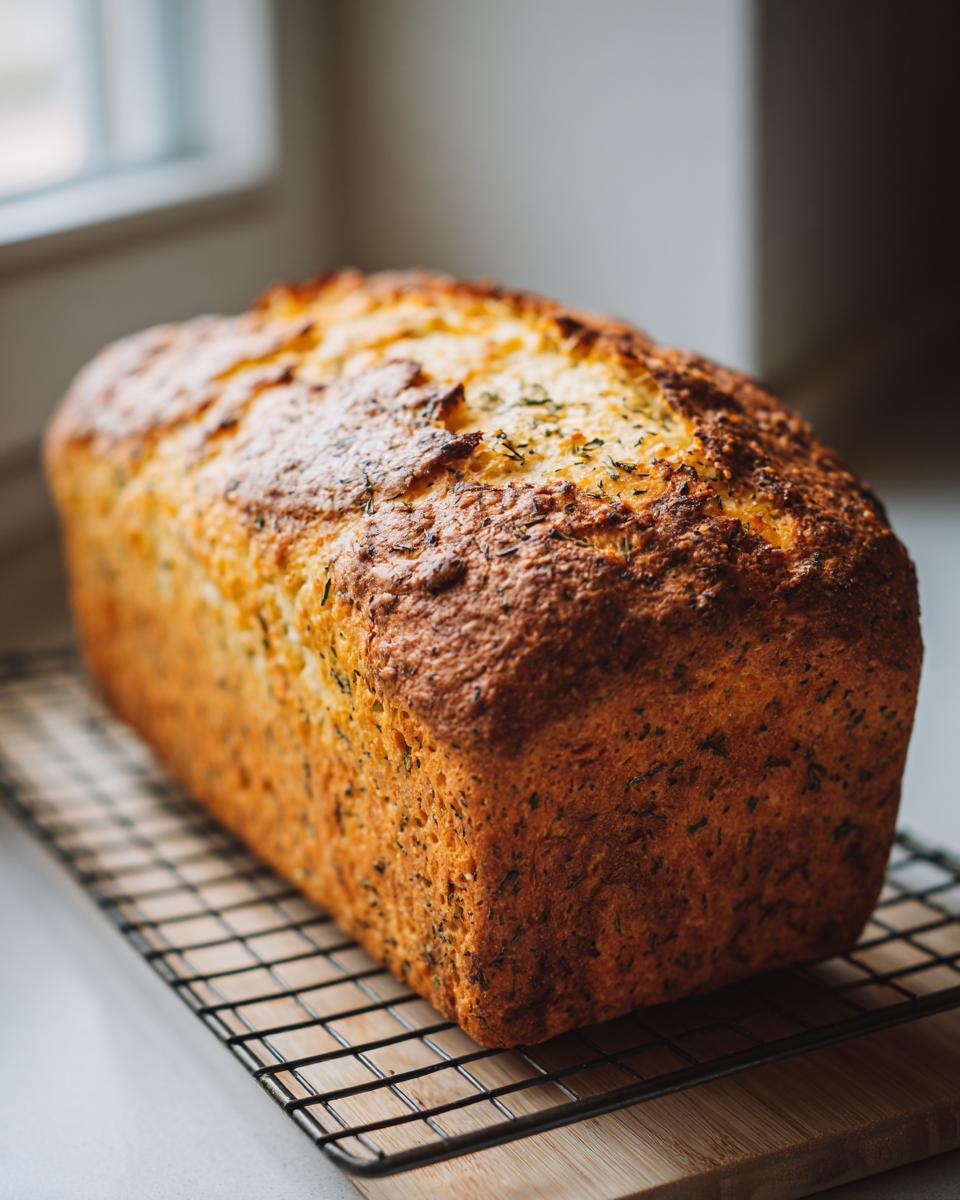
- It yields a resilient, perfect sandwich loaf structure that actually holds up to fillings.
- The herbs and cheese are added right at the end, so they don’t break down during the long mix cycle.
Flavor Profile: Rosemary Oregano Bread Meets Parmesan Herb Bread
You get that wonderful savory kick from the dried Italian seasoning blend and fresh rosemary. But the real kicker is the Parmesan cheese melting right into the hot dough. It gives you those sharp, salty pockets—it’s truly a Parmesan herb bread experience, not just plain bread. That little bit of minced garlic just makes the whole kitchen smell amazing!
Perfect for the Beginner Bread Machine Owner
If you just pulled that bread machine out of the box, this is the recipe to try first. Seriously, if you can measure liquids and dry goods, you can nail this. We aren’t fussing with kneading or proofing times. The machine handles everything. It truly sets you up for success when you’re just starting out with your beginner bread machine.
Ingredients for Your Italian Herb and Cheese Bread
Okay, the ingredient list here is so straightforward, which is part of why this is such a fantastic cheesy dinner bread option. You’re using some pantry staples, but the flavor builders are what matter most. Just make sure your yeast is fresh—that’s the lifeblood of any loaf!
For this Italian herb and cheese bread, you’ll need the basics like bread flour, sugar, and salt. Don’t skip the olive oil; it gives the crumb a lovely tenderness. Then, we load up on the flavor: warm water, active dry yeast, a generous half-cup of grated Parmesan cheese, and that fragrant mix of Italian seasoning, rosemary, and fresh minced garlic to really bring that rustic Italian scent into your home.
Step-by-Step Instructions for Bread Machine Herb Bread
Okay, this is where the real fun begins, and trust me, it’s just as easy as gathering the spices! The key to getting a perfect bread machine herb bread is understanding how your specific machine likes its ingredients layered. You want to avoid activating that yeast too early by having it touch the salt or the liquid ingredients right away.
Loading the Pan and Setting the Cycle
First things first: always check your machine’s manual, but generally, you load liquids first. So, pour in that warm water and the olive oil. Next, gently layer in your dry goods: the bread flour, sugar, and salt. Now for the yeast—make a little well right on top of the flour pile, or use the dispenser cup if you have one, but keep it separated from the salt underneath. Once loaded, select the Basic or White Bread cycle. I usually go for a Medium crust, but if you like it crunchier, go for Light!
Adding the Mix-Ins for Perfect Italian Cheese Bread
This is the moment that turns simple bread into amazing Italian cheese bread! You need to listen for your machine’s *beep*. This sound usually happens after the initial, short kneading phase. When you hear it, that’s your cue to add the real flavor boosters: the Italian seasoning, rosemary, that grated Parmesan, and the minced garlic. Just sprinkle them right over the dough surface through the chute.
Now, if your machine is super old school and doesn’t have a dispenser chute (oops!), don’t panic. Wait until the dough has fully mixed and formed a nice, cohesive ball. Then, quickly open the lid, sprinkle your herbs and cheese over the top, and gently punch them down just a touch so the dough incorporates them while kneading again. Then, shut the lid and let it bake!
Tips for Making the Best Italian Herb and Cheese Bread
If you want this loaf to sing—and trust me, you want it to sing—a couple of little tweaks can take your cheesy dinner bread from good to absolutely unforgettable. These aren’t complicated steps; they are just the things I learned after the first couple of slightly “meh” loaves.
Ingredient Notes and Flavor Boosters
You’ll see in the recipe that we use water, but for a truly richer, softer crumb, try swapping out a quarter cup of that water for milk. It just adds a lovely softness that works so well with the salty cheese. If you happen to have fresh rosemary sprigs, pull the leaves right off those—they have a punch that dried herbs just can’t match. Also, if you’re looking for new ways to use those amazing flavors, check out my recipe for easy garlic naan bread!
And about that garlic? Skip the jarred minced stuff if you can manage it. Just press two fresh cloves through a garlic press right into the mix. The aromatic oils released from fresh garlic are just divine when baked into bread like this.
Serving Suggestions for Your Garlic Herb Bread
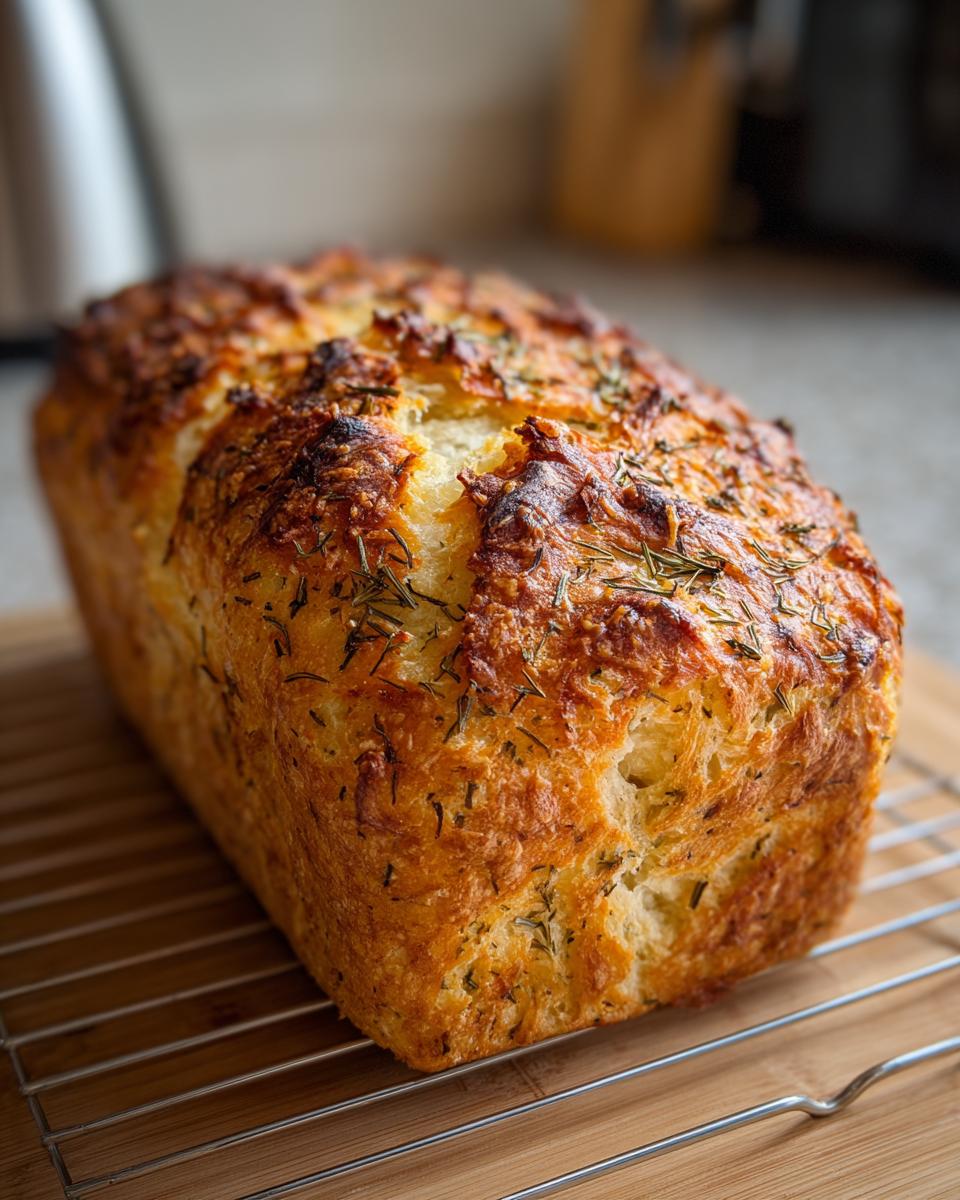
So, the machine beeps, the timer goes off, and you pull out this gorgeous, golden loaf. Now what? This garlic herb bread is so versatile, it almost begs to be eaten immediately! Since the texture is firm and sliceable, it’s honestly perfect for lunch the next day, but let’s talk about dinner tonight.
The most obvious pairing, of course, is Italian food. This bread is sensational served alongside a big bowl of homemade spaghetti and meatballs or dipped right into the sauce from a hearty lasagna. That rosemary and Parmesan combo just cuts through rich tomato flavors perfectly. I sometimes even use slices instead of plain bread for dipping into soup instead of crackers!
But don’t box yourself in! If you make an extra loaf, use the slices for incredible sandwiches. Think thick slices layered with salami, provolone, and peppers. It stands up way better than flimsy store-bought bread. And if you’re looking for other ways to bring that savory, cheesy goodness to your table, you have to check out how I use similar flavors in my garlic parmesan mashed potatoes!
Don’t be afraid to toast a slice and slather it with butter while it’s still warm—it’s addicting!
Storage and Reheating Instructions for This Sandwich Loaf
Once your glorious loaf cools down—and trust me, letting it cool completely is the hardest part—you have to store it right so that texture stays perfect. This isn’t meant for the fridge, folks! If you have any leftover sandwich loaf, wrap it up really, really tightly in plastic wrap or foil and keep it on the counter at room temperature. It keeps beautifully like this for about three days.
When you want to bring that crust back to life? Don’t use the microwave! That just makes it chewy. Slice what you need, mist the crust lightly with water, and pop it in a 350°F oven for about five to seven minutes. It comes out crispy on the outside and soft inside, almost like it just came out of the machine. It’s the perfect way to enjoy this bread the next day!
Frequently Asked Questions About Italian Herb and Cheese Bread
I know when I first started using my bread machine, I had a million questions. The machine works great, but adjusting recipes—especially adding flavorful things like cheese and herbs—can feel tricky! Don’t worry; we’ve solved all the little mysteries so you can just enjoy your cheesy dinner bread.
Can I use whole wheat flour in this bread machine herb bread?
That’s a great question for anyone trying to get a little more fiber in their diet! Yes, you absolutely can mix in some whole wheat flour, but you can’t just swap it 1:1 right away. Whole wheat absorbs more liquid and has less gluten structure than bread flour, which the machine needs.
I suggest swapping out just 1/2 cup of the bread flour for whole wheat flour initially. If you want to go half and half, you might need to creep the liquid up by about one extra tablespoon, but watch it closely during the initial knead. If you see slumping, stop and add a touch more flour. Stick to the Basic/White cycle unless you are using 100% whole wheat, in which case the ‘Whole Wheat’ cycle might be necessary.
What is the best cycle for a rosemary oregano bread?
For this specific rosemary oregano bread that has cheese and oil mixed in, the Basic or White Bread cycle is definitely your safest and best bet. Why?
These cycles give you a nice, long, slow process for the initial rise and a solid baking time. Because we are putting denser ingredients like Parmesan cheese and olive oil into the dough, it benefits from that standard cycle length. If you use a Quick bread setting, the dough won’t have enough time to develop the structure to hold up those goodies, and you might end up with a dense spot in the middle. I’ve tried it—stick to Basic for this!
If you’re looking for quick breakfast ideas that don’t need a machine, though, I rounded up some excellent easy breakfast ideas for you!
Nutritional Estimates for Cheesy Dinner Bread
Okay, let’s talk numbers because even a delicious loaf should fit into your day, right? Since this is one of those brilliant, hands-off solutions that fit right into a busy life, I wanted to give you a good idea of what you’re getting with this cheesy dinner bread. Remember, bread machines are amazing, but the final slice nutrition depends a little bit on exactly which brand of flour and cheese you use!
These estimates are based on a full recipe yielding one standard loaf, with nutrition calculated per slice. It’s honestly a great balance for a bread that tastes this indulgent!
- Serving Size: 1 slice
- Calories: About 180
- Total Fat: Around 5g (with 2g saturated fat)
- Carbohydrates: Roughly 30g
- Protein: About 6g
- Sodium: Approximately 280mg (Thanks, Parmesan!)
- Fiber: A modest 1g
So, you get a decent hit of protein and fiber for a piece of bread, and the fat content is relatively low considering how much flavor that olive oil and cheese bring to the party. It’s a reliable choice when you need something truly satisfying on the side of your weeknight meal!
Share Your Italian Herb and Cheese Bread Success
That’s it! You’ve crossed the finish line, and now you have a gorgeous, fragrant, cheesy loaf sitting on your cooling rack. I really, truly want to know what you think! Did your machine beep at the right time? Did your family devour the whole thing faster than you could slice it?
Your feedback is what keeps this community going. It shows me what Ava’s original philosophy works for everyone, and it tells other busy cooks that this recipe is worth their time. So please, take a second right now before you cut into that warm bread—or maybe right after you’ve had the first amazing bite!
Head down to the comments section and leave a star rating. Tell me how you served it! Did you use it for amazing lunchtime sliders, or did you just eat it standing over the sink? And if you snapped a picture of that beautifully marbled Italian bread, please share it on social media and tag us! We love seeing your kitchen triumphs. If you need to send us a direct message or have a specific question that didn’t get answered here or in the FAQs, you can always get in touch through our contact page.
Happy baking, and thank you so much for trying out this unbelievably easy weeknight side!
PrintItalian Herb and Cheese Bread Machine Loaf
Make a flavorful Italian herb and cheese bread using your bread machine. This recipe yields a good sandwich loaf with rosemary, oregano, and Parmesan cheese.
- Prep Time: 10 min
- Cook Time: 3 hr 30 min
- Total Time: 3 hr 40 min
- Yield: 1 loaf 1x
- Category: Bread
- Method: Bread Machine
- Cuisine: Italian
- Diet: Vegetarian
Ingredients
- 1 1/4 cups water (warm)
- 2 tablespoons olive oil
- 3 cups bread flour
- 1 tablespoon sugar
- 1 teaspoon salt
- 1 1/2 teaspoons active dry yeast
- 1 tablespoon dried Italian seasoning blend
- 1 teaspoon dried rosemary
- 1/2 cup grated Parmesan cheese
- 2 cloves garlic, minced
Instructions
- Add the water, olive oil, flour, sugar, and salt to the bread machine pan in the order recommended by your machine’s manual.
- Add the yeast to the dispenser cup or on top of the flour, ensuring it does not touch the liquid ingredients yet.
- Select the Basic or White Bread cycle, Medium or Light crust setting, and start the machine.
- When the machine signals the mix-in period (usually after the initial kneading phase), add the Italian seasoning, rosemary, grated Parmesan cheese, and minced garlic through the dispenser chute or by carefully dropping them onto the dough surface.
- Allow the bread machine to complete the full cycle, including the bake and keep-warm settings.
- Once the cycle finishes, carefully remove the loaf from the pan and place it on a wire rack to cool completely before slicing.
Notes
- For a richer flavor, substitute 1/4 cup of the water with milk.
- If your machine does not have a dispenser, wait until the dough has formed a rough ball, then add the cheese and herbs, punching them down gently into the dough.
- Store leftover cheesy dinner bread tightly wrapped at room temperature for up to three days for best texture.
Nutrition
- Serving Size: 1 slice
- Calories: 180
- Sugar: 1
- Sodium: 280
- Fat: 5
- Saturated Fat: 2
- Unsaturated Fat: 3
- Trans Fat: 0
- Carbohydrates: 30
- Fiber: 1
- Protein: 6
- Cholesterol: 5