
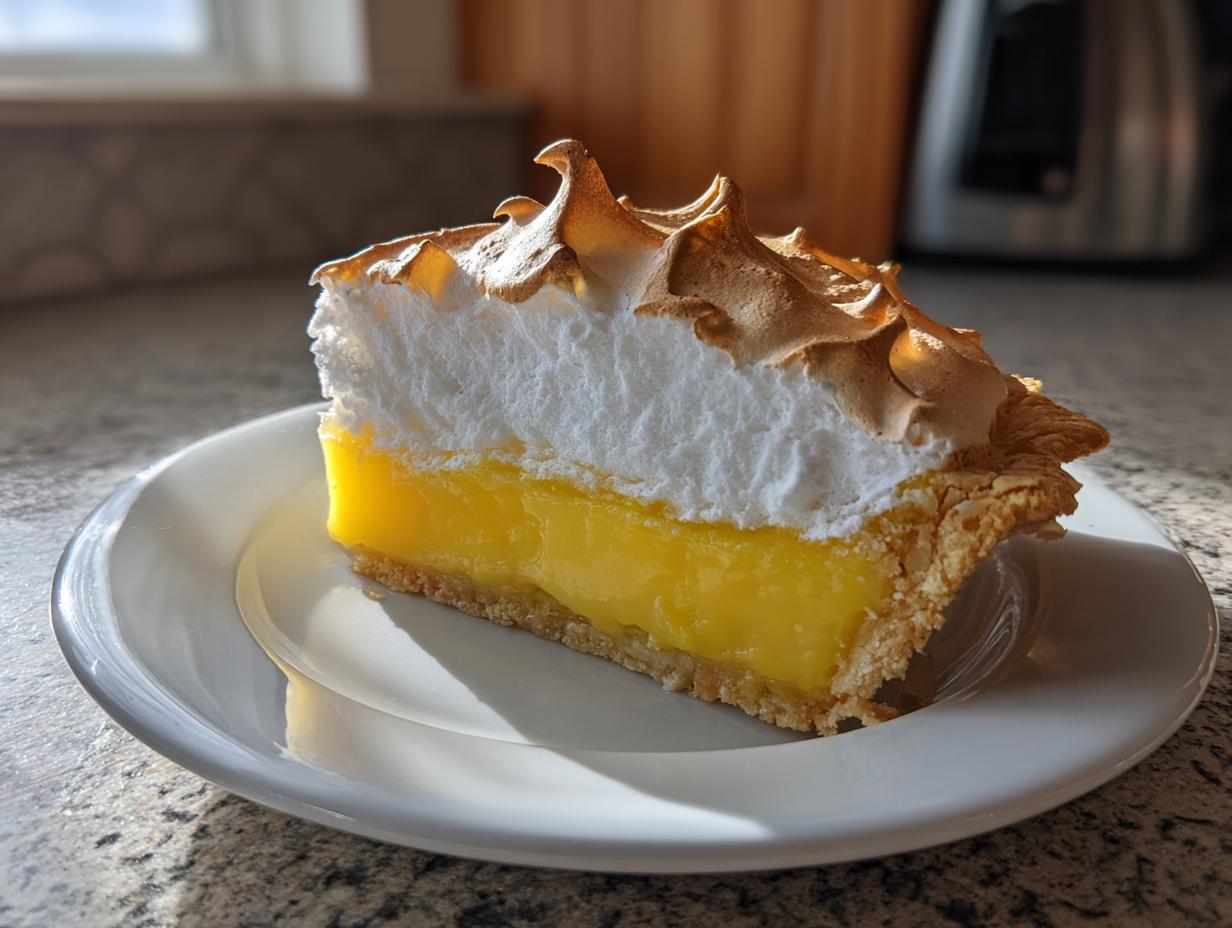
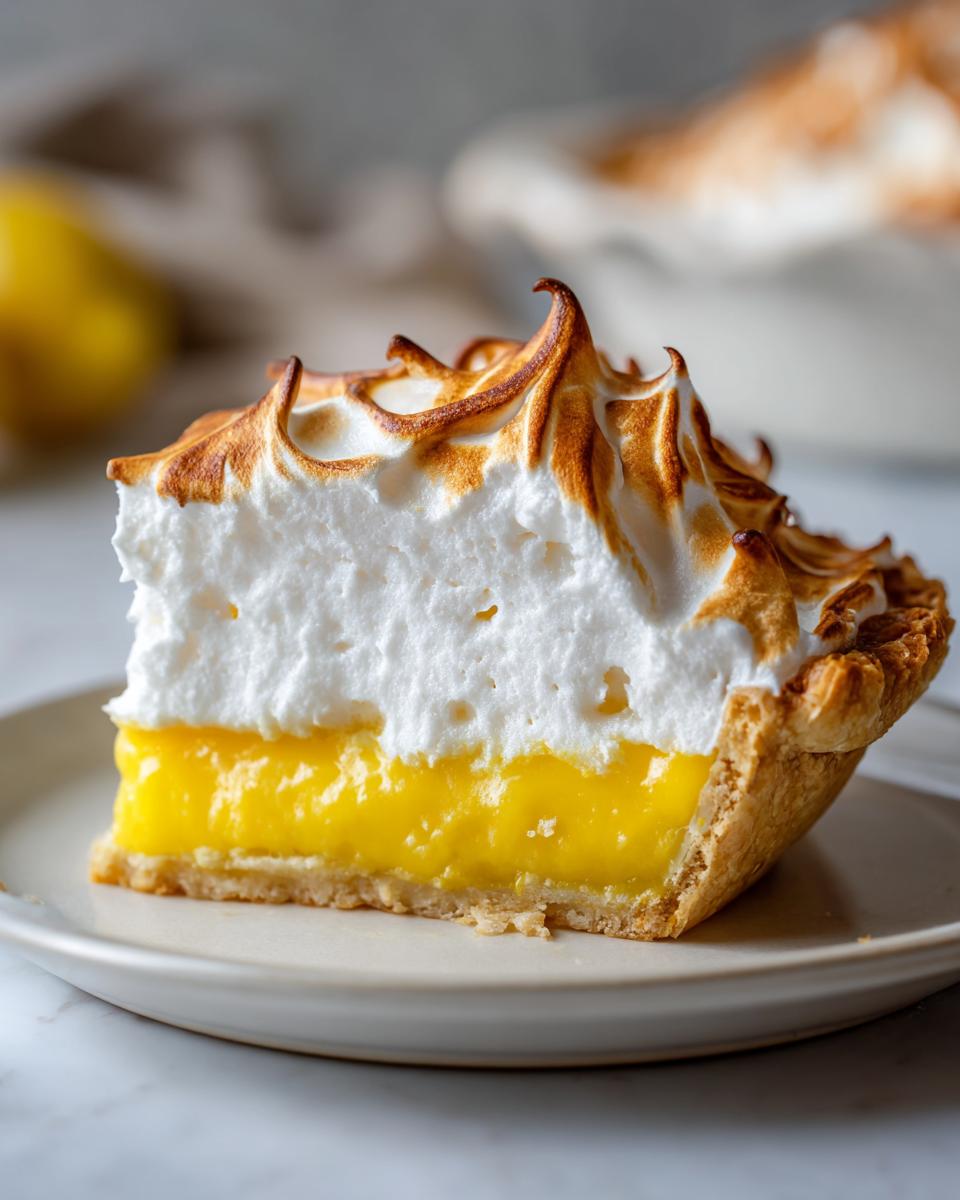
You know those desserts that just scream ‘showstopper’? That glorious height, that perfect swirl of toasted clouds? People think making a showstopper like a classic lemon meringue pie from scratch is impossible because of the dreaded ‘weeping’ meringue. Well, here at Cheffinity, we throw out that notion! I’m Ava Sinclair, and my philosophy is simple: real, incredible food should fit into real, chaotic life.
I learned strategy in a demanding marketing job, but the real lessons came watching my mom, a nurse, make miracles happen nightly in the kitchen. We’re cutting through the noise here to bring you a completely homemade, from-scratch recipe for lemon meringue pie where the filling is zesty and, more importantly, the topping stays stable. No fear, just fantastic, tart and sweet pie!
- Why This Homemade lemon meringue Pie Recipe Works (E-E-A-T Focus)
- Ingredients for the Ultimate lemon meringue
- How to Make the Zesty lemon dessert Filling
- Assembling Your classic lemon pie
- Achieving a Fluffy Meringue Topping for your lemon meringue
- Baking and Cooling the Showstopper dessert lemon meringue
- Tips for Success with Your lemon meringue Pie Recipe
- Storage and Serving Suggestions for this tart and sweet pie
- Frequently Asked Questions About lemon meringue
Why This Homemade lemon meringue Pie Recipe Works (E-E-A-T Focus)
Listen, if you’re reaching for a box mix, you can stop right now, because that isn’t making a classic lemon pie! The secret to a showstopper that doesn’t make you sweat comes down to control—control over the starch and control over the butterfat. We are going completely homemade lemon pie from scratch here, which means every layer works together perfectly. My mother always insisted on this traditional structure because you just can’t beat that bright, sharp flavor against a perfectly golden meringue.
We focus intensely on texture. That means making sure the filling has a full boil to activate the cornstarch, which is non-negotiable for stability. Trust me, when you follow these steps, you get that impressive height without the fear of leaks!
Achieving the Perfect Buttery Pie Crust Tutorial
You absolutely have to start with a sturdy foundation! If you try to pour hot filling into a warm crust, you’re just setting yourself up for a soggy, crumbling mess at the bottom of the plate. We blind-bake this crust until it’s deeply golden, making sure it’s completely, totally cool before the lemon filling ever touches it. This ensures you get that fantastic crunch described in the buttery pie crust tutorial, rather than a pale, weak shell!
Ingredients for the Ultimate lemon meringue
Getting the ingredients lined up is half the battle won! For this lemon meringue masterpiece, we need three main players: the crust, which needs to be ready and waiting, the brilliant zesty filling, and that cloud-like meringue on top. I’ve listed everything out here. Use the measurements exactly—especially when it comes to the starch and the sugar ratios in the filling; that’s what locks everything in place.
You’ll need a good shell, plus the sugar, cornstarch, salt, water, three egg yolks, fresh lemon juice and zest, butter, and then for the crown, four room-temperature egg whites, cream of tartar, and six tablespoons of sugar reserved specifically for that topping.
Ingredient Notes and Substitutions for your lemon meringue
Okay, let’s talk about the egg whites because this is crucial for a fluffy meringue topping. They absolutely must be at room temperature—cold whites just won’t whip up to their maximum volume. Also, don’t even think about scraping a bottle of juice into this! To get that bright, punchy flavor that makes this a true zesty lemon dessert, you need freshly squeezed lemon juice and that vibrant zest.
It adds about 30 seconds of effort but makes the difference between a dull filling and a vibrant one. And when you’re whipping those whites, make sure your bowl is spotless—no trace of grease or yolk allowed, or you’ll end up with sad, soupy peaks!
How to Make the Zesty lemon dessert Filling
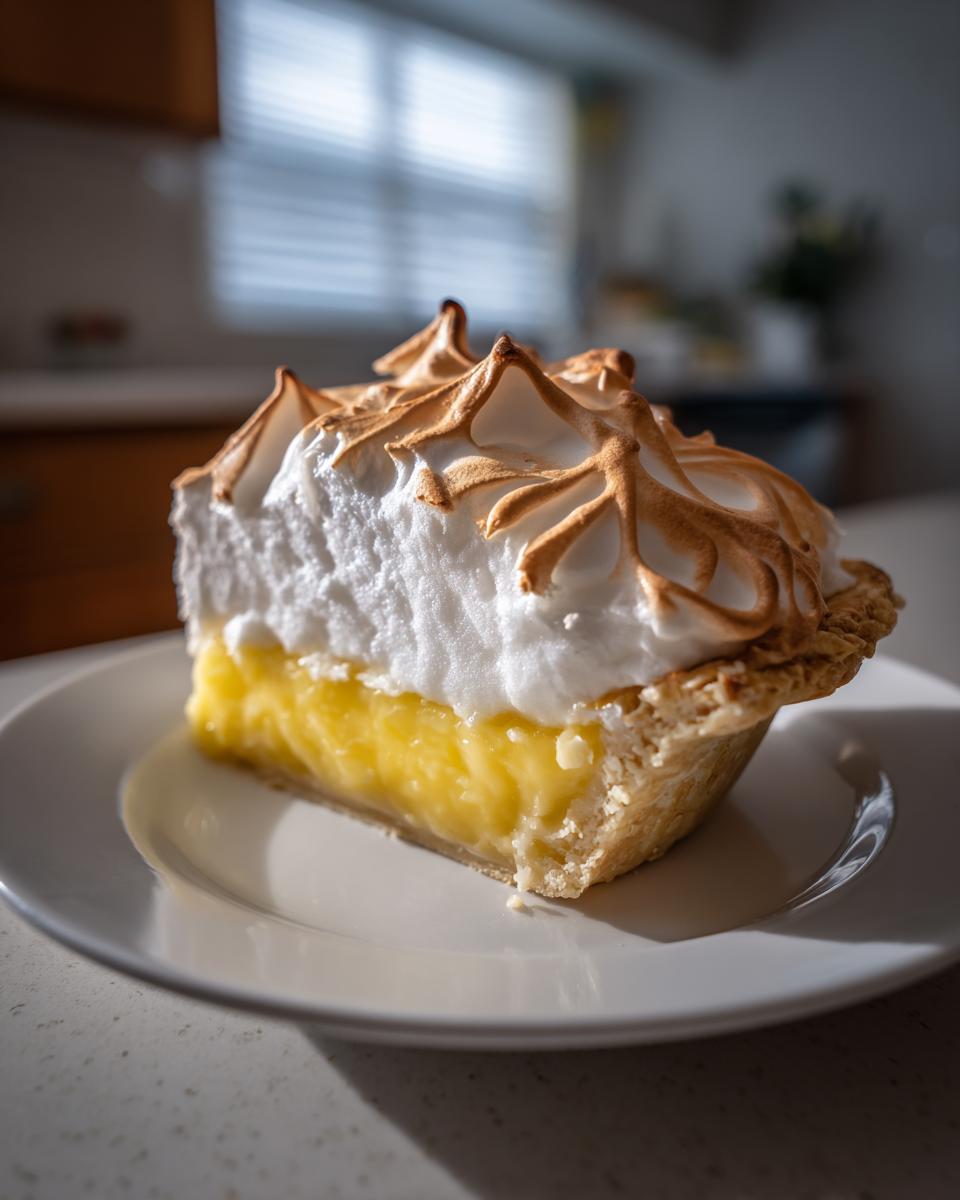
Now we move into the magic part—creating this incredible, bright lemon curd recipe that sets up thick and luxurious! First things first: grab a medium saucepan and whisk together the 1 1/2 cups of sugar with the cornstarch and salt. Don’t dump the water in all at once! Gradually whisk in that cold water until everything looks perfectly smooth, almost like silk. This step is important so you don’t end up with lumps in your filling later.
Then, you bring it to a boil over medium heat, stirring constantly until it thickens significantly and boils. You must let it boil for one full minute—this step fully activates the cornstarch so your filling sets up firm! After that minute, take it off the heat.
Here’s where we perform a little kitchen alchemy to save the yolks: tempering. In a small bowl, whisk those 3 egg yolks really well. Now, you slowly drizzle about a cup of that hot sugar mixture into the yolks while whisking non-stop. Seriously, don’t stop! This slowly brings the yolks up to temperature. Once they’re tempered, pour that warm yolk mixture right back into the saucepan. Return it to medium heat, cook, stirring constantly, until the filling comes to a boil again. Boil for one minute, stirring well. Remove from heat this time. Stir in your butter, lemon juice, and zest until everything melts into a glorious, zesty lemon dessert base. Pour it straight into that cooled shell! If you need more ideas on utilizing bright flavors, you might check out my thoughts on creamy lemon pasta sometime!
Assembling Your classic lemon pie
Okay, this is the moment of truth where the filling meets its shell! Remember, we worked so hard to make sure that pre-baked crust was completely cooled down—I mean stone cold. We need that temperature difference to help the filling set evenly when it hits the base.
Carefully, and I mean gently, pour all that hot, vibrant lemon filling right into the cooled crust. Try to keep the surface relatively flat so you have a nice canvas for the meringue masterpiece that’s coming next. Don’t smooth the edges too much; just get it settled in there. Next up is the part that makes everyone gasp: the cloud topping!
Achieving a Fluffy Meringue Topping for your lemon meringue
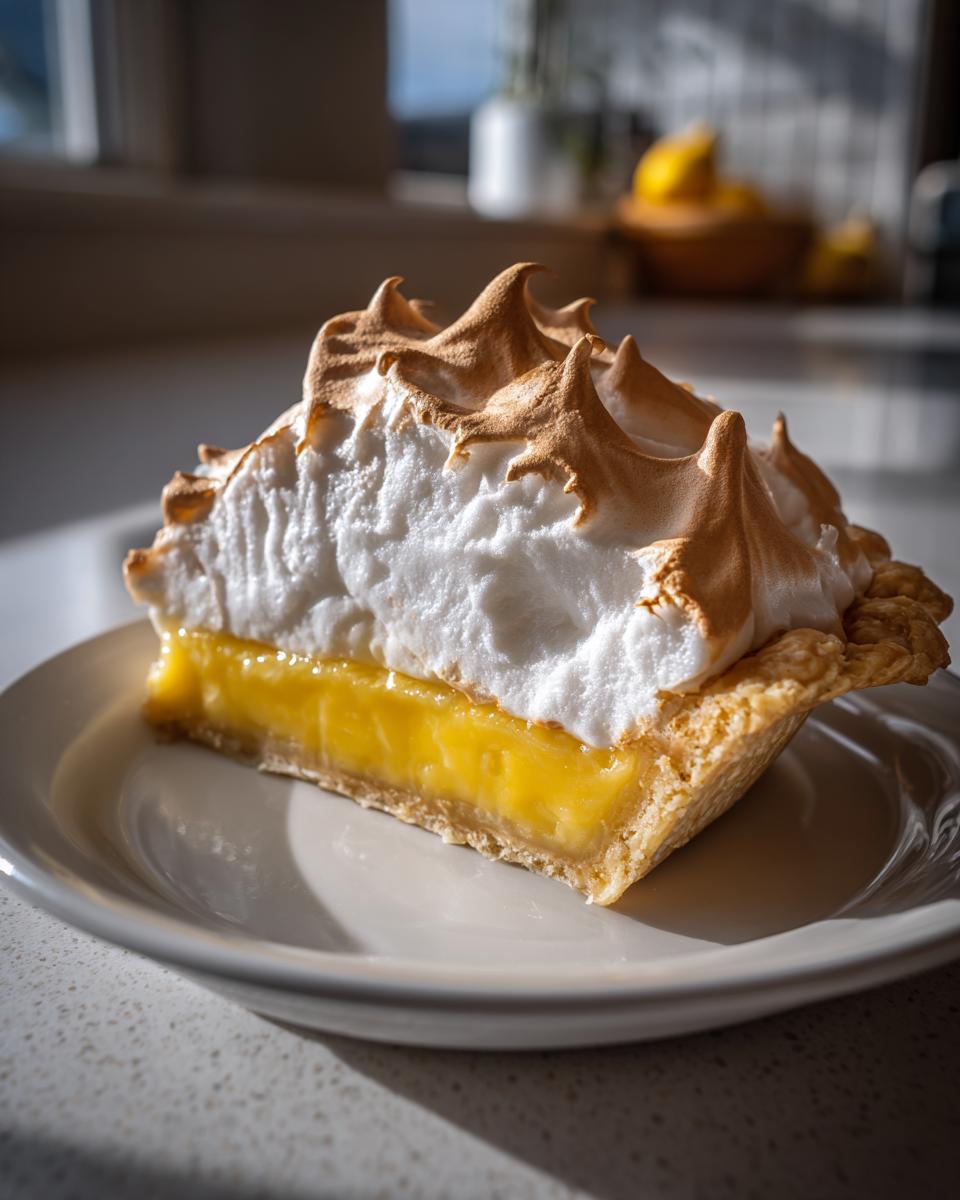
This is where we finally create that towering, gorgeous, fluffy meringue topping people talk about! Remember, we are aiming for the best lemon meringue you’ve ever seen, and that starts with pristine equipment. Grab your largest bowl—it must be completely grease-free, not a speck of yolk permitted. Beat those 4 room-temperature egg whites until they hold soft peaks. This is your base!
Now, take your time while adding the 6 tablespoons of sugar, one tablespoon at a time. Don’t rush this; you need that sugar to dissolve properly so you get stiff, glossy peaks that hold their shape against gravity. Learning how to make perfect meringue is all about patience right here. When you put the beaters up, the peaks should stand straight up without flopping over. This beautiful white cloud is ready to top that hot filling immediately!
Critical no weep lemon meringue tips During Assembly
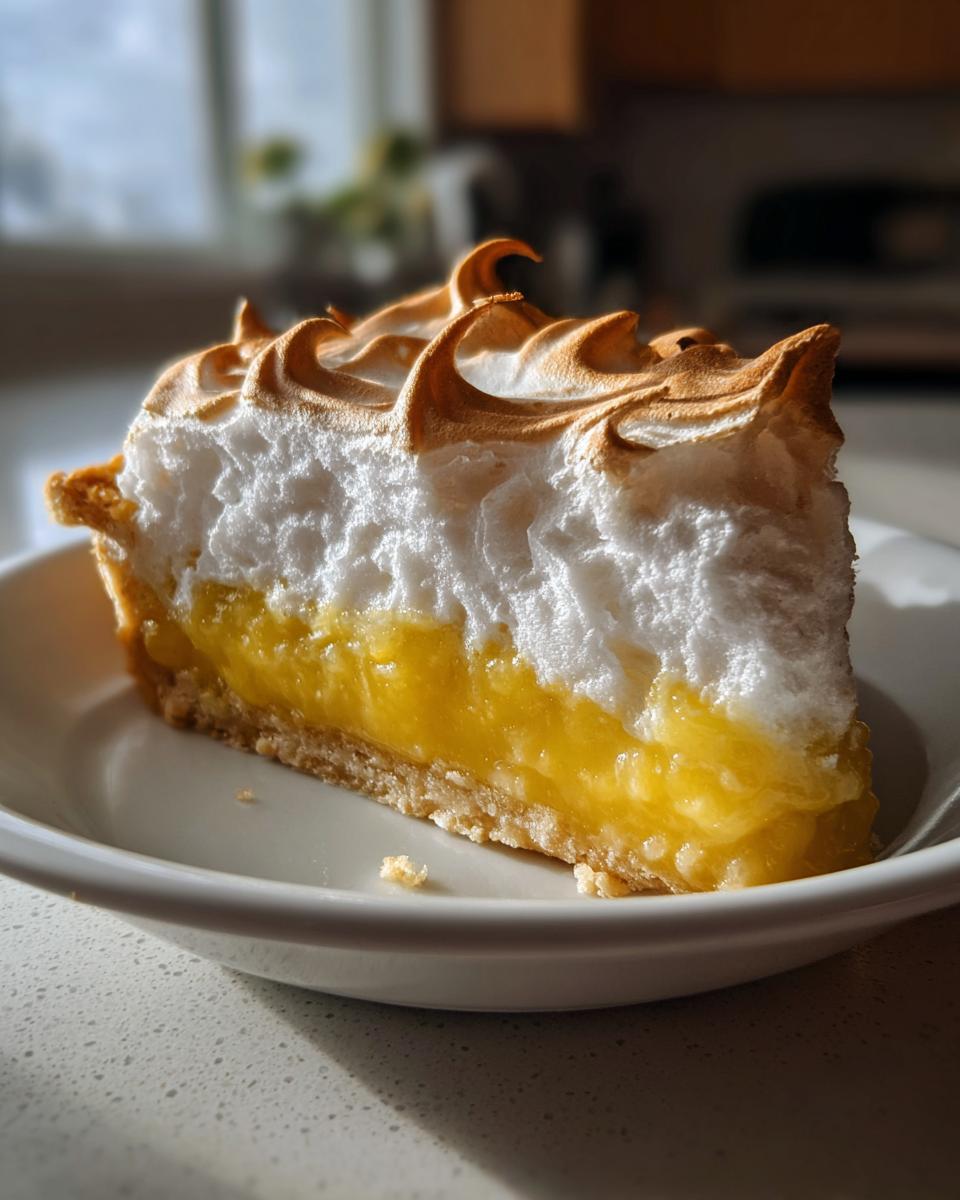
Speed matters right now! You need to spread this glorious meringue over the hot lemon filling right away. Why hot? Because the heat from the filling starts to cook the bottom layer of the egg whites, which is essential for preventing slippage later on. Make sure you seal the meringue completely—this is one of the most important no weep lemon meringue tips I have! Push the meringue right down until it slightly touches the inner edge of the crust all the way around.
This seals the edges and stops the filling from shrinking away from the crust, which is another huge cause of weeping and cracking. Create some dramatic peaks and valleys with the back of your spoon; these high spots are what will get beautifully toasted in the oven. If you want to skip the oven, you can get a similar toasted look using a kitchen torch, which is a fun trick if you want to see how the pros do it sometimes! If you want more inspiration for bright desserts, check out this amazing pie recipe reference.
Baking and Cooling the Showstopper dessert lemon meringue
We’ve built this magnificent tower, and now it’s time to turn it golden! You need to pop this showstopper dessert into a preheated oven—we’re talking 350°F (175°C)—for just 12 to 15 minutes. You aren’t cooking the filling here; you are just lightly toasting those gorgeous meringue peaks until they turn a delicate golden brown. Keep an eye on it; that meringue can go from perfect to burnt faster than you can snap your fingers!
Once it’s perfectly toasted, take it out, but please, this is the hardest part: you have to let it cool slowly. Do NOT rush this pie into the fridge! Rapid temperature changes are the enemy of a stable meringue. If you shock it cold, the moisture in the filling and the air pockets in the meringue contract too fast, causing that dreaded ‘weeping’ or big cracks. Let it sit on a wire rack at room temperature for at least four hours before you even think about slicing. This slow descent to room temperature lets everything stabilize beautifully.
If you need inspiration while you wait, you can always peek at other great pies, like the one described over here at tasty delight recipes. But honestly, patience here guarantees a tart and sweet pie that holds its shape!
Tips for Success with Your lemon meringue Pie Recipe
Okay, deep breaths. I know we covered a lot, but mastering this lemon meringue pie recipe really comes down to dodging a few classic pitfalls. My job here is making sure you succeed! The biggest hurdle is always weeping, right? Remember my Mom’s rule: a totally clean bowl for the egg whites is non-negotiable. Any hint of fat or yolk and you won’t get those stiff peaks.
For the filling, if you want that thick, satisfying texture, you have to let that cornstarch mixture boil for the full minute; don’t cheat that step! That starch needs to activate completely, otherwise, you end up with soup, not a set classic lemon pie filling. If you’re nervous about the oven browning, here’s a fun secret: use your kitchen torch! It gives you unbelievable control and brings out that golden color on the peaks instantly without risking overbaking the filling underneath.
Storage and Serving Suggestions for this tart and sweet pie
This beautiful, tart and sweet pie hates the fridge at first! Remember, we let it cool slowly on the counter for hours to set up right? Once it’s completely cooled down and fully stable, wrap the whole thing gently in plastic wrap—try not to let the wrap touch the meringue if you can help it. After that initial set, it needs to chill. It’s best eaten within 24 hours, honestly, because meringue doesn’t love being stored for too long.
If you have leftovers, you might technically be able to reheat slices briefly, but I wouldn’t recommend it; the meringue gets sad and wet fast. This is truly the star of your next picnic or backyard event—a perfect summer citrus dessert! If you are needing some side inspiration for your warm-weather gathering, you can always browse some great fruit ideas over at Hayley’s Recipes.
Frequently Asked Questions About lemon meringue
I know you’ve got questions lingering! It’s hard work creating a dessert this showy, so let’s make sure you feel confident tackling your classic lemon pie. We’ve tested everything so you don’t have to guess!
Can I make the lemon meringue filling ahead of time?
Honestly, I wouldn’t recommend it if you are after the absolute best texture. The cornstarch can start to break down and feel a little gluey if it sits too long before baking. If you absolutely must, pour the hot filling into the crust, cover it tightly with plastic wrap touching the surface, and chill it for only a few hours. But for an easy lemon meringue recipe, assembling and baking the same day is always best!
What is the best way to slice a lemon meringue pie cleanly?
This is where most people struggle when they try to make a clean cut! Here’s my pro tip taught to me by my mother: grab the sharpest, thinnest knife you own. Before you cut the first slice, dip that knife into a tall glass of very hot water, then dry the blade completely with a clean towel. You slice through, wipe the knife clean, re-dip, and repeat for every single slice. It melts right through the custard and meringue without dragging!
Are there variations if I don’t want a full pie?
Absolutely! Sometimes you just don’t need a giant pie sitting around, or maybe you’re making dessert for a crowd that needs individual portions. If that’s you, you can take this filling recipe and put it into individual tart shells to make gorgeous mini lemon meringue tarts. Or, if you want something slightly simpler to handle, you can transform the components into lemon meringue bars! All the flavor, just in a sturdier, easier-to-serve square. If you need help streamlining your planning for desserts like this, I share some general tips for easy weeknight dinners that might help you make room for pie prep!
PrintGrandma’s Classic Lemon Meringue Pie From Scratch

Make this classic lemon meringue pie completely from scratch. You get a buttery crust, a zesty lemon custard filling, and a tall, fluffy meringue topping that balances sweet and tart flavors perfectly.
- Prep Time: 30 min
- Cook Time: 30 min
- Total Time: 4 hours 0 minutes
- Yield: 8 servings 1x
- Category: Dessert
- Method: Baking
- Cuisine: American
- Diet: Vegetarian
Ingredients
- 1 recipe for Buttery Pie Crust (for a 9-inch pie shell)
- 1 1/2 cups granulated sugar
- 1/3 cup cornstarch
- 1/4 teaspoon salt
- 1 1/2 cups cold water
- 3 large egg yolks, lightly beaten
- 1/2 cup fresh lemon juice
- 1 tablespoon lemon zest
- 2 tablespoons unsalted butter
- 4 large egg whites, at room temperature
- 1/4 teaspoon cream of tartar
- 6 tablespoons granulated sugar (for meringue)
Instructions
- Prepare and bake your pie crust according to your preferred recipe for a 9-inch pie shell. Let it cool completely on a wire rack.
- Prepare the Lemon Filling: In a medium saucepan, whisk together 1 1/2 cups sugar, cornstarch, and salt. Gradually whisk in the cold water until smooth.
- Cook the mixture over medium heat, stirring constantly, until it thickens significantly and boils. Let it boil for one minute, stirring constantly. Remove from heat.
- Temper the egg yolks: In a separate bowl, lightly beat the 3 egg yolks. Slowly pour about 1 cup of the hot sugar mixture into the yolks while whisking constantly to prevent scrambling.
- Pour the tempered yolk mixture back into the saucepan with the remaining hot mixture. Return the pan to medium heat. Cook, stirring constantly, until the filling comes to a boil again. Boil for one minute, stirring well. Remove from heat.
- Stir in the lemon juice, lemon zest, and butter until the butter melts completely.
- Pour the hot lemon filling immediately into the cooled, pre-baked pie crust.
- Prepare the Meringue Topping: In a large, clean, grease-free bowl, beat the 4 room-temperature egg whites with an electric mixer until soft peaks form. Add the cream of tartar and continue beating.
- Gradually add the 6 tablespoons of sugar, one tablespoon at a time, beating well after each addition until stiff, glossy peaks form. This step is key for a stable, fluffy meringue.
- Spread the meringue over the hot lemon filling, making sure the meringue touches the inner edge of the crust all the way around to prevent shrinking. Create decorative swirls with the back of a spoon.
- Bake the pie in a preheated 350°F (175°C) oven for 12 to 15 minutes, or until the meringue peaks are lightly golden brown.
- Cool the pie completely on a wire rack at room temperature for at least 4 hours before slicing. Do not refrigerate immediately, as rapid cooling can cause the meringue to weep.
Notes
- To prevent the meringue from weeping (beading moisture), make sure your mixing bowl for the egg whites is completely free of any grease or yolk residue.
- For a stable filling, ensure the cornstarch mixture boils for the full minute specified to fully activate the starch.
- To achieve a showstopper dessert, use a kitchen torch to brown the meringue peaks instead of baking, if preferred.
Nutrition
- Serving Size: 1 slice
- Calories: 380
- Sugar: 45g
- Sodium: 150mg
- Fat: 18g
- Saturated Fat: 9g
- Unsaturated Fat: 9g
- Trans Fat: 0g
- Carbohydrates: 52g
- Fiber: 1g
- Protein: 6g
- Cholesterol: 110mg